52. How to add basic MMO-style monster AI in UE
In this post, we will be looking to add very basic monster AI to our game.
In the recent posts, we created basic combat implementation using our custom Java server and UE:
- How To Begin Basic MMORPG Combat Validation With UE and Java
- How To Create Animation Blueprint In UE5
So to this point, we had the ability for our character to hit the mobs while the mobs just wondered randomly.
Now we want the ability for the mobs to attack our player back and essentially chase the player.
In this post, we will be introducing how this will be achieved and it will be continued and refined in the posts that follow.
We will be using the following tools to achieve this:
- AI Controller
- AI Perception
- Behavior trees
- Blackboard key/values
- Behavior tree tasks
Note that in my implementation, actual hit requests and damage will come from the custom server.
AI Perception and AI Controller
AI perception is an out-of-the-box component/solution available in UE which allows us to have mobs detect players.
Bear in mind, this implementation should be applied on the server side logic, not on the client side. This is because your server should be controlling and deciding what your mobs are doing, not the clients.
Ok so what do we need?
We need to add a component called AIPerceptionStimuliSource to our characters. I added it to a base actor component which is shared by my players and my mobs, this is because in future, I will want my mobs to potentially interact and even combat with other nearby mobs.
Adding this component to your player character blueprint will suffice.
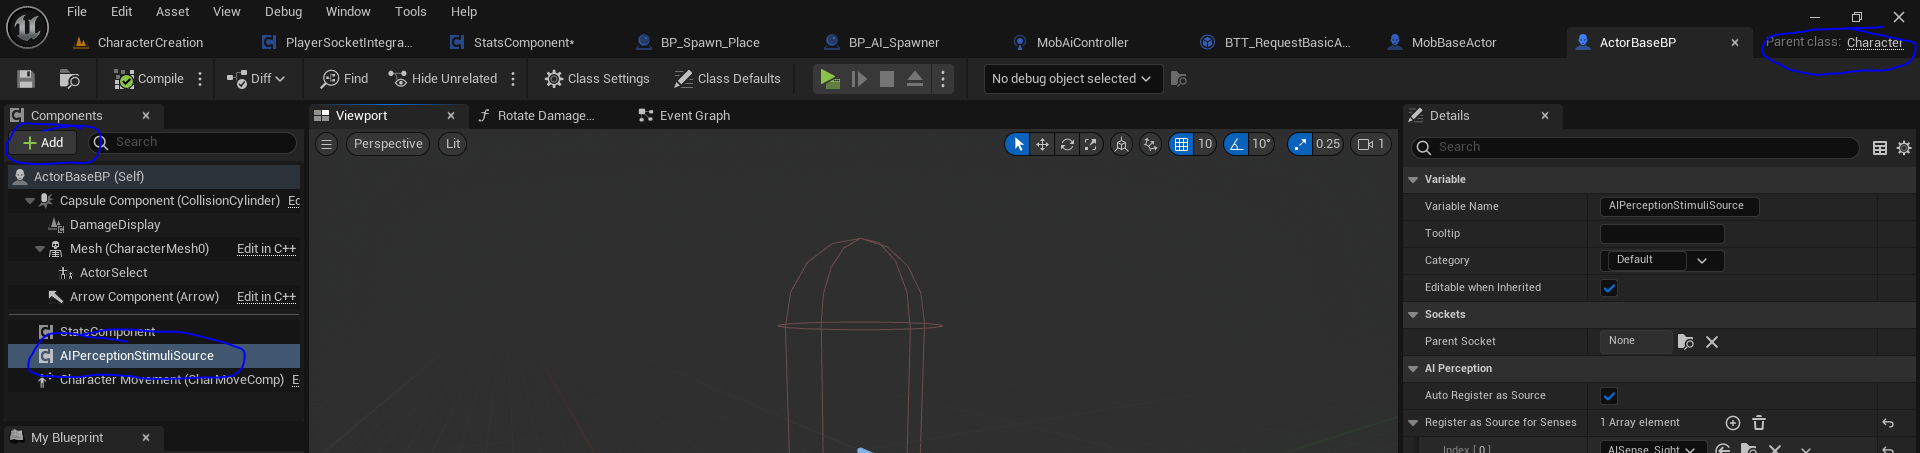
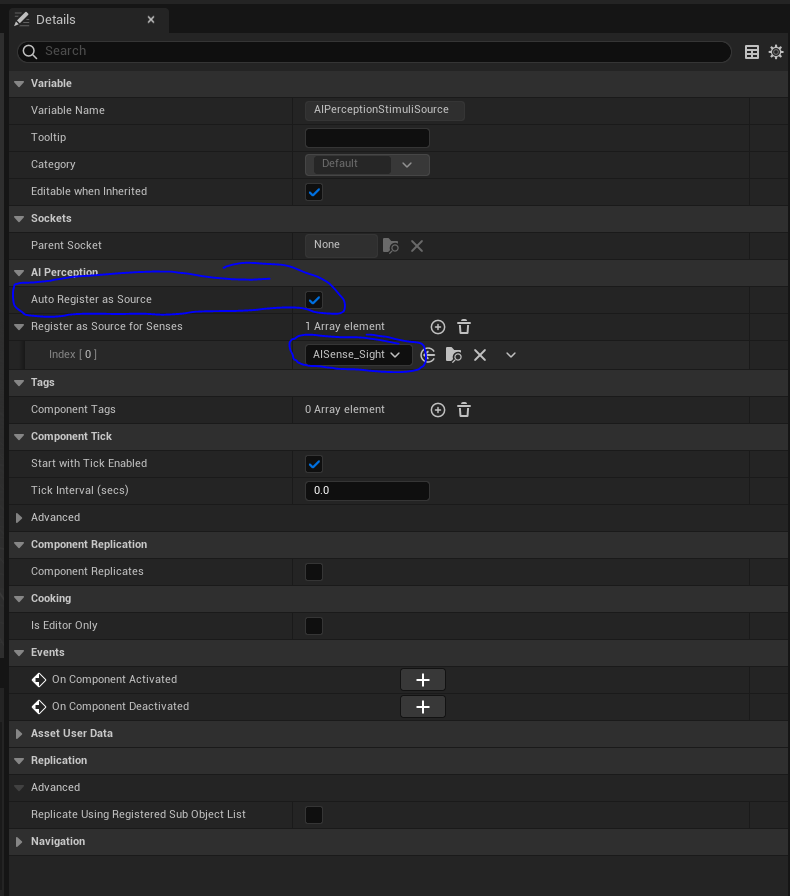
You will want to register the source of the stimuli here as sight.
Next, we will be adding the AI Perception component to your mobs, however we don’t add it directly to your mob blueprint, we will add it to their AI Controller.
So, right click on your content browser and create a new blueprint and for the parent class, find the AI Controller.
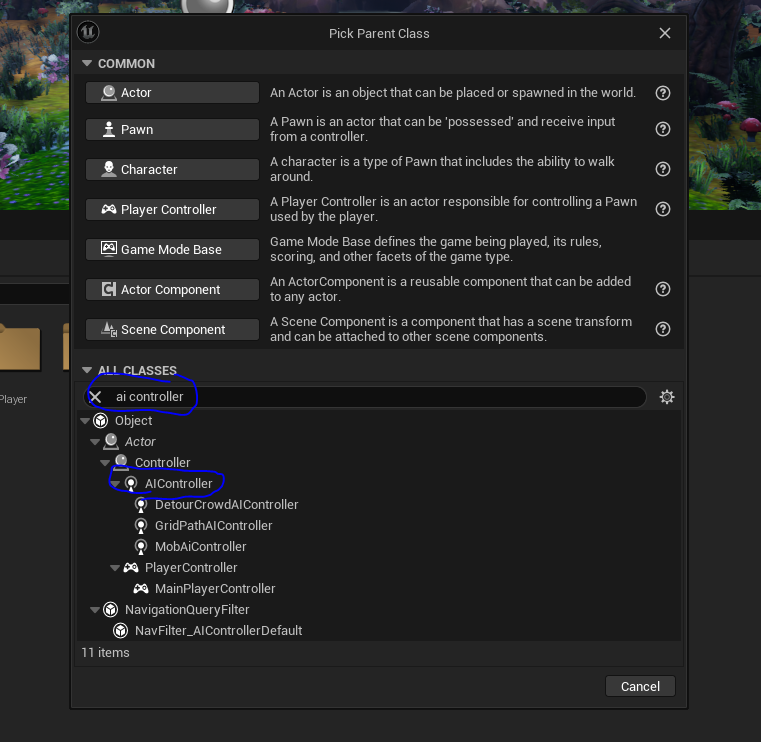
I called mine MobAiController and you can call yours as you like.

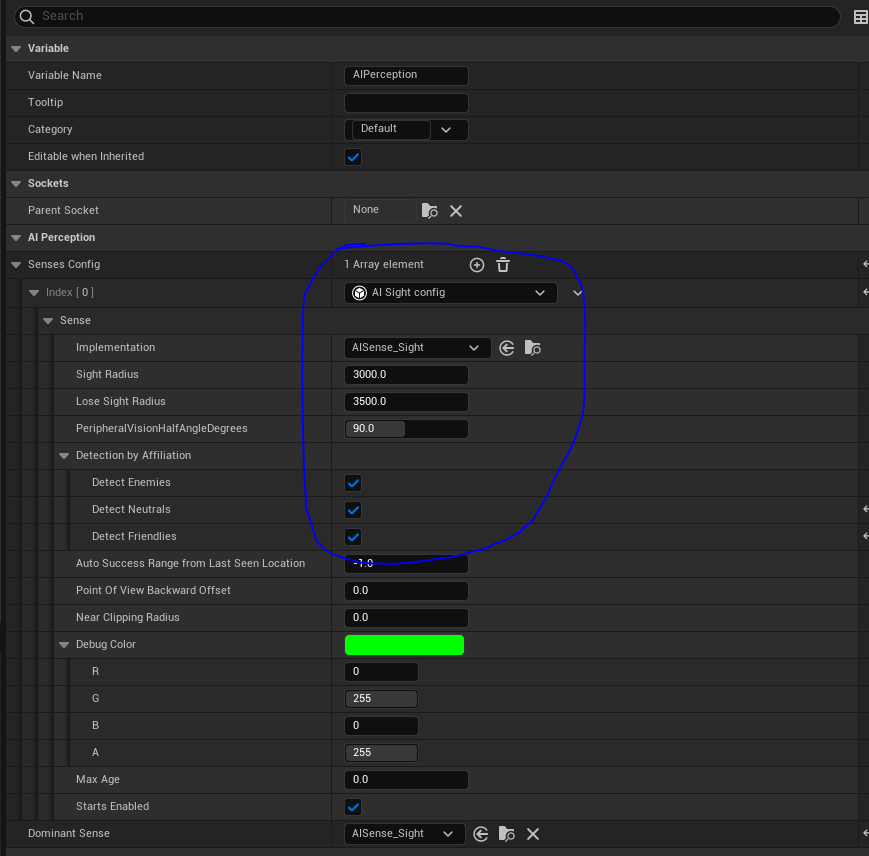
Now you can add the AI Perception component by clicking the add button.
You will also want to configure the default settings for this perception, mainly setting to detect by sight.
Next, you would need to modify the project default settings for auto-registering pawns as sources.
This is modifying DefaultEngine.ini and adding this:
[/Script/AIModule.AISense_Sight]
bAutoRegisterAllPawnsAsSources=false
This is covered in places such as AI Perception bAutoRegisterAllPawnsAsSources? – Programming & Scripting / AI
Configuring AI Controller
Ok now we’ve added the AI Perception to our AI Controller, we want to use it to detect and keep reference of our players.
You can quickly do this by clicking on the AI Perception component, and in the settings, find the On Target Perception Updated event.
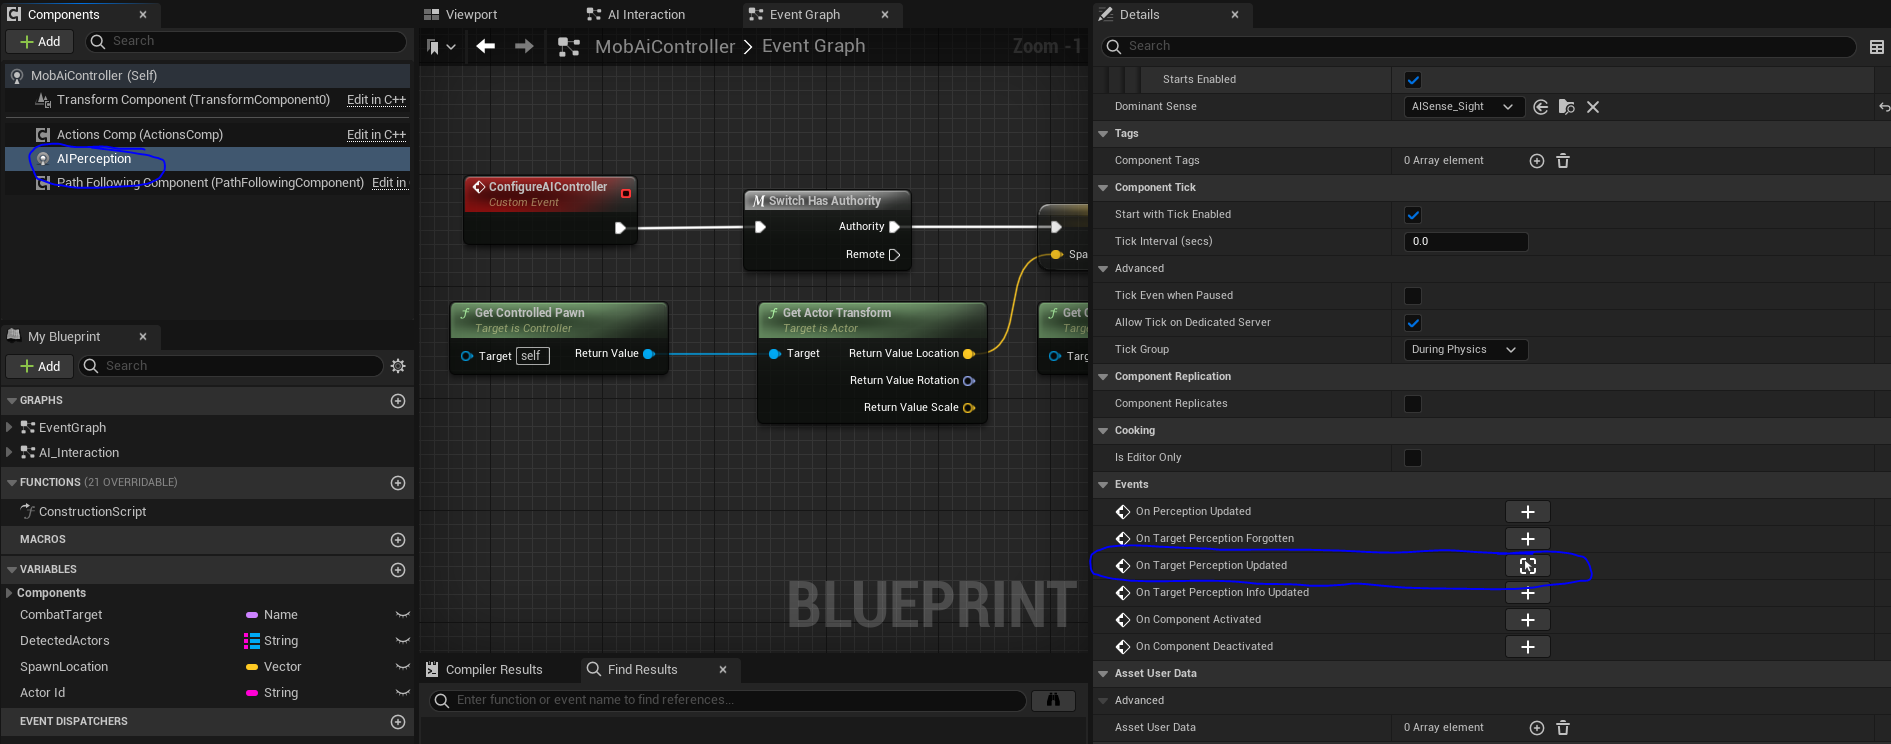
Now you can implement this functionality, here’s what I’ve done:
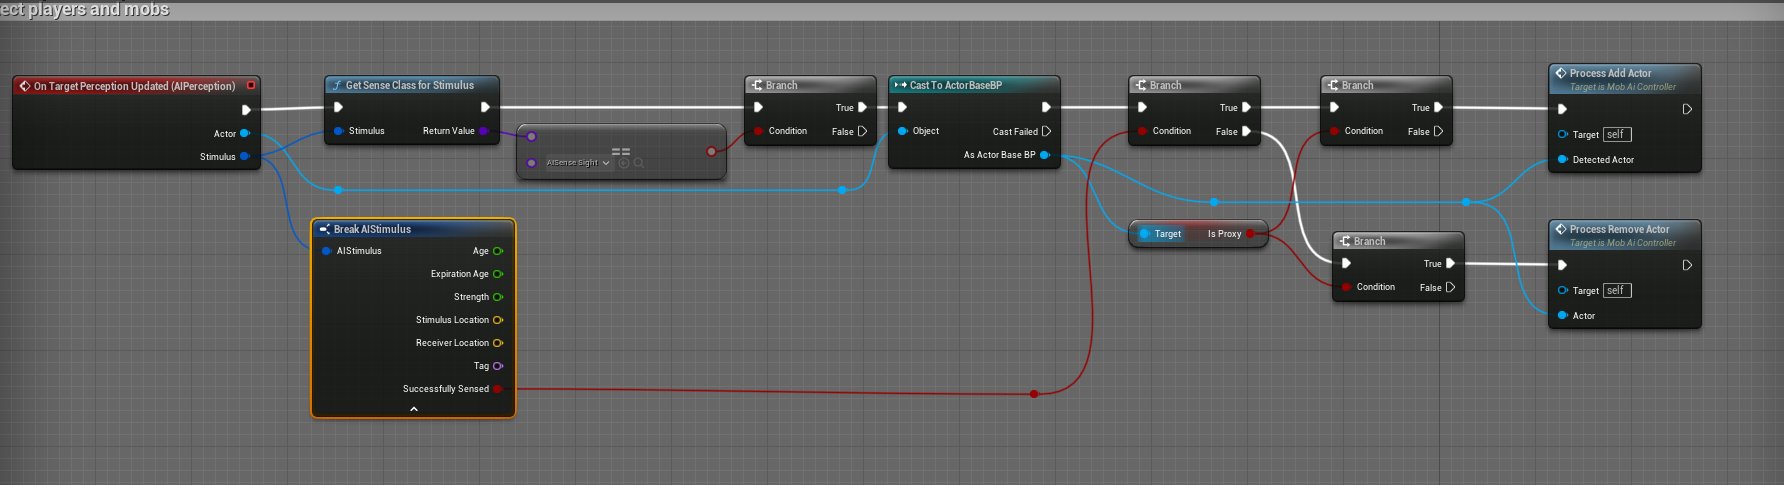
Here you get an event for the AI perception event when the player is either detected or lost (symbolized by Successfully Sensed parameter).
In this case, we check that the stimulus is coming from Sight, which is the only one configured so far.
Next, I want to ONLY process my player actors, which as symbolized as proxies in my implementation.
If you added the AI Perception Stimuli Source only to player, you don’t need any distinguishment here. I added it to players and mobs which is why I add an extra branch.
Let’s see what I do when I ‘process add actor’.
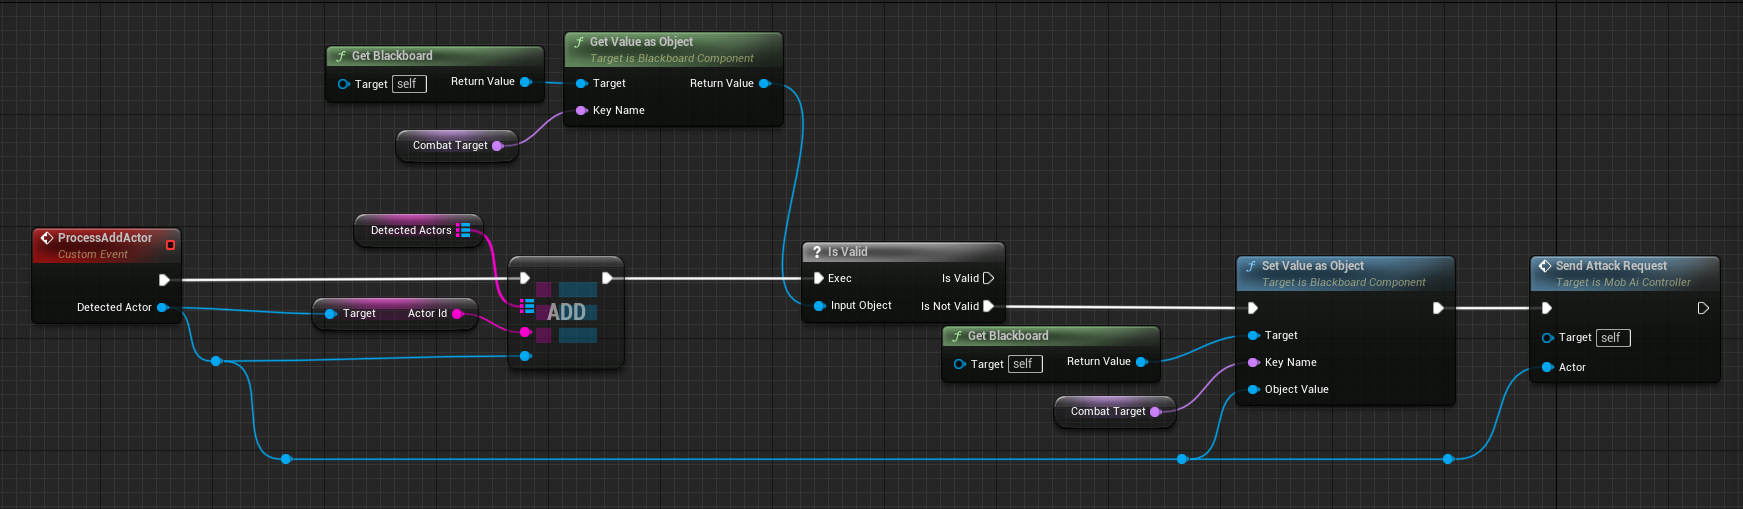
I add it to a variable keeping track of detected actors:

Then I check whether the blackboard associated to the AI controller has any combat target currently set.
If there is no valid combat target currently set, I will set the target as the newly sensed actor.
I then do something quite specific to my custom server, which is ask my server to initiate combat between the two actors, but this may not be a necessary step for you.
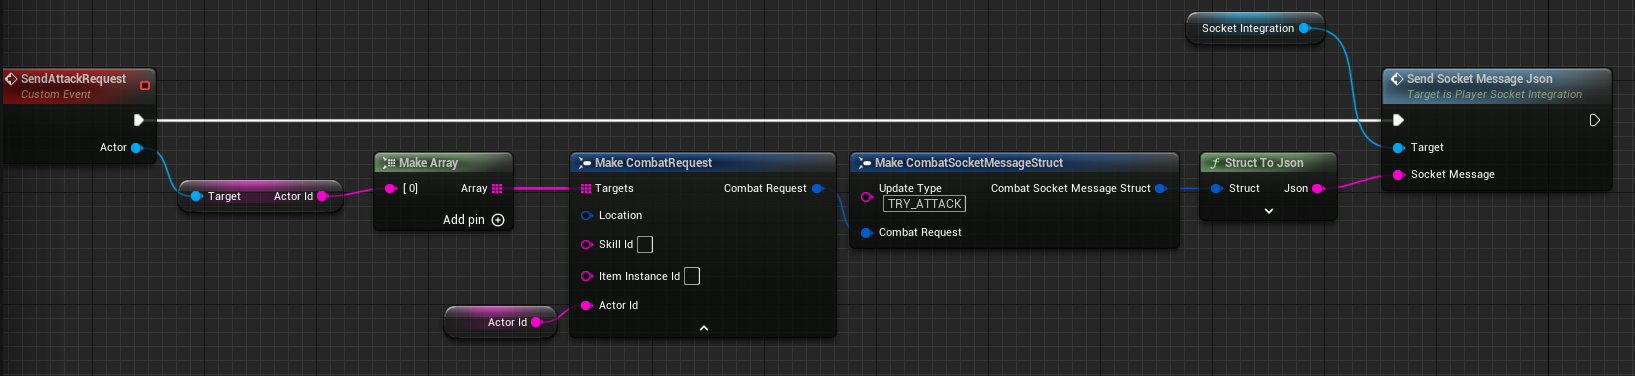
If you are using native UE replication, you would not need to do this and you should instead request attack combat via a Behavior Tree Task, which will be introduced a bit later.
Processing remove actor
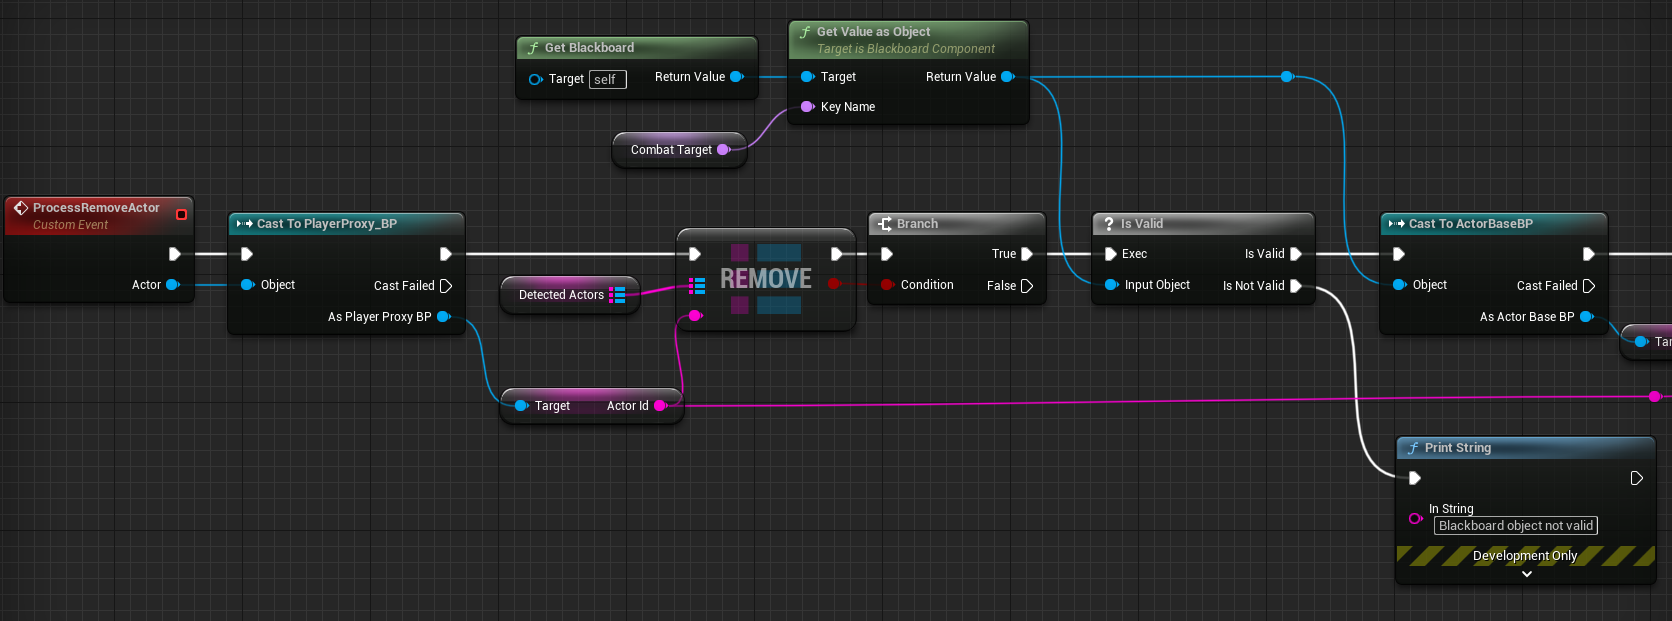
In this event, we process what happens when the mob loses sight of the player.
This functionality is currently made for demo purposes and will definitely be changed in near future
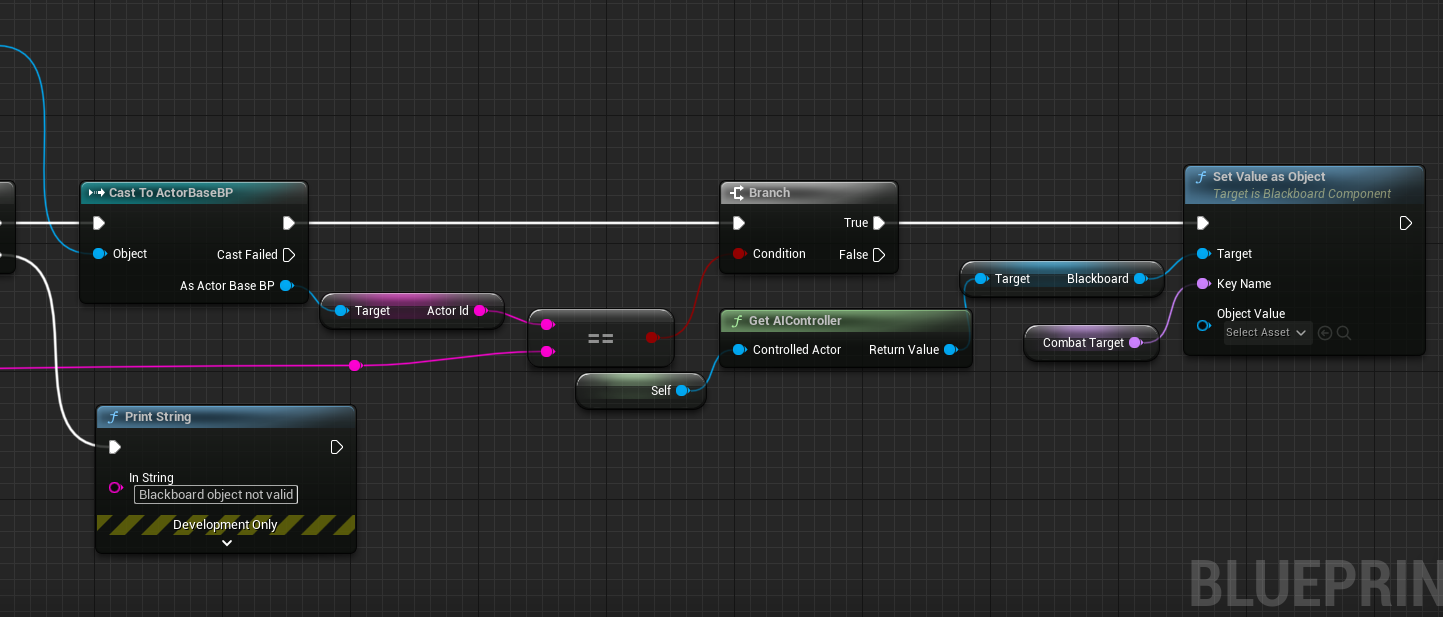
For now, its basically just removing the player/actor from the list map of detected actors. Then it checks, was the removed actor the one that the mob is currently targeting in the blackboard values.
If it is, we reset that variable in the blackboard.
Link the AI controller to your mobs
Go inside your mob blueprint, mine is using blueprint called MobBaseActor and in the default settings, set the AI Controller Class as the newly created AI controller.
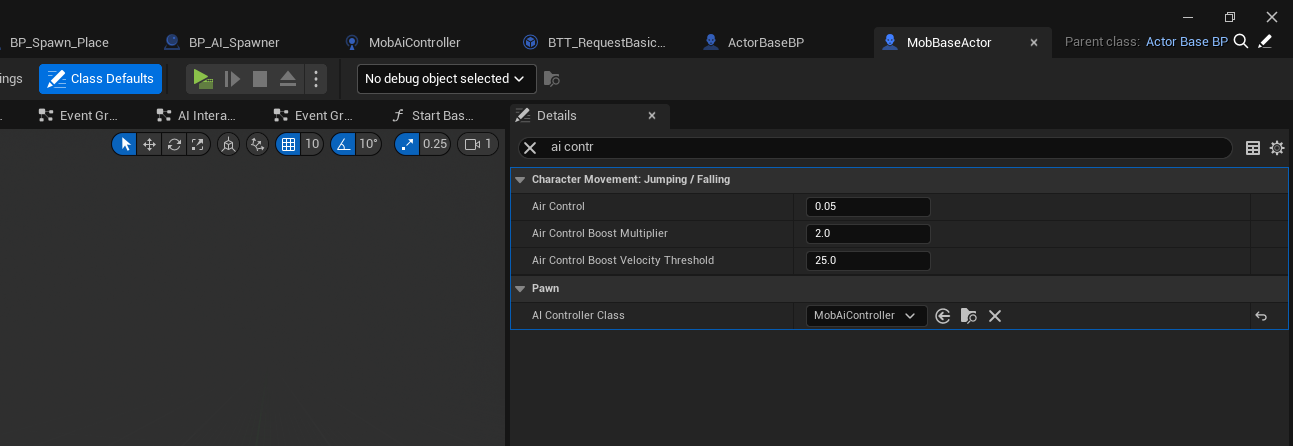
you may also need to auto posses this pawn:
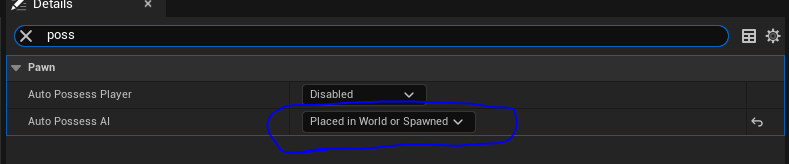
Create a Behavior Tree for the mobs
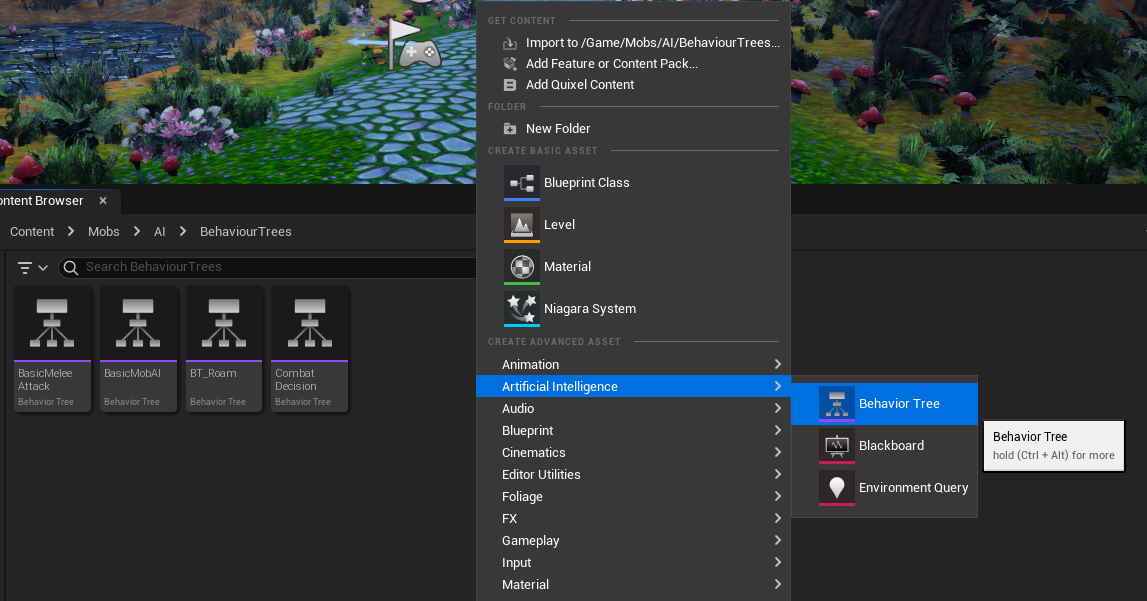
You can start with creating Basic Mob AI behavior tree and a blackboard which I named BB_MobAI.
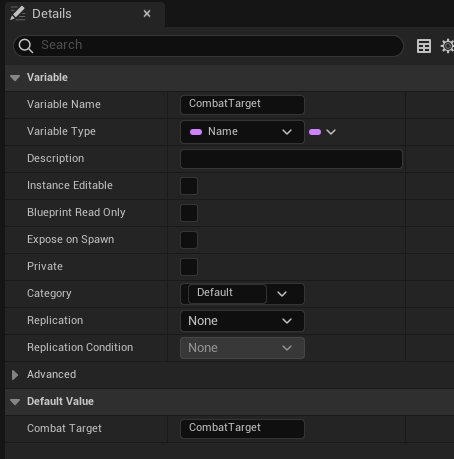
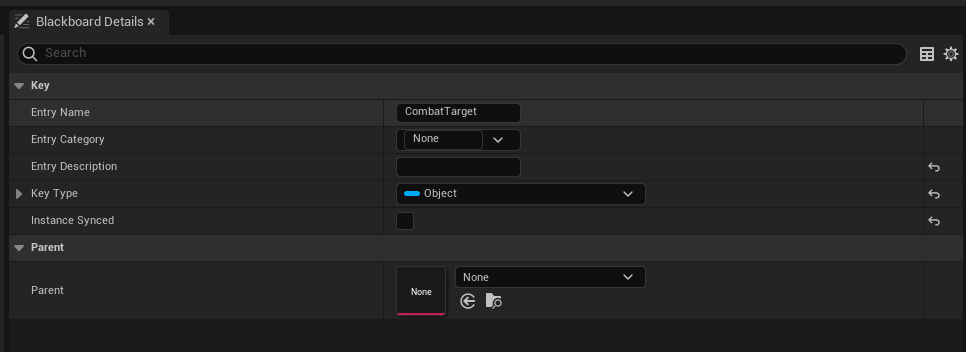
In my blackboard, I have these parameters:

The Combat Target will be a (custom) base actor class for me and can be the player blueprint, or its parent classes. As far as the blackboard is concerned though, its an object.
For now, link the blackboard to the behavior tree.
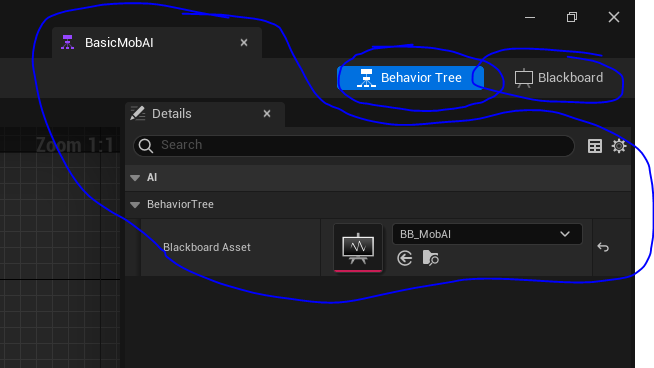
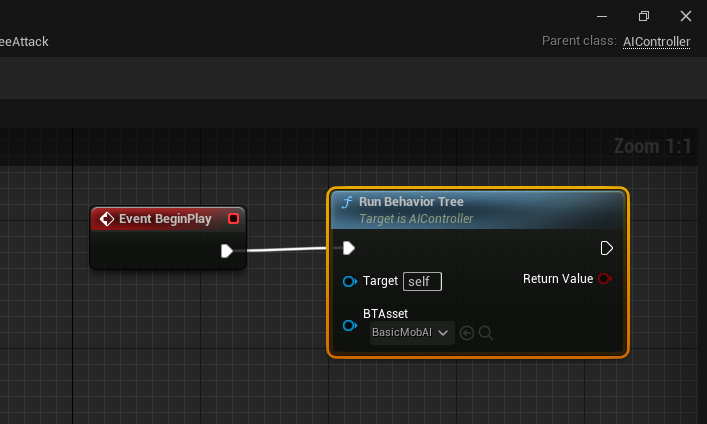
Now, simply run this behavior tree inside the AI controller, so we don’t forget!
You can do it part of begin play like this:
Note that in my case, I am not doing that, I am referencing the behavior tree as part of my spawner component:
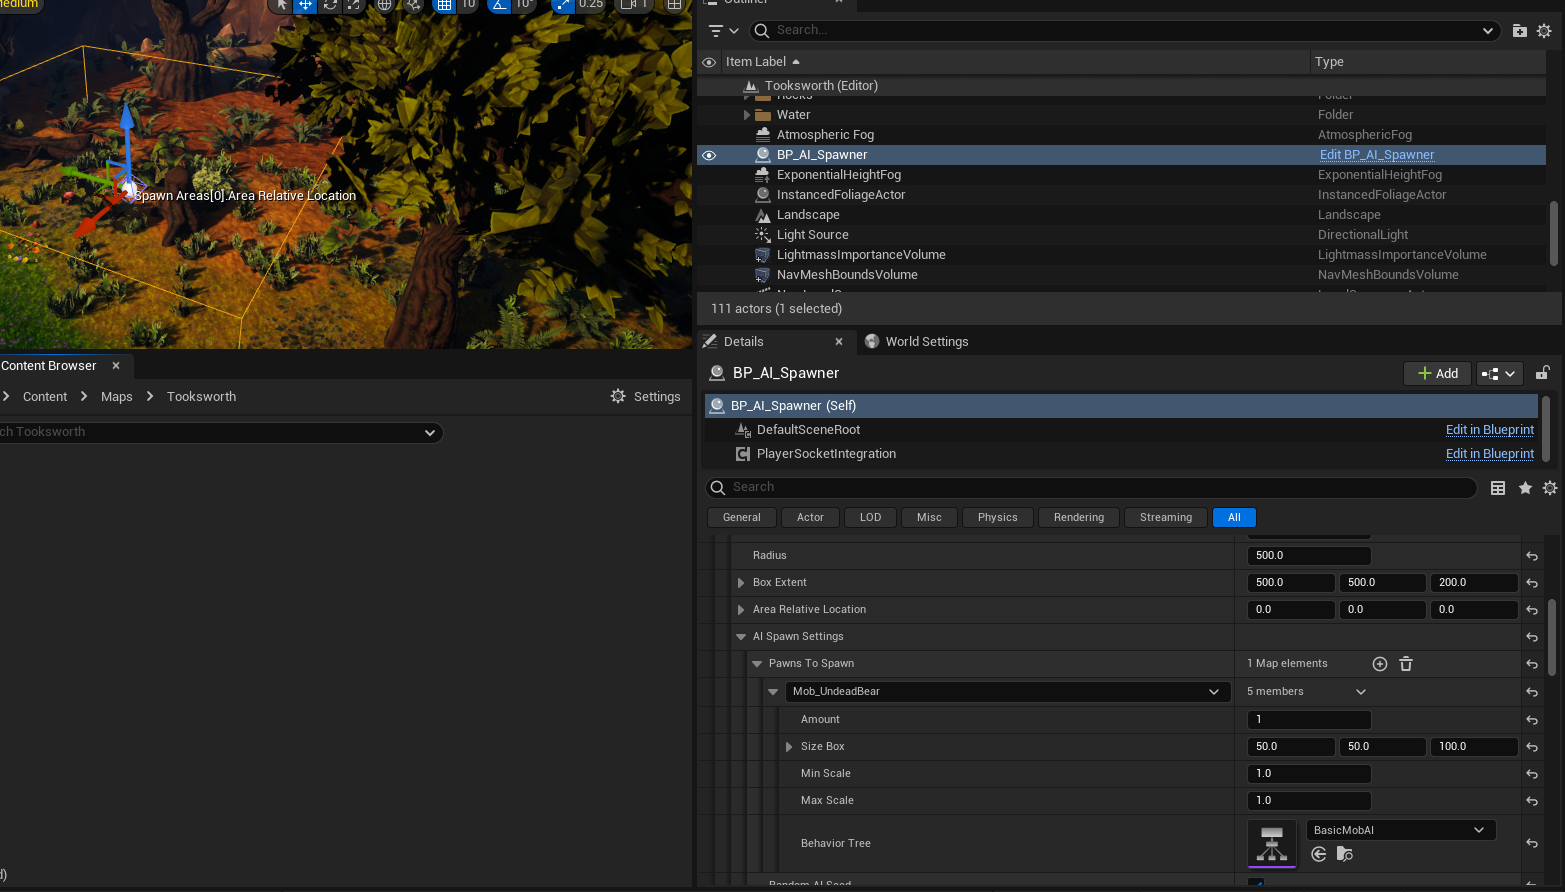
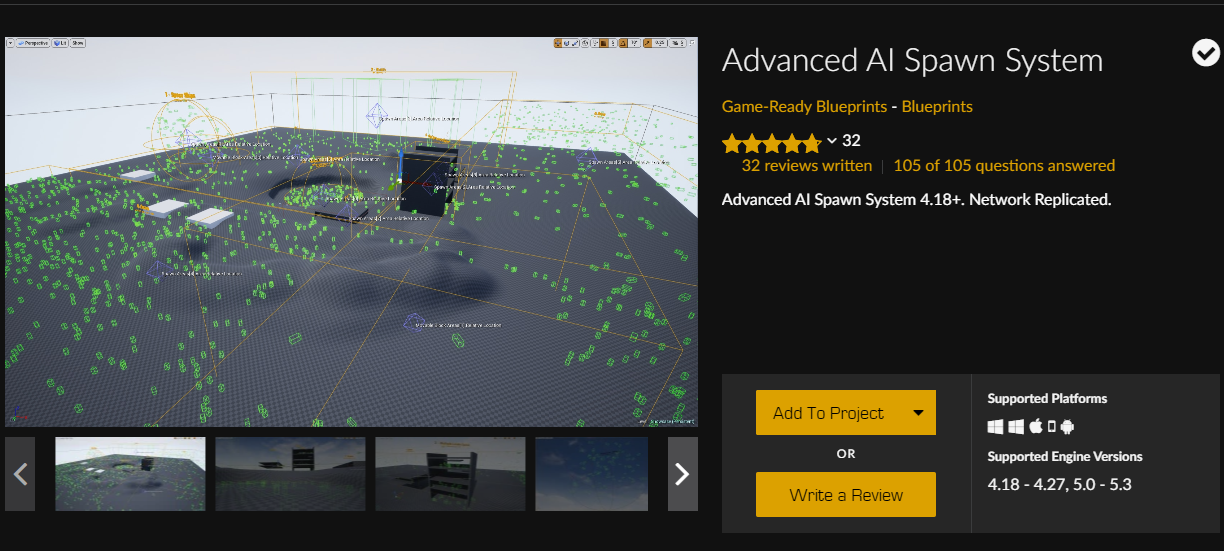
Just for reference, I am using this spawner system:
Basic Mob AI Implementation
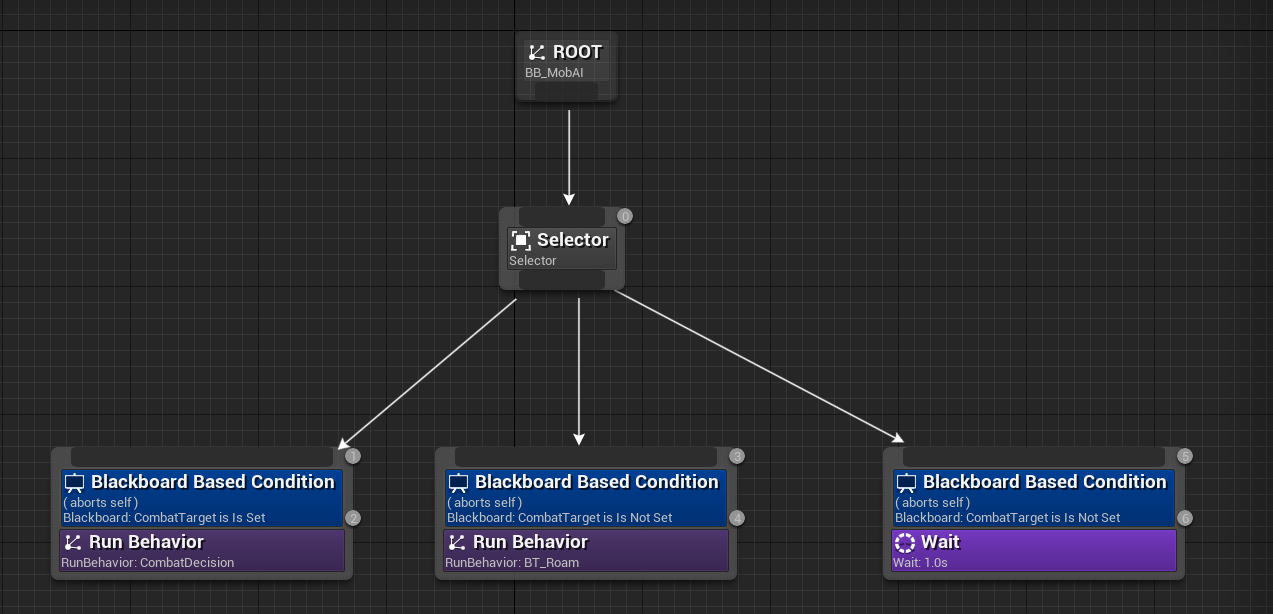
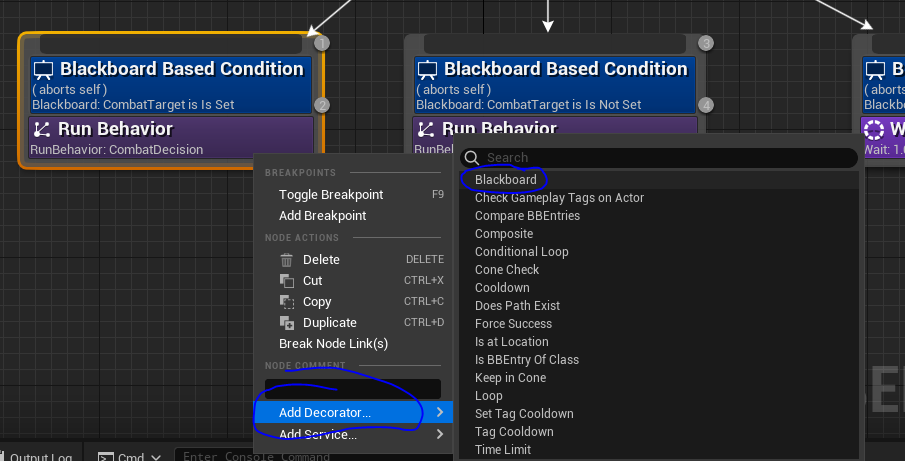
We’re using the selector node rather than sequence. This means we’ll only successfully run one of the lines, with priority from the left.
The executions of each node is conditional, you can add this by rightclicking the function and adding decorator and choosing ‘blackboard’ from the list.
If we look at the behavior tree then, we can determine what the mob logic is currently set to:
- chase the target, if we have one
- roam around if we don’t have a target
- wait 1 second, if we don’t have a target <– this one not necessary but can be useful for debug purposes
I split the logic of the nested calls into their own behavior trees as I expect them to grow, but this is optional.
Let’s check the first one, combat decision.
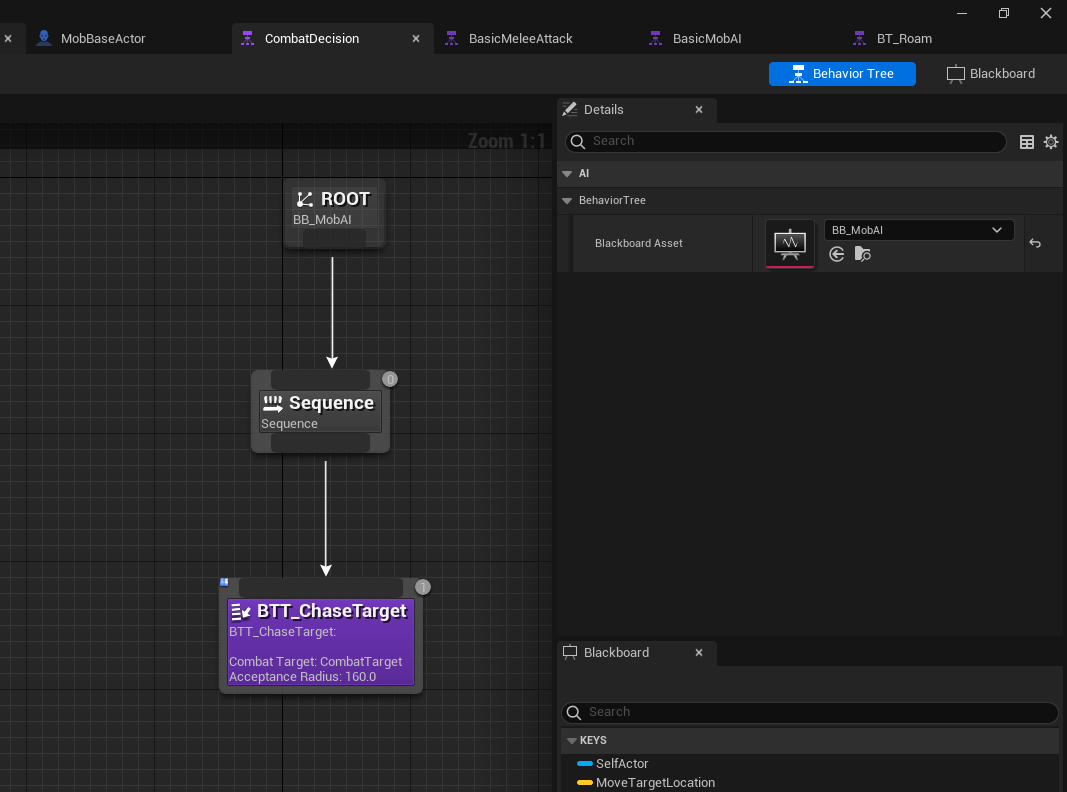
As you can see, for now its very simple. I set this as its own behavior tree because in future I may want to add features here for:
- special attacks, requiring different positions
- running away/to friendlies when HP low
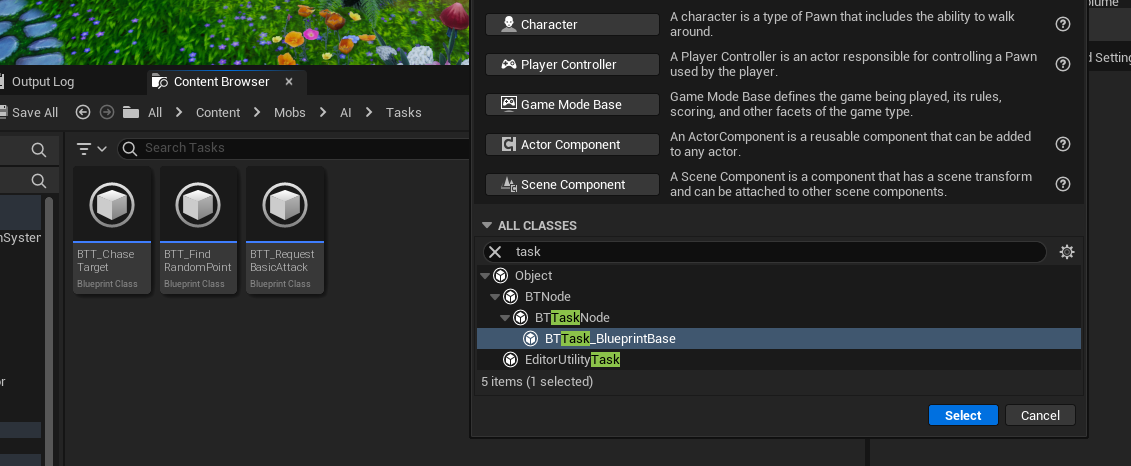
Now we will create a new task, BTT_ChaseTarget.
Both, CombatTarget and Acceptable Radius parameters are set to instance editable and expose on spawn which allows them to be controlled in the behavior tree (you will be able to see it set in screenshot above).
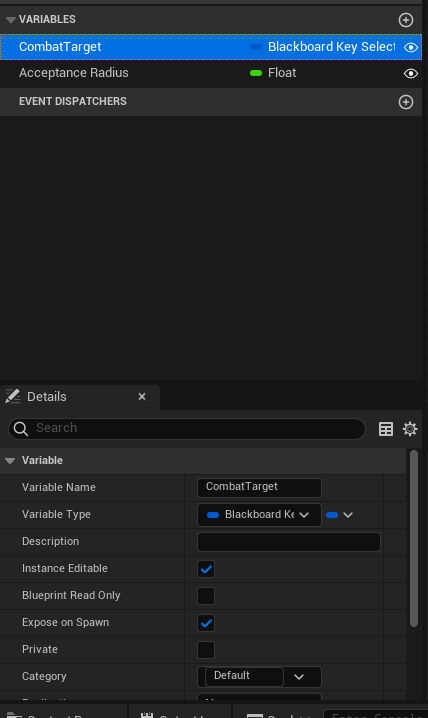
With those parameters all set, this function becomes quite simple.
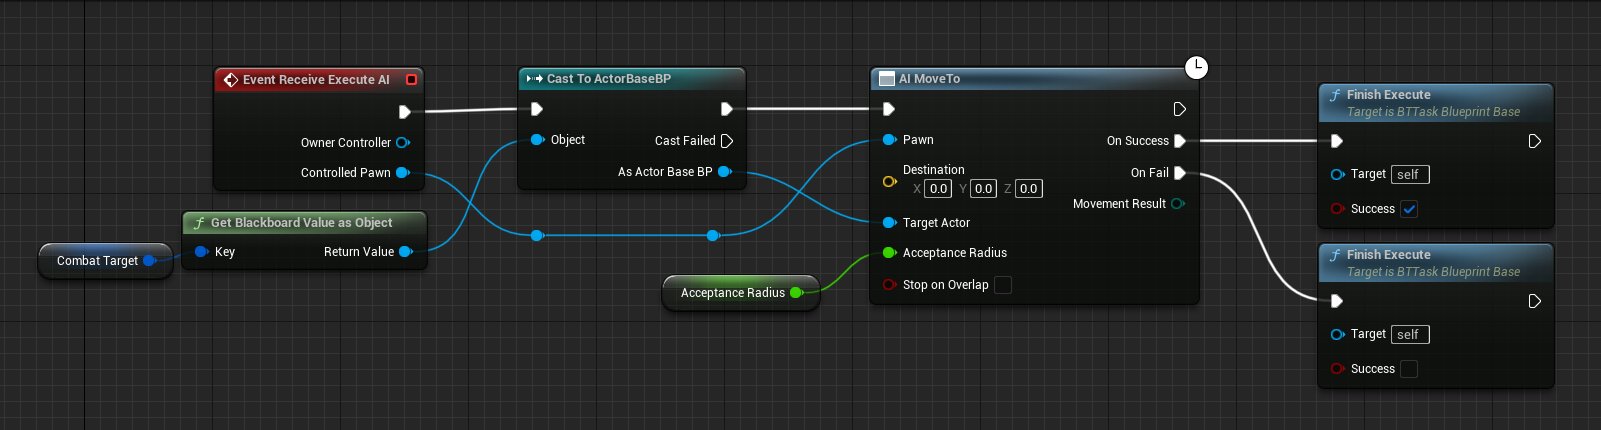
We simply have to ask our mob to chase the requested target, using the AI Move To function.
Note, for this function to work, you will need to have a Nav Mesh component added to your level.
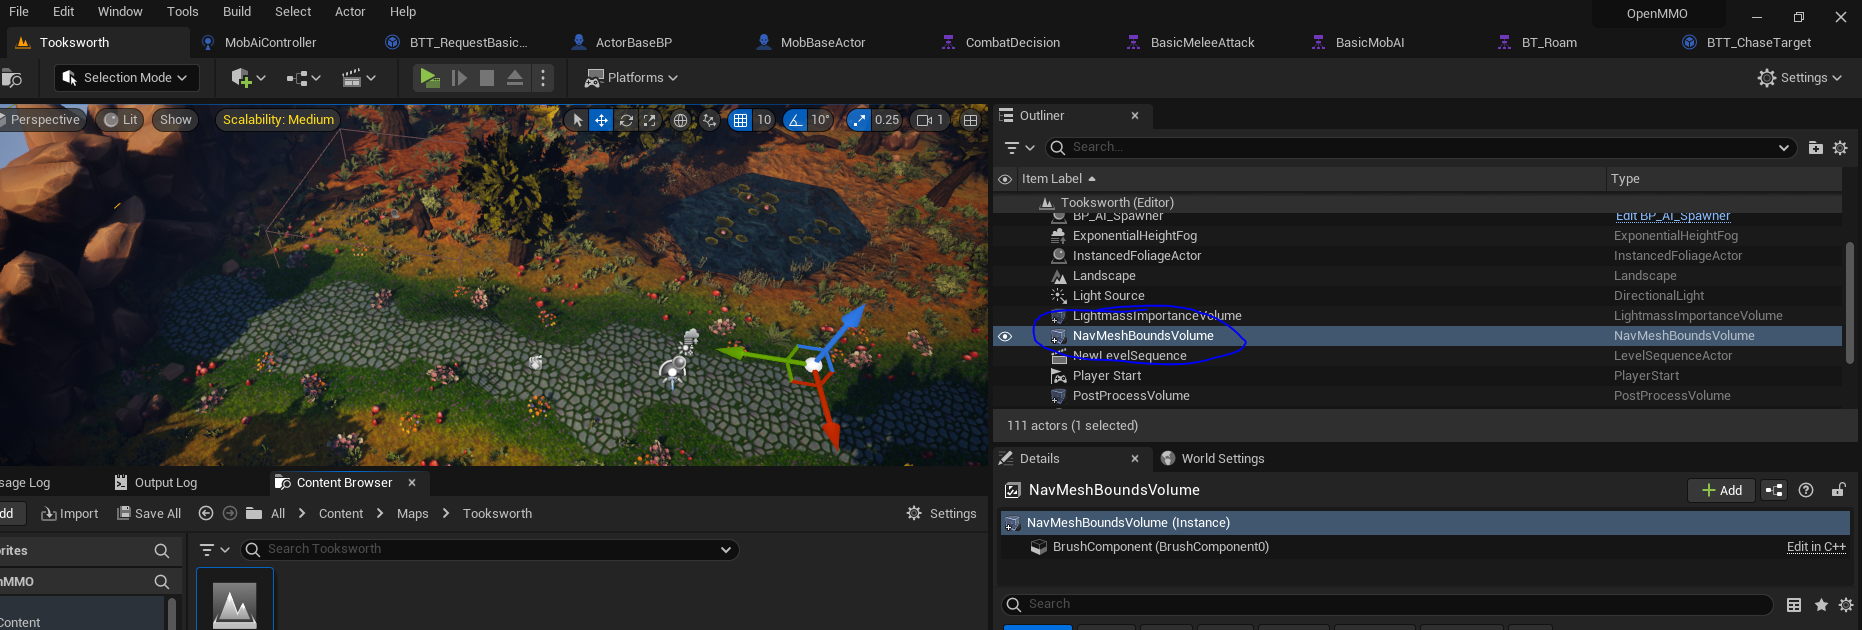
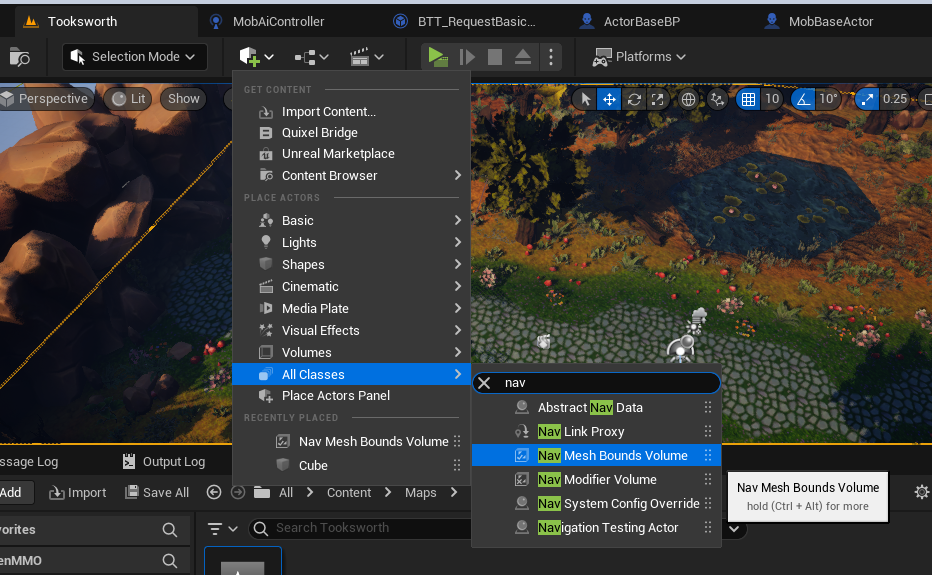
Without this component overlaying where your mob needs to move, your mob will not be able to move.
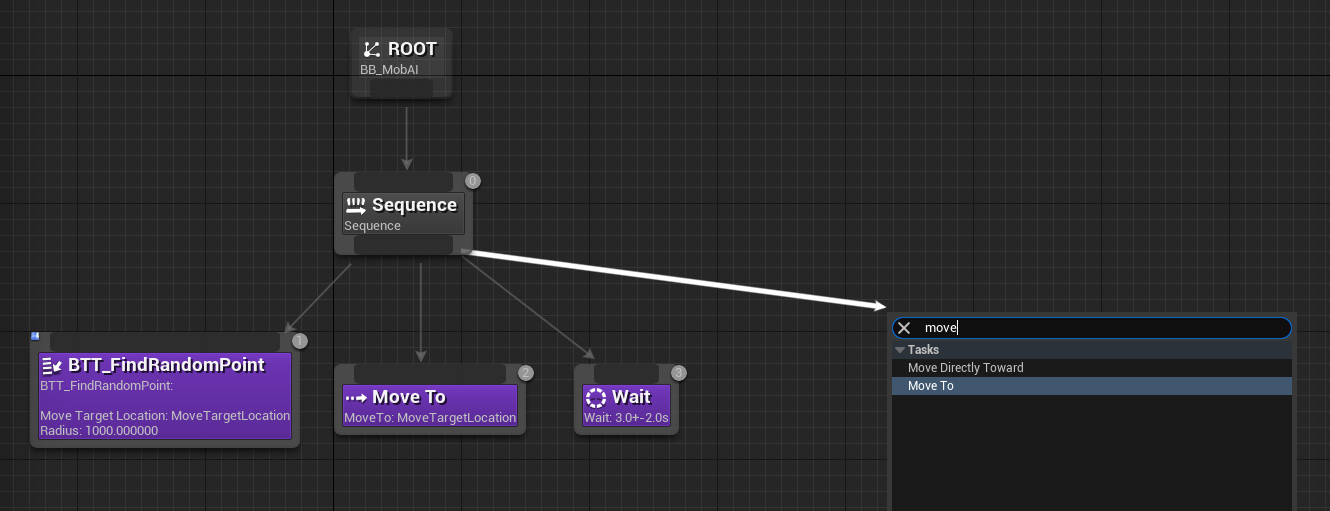
Basic Roam
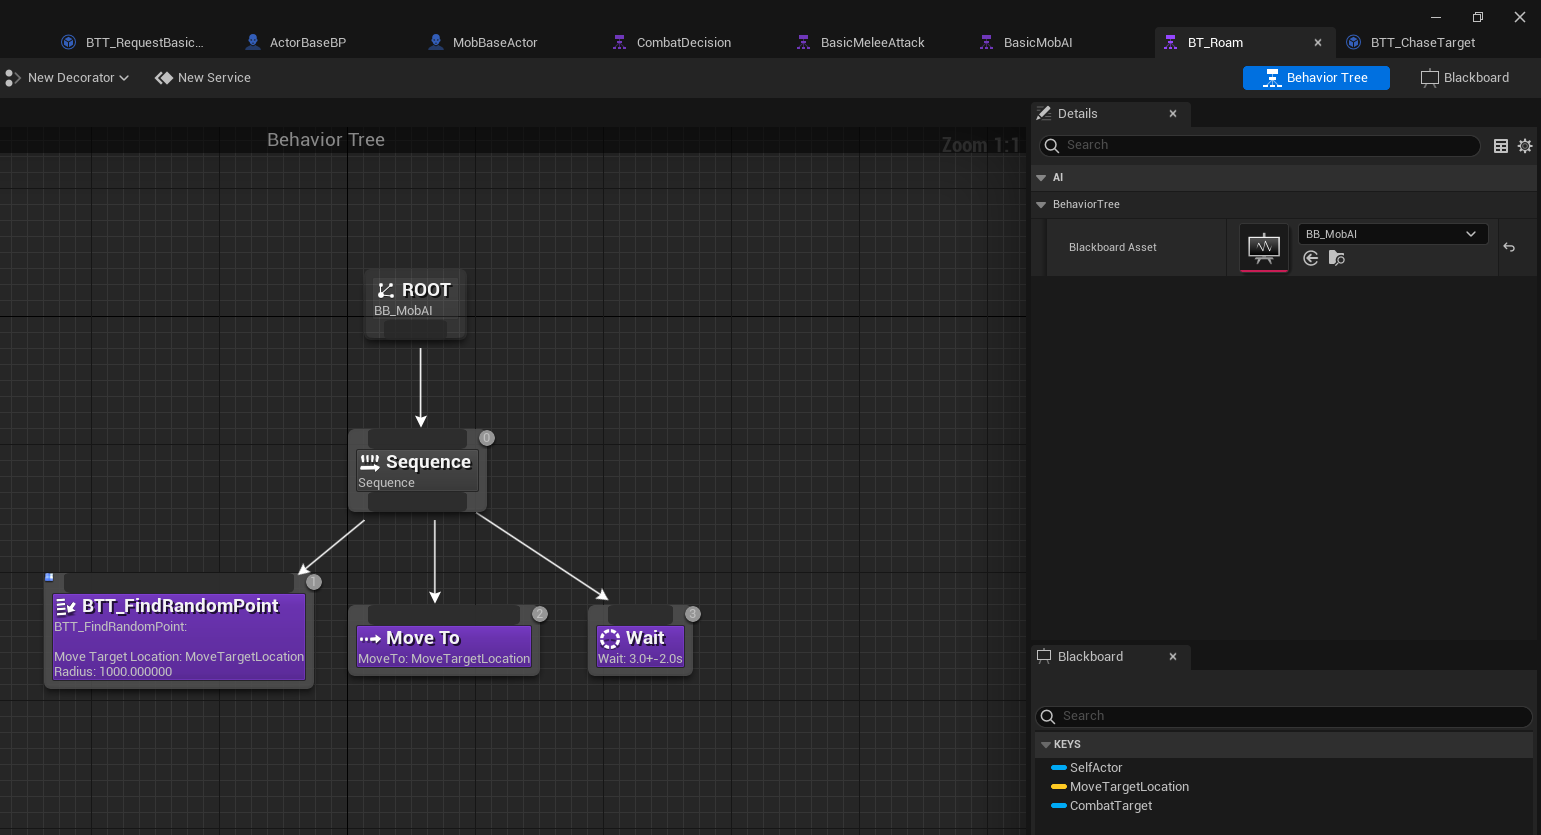
Here we simply find a random point to move to, move to it and wait.
Remember, this task should be overridden/cancelled if a combat target is detected.
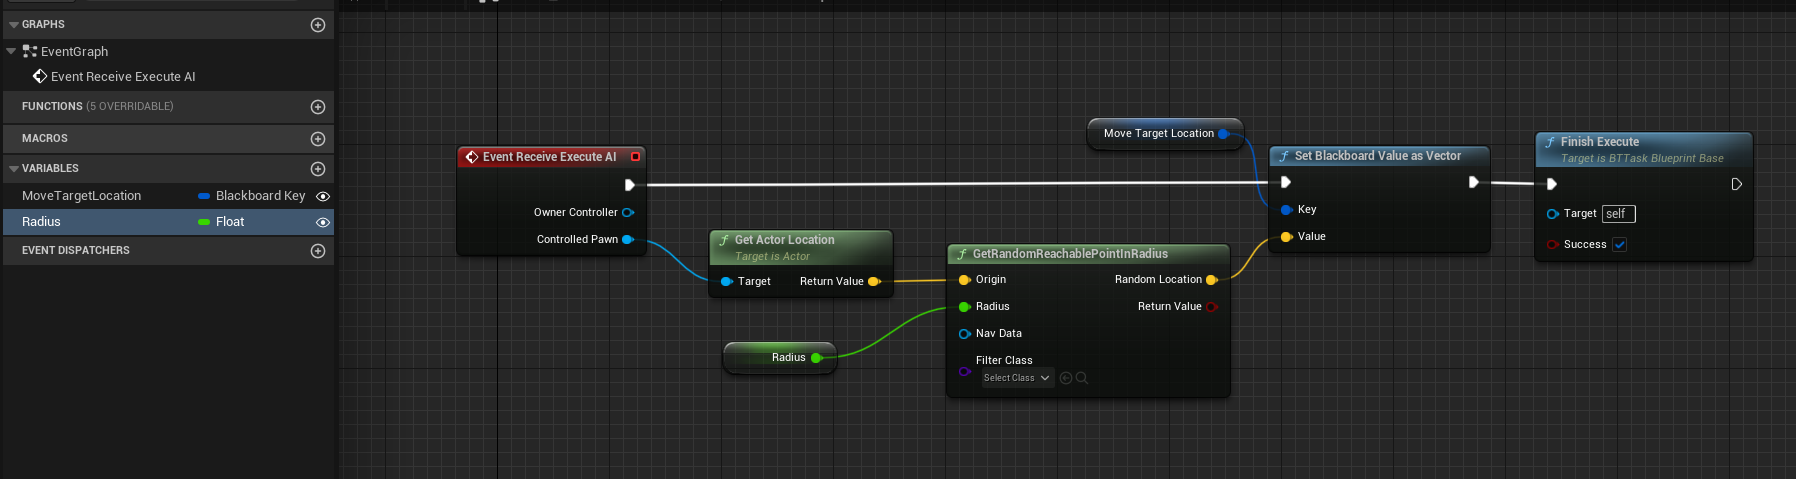
The Move To and Wait are native functions which you can find without creating a task for.
Extra configuration between Custom server and UE client
So this is a bonus section for those interested between custom server integration and the UE client.
The combat for monsters is handled in very similar fashion to player combat now.
I send a request to server to initiate a combat loop, which validates every 0.1 (variable) seconds to see if the target is within distance threshold and is facing target.
When valid, an attack is initiated and request to begin animation is sent, then 100ms it does the validation again before actual damage is applied.
The damage is evaluated based on stats of the actor and the target (e.g. weapon damage, defense, etc).
Therefore, there’s 2 things that I need to have in my UE client to ensure integration.
- receive a start animation request
- process stats to take damage on player
Start attack animation on mob
This just required some refactoring as this logic was created for the player originally.

We receive a request from the server with message type of INITIATE_ATTACK.
The combat request contains the actor ID for who will be starting the attack animation, so we just need to find that actor. Find relevant actor function:
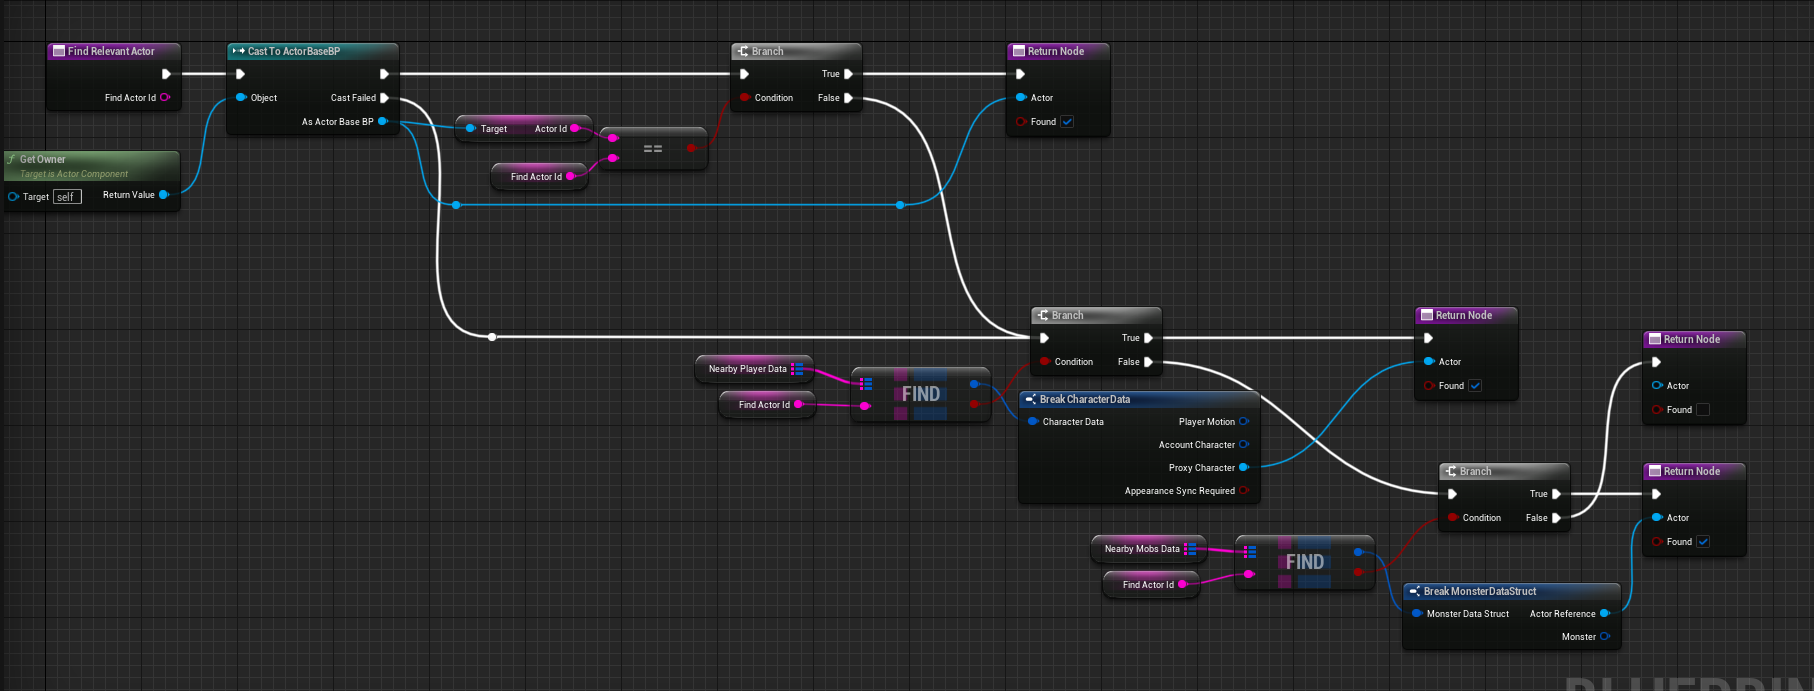
So, we have an Actor ID and we want to find the relevant actor. We check if the actor ID refers to our player and check the synchronized nearby players and mobs.
Then, we use the Actor Base BP as a base, in a same way an interface is used, to start base attack animations.
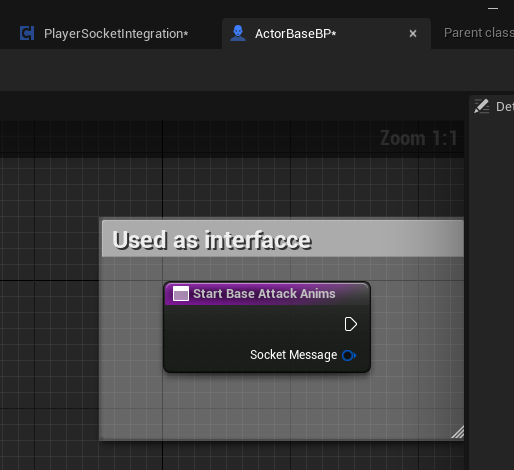
Next, in our MobBaseActor blueprint, we implement the logic for carrying this out, however we don’t populate the actual attack animations!
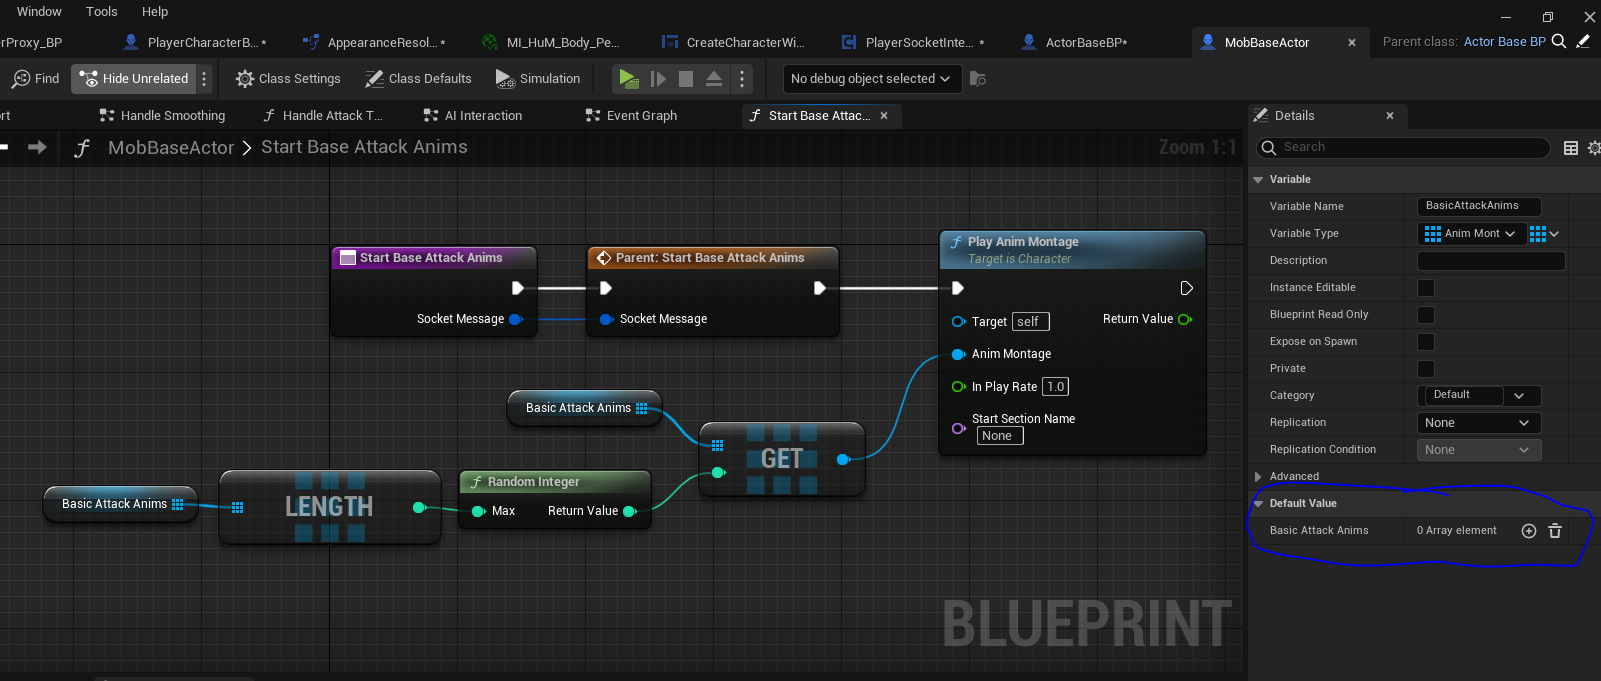
This way, we don’t duplicate code.
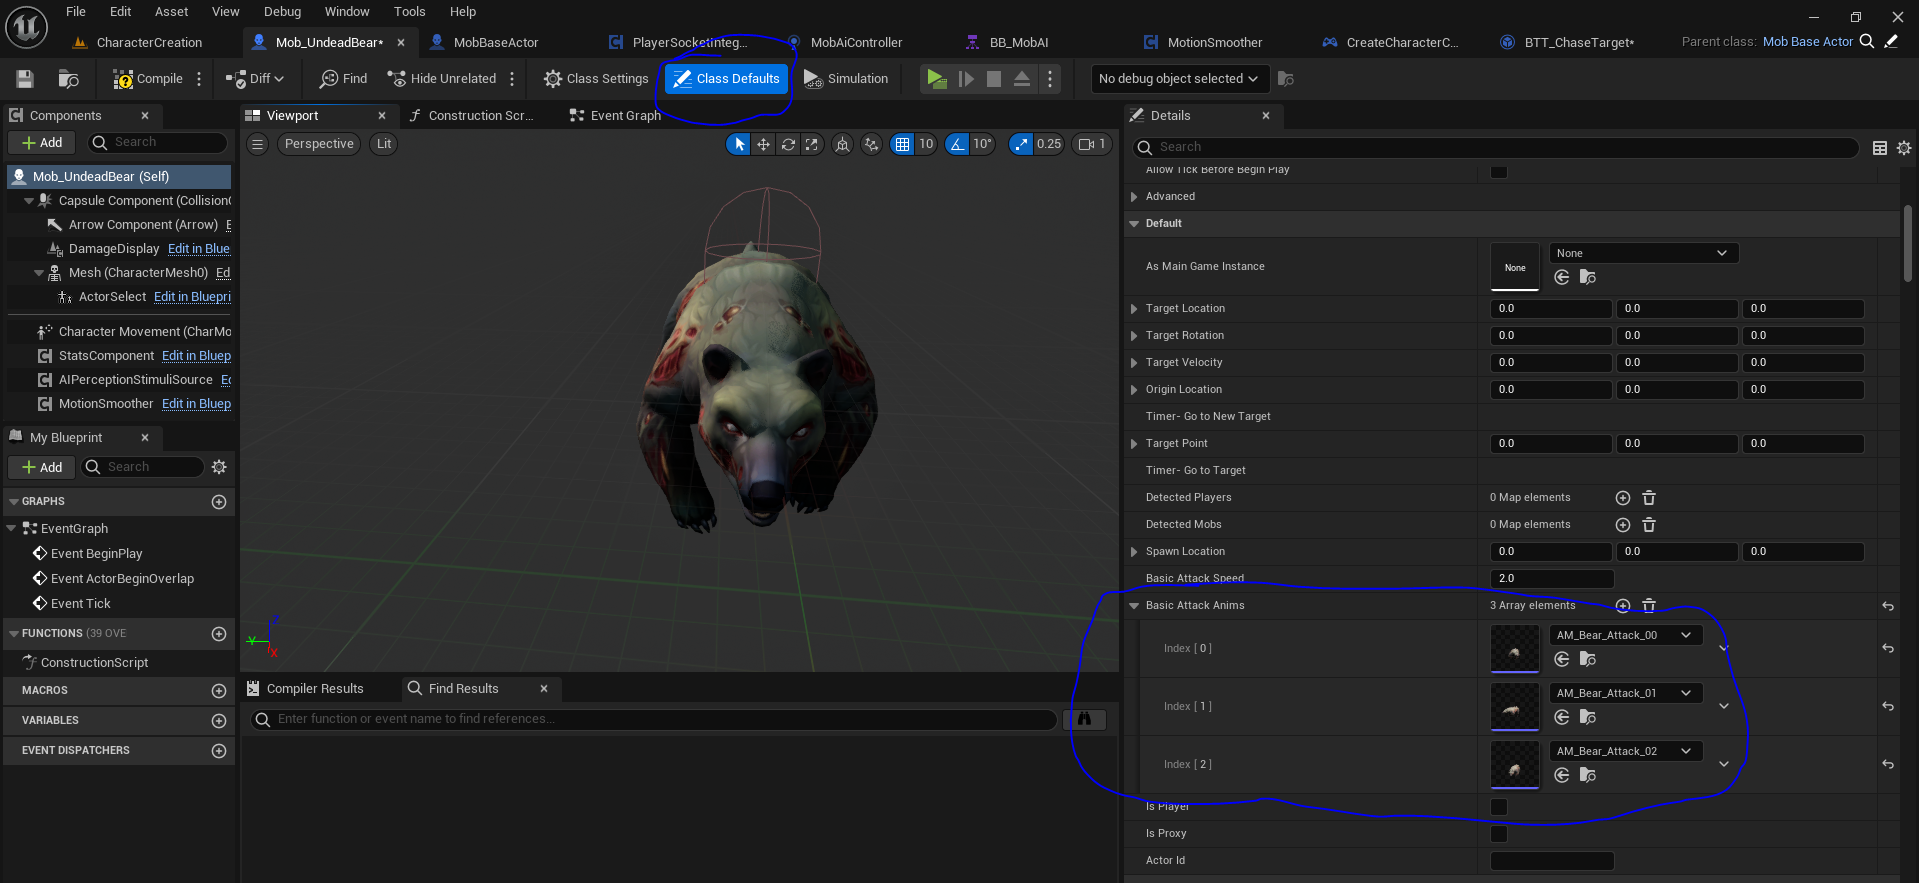
Then, in our Mob blueprints, such as MobUndeadBear, we just need to populate the default attack animations and not repeat the code logic.
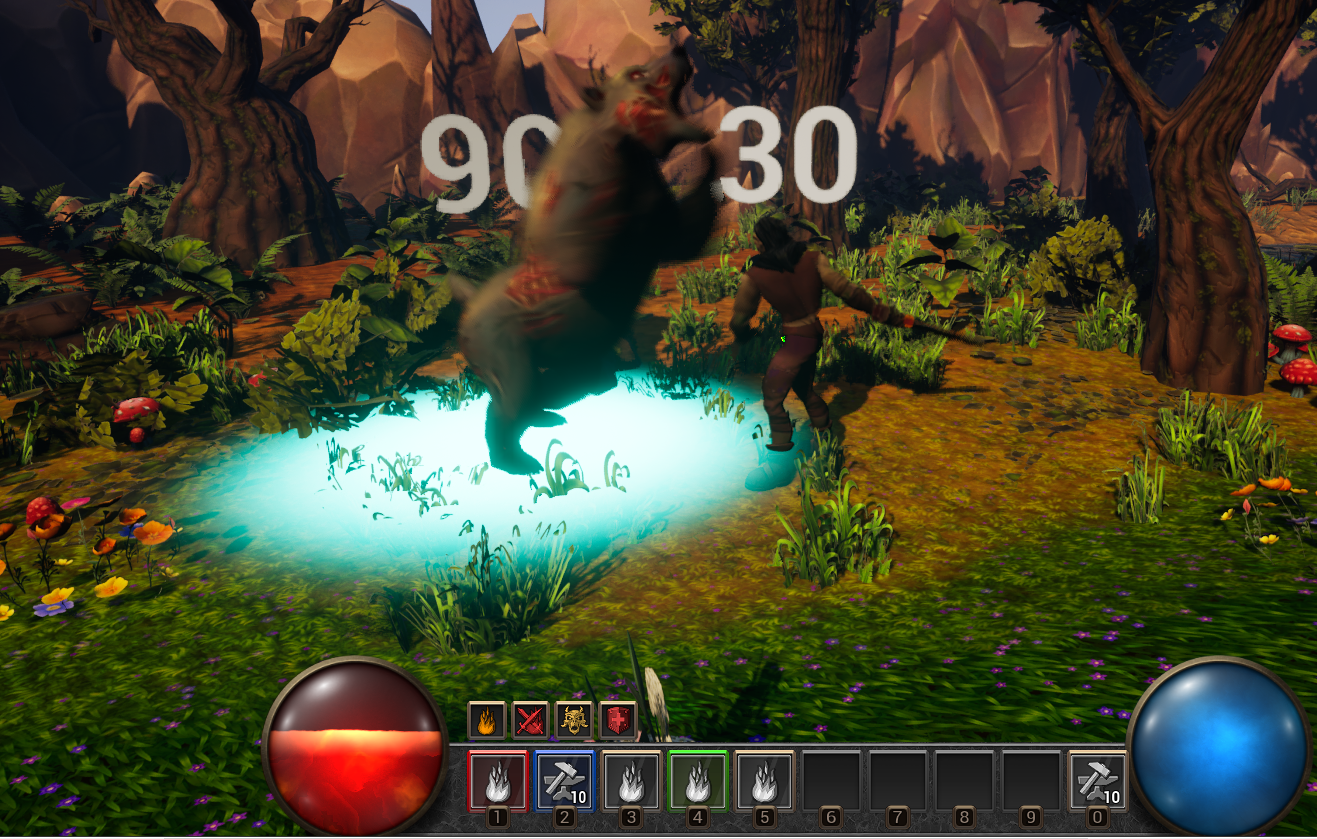
Displaying damage on the player
We already create a component to display damage and stats component which handled populating it. It was only designed for the mob, so we just needed to do a minor refactor to make it work for the player too. This was covered in the post here.
I just needed to obtain correct actor BP, and I could use the same function (Find relevant actor) I shared earlier.
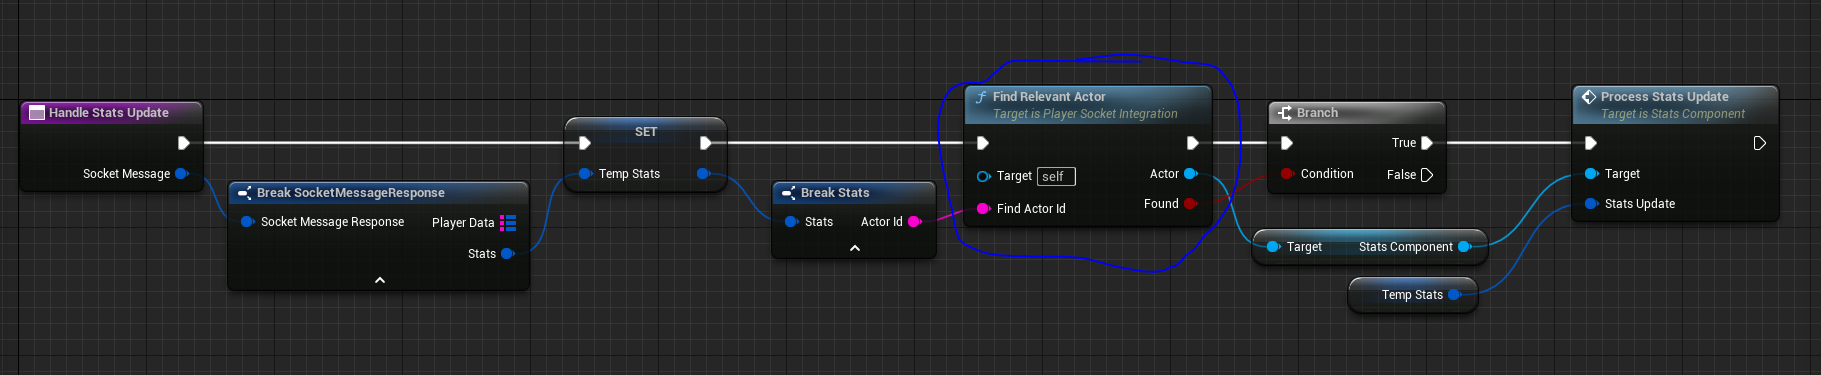
In this case, the stats update contains the actor ID and the updated stats. I use the actor ID to find the relevant actor BP, including self and synched mobs and players. Then I use the stats component to process the updated stats, evaluating the difference in current HP and placing that into the widget.
What’s next?
There’s still many aspects of the combat system that are unfinished.
- Death states and player respawn settings
- Skills, abilities and passives
- XP and level up
- Loot system upon mob death