50. How To Begin Basic MMORPG Combat Validation With UE
In the previous post, we’ve introduced a very basic combat implementation that’s running between Unreal Engine and Java, you can find it here.
As usual, the Java Micronaut server code can be found here.
The agenda for this post:
- Implement distance validation, alert user when too far
- Implement angle validation, alert user if not facing target
- Attack nearest target, instead of random one on button press
- Highlight attacking target by drawing a circle actor underneath
- Added HP/MP regen, purely backend, no UE impl required
Distance validation
These were implemented in custom server.
I personally found distance and angle validation quite interesting.
This validation happens purely on server as to avoid any hacking. The distance validation is quite trivial, we simply have a location for our player and location for our target. We then want to evaluate whether the 2 points are within a certain threshold.
The threshold can be taken from our weapon, so I have added a new parameter to WEAPON items specifying ATTACK_DISTANCE.
This is to allow a deeper configuration for weapons, for example, daggers will have short attack distance, polearm will have longer ones and bows have significant range.
I will include the Java code for reference, which can easily be transferred into C++ or blueprints if you’re interested.
 public boolean withinRange(Motion motion, int threshold) {
boolean xValid = validDimension(this.getX(), motion.getX(), threshold);
boolean yValid = validDimension(this.getY(), motion.getY(), threshold);
boolean zValid = validDimension(this.getZ(), motion.getZ(), threshold);

return xValid && yValid && zValid;
}
…
private boolean validDimension(long v1, long v2, int threshold) {
return ValueRange.of(v1 - threshold, v1 + threshold).isValidValue(v2);
}
Angle validation
Angle validation was also implemented on the custom server.
The purpose of the angle validation is to ensure that target A is facing target B.
In order to process this request, we need the locations of both point A and point B as well as the direction of point A.
I will only process the angle validation across 2 dimensions instead of 3, as I am not concerned about Z axis here right now.
Here’s the function I used to evaluate it:
public boolean facingMotion(Motion motion2) {
double maxAngle = 90;
// Calculate direction vectors for the player and the monster
double x1 = this.getX();
double y1 = this.getY();
double x2 = motion2.getX();
double y2 = motion2.getY();
double vectorX = x2 - x1;
double vectorY = y2 - y1;
// Calculate direction vector based on yaw (horizontal angle)
double directionX = Math.cos(Math.toRadians(yaw));
double directionY = Math.sin(Math.toRadians(yaw));
double dotProduct = directionX * vectorX + directionY * vectorY;
double magnitudeDirection = Math.sqrt(directionX * directionX + directionY * directionY);
double magnitudeVector = Math.sqrt(vectorX * vectorX + vectorY * vectorY);
double cosTheta = dotProduct / (magnitudeDirection * magnitudeVector);
double angleRad = Math.acos(cosTheta);
double degrees = Math.toDegrees(angleRad);
return degrees < maxAngle;
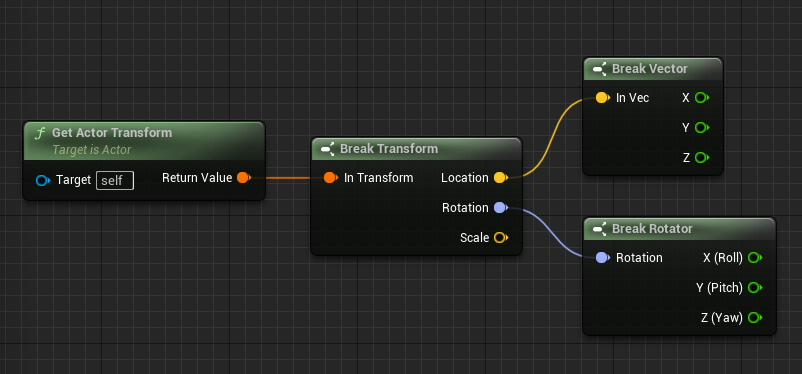
}You’re able to extract the relevant data in Unreal Engine by getting actor transform, like so:
Applying distance/angle validation in combat
As I mentioned, the distance and angle validation occurs on the custom server and we need to provide updates to UE client with results.
In my custom server this happens specifically here.
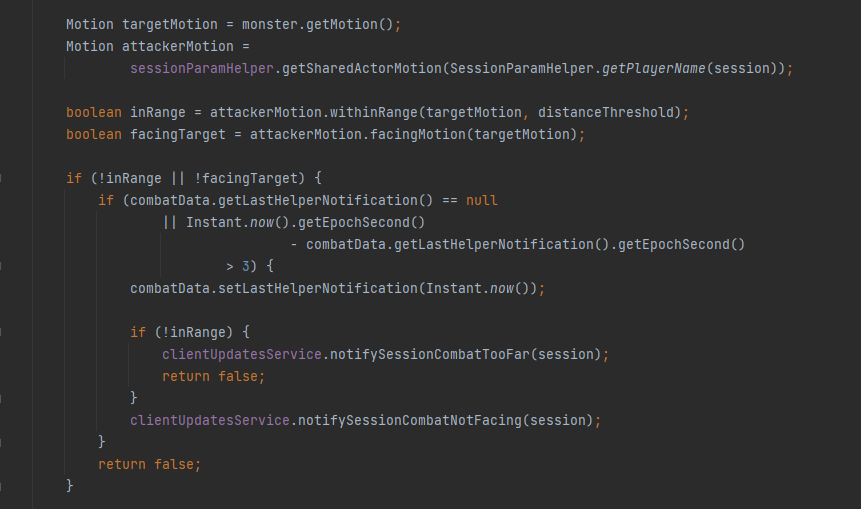
What this is doing is if the validation has failed and a notification hasn’t been sent to client in the past 3 seconds, it will send a notification indicating either the target is too far or character is not facing the target.
The specific messages say:
- COMBAT_NOT_FACING
- COMBAT_TOO_FAR
This way, our client is not spammed with updates and we can expect to get a message at most once every 3 seconds.
Displaying the validation messages in UE Client
Ok now that we have the validation results on server, we want to display them on the UE client when they occur.
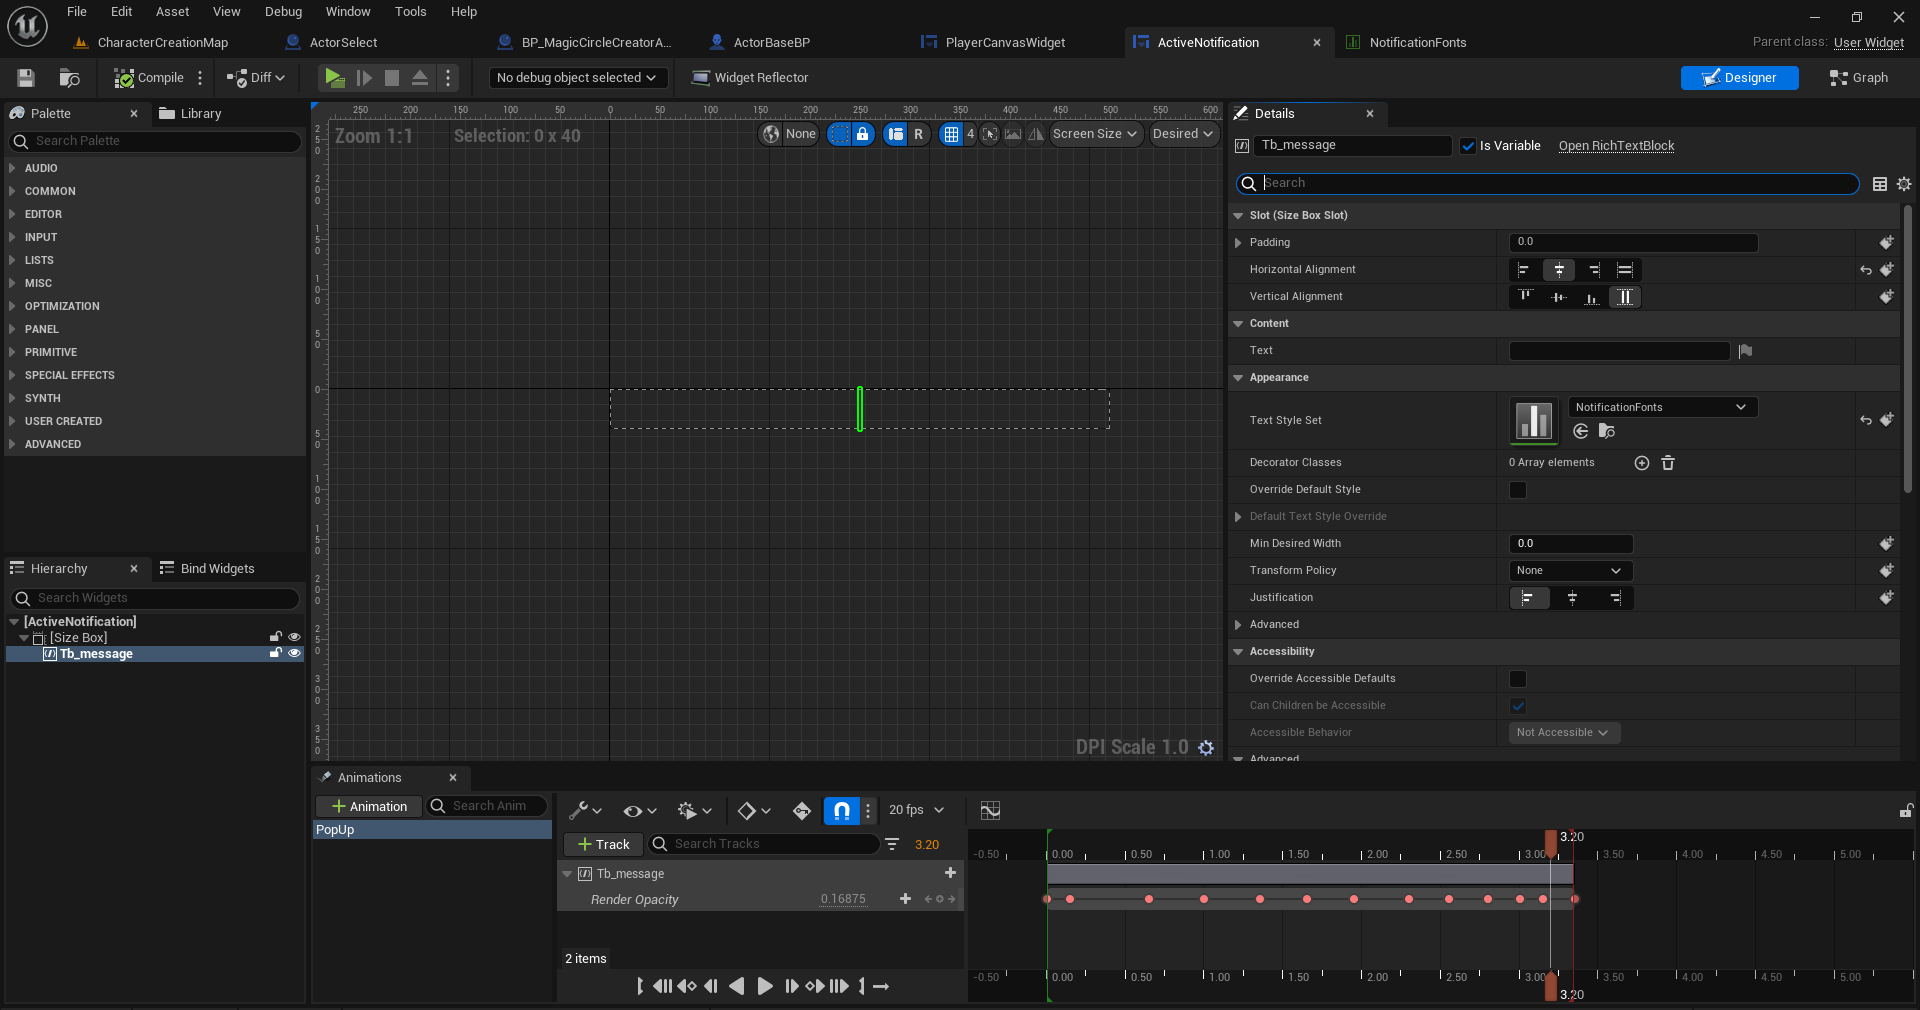
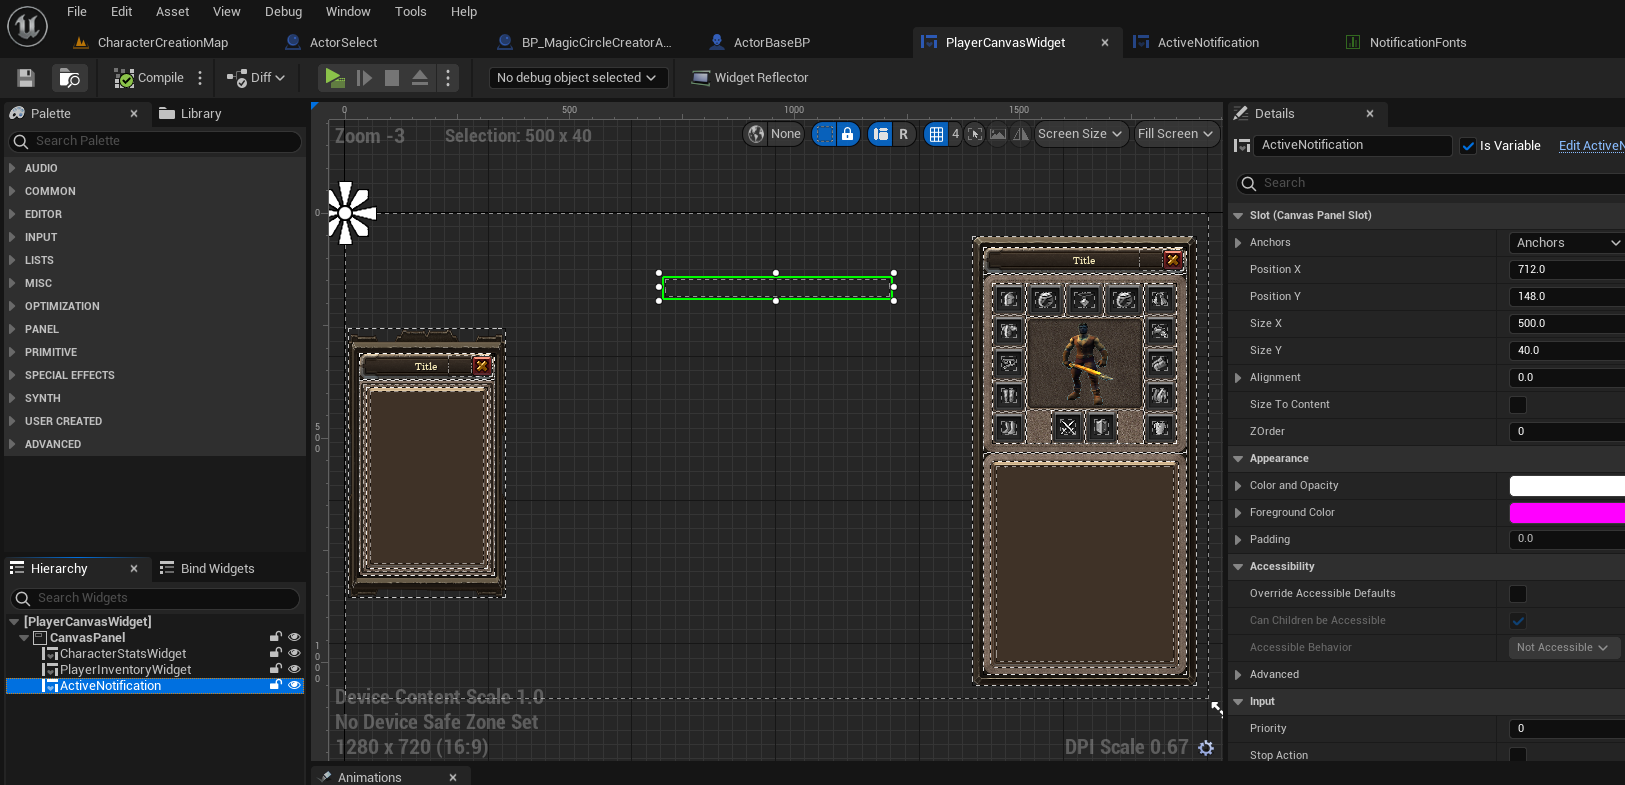
For that, I create a very simple widget, I called it ‘ActiveNotifications‘.
I will use it to show validation notifications, for combat and perhaps other actions too.
I just needed to create 1 additional function inside the event graph.
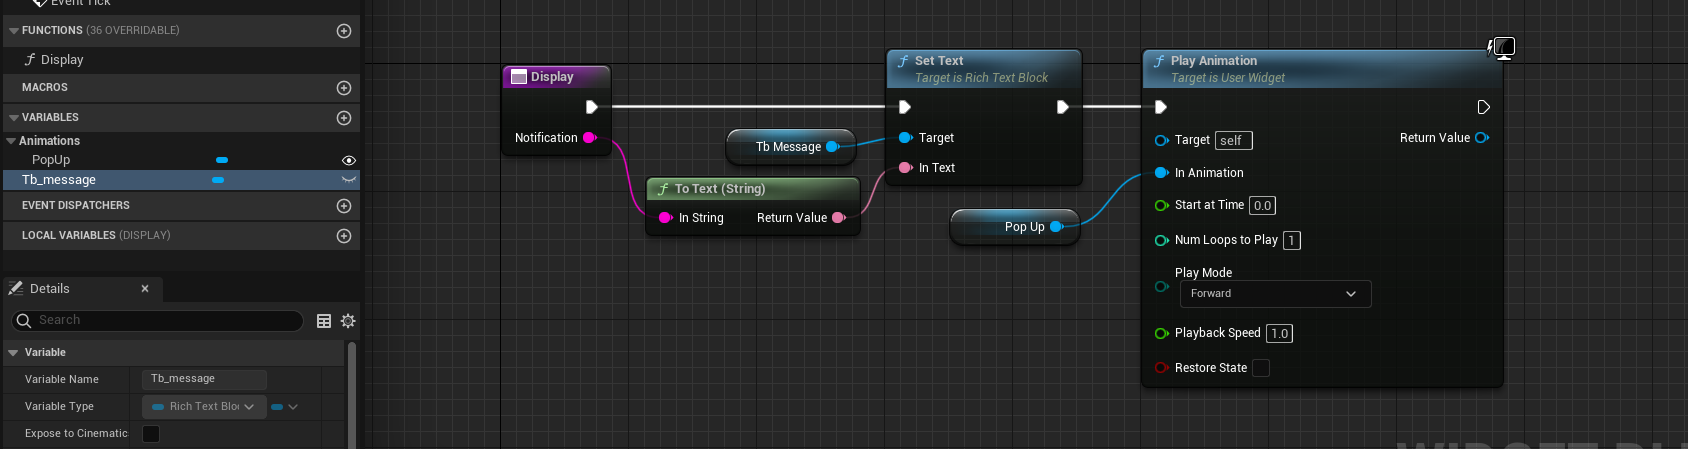
When I receive the notification, I will simply call this function to display the notification content.
The animation simply alters the opacity of the text.
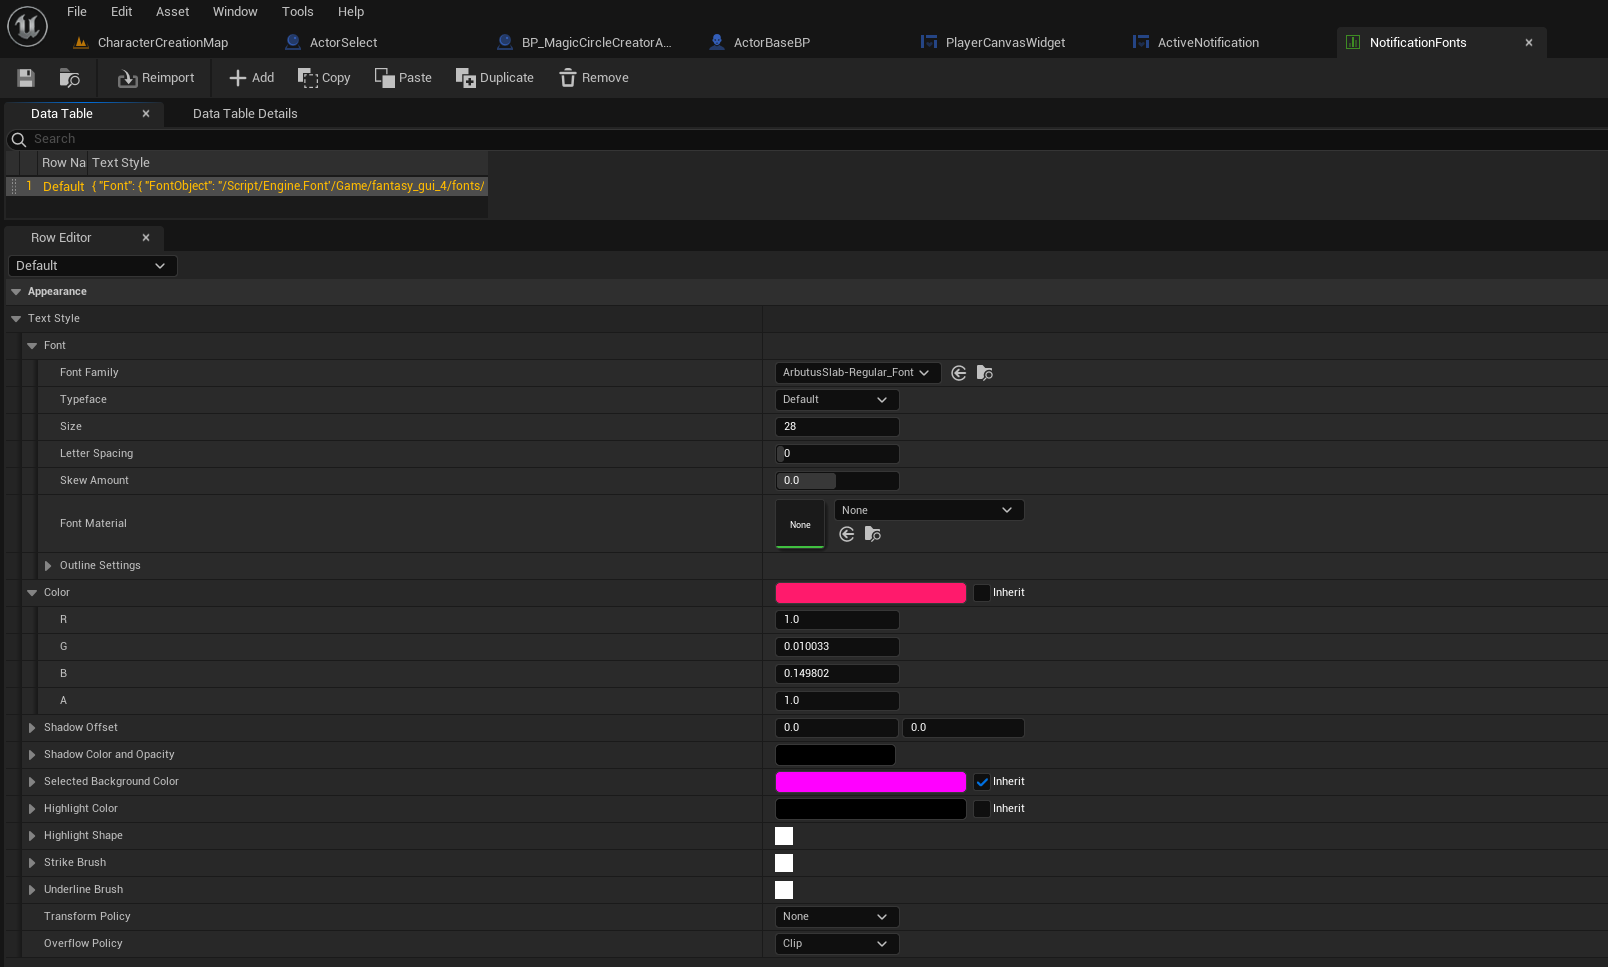
I used rich text component and for that I need to specify the fonts in a data table. To create one, find it here:
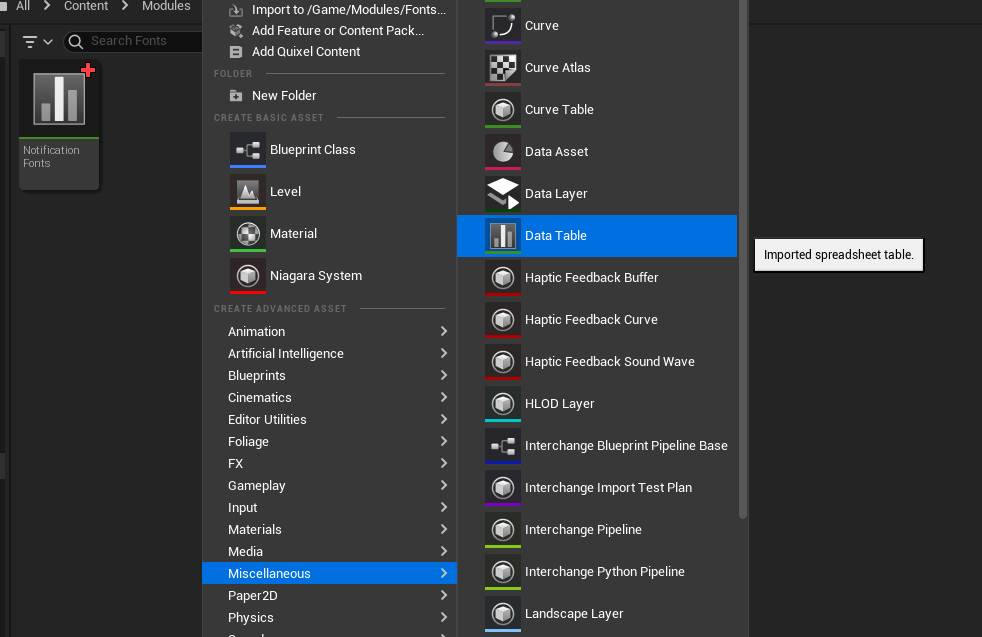
Once created, I needed to specify a ‘Default’ entry:
With this setup, I just need to add it to my Player Canvas Widget that I always display.
Receiving validation notification and drawing it
Drawing the notification is now very simple! We have the server do all the hard work and provide us with the message we need to display. We receive this message via our Websocket.
Above we also created the widget which is used to display the notification and all we need to do is call the function Display.
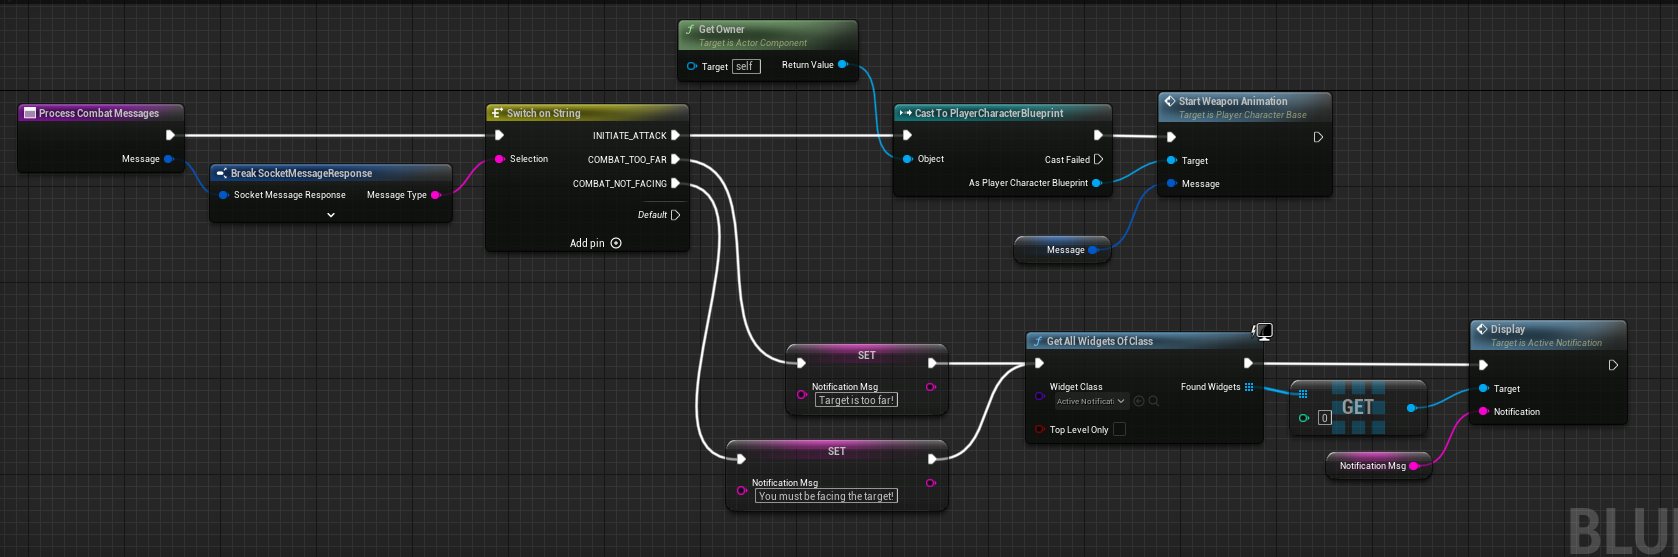
Here we receive the Websocket message, as usual we simply check the message type. Based on that message type, we can now draw the relevant notification.
I could add the Get All Widgets of class to the constructor and promote the widget as a variable to make this slightly more efficient and neater.
Attacking nearest target request
In the previous post, we attacked a random nearby mobs, from a list of nearby actors. Now we want to change this behavior to attack the nearest mob instead.
Let’s have a look at the blueprint.
There’s multiple ways of doing this, I also kept a Map<String, MonsterData> struct which I could use. However this approach is a bit more generic and you’d be able to use it too.
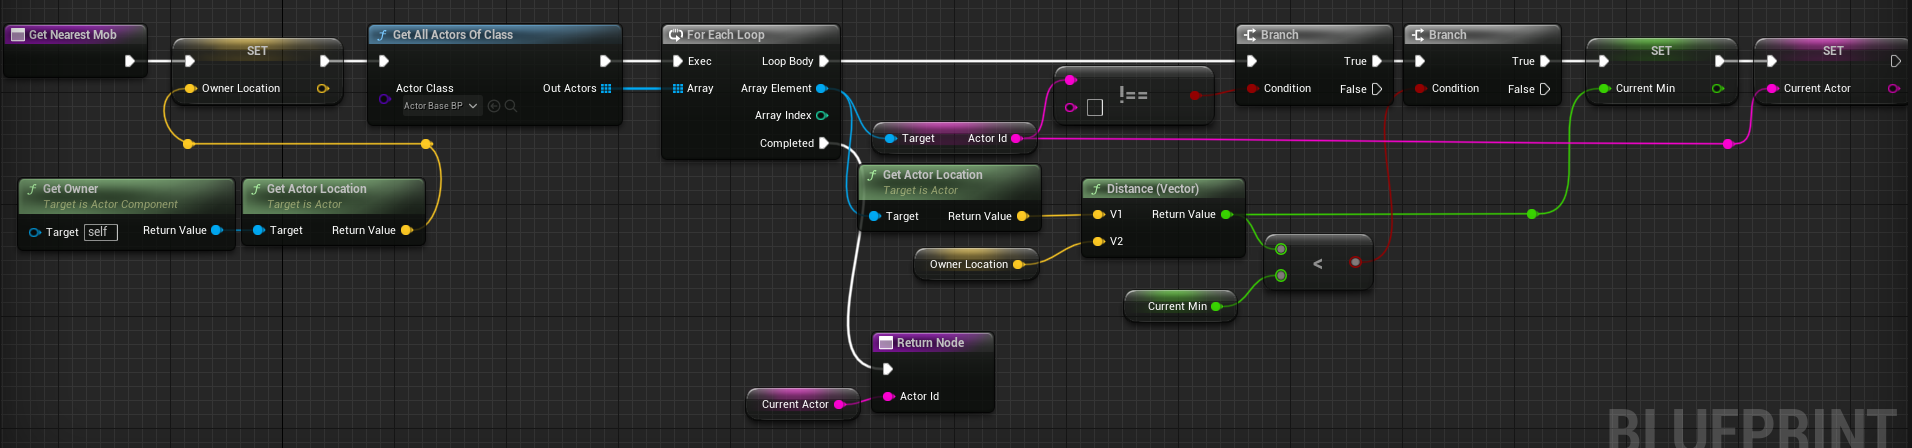
What am I doing?
- Get my current player location, through Get Owner Location.
- Find all actors of class – here, specify the class of your mobs.
- loop through each one, in my case I ignore anything without actor ID which is a custom variable I set for mobs.
- Get Distance (Vector) between owner location and actor location
- Check if distance is smaller than temp var of current min.
- If smaller, keep it as a reference to pass back on Loop Completed call.
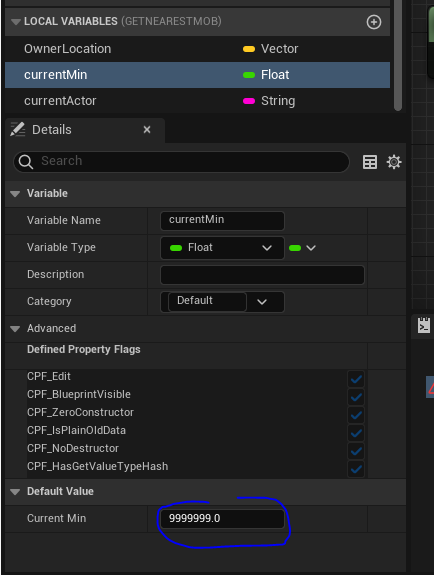
For reference, I set a high default value for CurrentMin to ensure its always populated
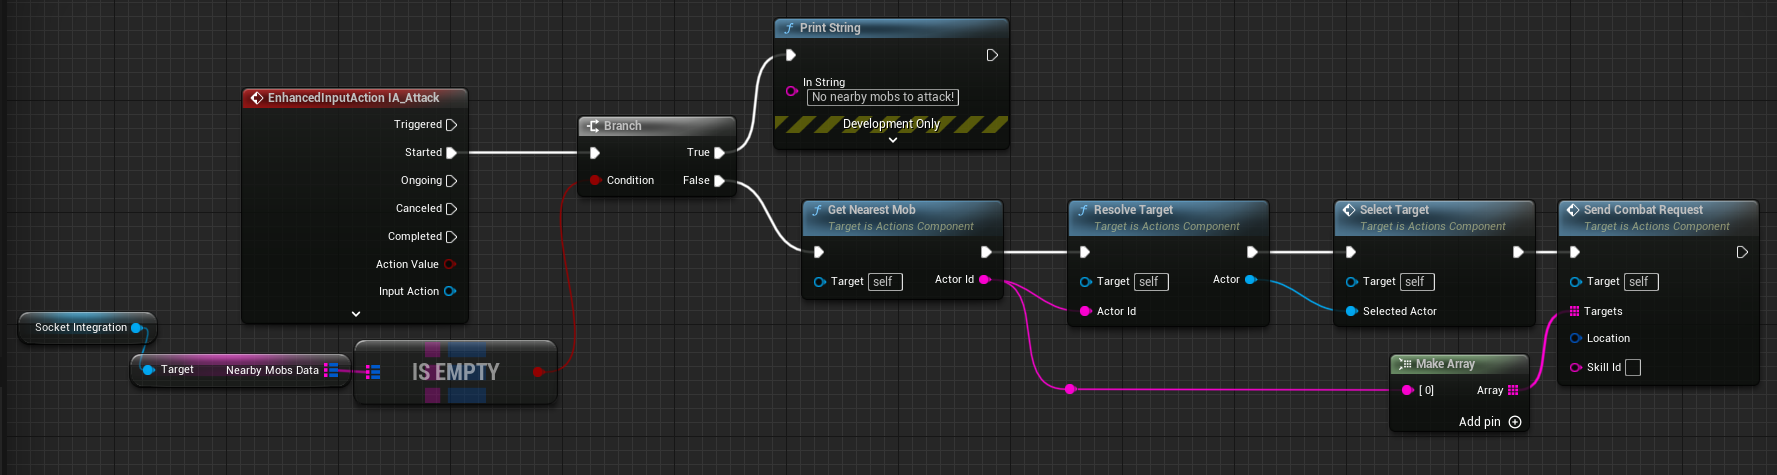
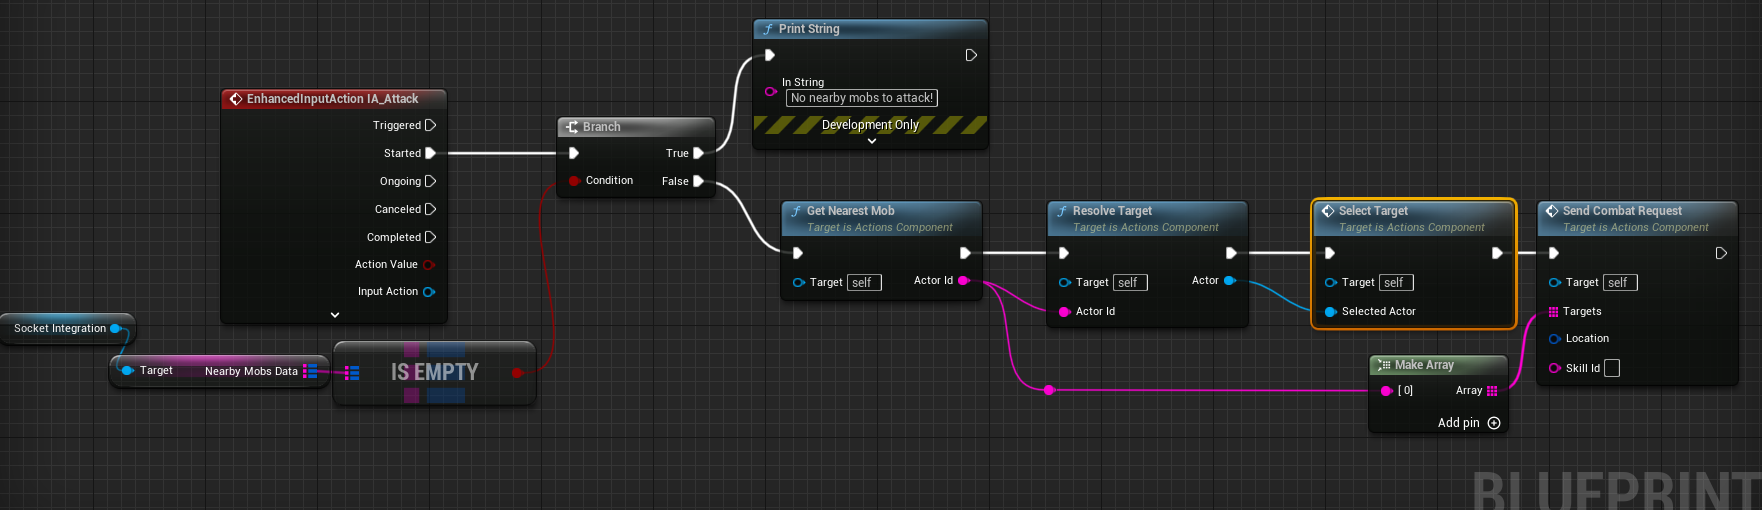
I then just have to link it to my input action combat request.
Highlighting selected target
Perhaps you’ve spotted above, another feature added is Select Target.
For that, I want to just draw a circle around my actors.
To help with that, I am using Magic Circle Creator asset pack as I’ve already had it, but this approach will work with any actor type asset.
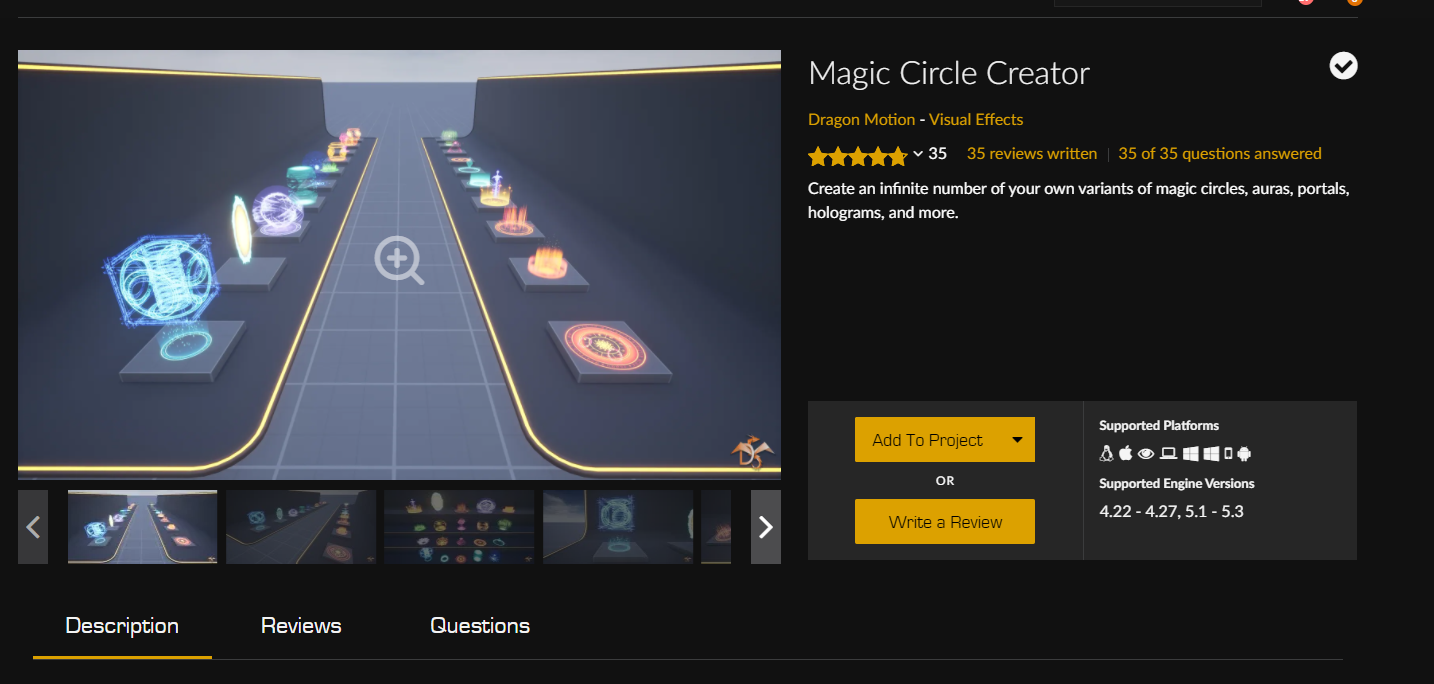
For reference, the above asset can be found here: Magic Circle Creator in Visual Effects.
I then create a new blueprint, ActorSelect.
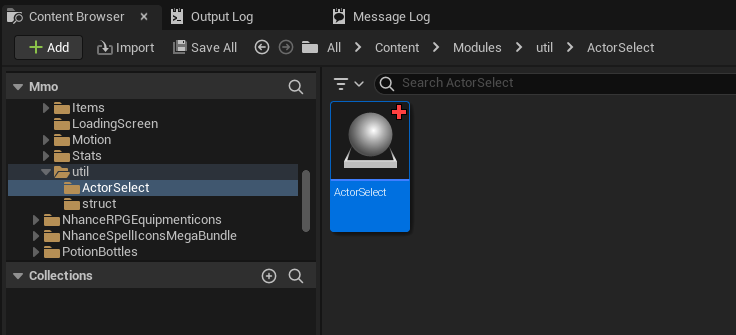
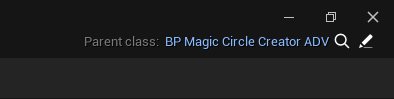
I then make sure the parent is set to whatever will have the mesh I desire, in this case, BP Magic Circle Creator ADV.
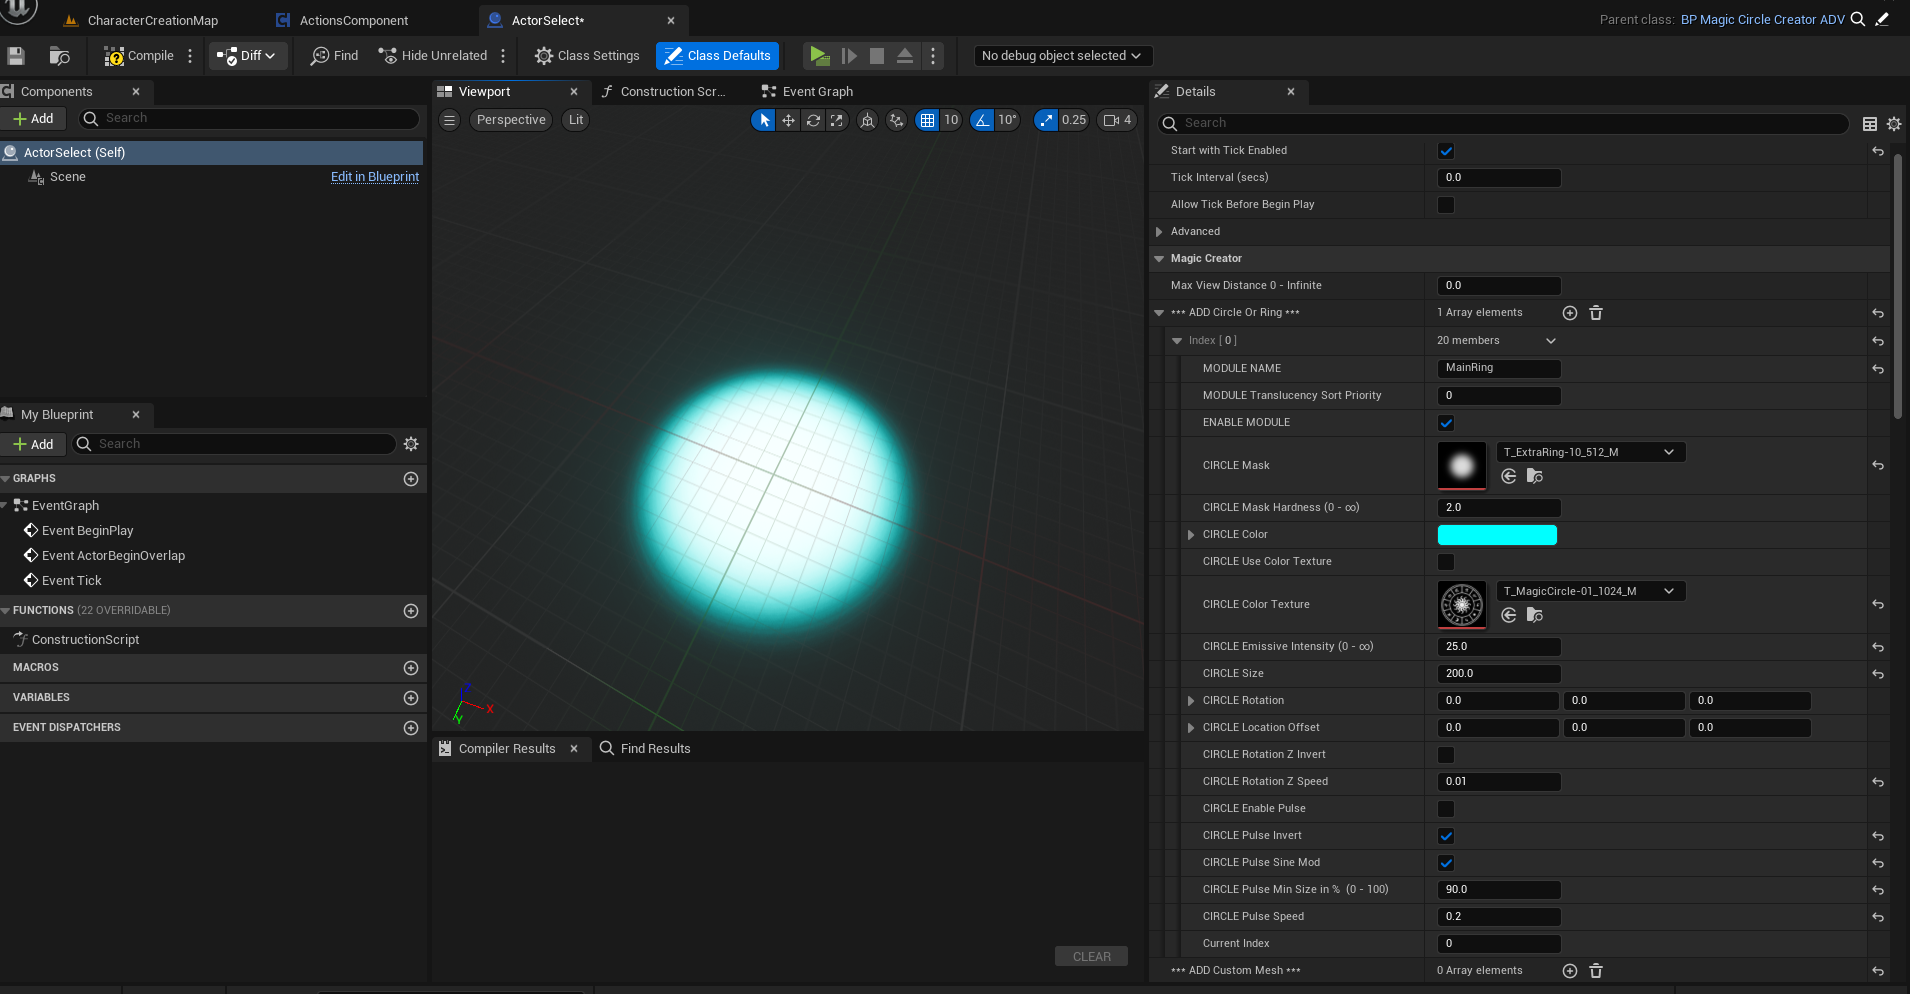
In this blueprint, the circle details are simply characterized in the default settings of this class.
Applying the Actor Select to actors
Navigate to your mobs/players base class, ideally its a common class. In my case, I have Actor Base BP which is shared by my players and mobs.

Here you will want to add ‘Child Actor’ component to the blueprint.
Once you’ve added it, you should be able to set the relative location for this actor in the Transform details.
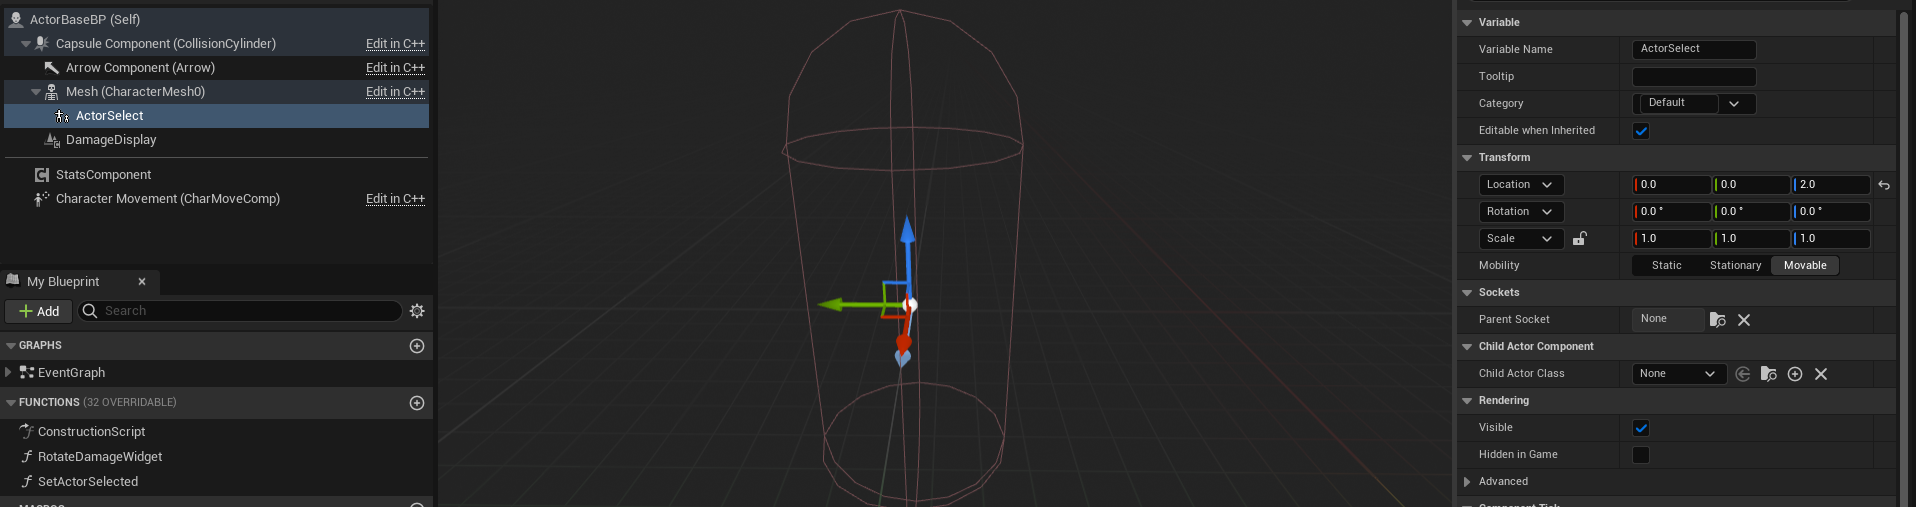
I also added a new function which will toggle this actor visibility.
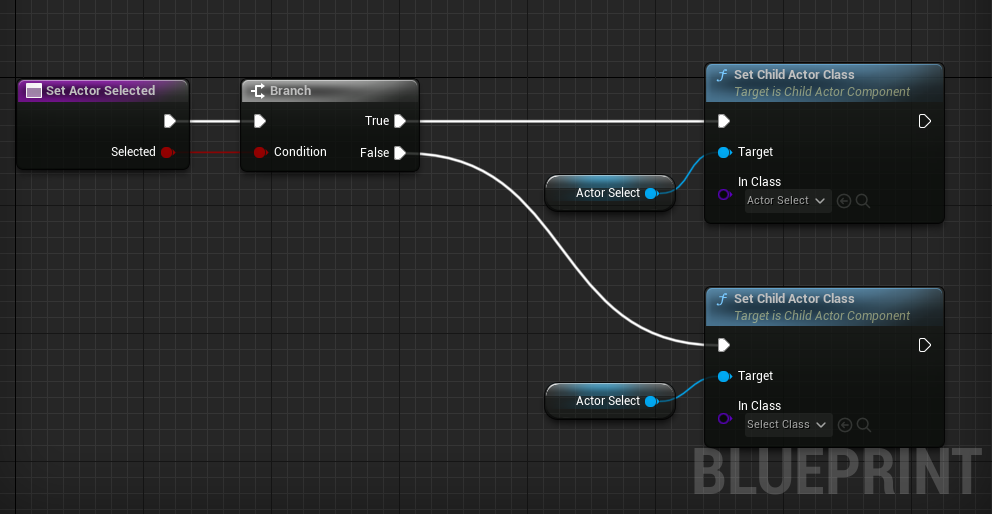
You can see, when selected, I set this actor component to Actor Select and I set it to null when not selected.
Now I can use this function inside my Actions Component.

As you can see, I now keep a reference of the selected target and when I select a new one, I unselect the previous one.
And this takes us back to the Attack Input Action.
HP and MP Regen
This was handled purely in backend, so no implementation required from UE!
The way it currently works is still just updating the stats and sending this update to the client.
In future I will add additional data to HP updates, such as damage map which can be applied for heals too.
For now, I didn’t want to display the regen updates as they occur every 0.2 seconds. So I just applied a threshold for the damage taken here:
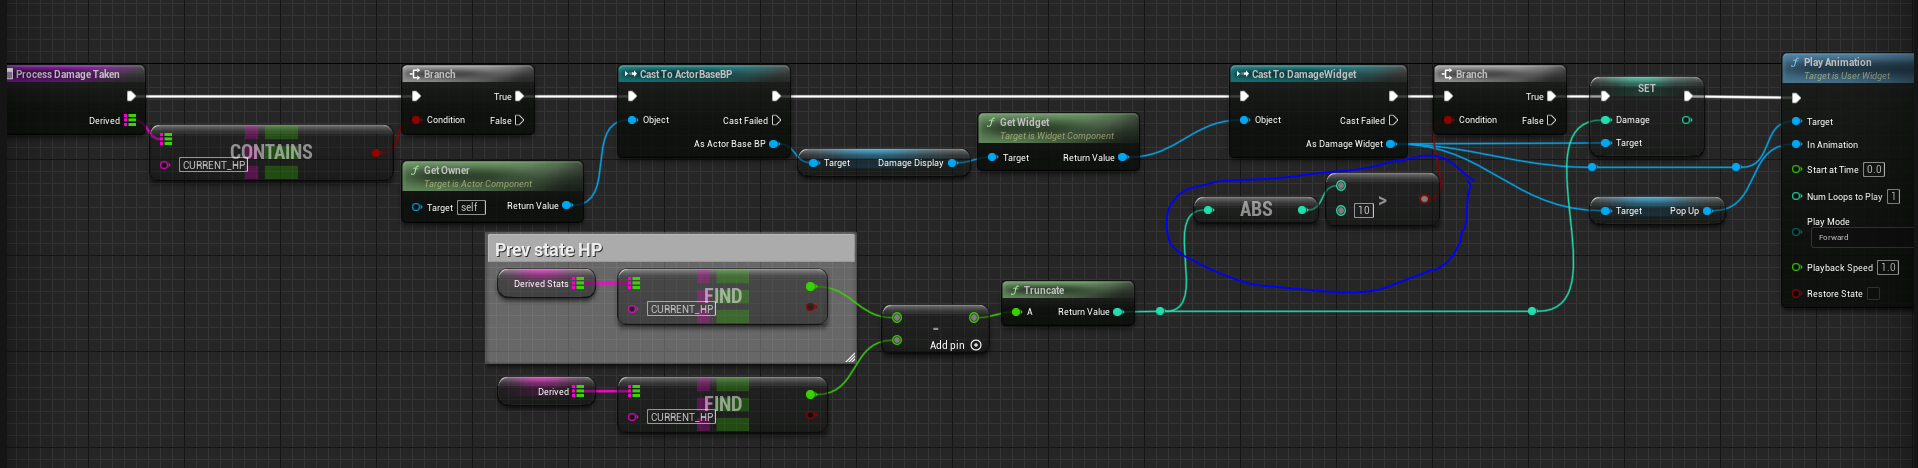
The damage display functionality is still very simple and I will re-write it entirely, this was a quick way of displaying results.
What’s next?
There’s multiple things to consider:
- Extend combat to players too, at the moment only supports mobs
- Add abilities and skills (this can be tricky for some skills in Java)
- Add status effects, with simple skills, e.g. stunned, silenced, death, etc.
- Add player level support, extend stats, add XP on mob death
Lots of interesting topics to come!