49. How to begin basic MMORPG combat implementation with UE
In this post we explore how to begin a very basic combat implementation for our MMO in Unreal Engine.
Note that we will not implement even the basic validations such as players position or rotation, but that will come shortly after.
We’ve integrated the characters equipment and stats in this post.
And we created Item hierarchy in this post.
What we will be achieving in this post:
- Client sends attack request to server, indicating our player wishes to attack a mob
- Server processes this request and initiates an attack (abstracted)
- The server sends a message shortly before an attack takes place, to start weapon animation
- Server processes damage and updates stats, sends stats update
- Client receives start animation message, looks up weapon class for it
- Client receives stat updates and displays damage taken by mob
- When mob reaches 0 HP its deleted in server, synchronizes with UE server to respawn
The server code can be found here: yazoo321/mmo_server_with_micronaut: Hobby project to create mmo server using Java Micronaut with JWT Auth, postgres and mongoDB support (github.com)
What the server does – optional background info
This is optional information to understand what the server is doing, feel free to skip to UE integration section.
The server is now equipped to process a new type of message, “TRY_ATTACK” with a payload of actor IDs that the player/mob wishes to start attacking.
When the server receives this message, it adds the session and target(s) to cache, this is to ensure actor can only initiate 1 attack at a time.
The server then does very basic validations (to be extended in near future), which at the moment simply ensures the mob exists and initiates an attack loop.
The attack gets the sessions relevant combat data, which includes the actors stats and equipment. This includes the weapon which contains base attack speed and damage as well as the characters stats attack speed and physical damage amplification.
The attack checks both, main hand and off hand weapon to try attack with, however for now only main hand weapon is supported.
The attack checks whether the player can attack again – it checks when was the last attack made and is it longer than the expected attack speed.
If it can attack, it calculates the damage and applies it using Stats service, which is integrated to evaluate differences and send to clients async.
Then, if the stats health goes below 0, the mob instance is deleted and because of this the attack stops because it fails the validation.
This attack re-executes itself every 100ms (to be modified) so that if any stats changes, e.g. you got buffs to increase/decrease attack speed, they will be applied and re-evaluated as expected.
Initiating the attack from UE
In Unreal Engine client, we would like to initiate an attack on a mob.
There will be multiple ways of doing that. For now, I wanted a very simple input action which I will override later in future.
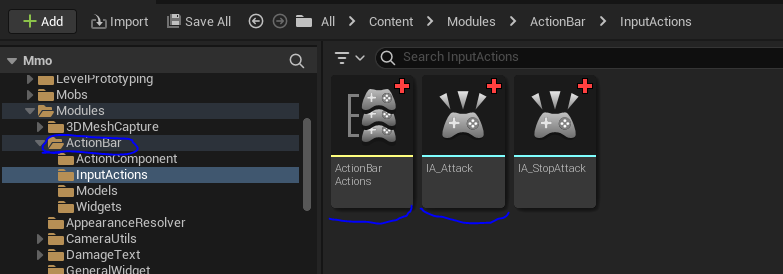
I create a new input action IA_Attack and an Input Mapping Context ActionBarActions.
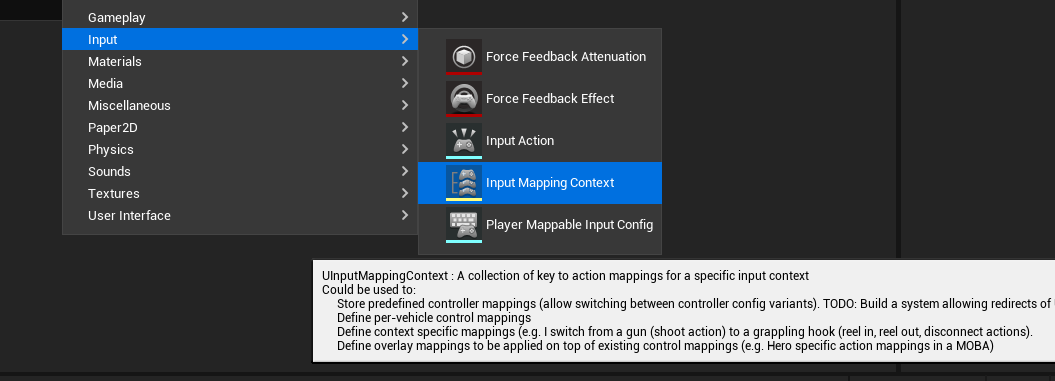
If you’re not familiar how to create them, simply right click -> Input -> Input Action.
The IA_Attack is quite simple, a digital bool.

And the mapping context is also very simple:
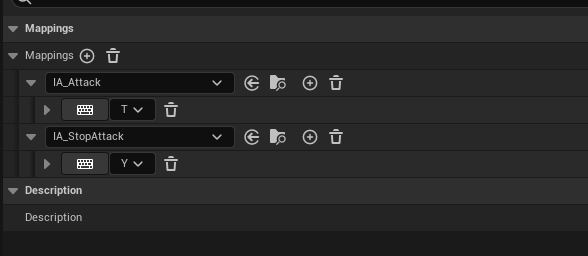
Basically if I press the button ‘T’ it will get triggered.
I will show this functionality inside the Actions component.
Actions Component
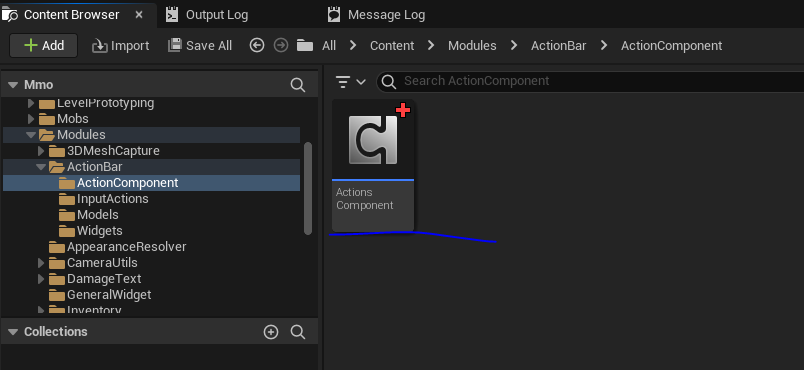
I decided to create an Actions Component as I wanted a dedicated component to handle things such as combat, skills, harvesting, etc.
Inside here I want to first register inputs.
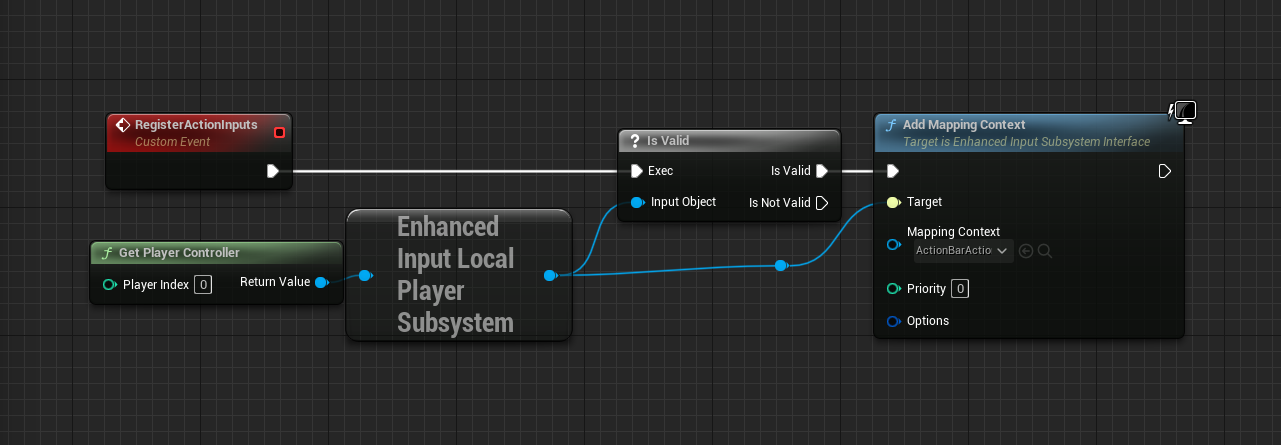
I then want to initiate this component.
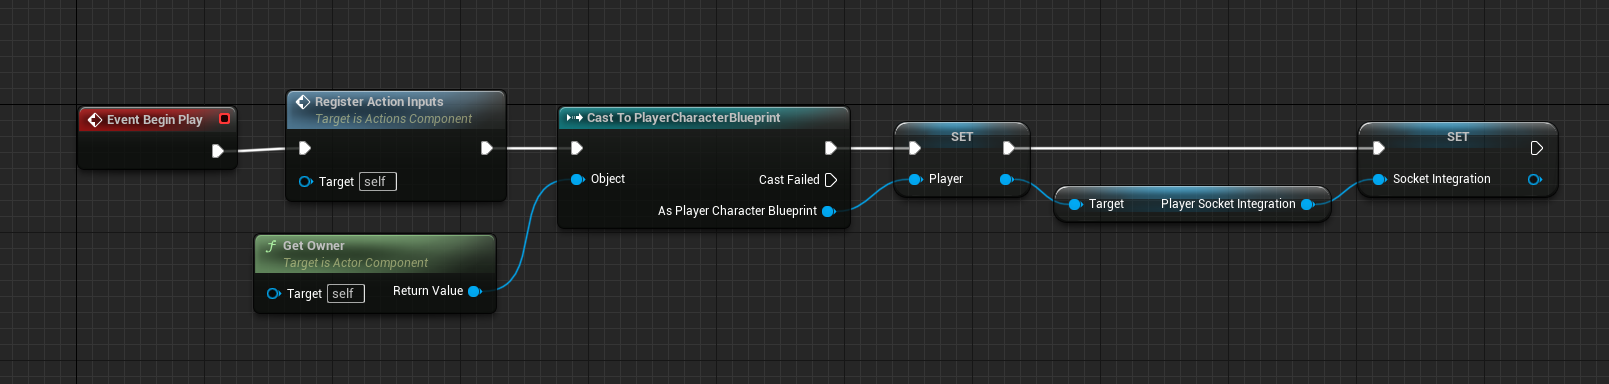
So in begin play, I register the action inputs and I set the player and the socket integration component as a variable for easier access.
Attack trigger
Now after registering the input, I am able to reference Input Action for attack.
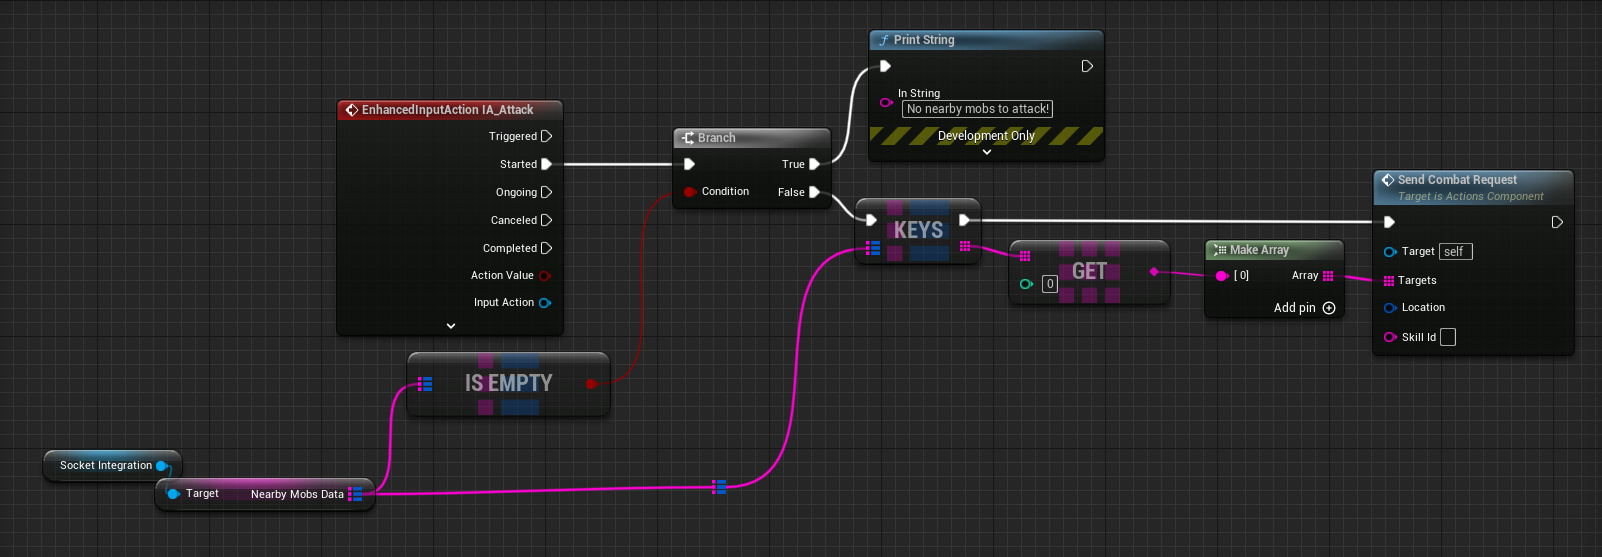
You can see the logic is very trivial for now, I am simply looking at the nearby mobs to player and taking the mob ID and sending a combat request.
In near future, I may change this logic to ‘try attack nearest mob’.
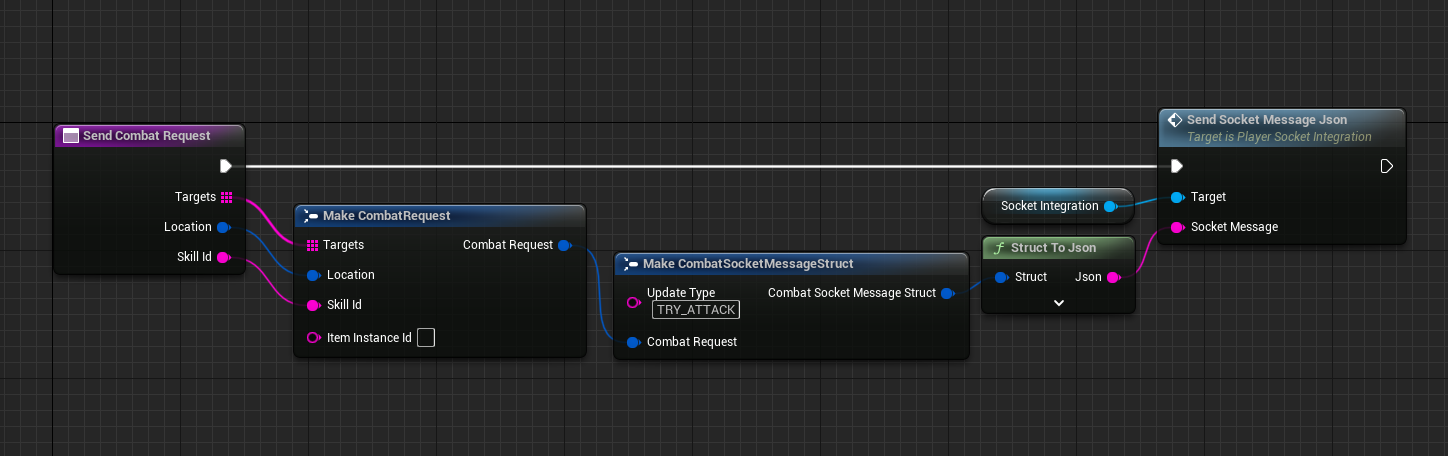
Send Combat Request wraps this in a JSON object and sends it to the server.
With the attack trigger sent, we don’t need to do anything else here because the responses are handled async.
Receiving initiate attack message from server
After the client requests the server to initiate attack, the server will respond with when the client can actually start animating. Bear in mind, even the server doesn’t know yet whether the hit will succeed, it just knows the hit is about to happen.
As usual, this message is received in ‘Player Socket Integration’ component.
My ‘Process Message Received’ function is getting too large, so I will start splitting it up into domains now.
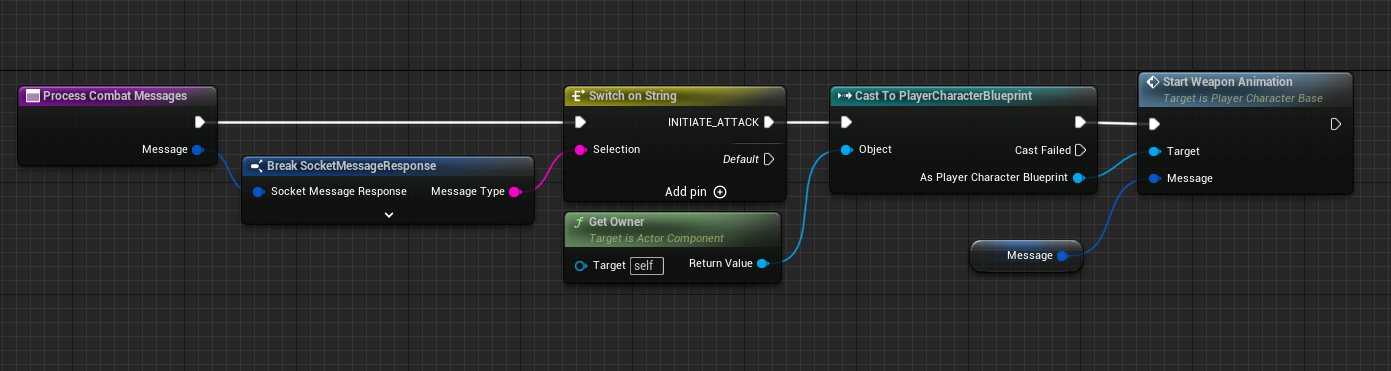
This function will definitely change a bit – it will need to request the correct actor to process the attack. i.e. I don’t check is it the player or a mob that received this message, because at the moment only the player is implemented.
But to break it down, we simply grab our character reference and ask it to start weapon animations.
Let’s see what the character blueprint does to achieve it.
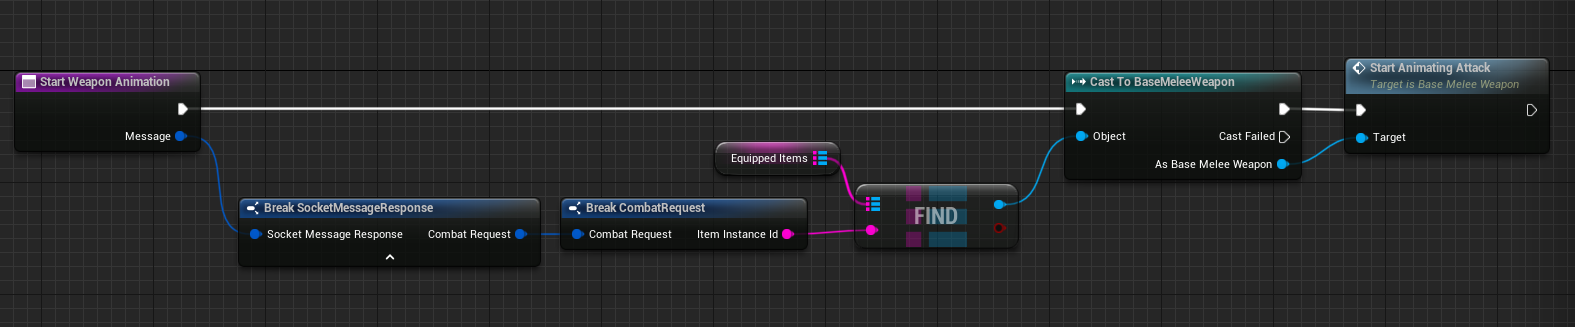
For now its extremely simple, the attack also references the equipped item ID which is being used to attack (so unarmed is not currently supported). We find the instance of that item and ask it to handle the animations.
In future I way want to position and rotate the character closer to the target but for now its out of scope.
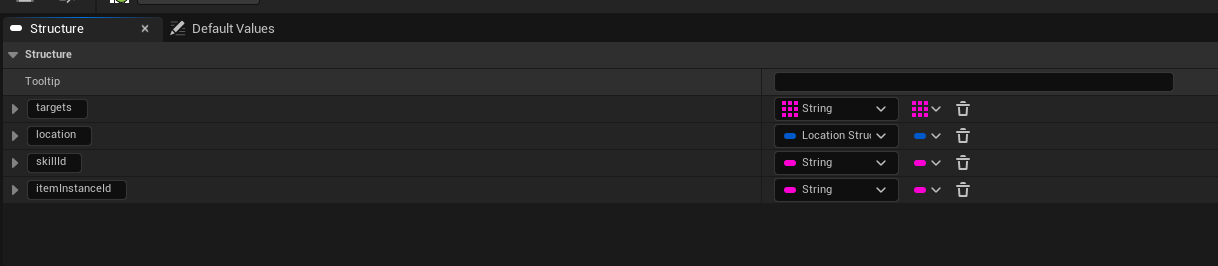
Let’s reference the CombatRequest structure since it’s used:
Weapon items handling animations
Now let’s check the BaseWeapon class.
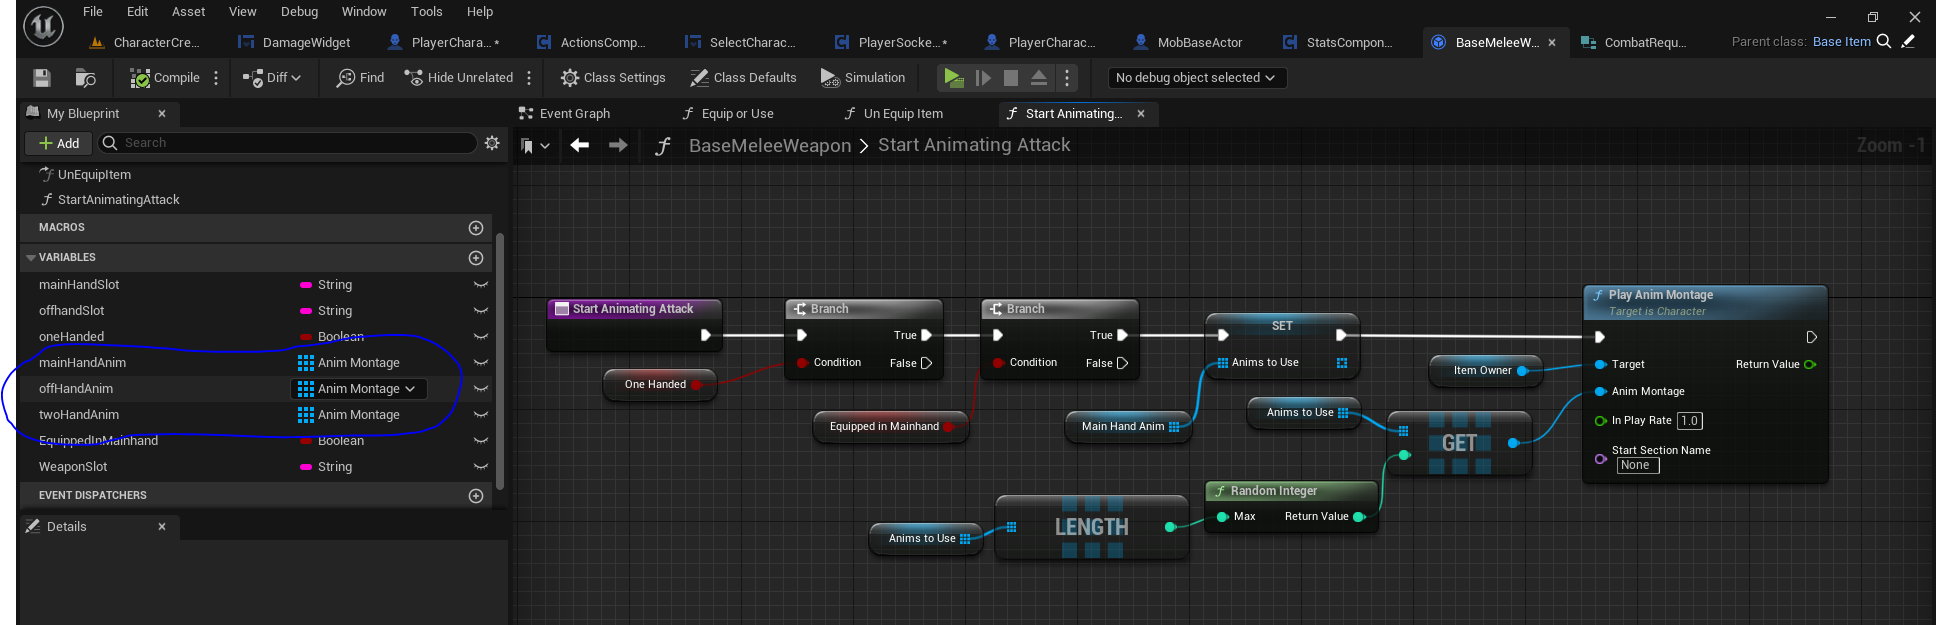
Here as you can see I have access to multiple animations, including main-hand, offhand and 2h animations. I can override them through actual item instances themselves or keep as default when not required.
When I request to attack, I first check where the item is equipped. I set the relevant animations to ‘AnimsToUse‘ variable. I then use a random index to choose one from the list and ask to play that montage. Bear in mind, I only completed the flow for 1h main-hand weapons and it will be extended in near future.
Blending attack animations on character
In order to make attack animations only make modifications above the characters waist, I needed to modify a few things.
First of all I wanted to find the animation blueprint used by my character class.
You can click the magnifying glass on a folder button which will open it up in browser.
These are the additions I needed to add to make it work:
Here we have your default state machine which would normally connect to output pose be split.
Its now caching the default animations, called ‘WalkingAnim‘ (though it will be more than walking).
This cached walking anim is now inserted into the Layered Blend per Bone function.
The second input also has the default slot applied, which ‘Plays animation from code using ‘AnimMontage’ which is what we will be doing.
You can see on the properties of Layered Blend Per Bone I set the bone name to spine_01.
This is essentially the waistline. To find this bone, you can click on the skeleton icon on top right.
When you have the skeleton open, you can find the relevant bone on the bone menu.
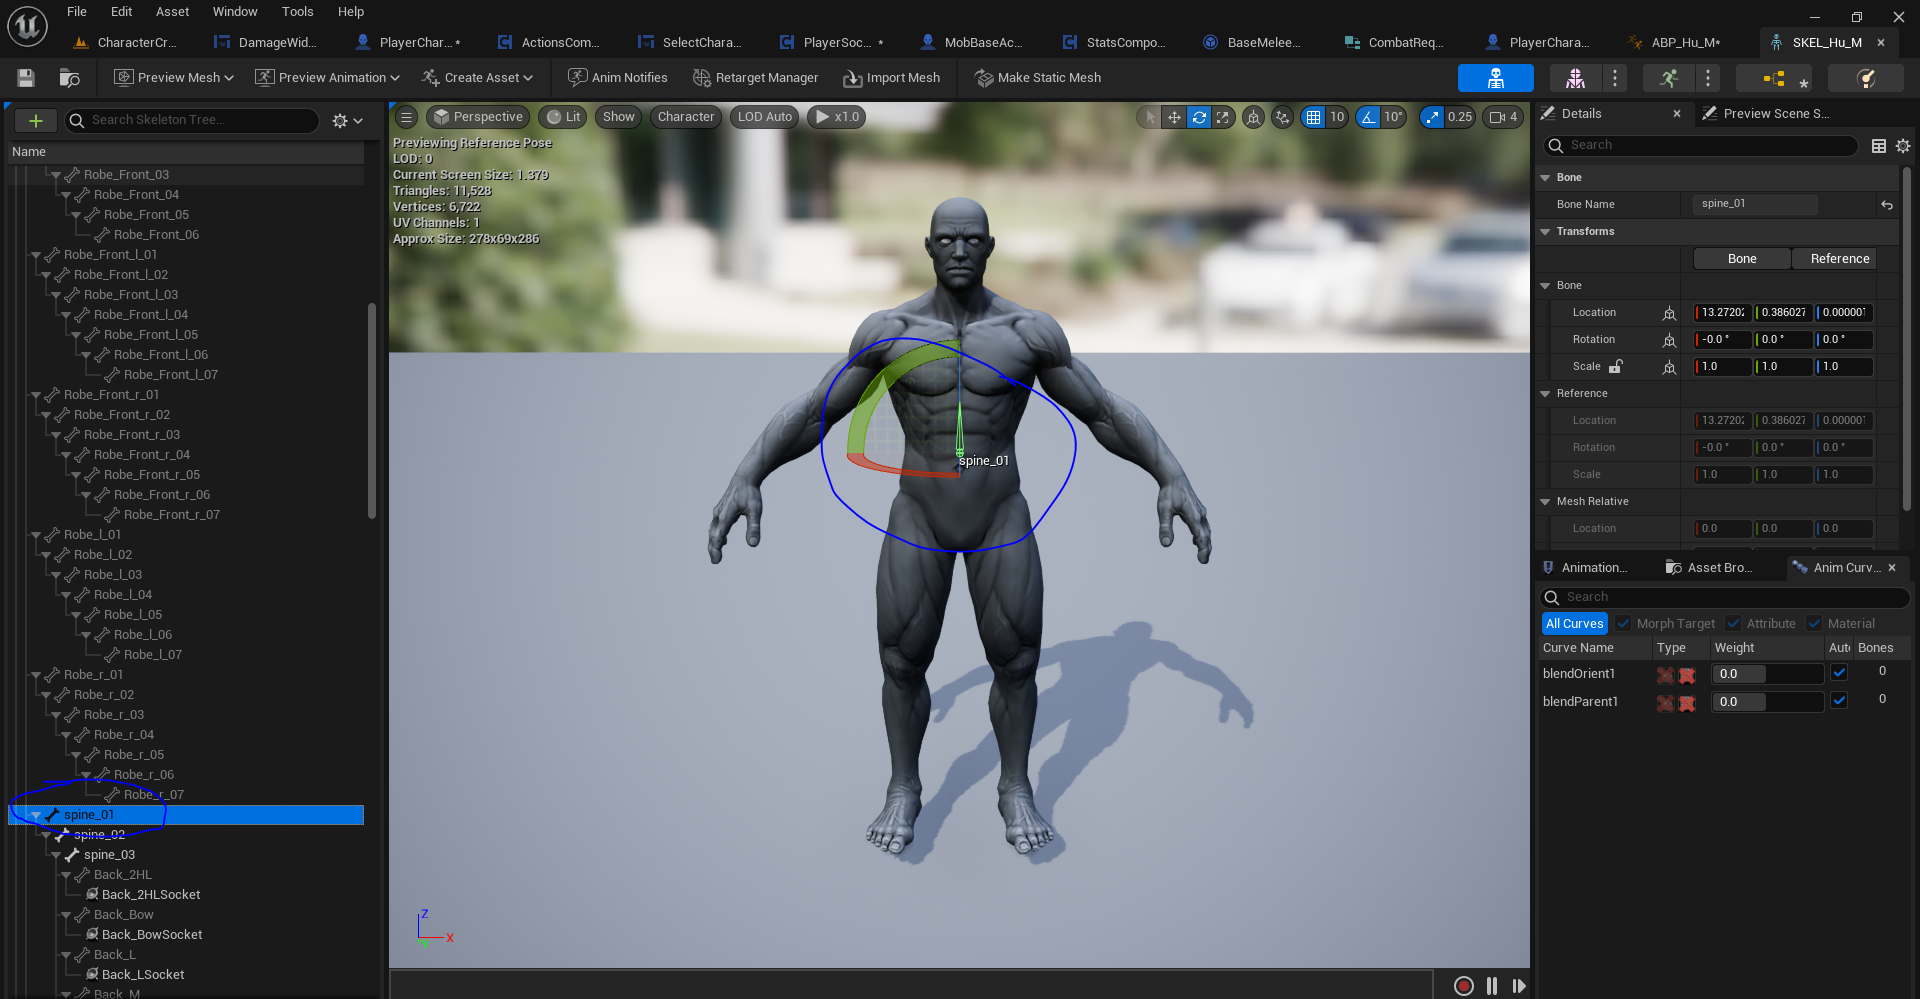
If you’re struggling with this part, check out this video on YouTube which is an excellent tutorial.
Stats and taking damage
We built a stats system previously as a Stats Component. The post covering this stats system can be found here. This component was applied to our Character and now we want to apply it to our mobs.
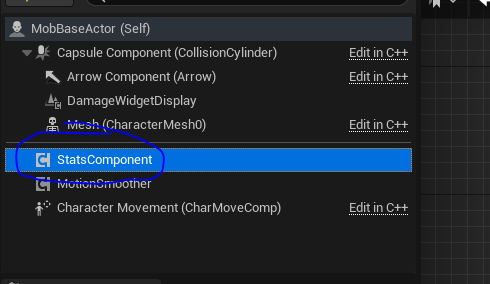
So we now make sure this component is generic and contains stats applicable to players and mobs.
We’ve already implemented the stats update logic previously when we integrated with equipped items. This integration happened in this post.
From our PlayerSocketIntegration component, we process messages that contain STATS_UPDATE:
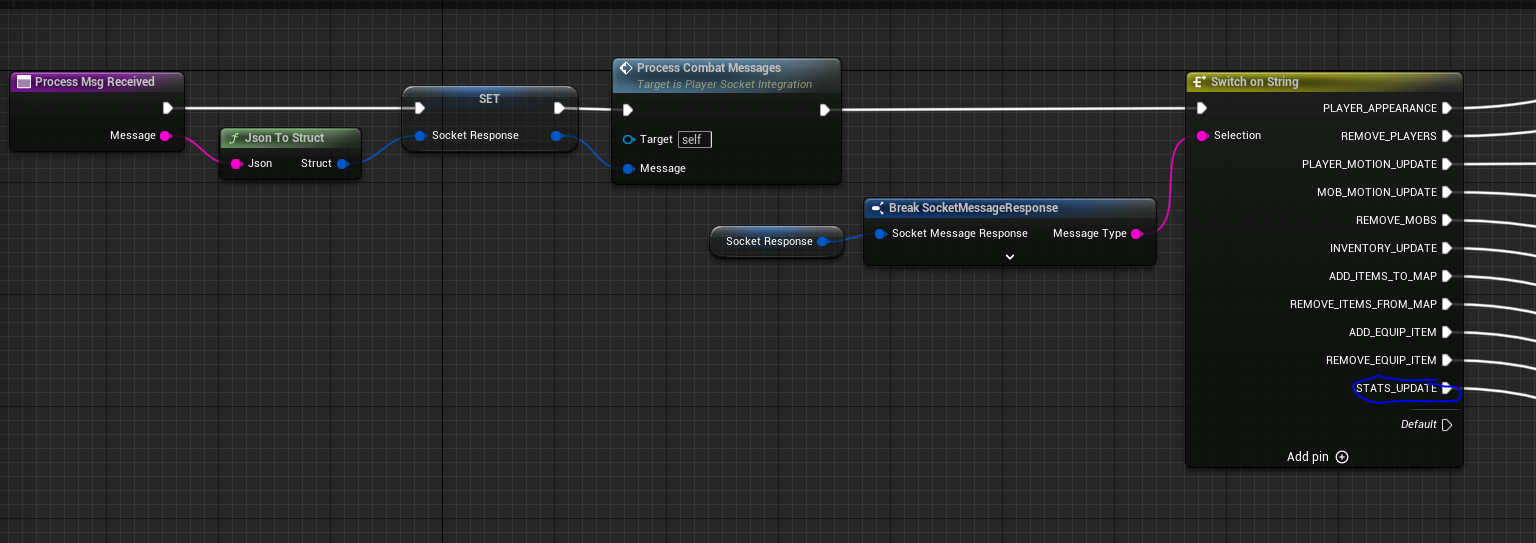

The Socket Integration component is generic and can be applied either to player or be controlled in server.
It received message with stats update for specific ID, this can be mob ID or player ID. I use this ID to apply stats update to correct stats component.
Note that when the server processes the damage, it simply updates the stats and sends that update to the client.
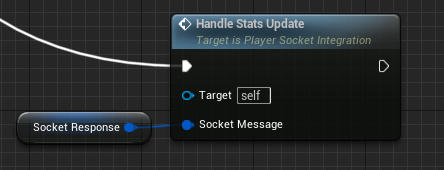
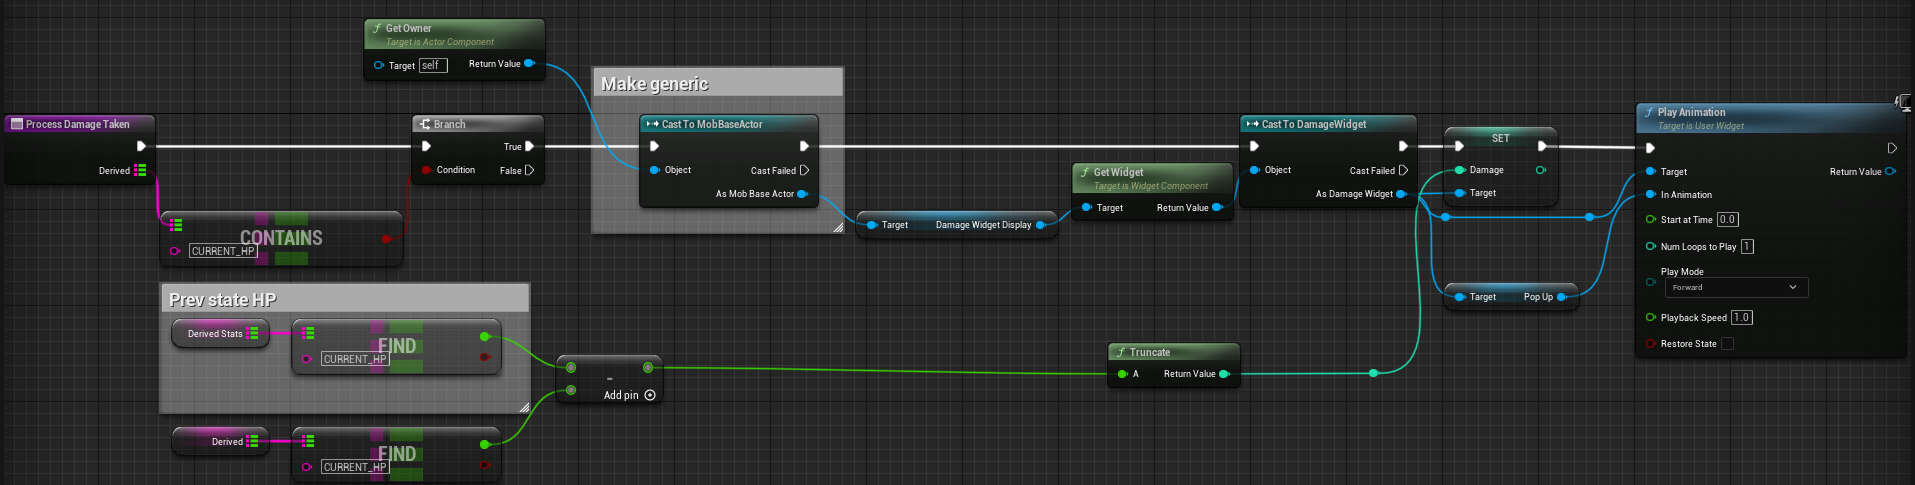
Processing damage inside stats component
So when we take damage, we receive a stats update with the new health values. Perhaps in near future I will explicitly have a command to process damage/health as I have some ideas to split damage types with different colors etc. For now, I’d like to keep it minimal and simple.
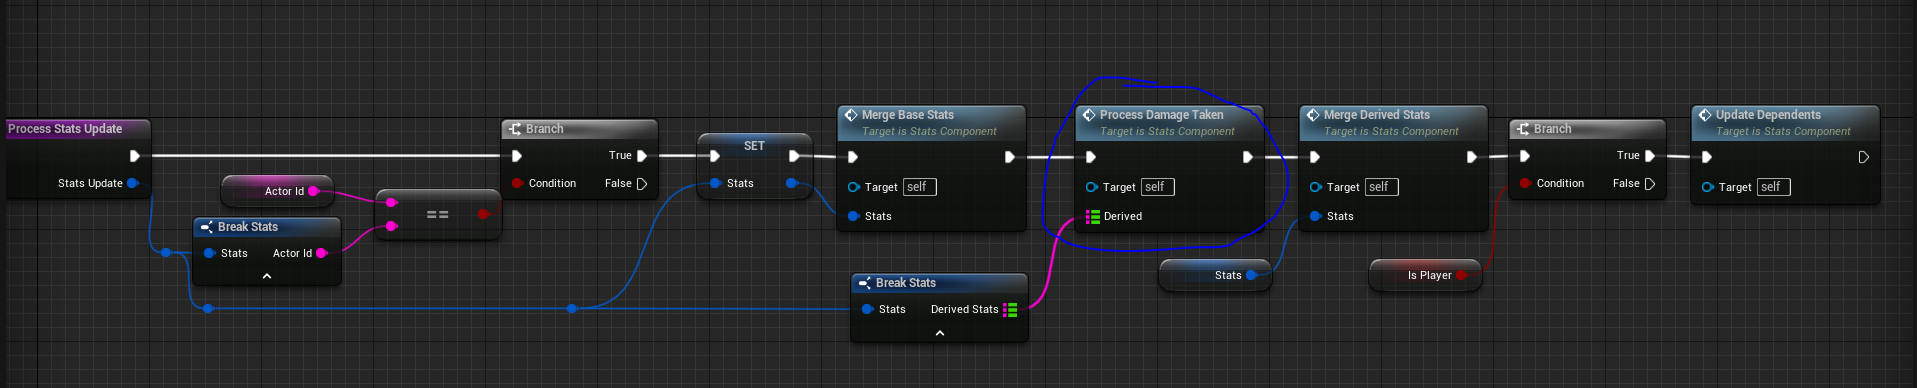
The new function is highlighted.

When I receive a stats update relating to HP, the stats will contain ‘CURRENT_HP’ key. This is where I know either damage/healing was received.
I take the old state of current HP and subtract new current HP to get the difference. This will either be damage/healing depending on whether its positive/negative difference.
I then grab the Damage Widget Display to highlight this damage to player.
Damage Widget Display
For now I create a very basic damage display widget. I will quite likely get a nice asset from store to show damage in future to help with design. But I thought it’d be useful to show how we can wire a basic damage widget manually.
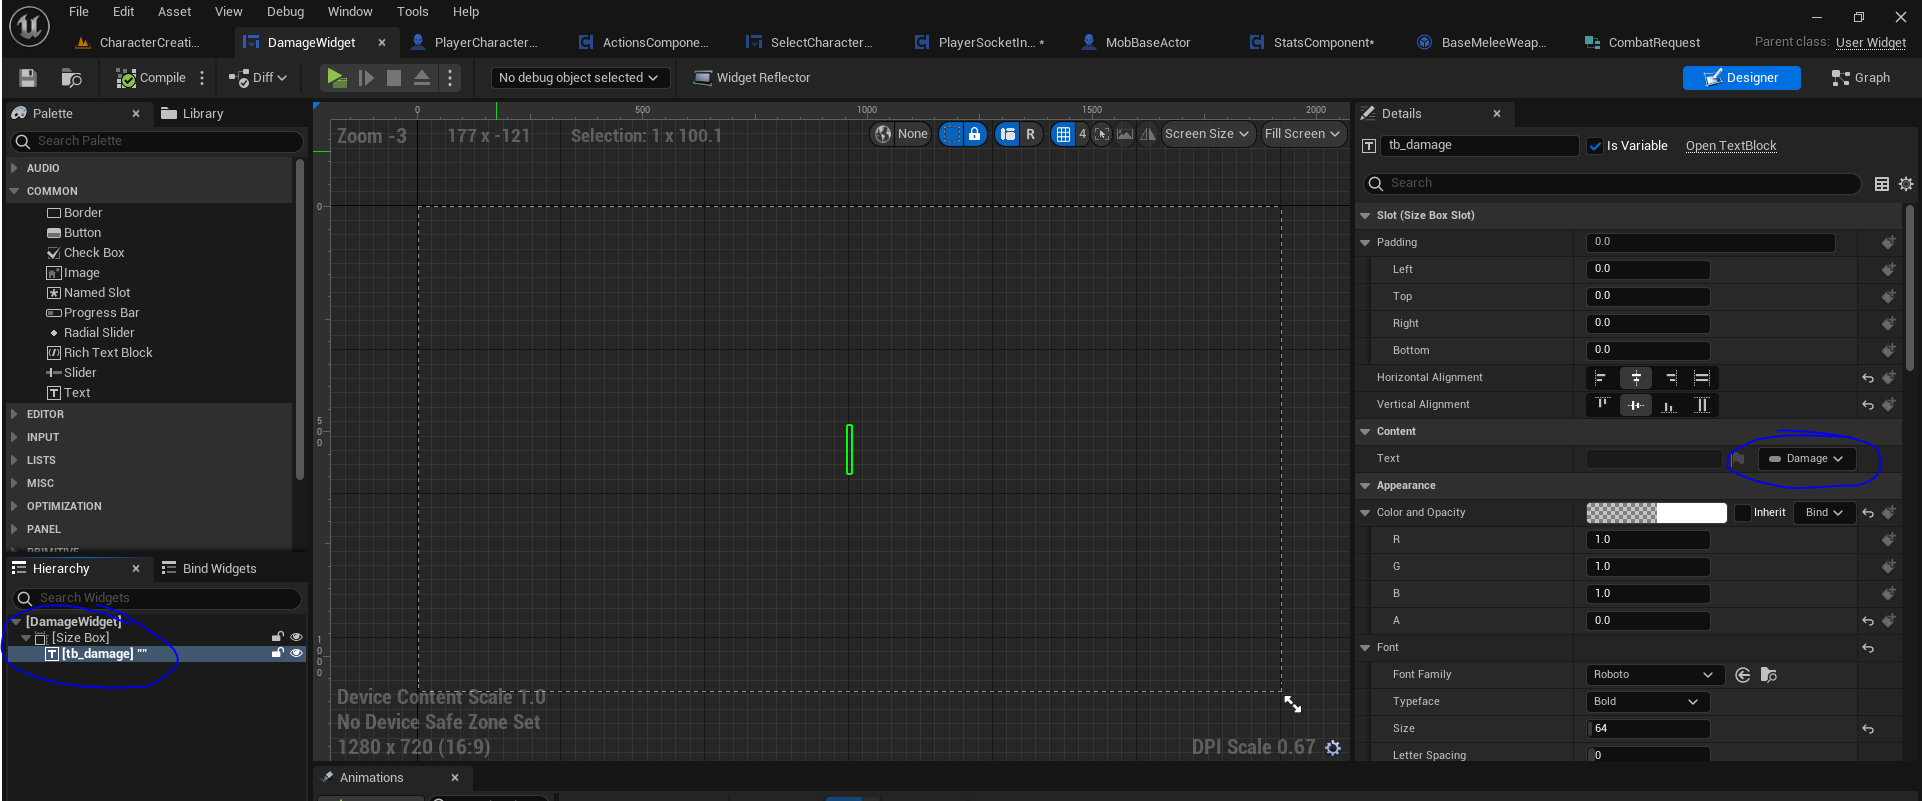
First I create a very basic widget which should mainly contain a textbox to show damage.
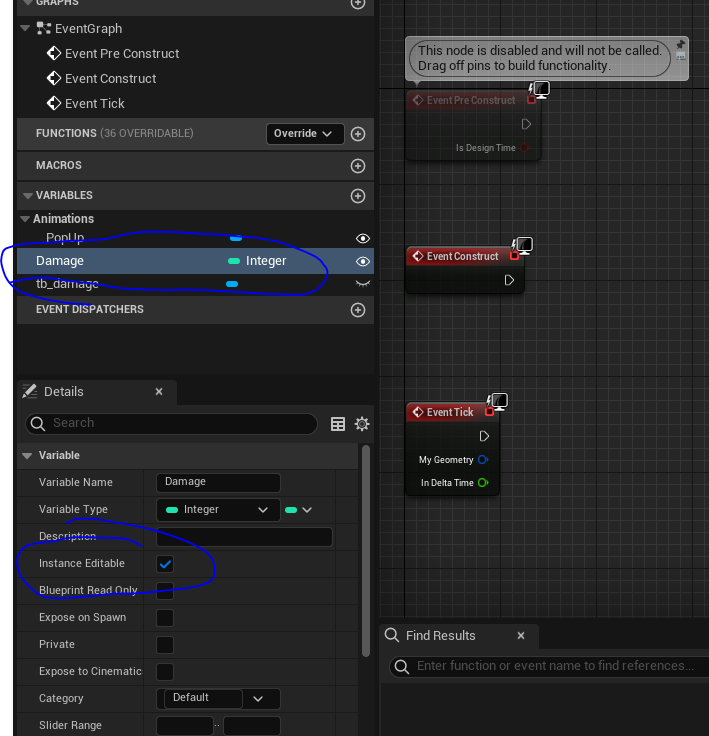
You will find that I did not need to add any blueprints here, but I did need to create a ‘Damage’ Integer field that I bind to the textbox as you can see above.
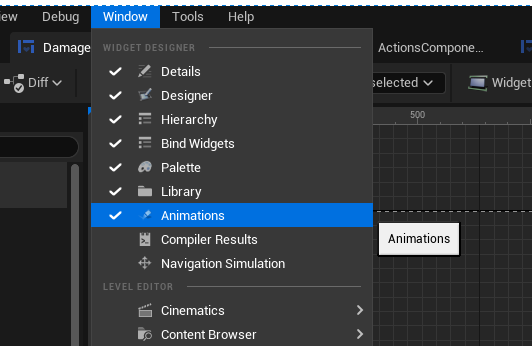
Next, you will want to configure some very basic animation for this widget. To open it, click Window -> Animations.
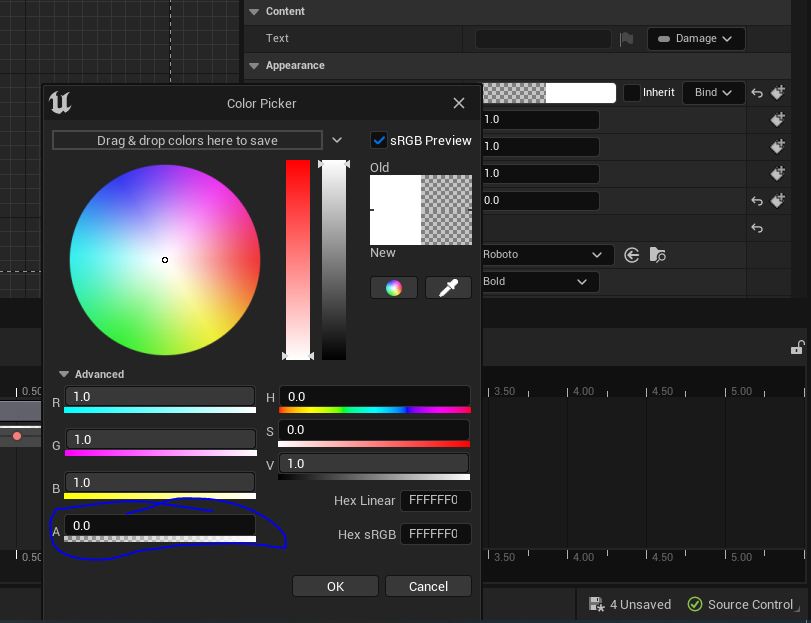
First, you may want to modify the text box ‘A’ (Alpha/Opacity) field to 0 which makes the text transparent.
Next, add a new animation in the animation window that’s opened.
Drag the pointer in animation to 0 initially and click ‘Add Keyframe for this property’ button highlighted on left, on side of ‘Color and Opacity’.
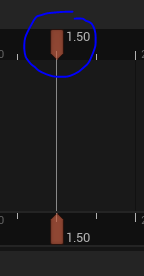
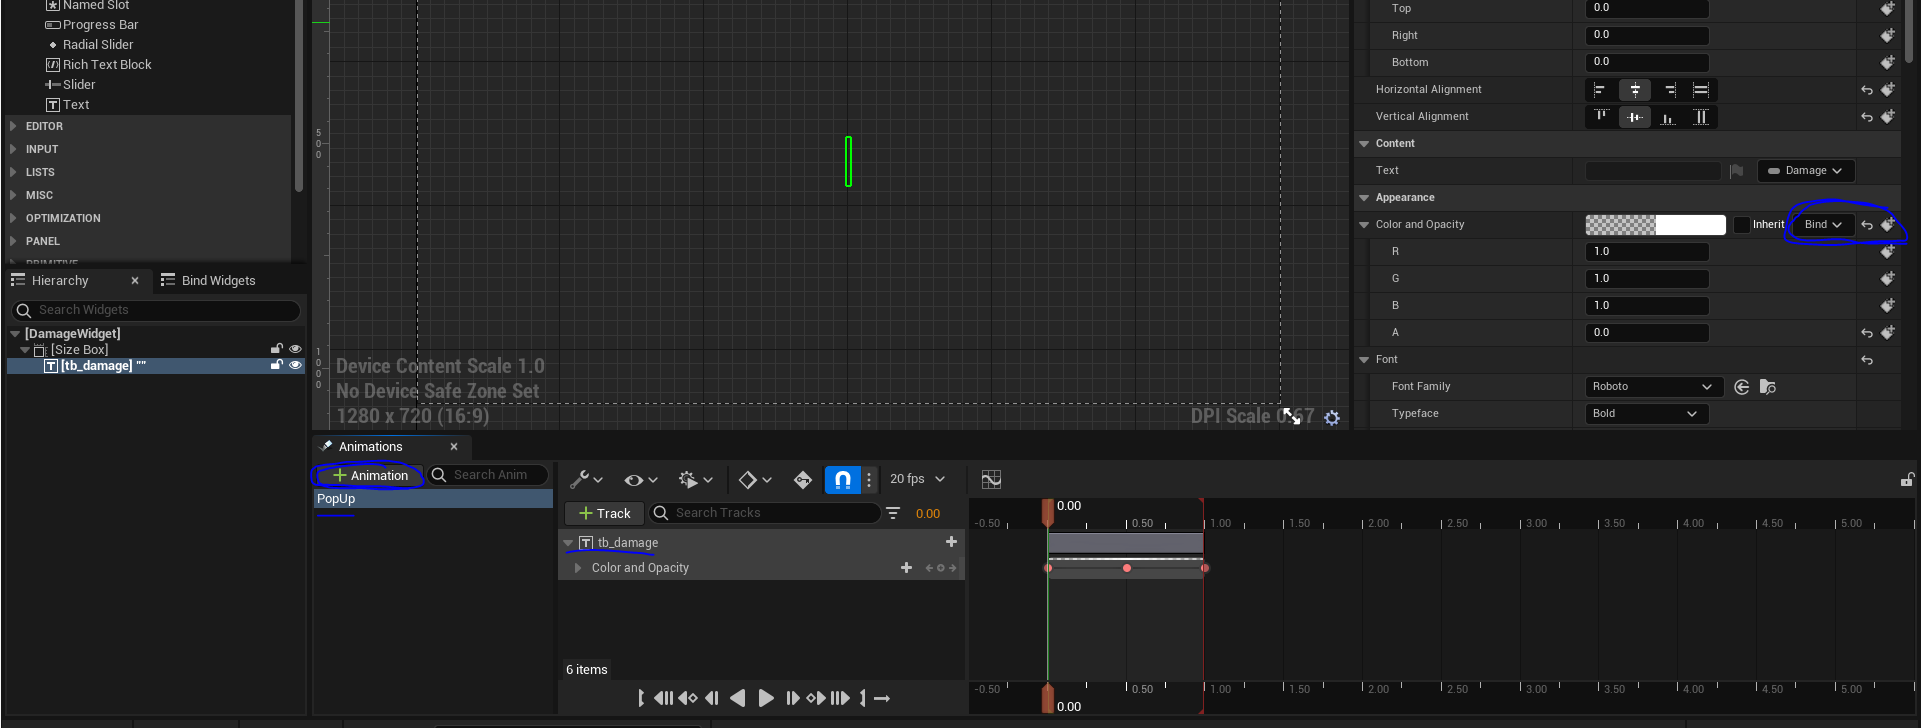
Then drag the arrow to 1.0 and add another keyframe there (with alpha/opacity set to 0).
Finally, drag the keyframe to 0.5, set the opacity to 1.0 and add that keyframe again here.
This means on animation, the opacity begins with 0, goes to 1 at 0.5 seconds and goes back to 0 at 1 second.
You can also find another good tutorial for this here.
Integrating widget to mob
Open up the base actor class for mobs/players (actors that you wish to display damage on).
You will now want to add a Widget component to this bluepirnt.
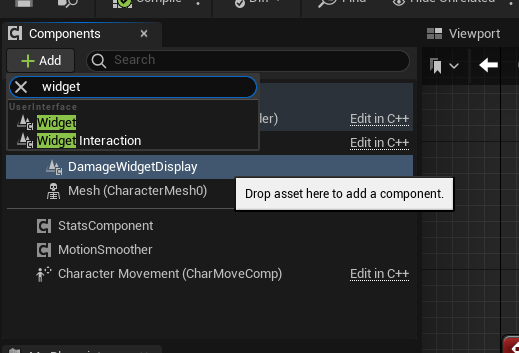
In the details section, we will want to link it to the DamageWidget that we’ve just created.
And that’s how we link it to the image we shown earlier, part of stats update.
The other thing I needed to do is rotate the widget to always face the player in 3D.
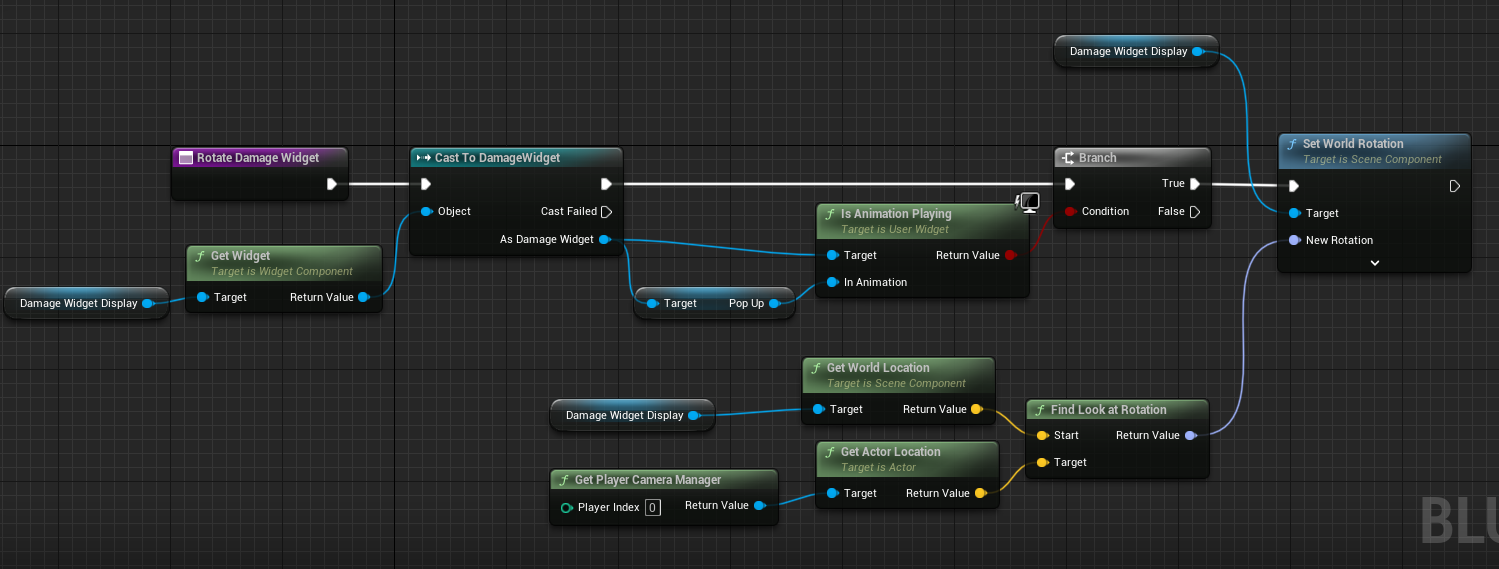
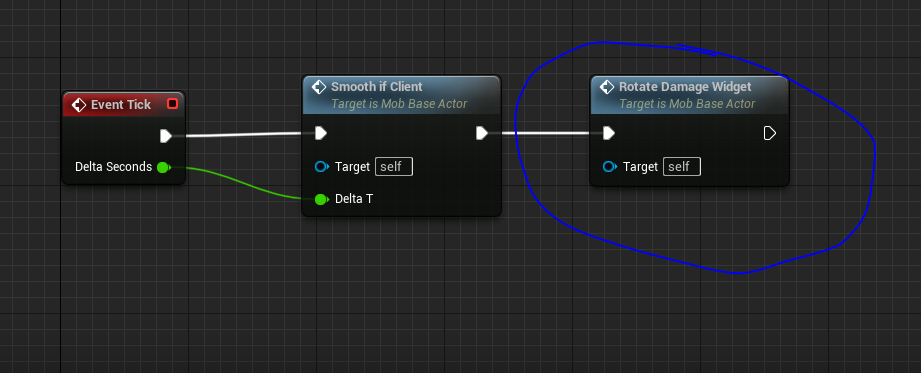
And this happens on each tick, that’s why I just do a check to make sure animation is playing, to avoid redundant processing.
What’s next?
This implementation is extremely basic but it provides me the groundwork to iteratively design and improve the combat system. So stay tuned for updates!
Some key changes that I will want to do soon:
- create a base class that can be reused for players, mobs, proxies
- add stats to proxies (actors representing nearby players) (via base class above)
- allow player to attack another player
- change input actions for combat, potentially right click actor to initiate combat
- change damage received function/widget