51. How To Create Animation Blueprint In UE5
In the previous two posts, we were creating our combat system for our game.
Now, I’d like to create some better mobs that we can have combat with.
What will we cover?
Some assets come with skeletal meshes and animation sequences. They may be missing animation blueprints and animation blendspace.
In this post we will create a very basic implementation for these blend spaces and animation blueprints to use in the project.
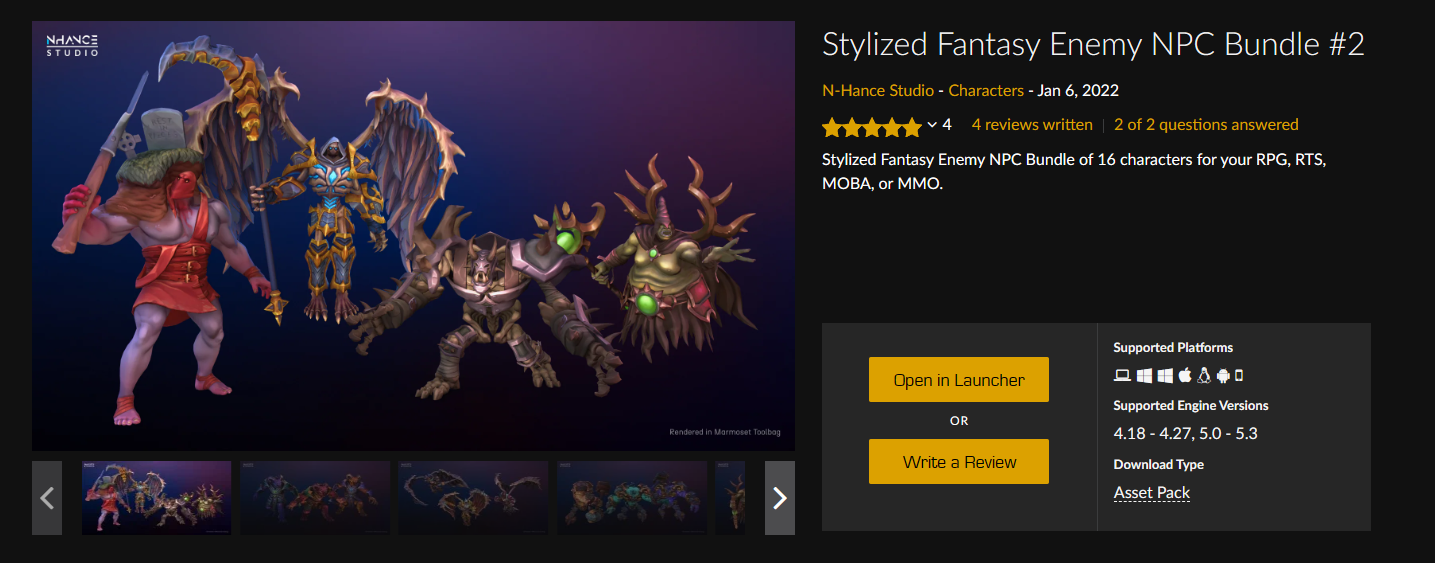
For assets, I will be using a bear from: Stylized Fantasy Enemy NPC Bundle #2 in Characters – UE Marketplace (unrealengine.com)
What you will require to begin
A lot of asset packs that you purchase in the marketplace stores may come with skeletal meshes and animation sequences. Therefore for this post, that’s what we’ll need.
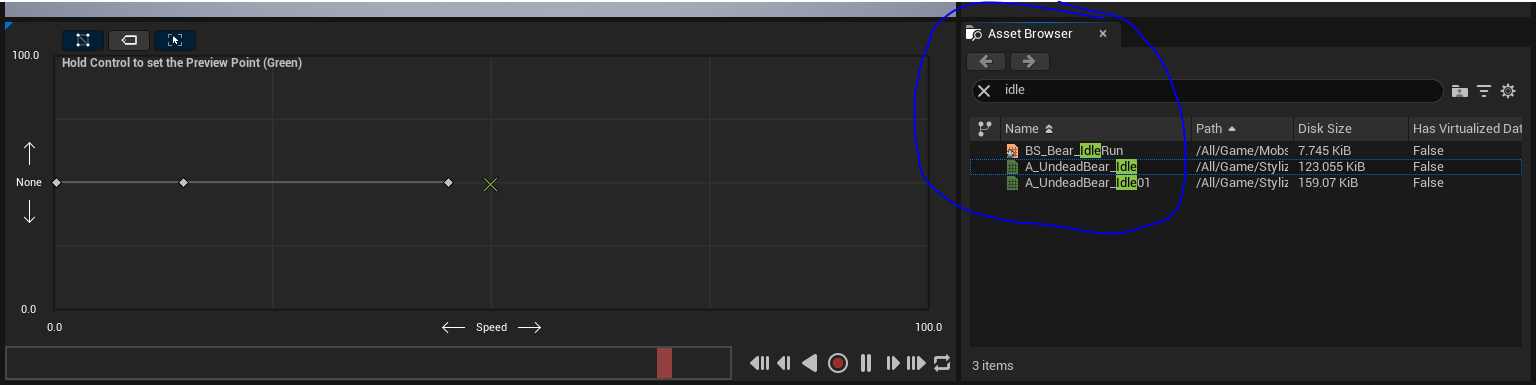
Here’s example of what I have:
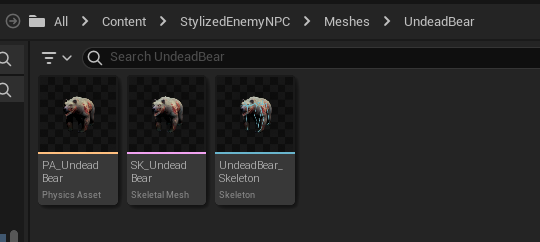
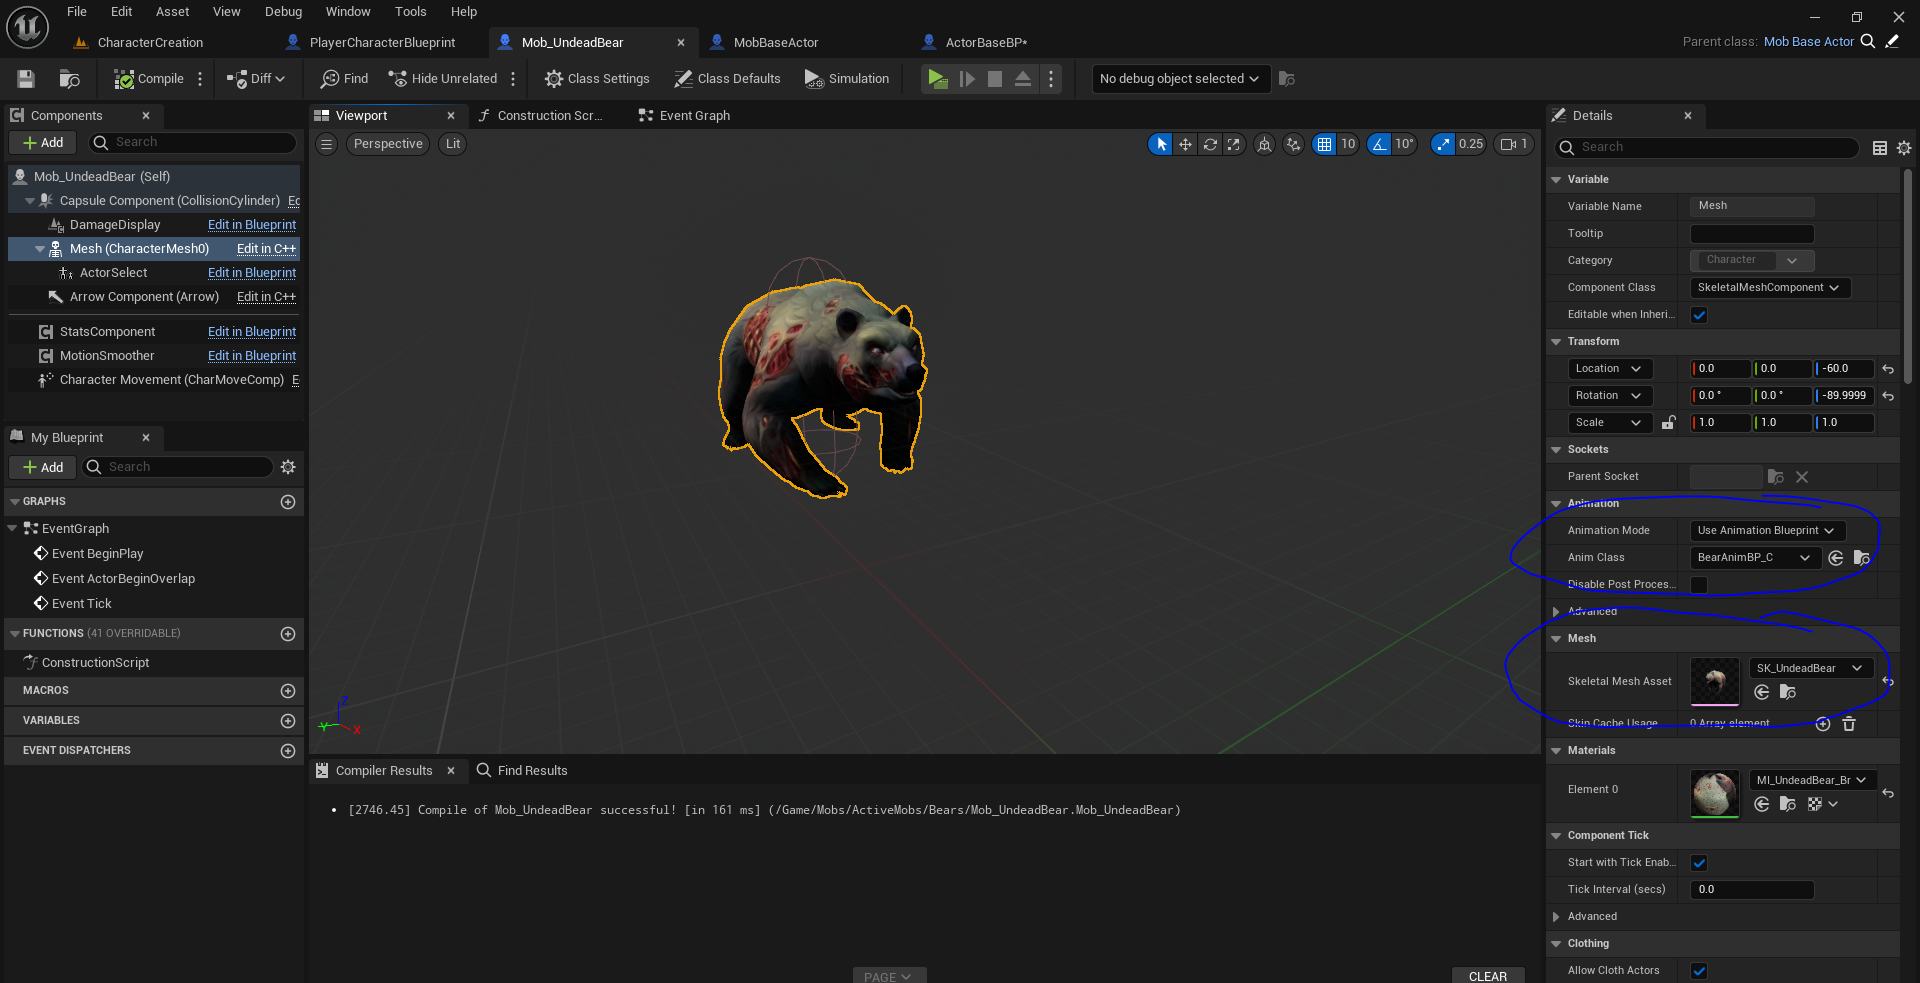
Here we see I have a skeletal mesh, I will be adding this to a Character blueprint, but you can also use it with other actor blueprints.
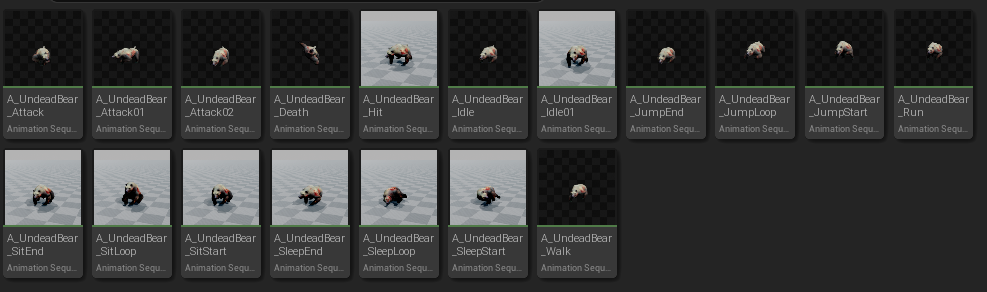
Along with the skeletal meshes, I have a list of animation sequences.
Creating character / actor with skeletal mesh
The first thing you may want to do is create your character/actor.
For me, I create my mobs which extend the Mob Base Actor class which also extends Actor Base BP which inherits Character.
If you wish, you can create a blueprint of type Actor, Pawn or Character for this.
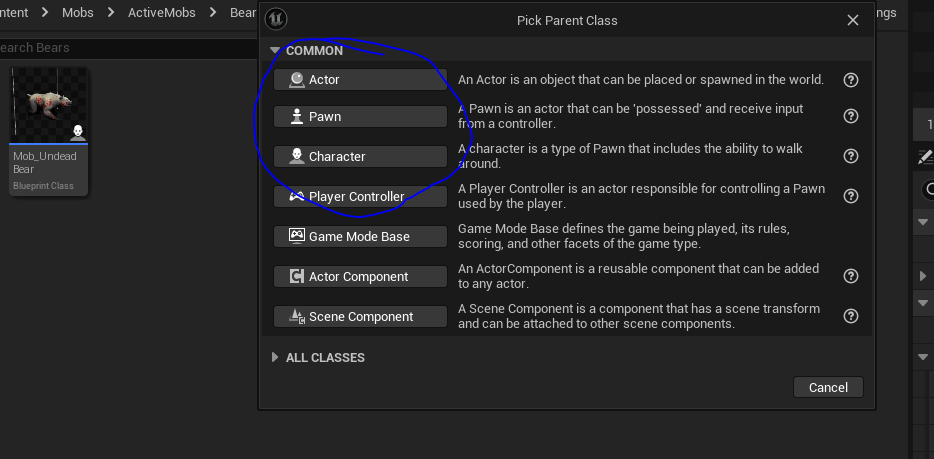
I have a class hierarchy to make things more scalable, in order to re-use certain functions across my blueprints, but its not essential for this post.
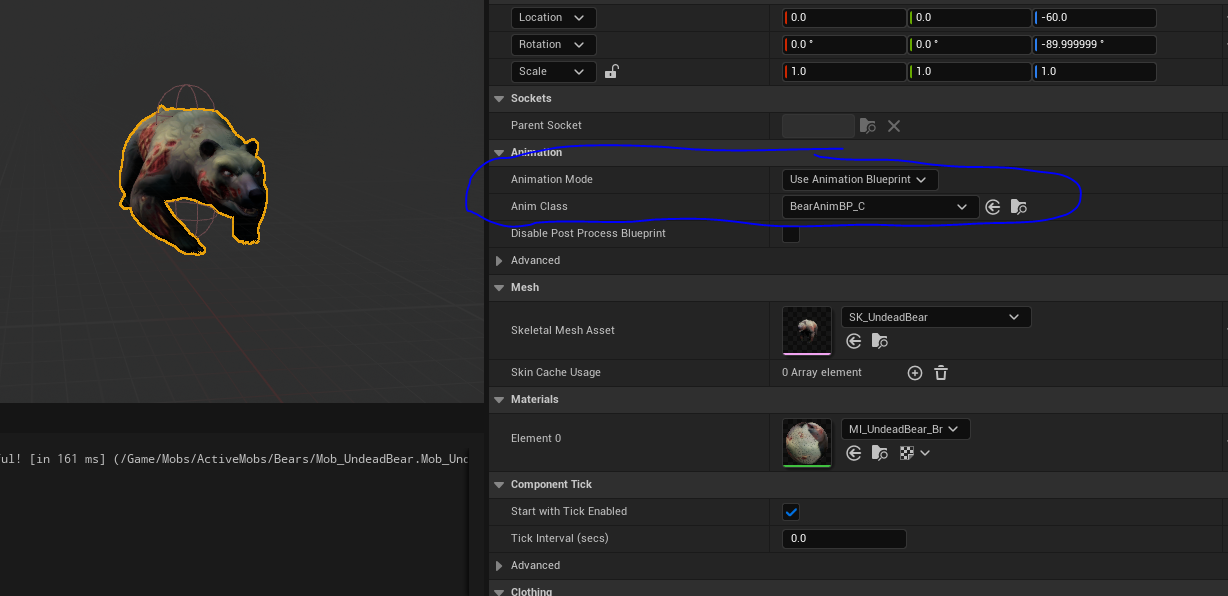
In this blueprint, you will want to set your skeletal mesh onto the mesh. There is an option to configure your animation blueprint, but we haven’t created that yet, so we will do so shortly.
Prepare your blendspace
I will only prepare one blendspace, which is animation blending between idle, walk and run.
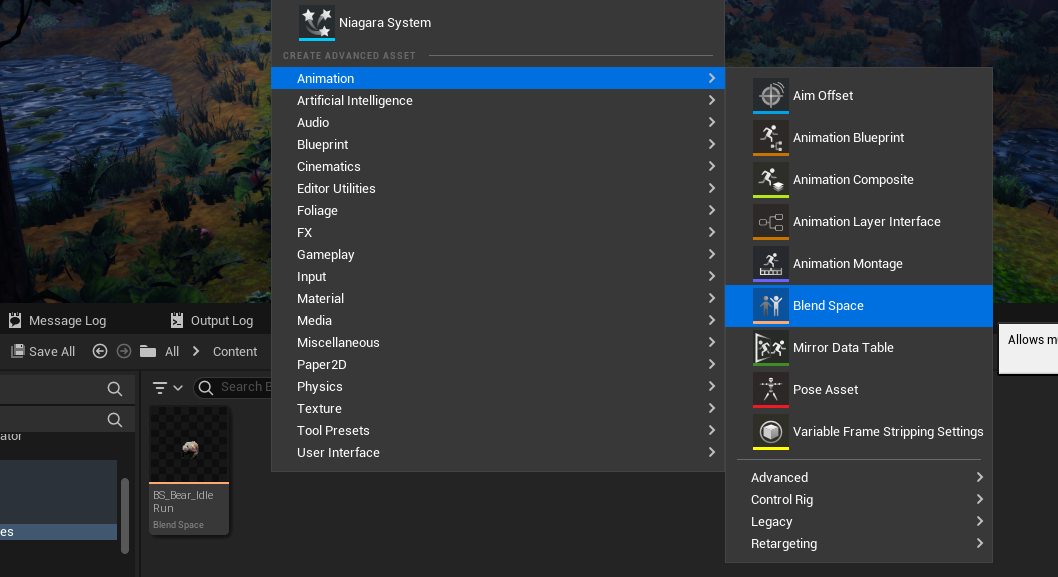
Create yourself a blend space, 1D is sufficient but is also being deprecated.
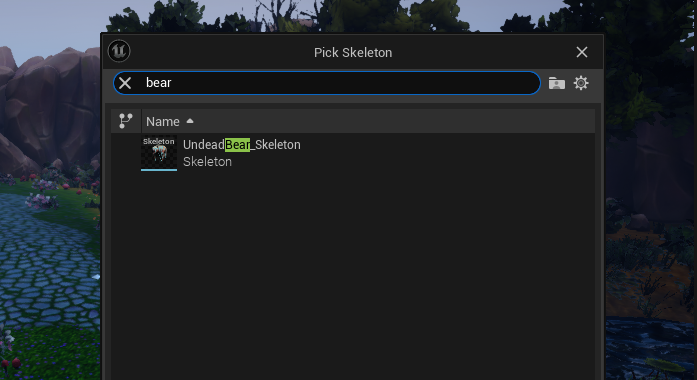
Select the skeleton for the blend space. This is actually quite good because UE will automatically filter the relevant animation sequences that this blend space can play.
For the Horizontal Axis, we will want to add Speed variable. Set the max value according to your requirements.
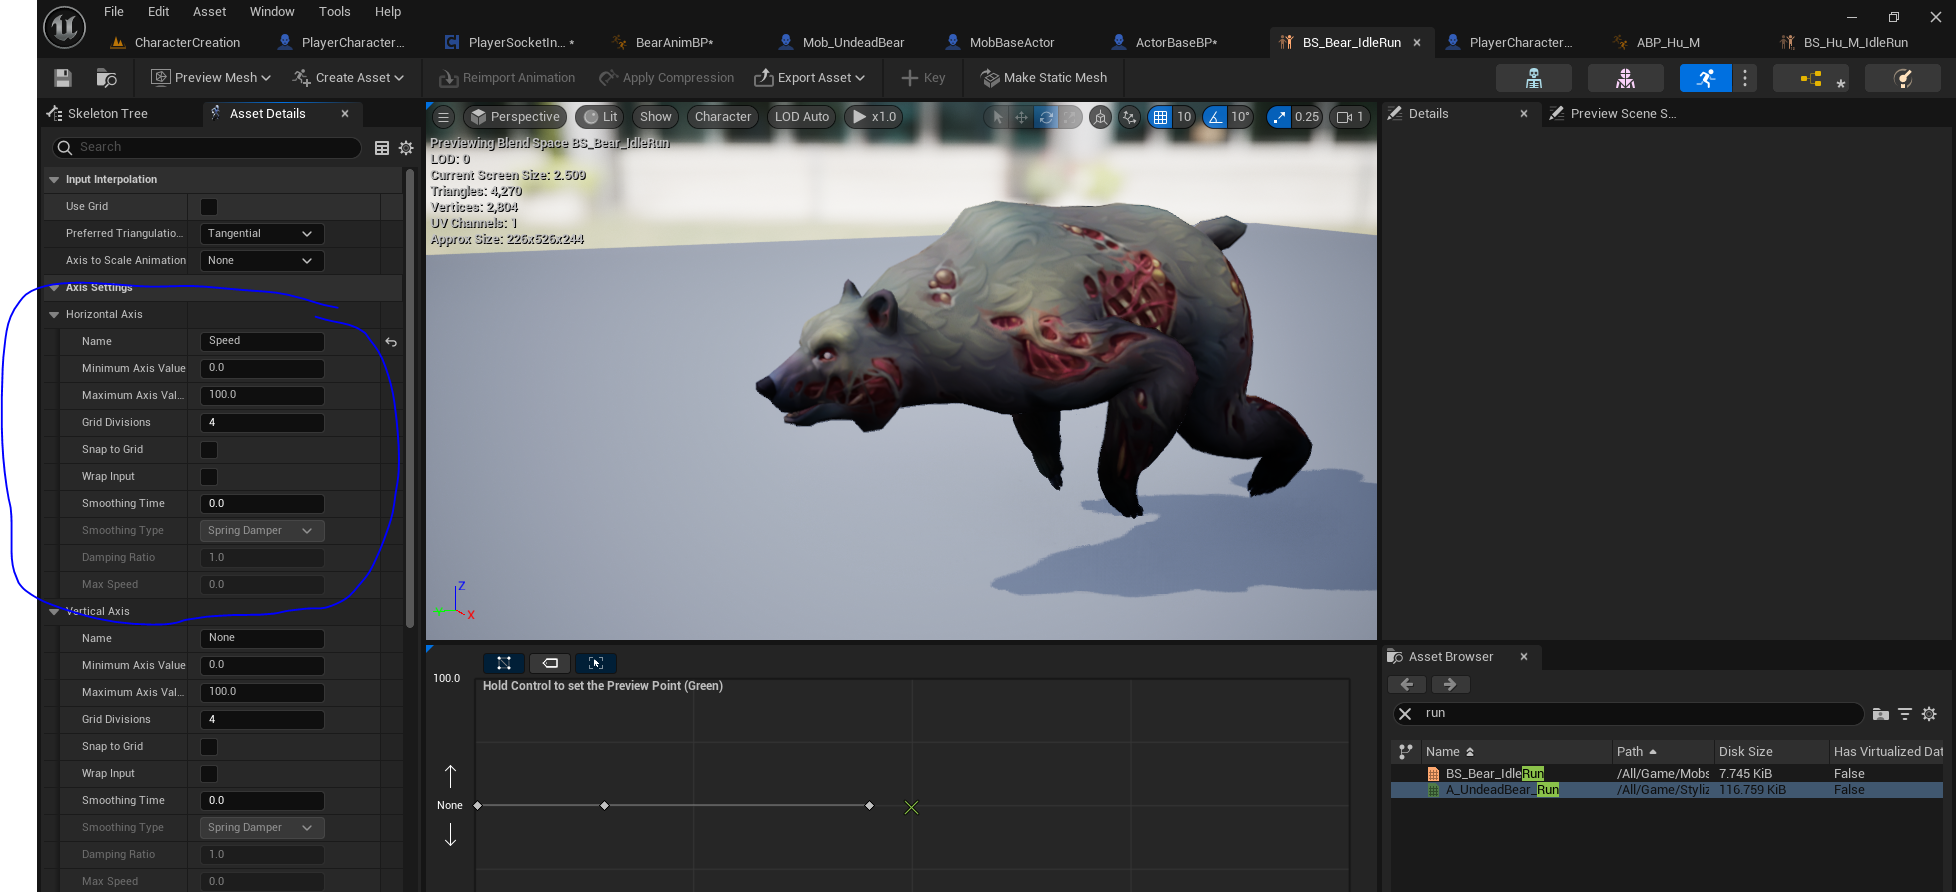
For now, we will only work with 1D, but you’re actually able to add additional axis, which is usually direction and blend animations based on both, speed and direction.
Furthermore, if you have animations for running backwards, you may wish to set the minimum axis value to a negative value, such as -100. I do not have this animation, hence I start at 0.
Ok let’s first begin with our idle motion.
When you found your asset, drag it into the left window
You will want to set the idle animation where the horizontal (speed) axis is 0. For me, this is at the very left, but if you set negative value for min, it may be in the mdidle.
What does it mean? Basically, when your pawns speed/movement/velocity is 0, then we will be playing the idle animation.
Now add the other animations into this window, for me its walk and run animations.

You’re able to right click those points to add specific values to them, which can be easier.
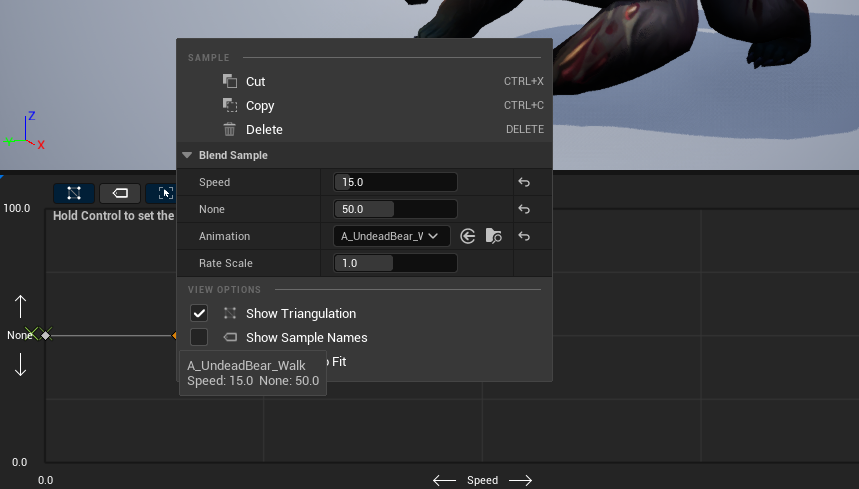
So this is details for my walk animation, which means that when my speed is exactly 15, I will be playing my walk animation. This also implies that if its less than 15, it will be a mix blend between idle and walk and if its over 15 its blended with run.
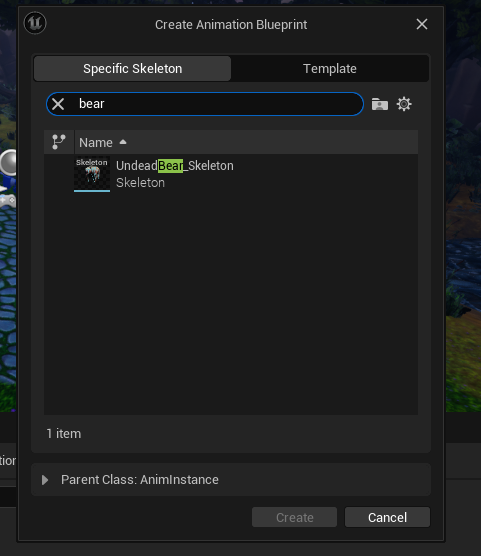
Creating the animation blueprint
Now we can start creating an animation blueprint!
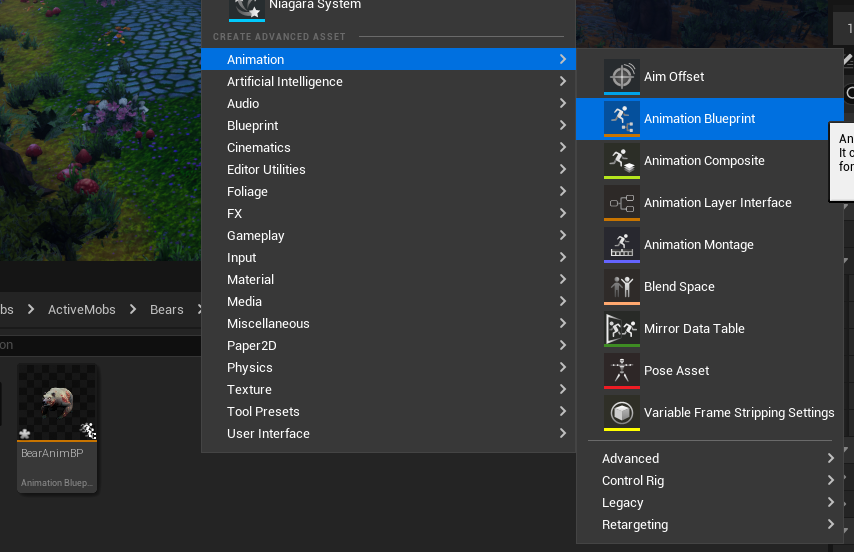
Again, you will want to define the skeleton for the animation blueprint.
This is what we will be creating:
This animation blueprint covers:
- idle, walk and run animation (via blendspace)
- Start jump animation sequence
- jump / falling animation sequence
- jump end animation
In order to do this, we will need some variables about the character. Specifically, we need the characters:
- pawn speed
- whether pawn is falling
Let’s extract those two parameters then.
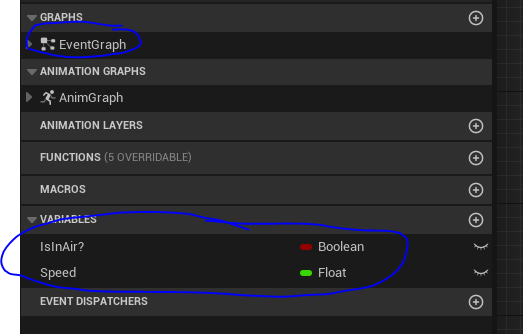
Add the two variables and navigate to your event graph.
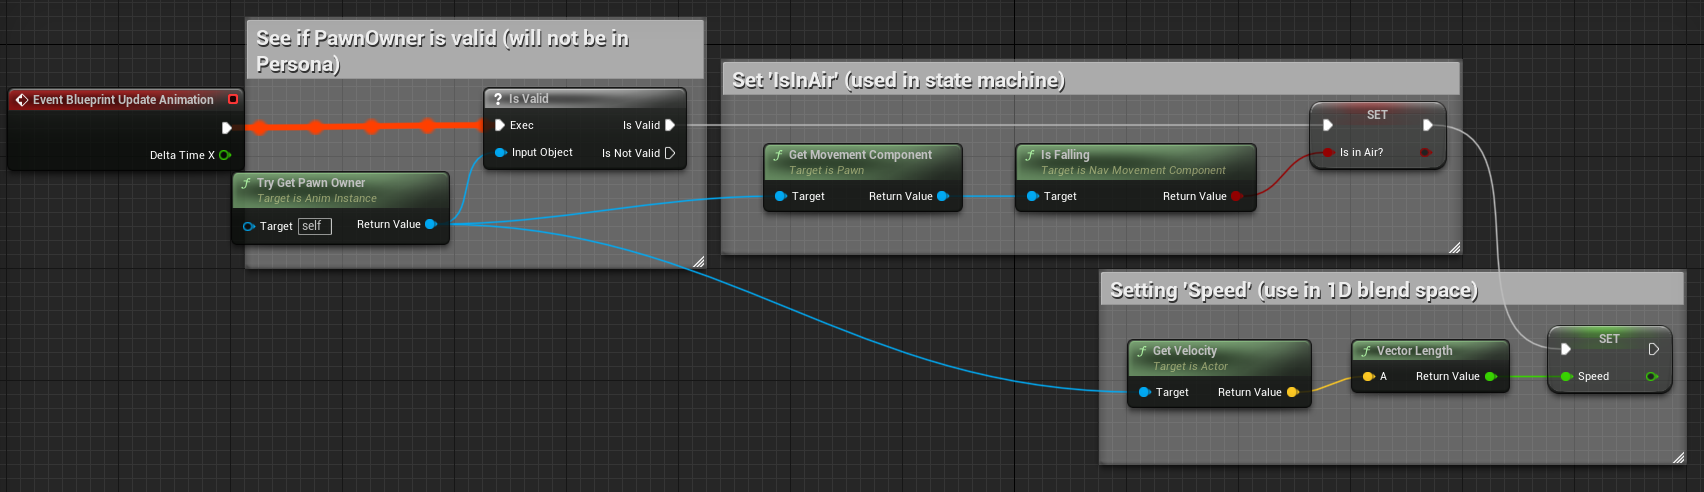
So, you will assign the animation blueprint to your character/pawn/actor, so when you call Get Pawn Owner you will return the pawn itself.
From here, you will be able to extract all necessary details, including the isFalling which is part of the Get Movement Component and the actor velocity, to extract speed via Vector Length function.
More complex variables
Getting the pawn owner may not be sufficient, sometimes you will have parameters nested in the specific classes. In those cases, you may wish to cast the pawn to your specific class.
Here’s an example where I know that this bear animation blueprint, will only be assigned to bear type mobs. Therefore I can safely cast it, potentially I can cast to another sub class.
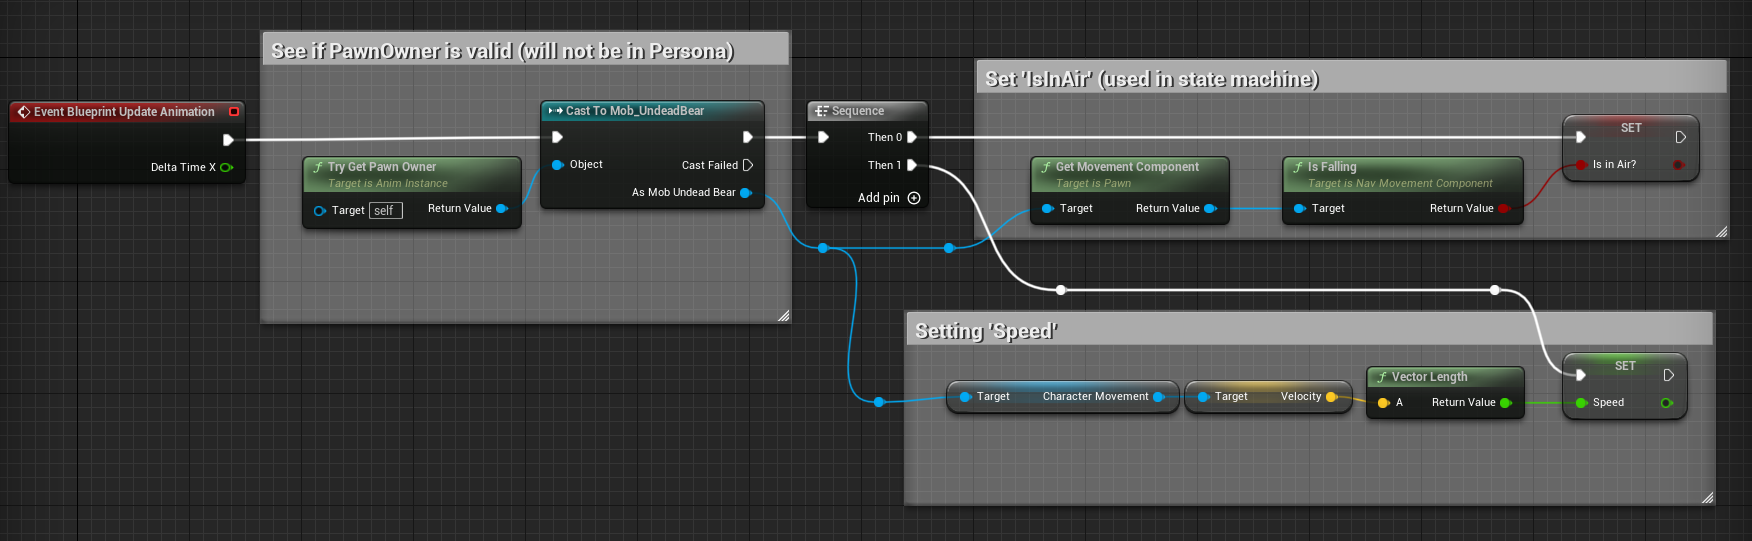
In this approach, I have character movement component which controls the velocity, so I can extract it here too. Potentially you will have other variables in this class that you may wish to expose to your animation blueprint.
Anim graph
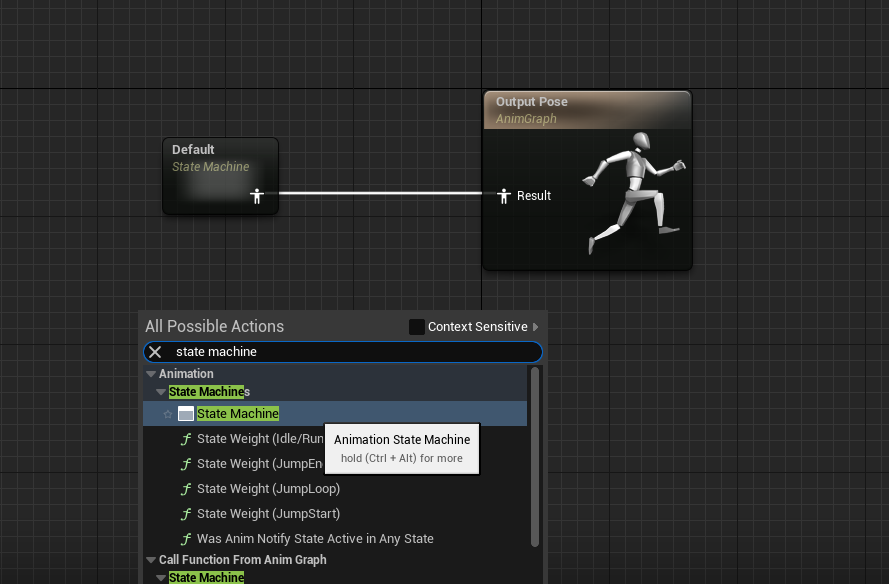
Here you may see just the Output Pose node when you have a fresh blueprint.
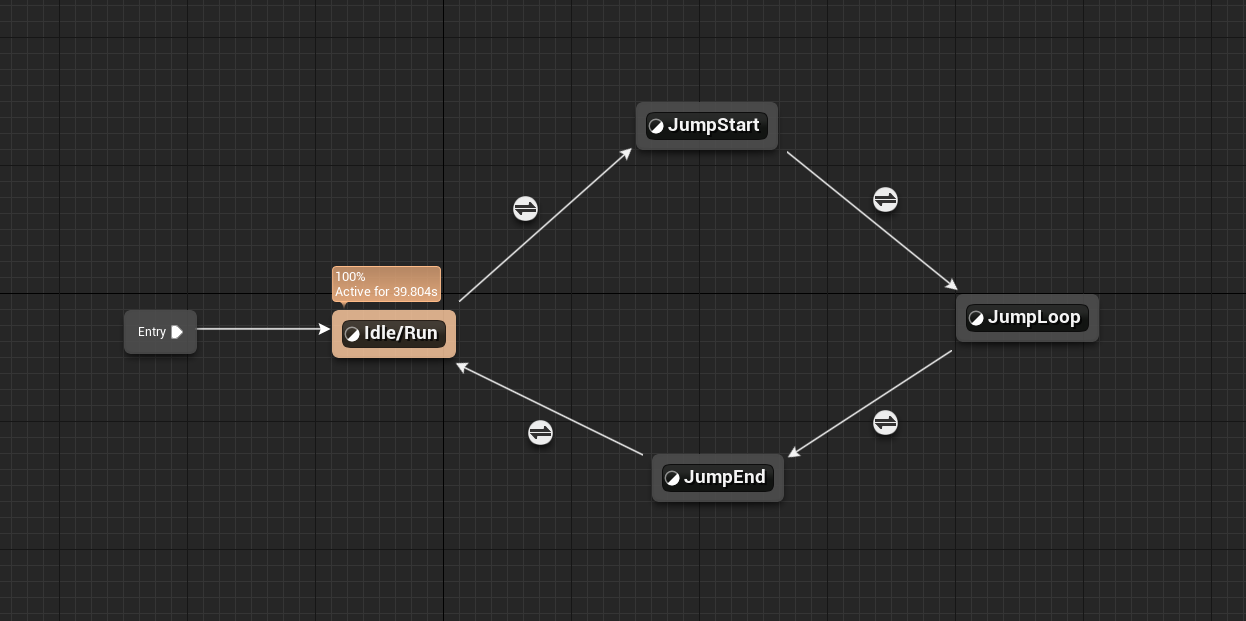
You will want to create a state machine here, which will be connected to the output pose. I called mine, ‘Default’ but you may call it as you like.
If you double click your state machine, we will be able to define the states and transitions.
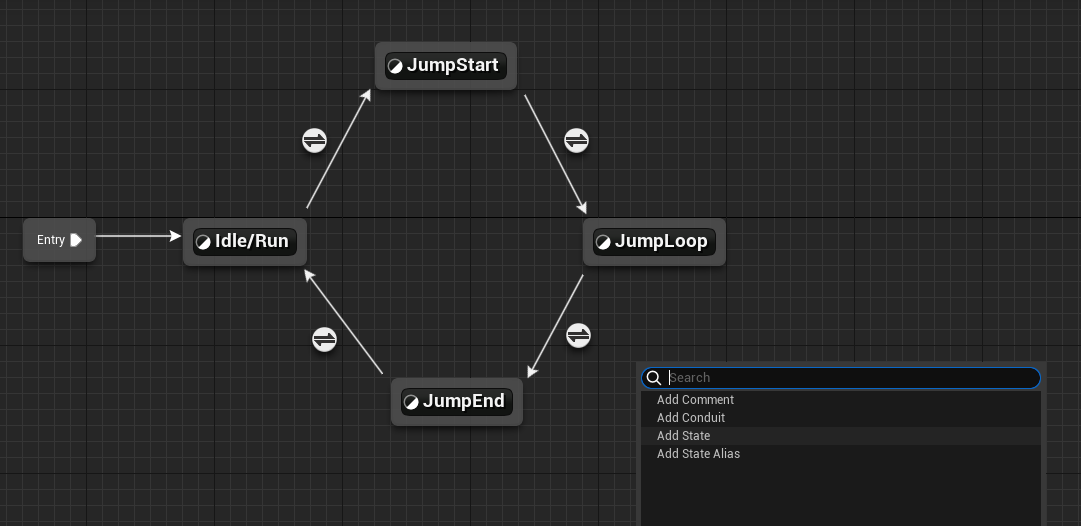
Right click and create some states, we will want:
- Idle/Run
- JumpStart
- JumpLoop
- JumpEnd
When you created these states, connect the Entry to your Idle/Run state, which is the default entry state.
Double click the idle run state and here you will want to add the Blend Space that we created in the earlier paragraph.
If you right click and search for it, you should find it come up.
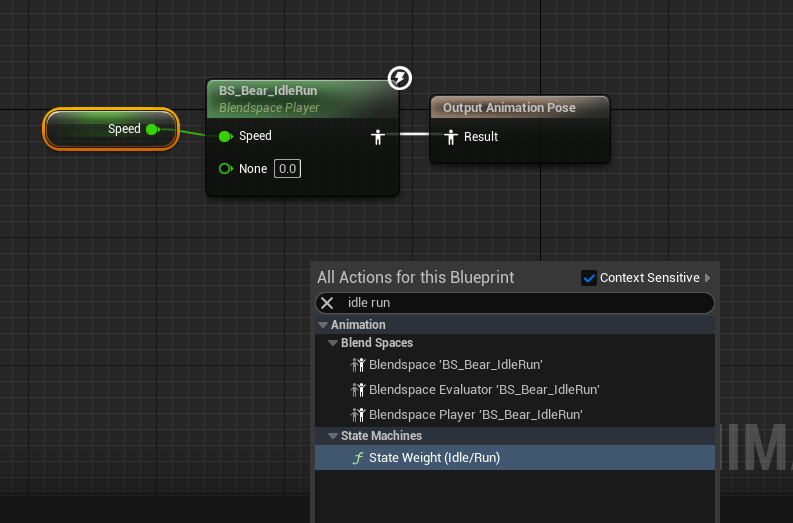
You want the blendspace player node.
Note that this search automatically filters files based on their skeleton, so if you don’t see your blend space popping up, double check the selected skeletons!
Once you found it, connect the Speed variable that we defined in the Event graph.
That’s done on the idle/run section!
Transition to Jump Start
Now you want to grab the edge of your Idle/Run state and drag the arrow to the edge of Jump Start node.
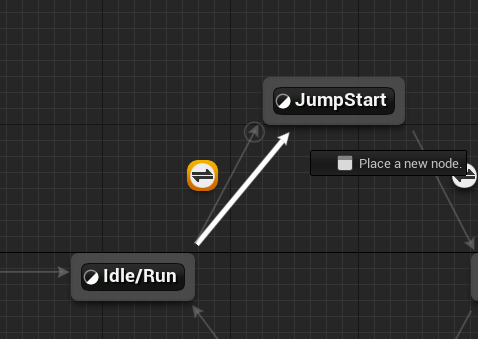
This defines how you transition out of one state to another.
Double click that node to enter and define the transition rules.
These can sometimes be complicated and you’re also able to make them shared to refactor the logic. Ours for now will remain very simple.
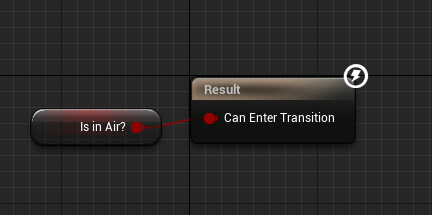
This means that if the actor has the boolean of ‘Is In Air‘ enabled, we will transition out of idle/run into the jump start node.
Now let’s go into the Jump Start State.
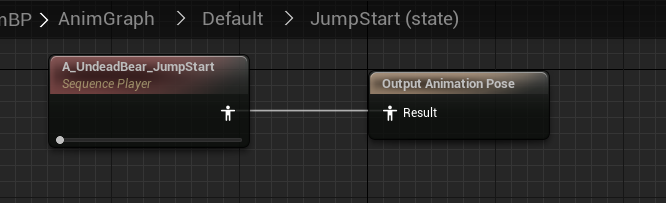
Here we just want to play the raw animation sequence for jump start.
We don’t need to use blend spaces or montages, we can also use raw animation sequences.
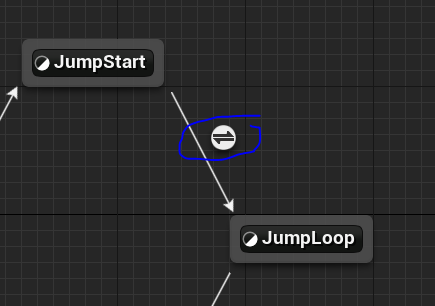
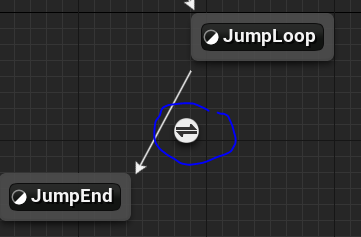
Transition to jump loop
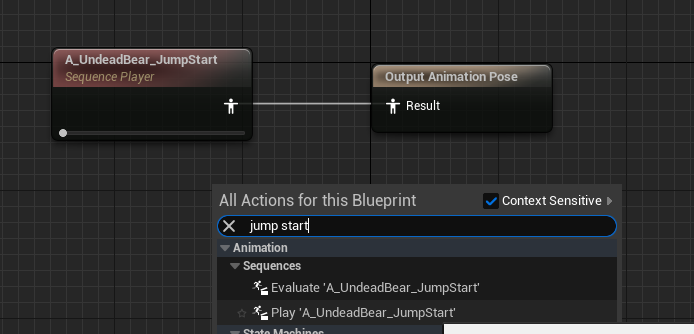
Ok now we have configured the idle/walk/run and jump start. Let’s configure the jump loop.
There’s multiple ways of transitioning to this and one trivial method is to just check how much of the jump start animation sequence has played.
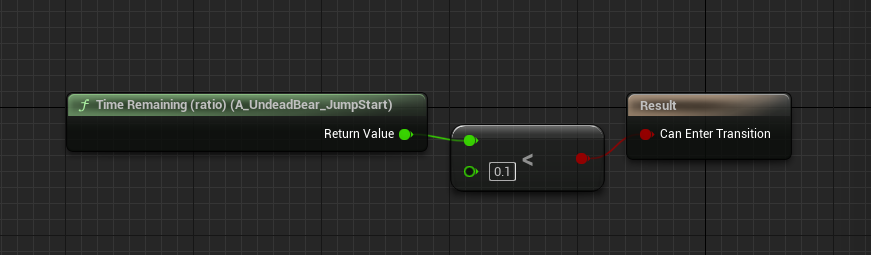
Bear in mind, this can have some edge cases / bugs such as character may be in air for less time than the anim sequence, but again, this is a trivial solution.
Inside the jump loop, we again just play the jump animation sequence.

Ending the jump
Let’s now cover the Jump End state.
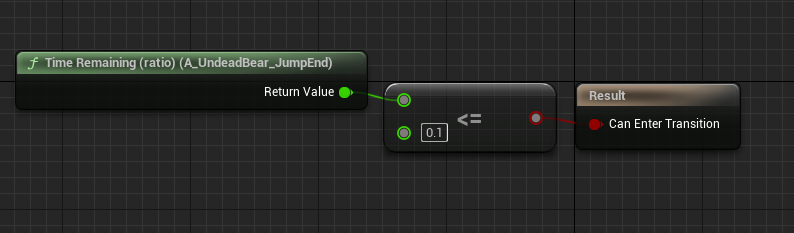
This is quite simple, this is when the pawn lands, i.e. the pawn is not in air.
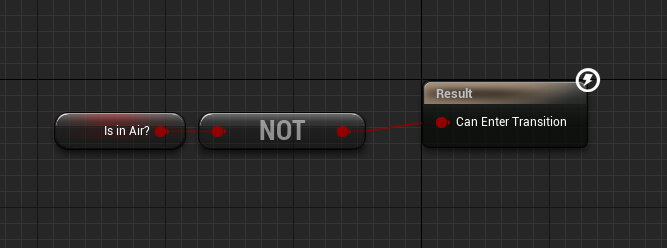
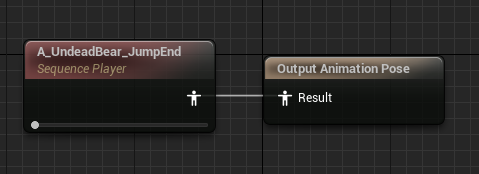
And we simply play the jump end animation.
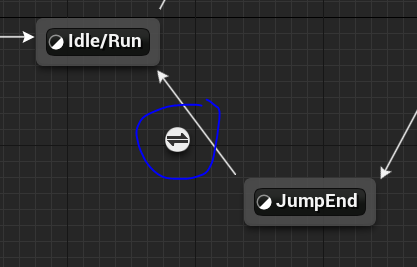
Finally, we can transition back to Idle/Walk/Run when this animation has completed.
That’s it!
You now have a full, albeit basic, animation blueprint you can use on your characters/pawns!
Don’t forget to attach it to your actual actor blueprint.
And now you can test and perhaps tweak the blend spaces in action.