48. How to modify your character mesh on item equips in Unreal Engine
In this post we’re extending our inventory and our items equip system. The equip system was implemented in part 46.
Please note that this is effectively still work in progress, but there’s enough to give people and idea with how to create such a system / framework for their game.
It will also be useful to note that complex pieces like this should have a general high level drawing, indicating the structure of what’s to be built.
In my case, this is what I am aiming to achieve:
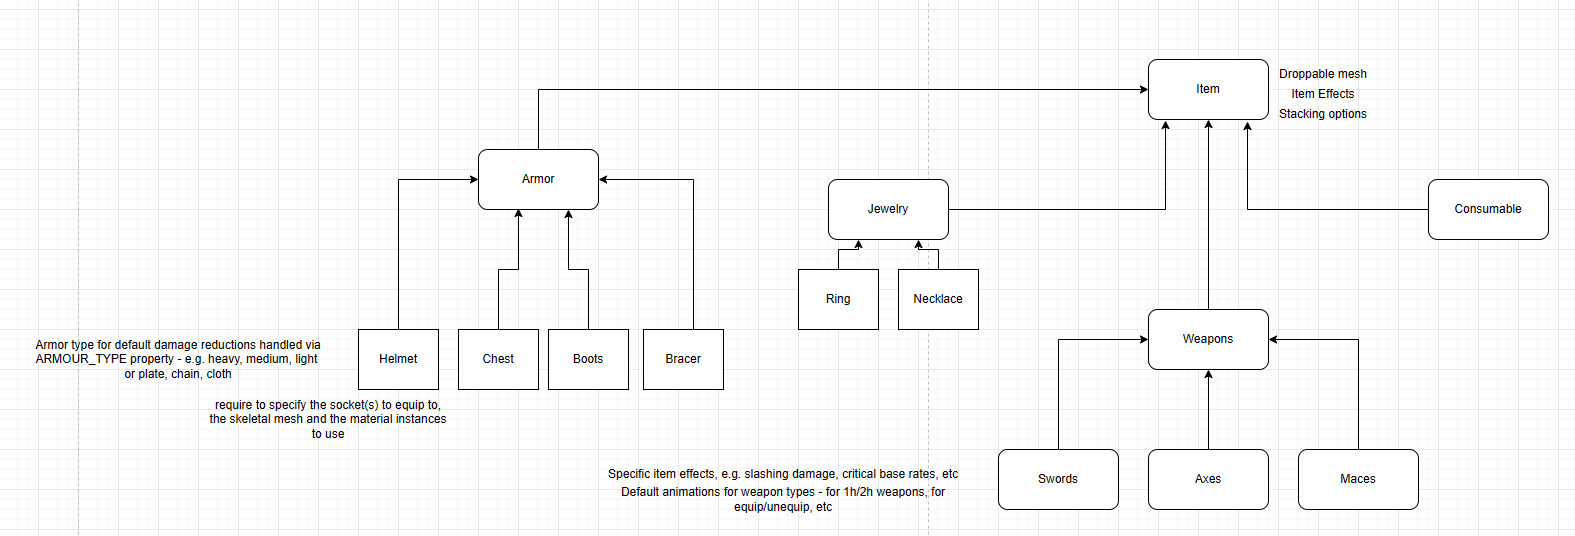
In this post, we will look to cover the following classes from the diagram above:
- Base Item
- Base Weapon
- Base Sword
- Sword example
- Base Armour
- Base Helmet
- Helmet example
First of all, why do we want this class structure?
Simply put, we will write all of the common defaults to those classes such that it will become much easier to create new items. To the point where we should be able to simply specify the meshes, materials and properties for those items.
Base Item
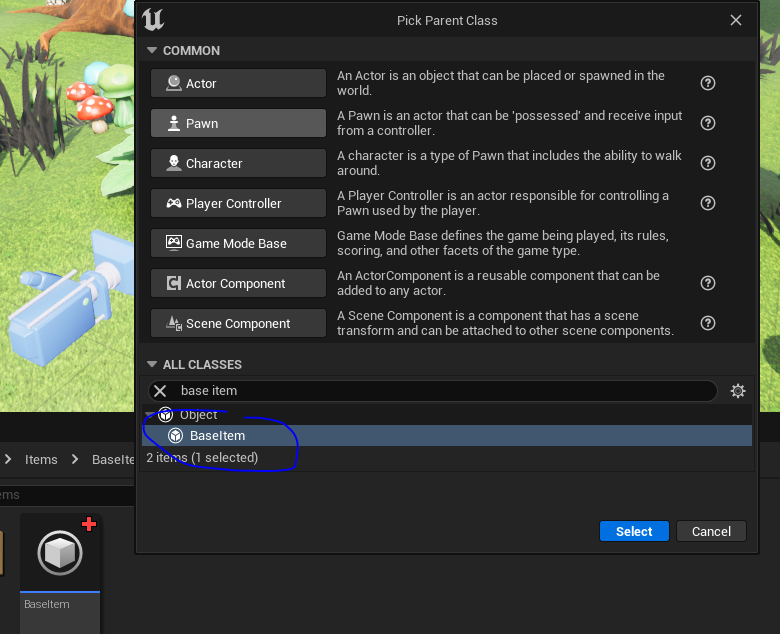
Base Item will be a pure object and to create it, simply select ‘Object’ as parent class when creating your blueprint.
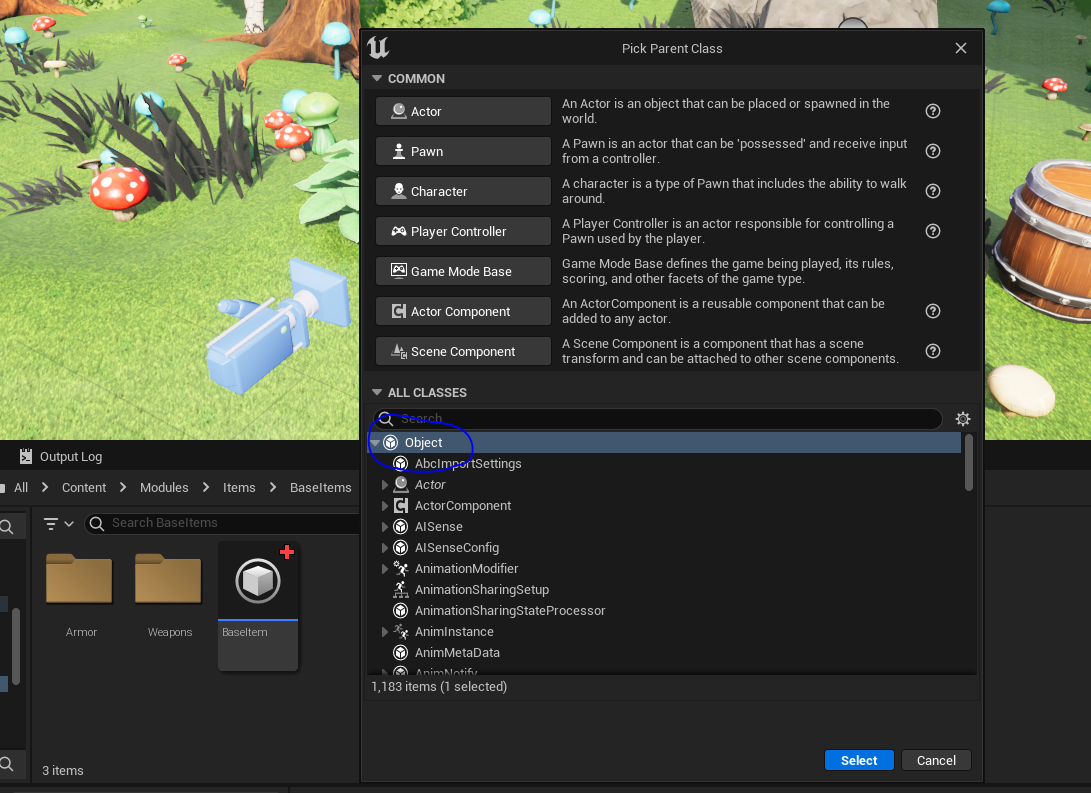
Base item class will include properties and functions that I want ALL my items to possess.
For example, all items should be droppable (so that characters can pick them up) – therefore it needs a skeletal mesh for the dropped item representation.
All items will need to interact with a player/actor, therefore I should have a Item Owner
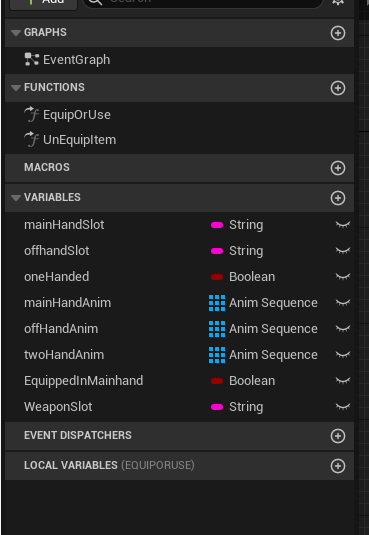
Here’s the common variables and functions I currently have, which will change as the game develops.
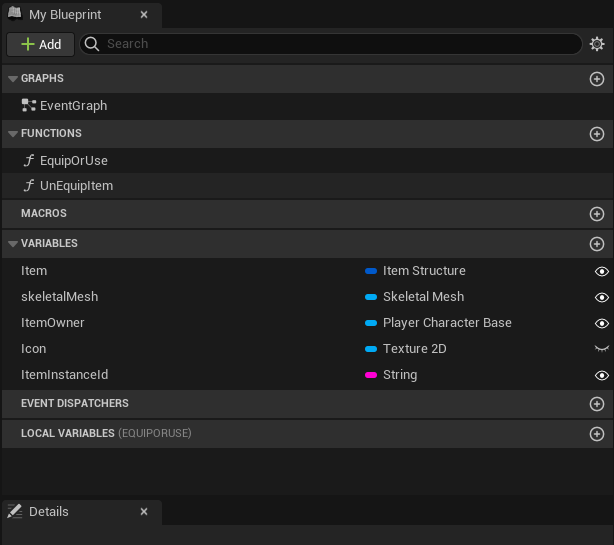
- Item has all item properties, such as name, description, value, etc
- skeletal mesh is for when the item is dropped (also currently re-used for actual equip)
- item owner is player interacting with the item (not strictly your main character BP!)
- icon is used to represent item in inventory
- item instance ID is the unique identifier for the item, for requests like dropping/pickup
For now, I also added two functions:
- Equip Or Use
- UnEquip Item
These functions will be overridden in the parent classes and in most cases we’re also going to call this base class function too.
So I will be able to use this base class as an interface to interact with my items.
Base Melee Weapons
There will also be ranged weapons in future, which will require their own base.
We’re now able to create a new blueprint and select the Base Item as the parent class.
This class will extend the Base Item further, utilizing the existing parameters and adding new ones.
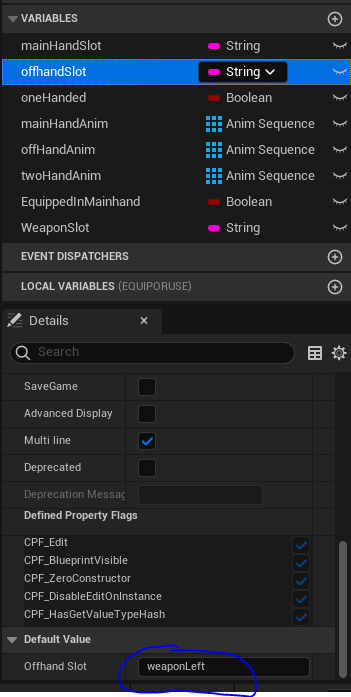
All melee weapons will be equippable. This means that you will be able to add a weapon to your main hand or your offhand.
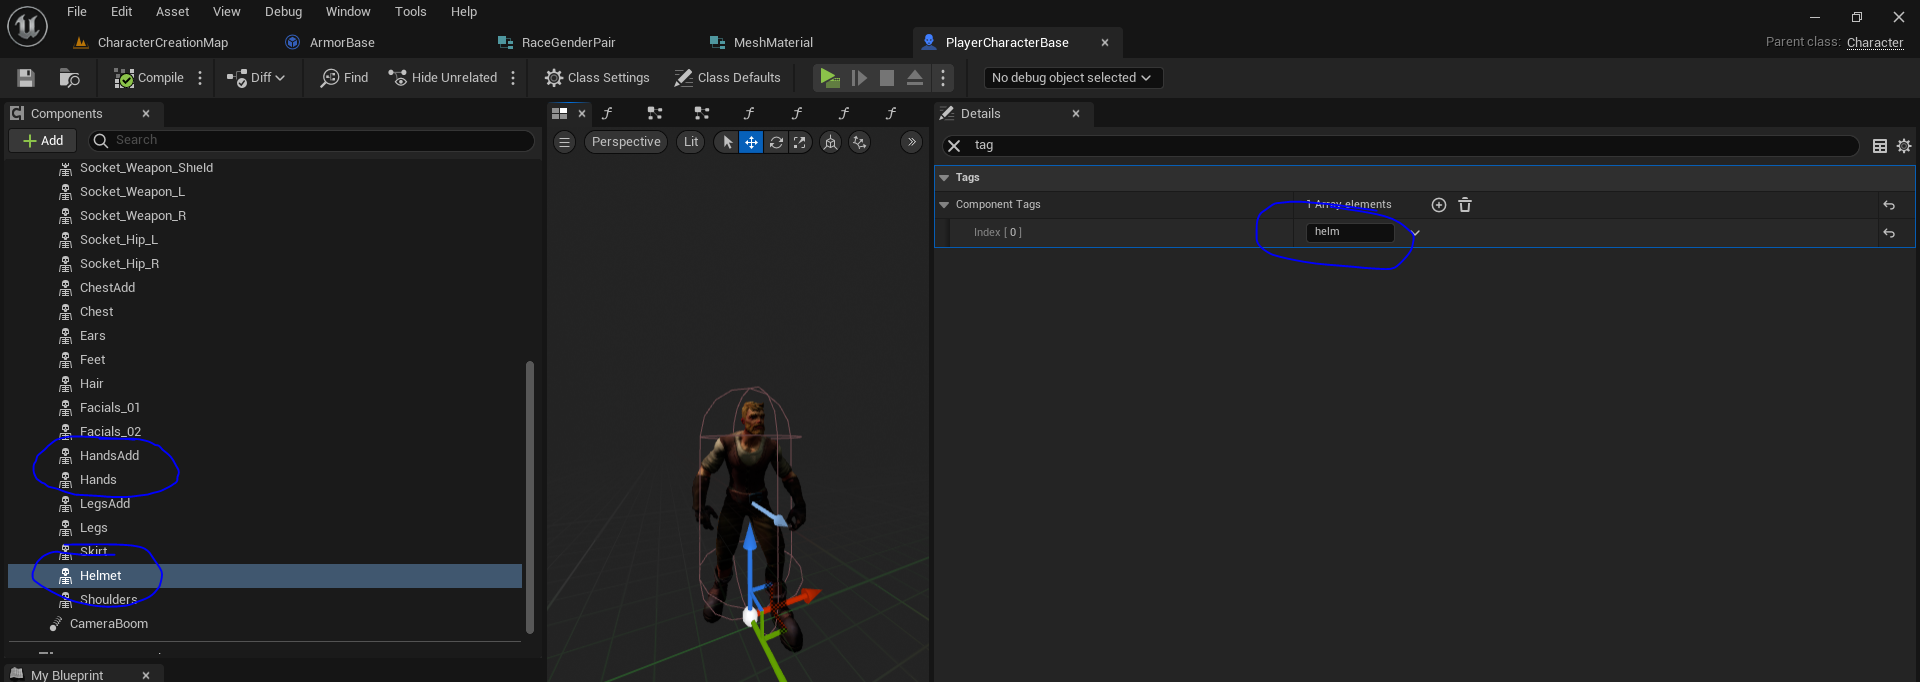
The mainHandSlot and the offhandSlot refer to the component TAG names for the skeletal mesh slots on your character.
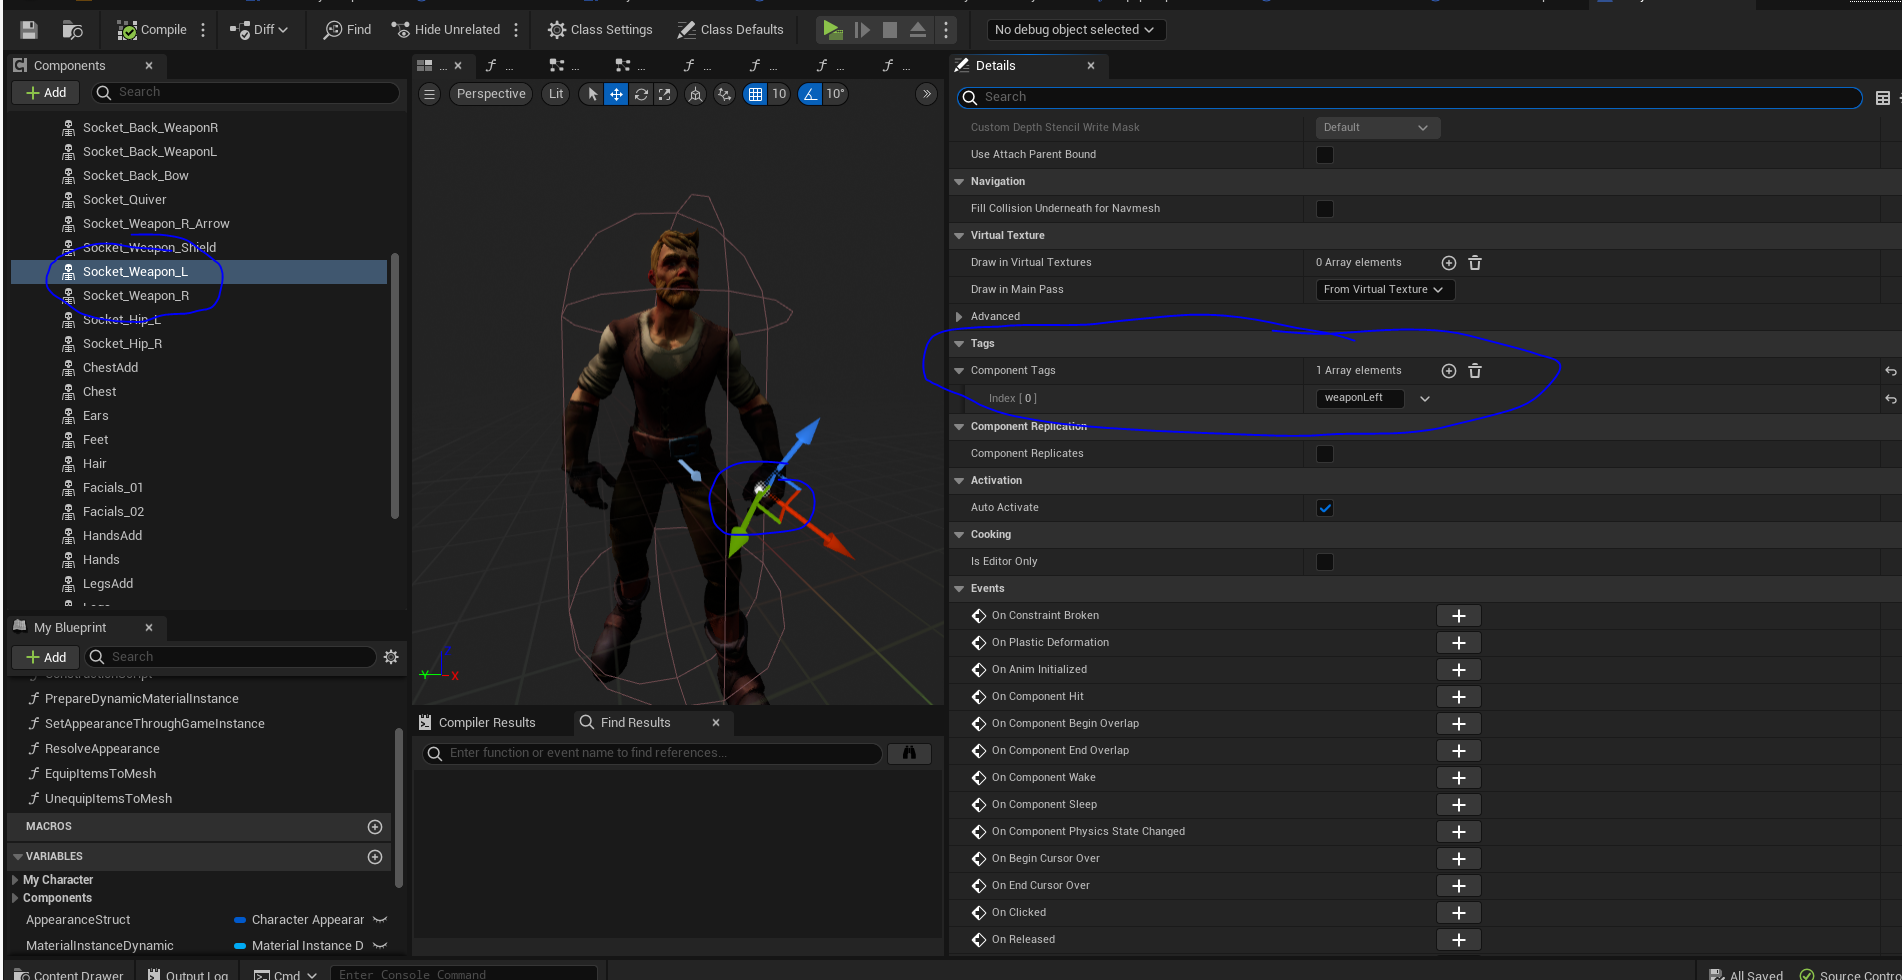
Here we can see, there’s a socket connected to the characters left hand – it’s designed to hold the weapon there. That component has a tag field and I added a tag named ‘weaponLeft’.
Then my slot name should refer to these tag names.
Next, oneHanded is a boolean indicating whether the weapon is 1h or 2h.
This will help determine a lot of other factors, such as animations etc.
I’ve added animation sequences here too, but this is not yet configured so it may look differently later once I start implementing combat.
Animations for equipping and putting weapons away could also be added here.
EquippedInMainHand and WeaponSlot refer to essentially the same thing.
This is to support dual wielding weapons in the future. So I specify the slot that the item is equipped to to indicate whether the weapon is in main or off hand.
Base Melee Weapon Blueprints
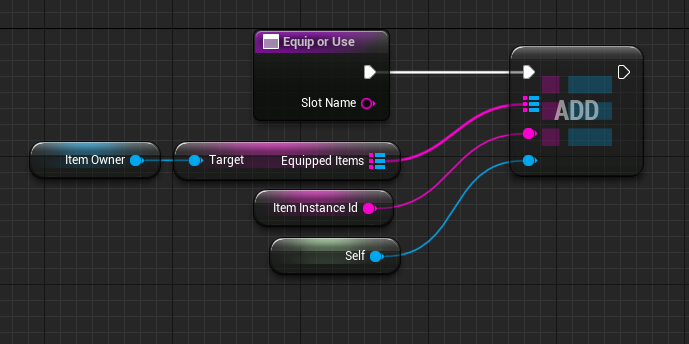
Let’s see Equip Or Use function.

First, we ensure to call the parent function. Next, we check, what slot is this item equipped to? I will potentially need to rename my slot names as its ‘Weapon’ and ‘Shield’ and potentially it should be ‘Main hand’ and ‘Off hand’.
I set the boolean for ‘EquippedInMainhand‘ so that it will be easier to branch on this variable in future, for example when playing animations it will depend on which hand the item is equipped.
As shown earlier, we have main hand slot and off hand slot which determine the component we find by tag – so that’s what you can see us do next.
After getting the component, we cast to Skeletal Mesh Component and set its skinned asset and update.
I will have another base class for swords, axes, hammers, etc. For now they will be completely empty, but when I will want to customize their parameters and effects, I can do it as class defaults in those.
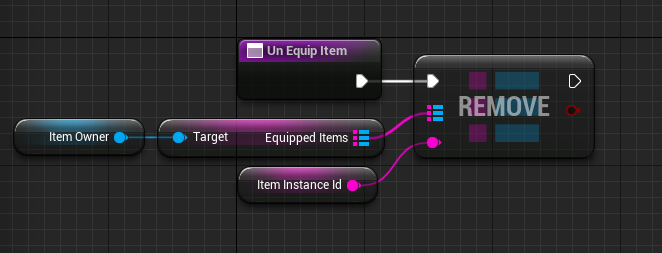
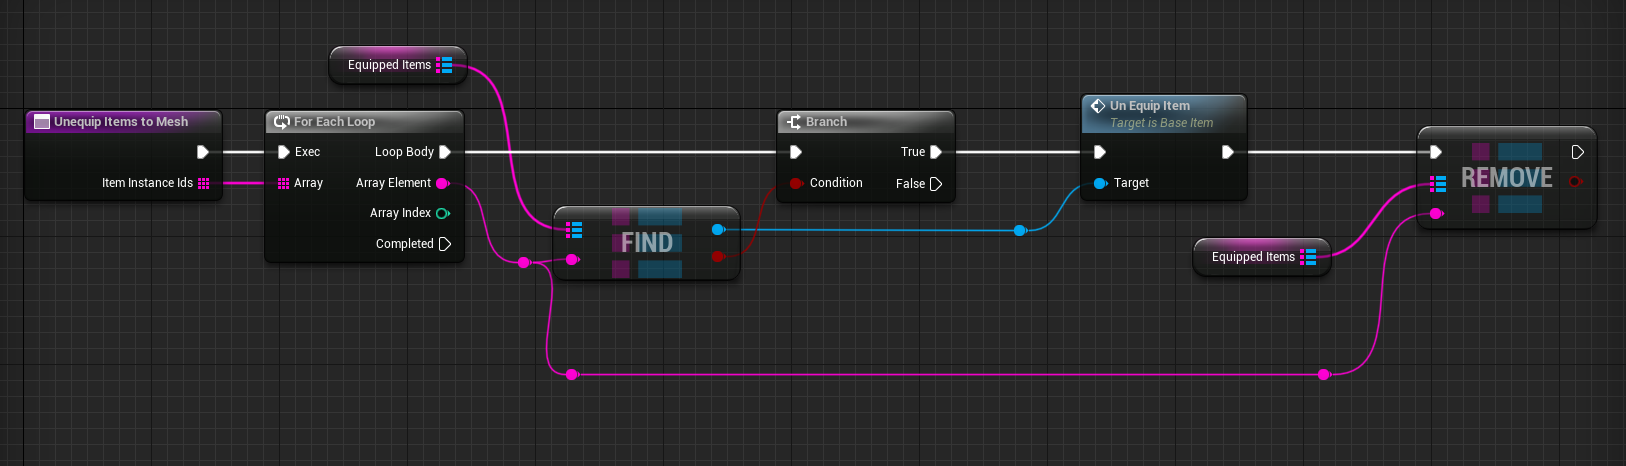
Let’s check the Un Equip Item function.

Here we simply clear the weapon slot (skeletal mesh) where the item is equipped. We’ll see these usages soon.
Creating first sword
Ok now I will go ahead and create a new sword.
First I will create a new blueprint, which extends the Base Melee Weapon.
It will not have any additional blueprints for now. But you can see I will be able to customize default parameters here.
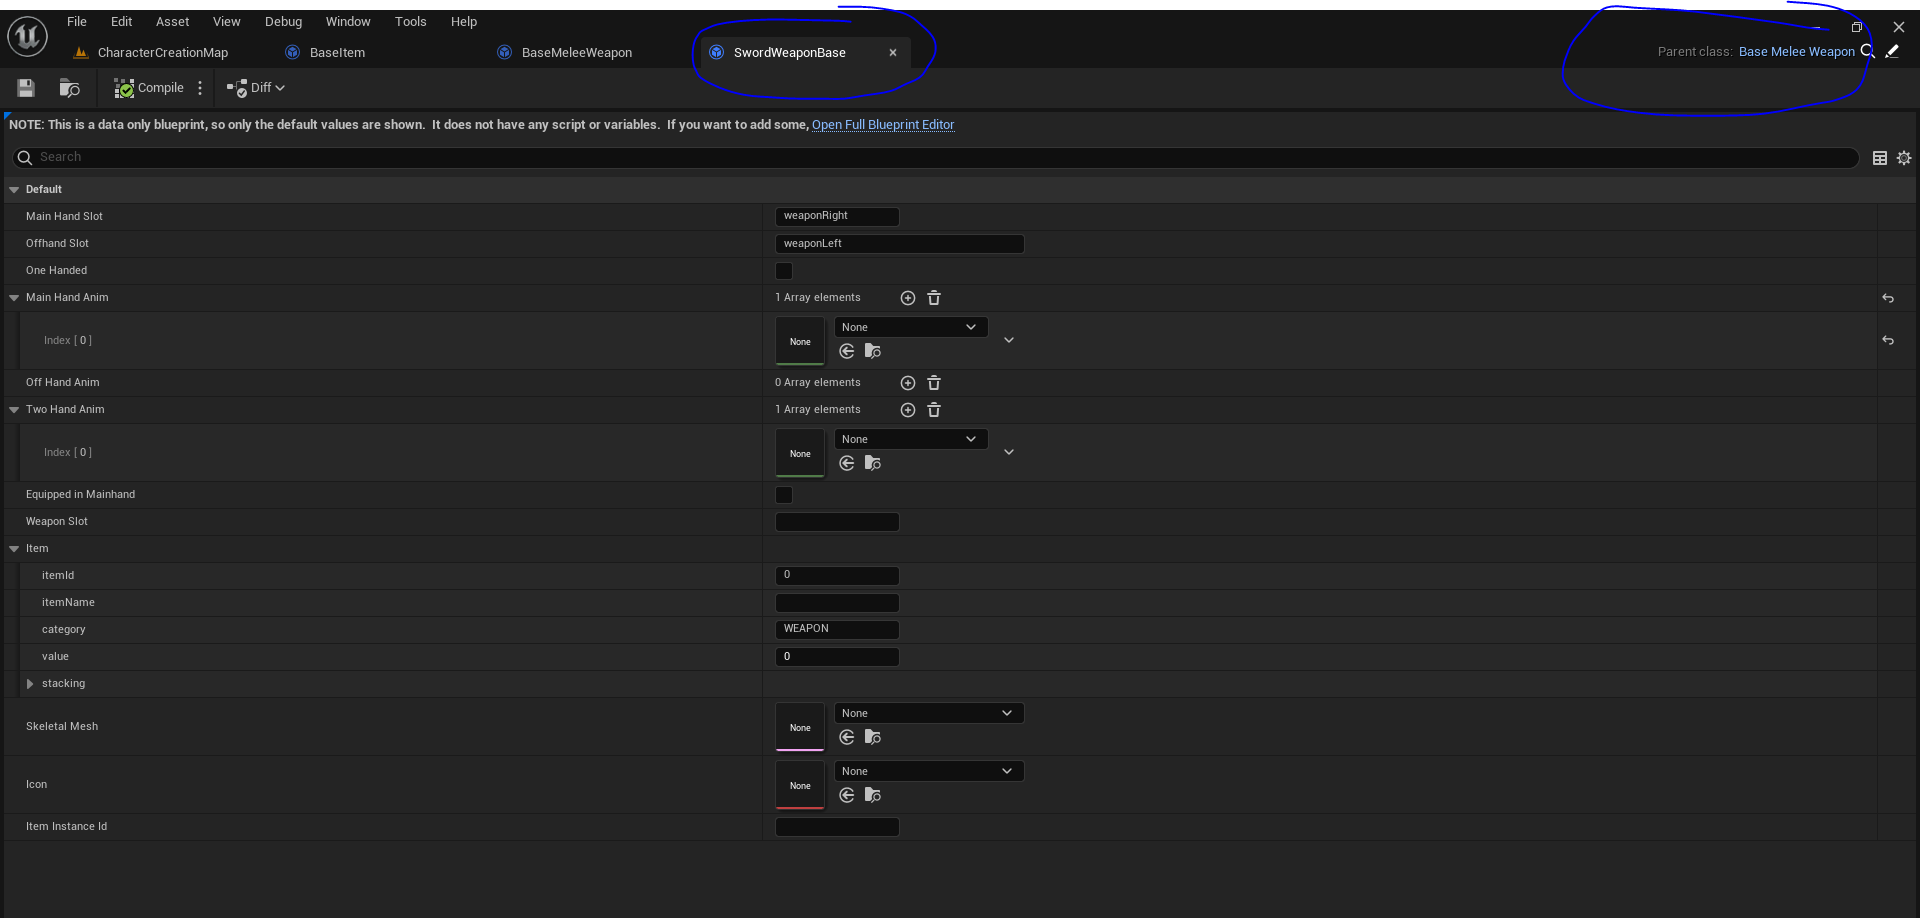
Let’s see what’s inside:
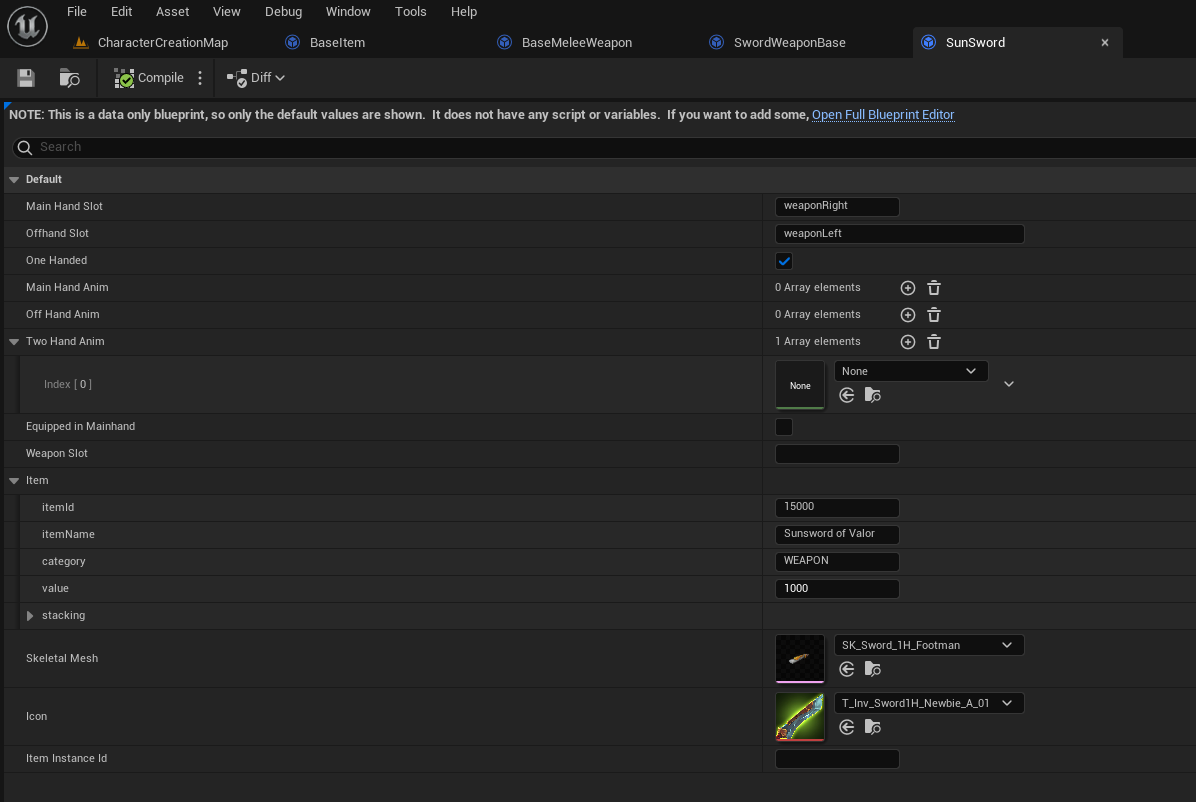
By the way, you can also click on the Class Defaults button and see the default parameters in the Details tab.
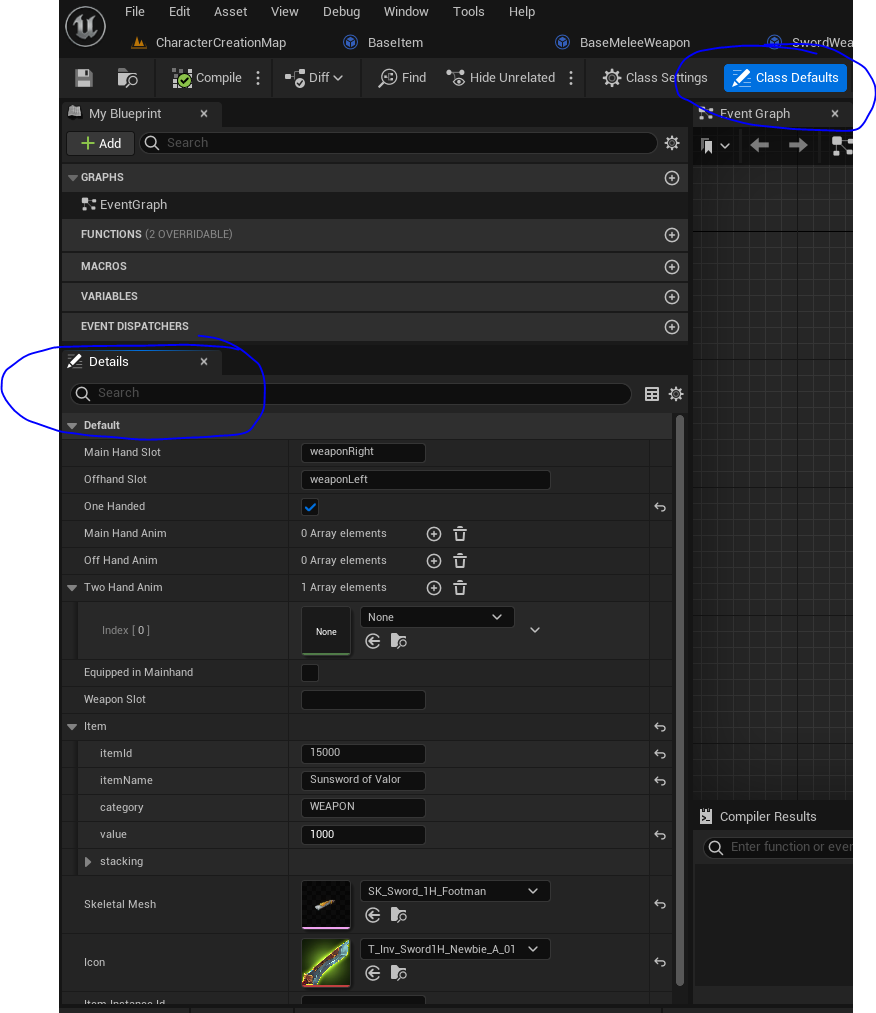
For me, it’s not essential to fill the Item details, such as item ID, name, etc – they will come from my server. However you can populate these specifics here.
Things like Main Hand Slot will be defaulted from its parent class, so you will not need to repeat them.
How will we find this item?
Finding items
We will find items using a data table.
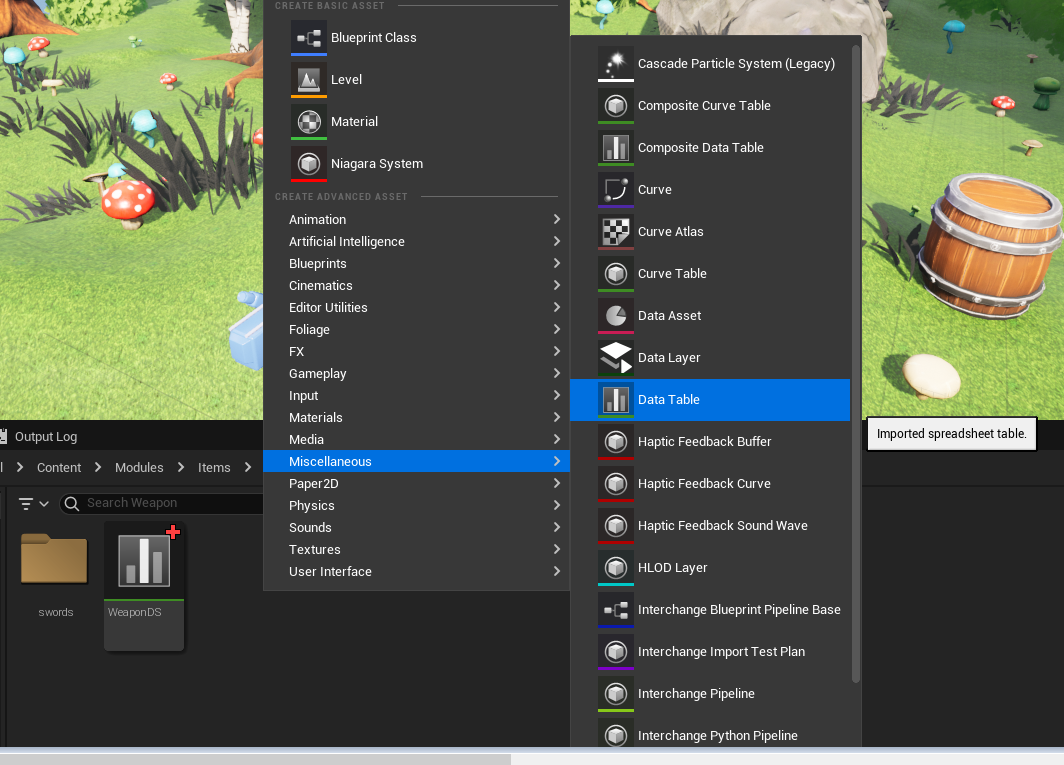
In order to add our data into the data table, we need a structure which represents our item.
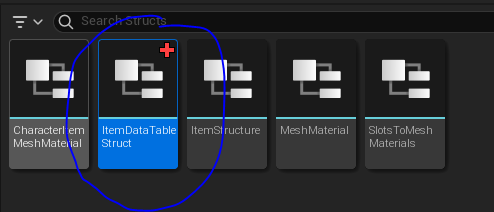
I created a new struct called ItemDataTableStruct for this purpose.
In there, I simply specify the ItemClass for parameter which contains Base Item as the type.

You can do it in many other ways. For example, you can load all the data into this structure and create an item based off the contents in the table, effectively using the data to feed constructor.
So how does it look?
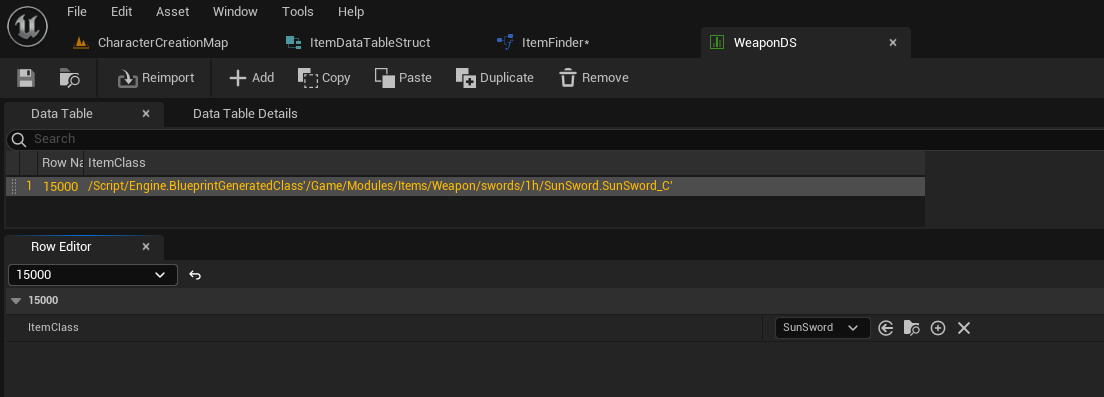
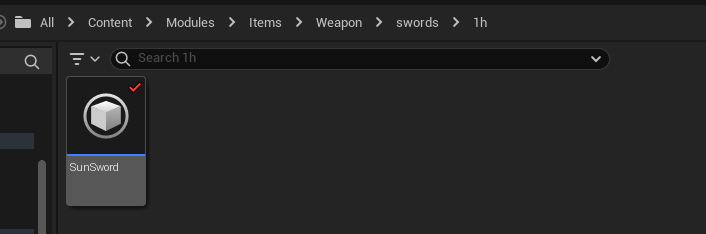
I basically specify, that my item ID 15000 points to the SunSword class, which contains all the data I may require.
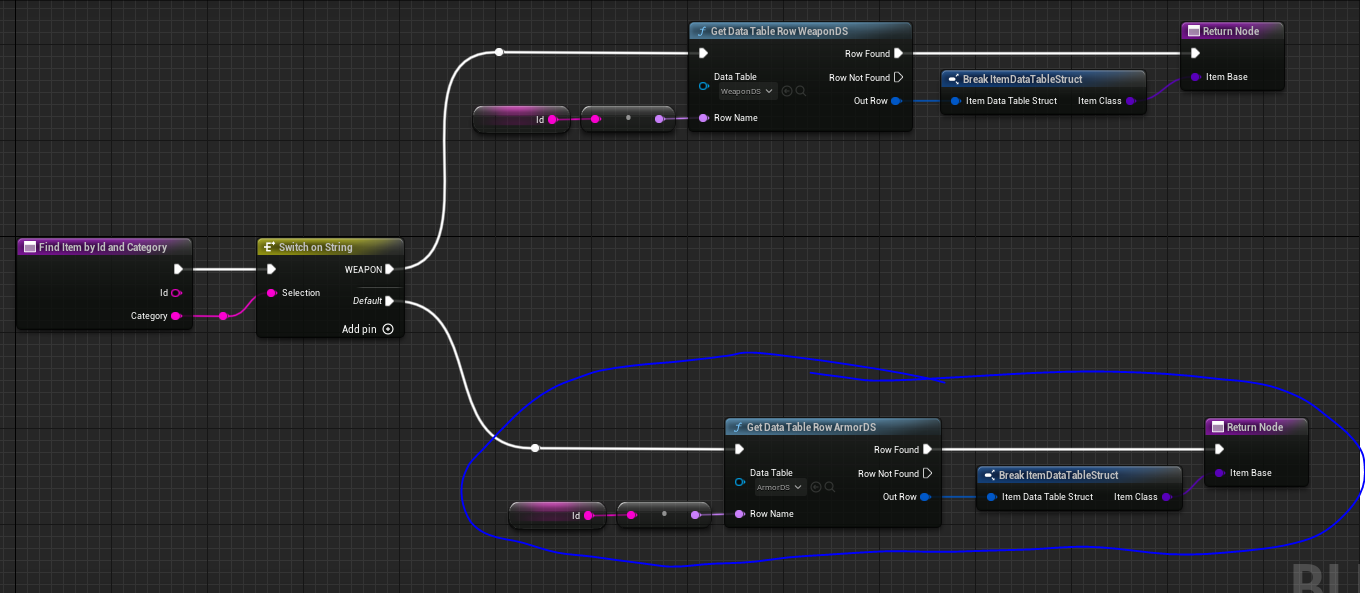
I’ve also created a helper function to find these items.
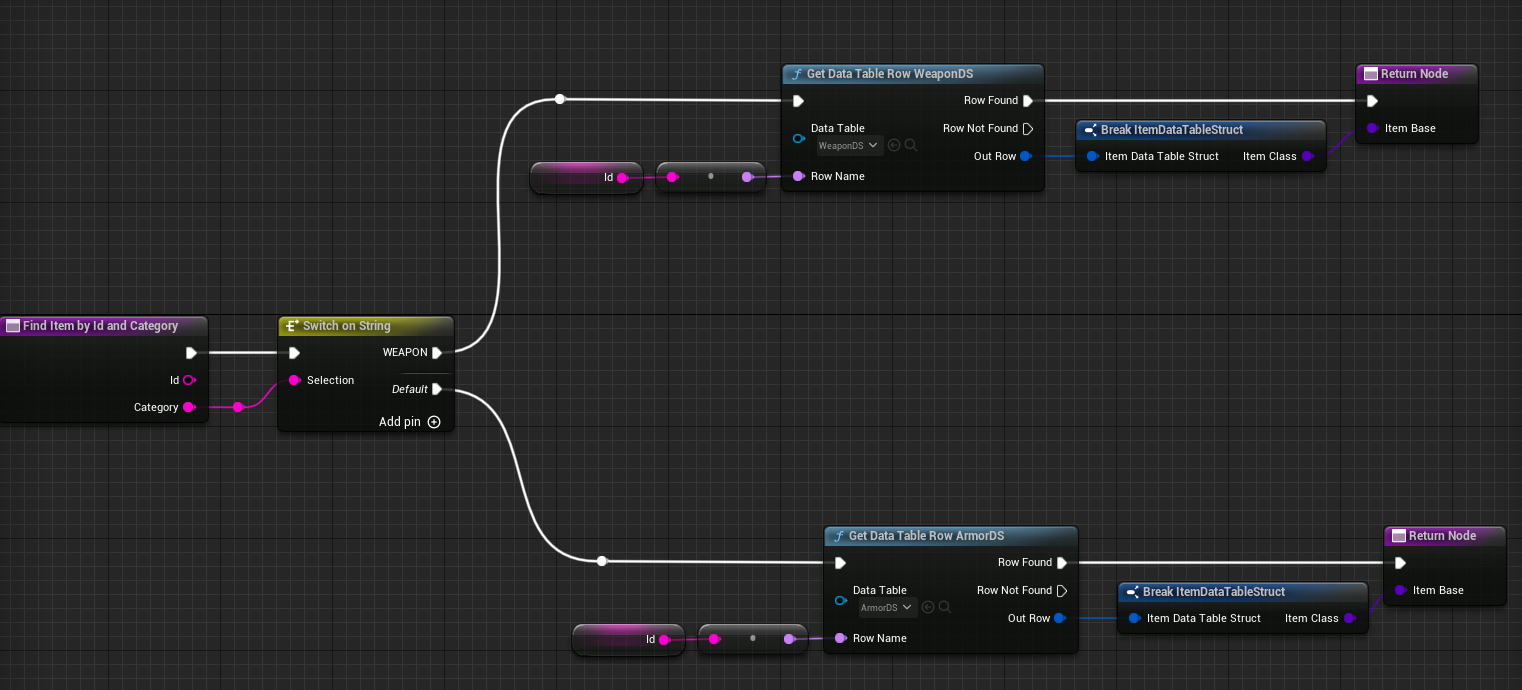
I will want to keep the data tables relatively clean. So I don’t want to bundle all items, weapons, armor, etc into same table. That’s why I create these flows, but they are optional.
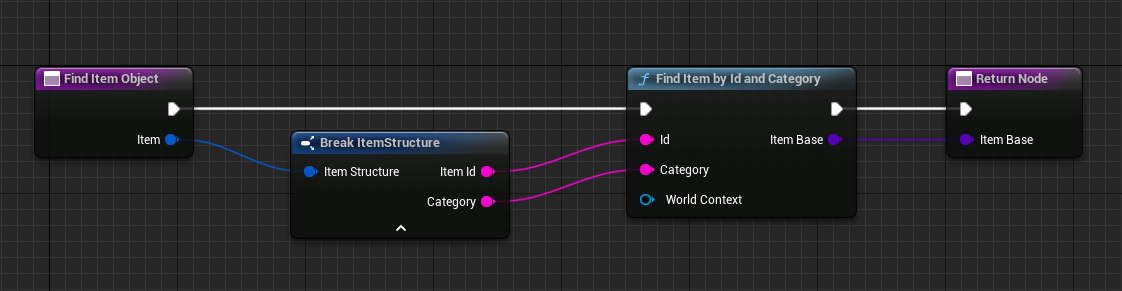
I also have another helper in there to find the item using the ‘Item’ struct, which I can obtain from my server. It contains the ID and category that’s used to locate the items.
Refactoring inventory and equipping items
I made multiple modifications to use the updated Item object in my inventory and equip items, I will skip some of it because its quite specific to my app, but please comment if you want some additional info on that!
The general gist of it though is that I create an instance of the item when it gets into my inventory and that reference is utilized to get the icon to draw, the skeletal mesh, item name, description, etc.
For example, this is me constructing the item into my inventory on pickup.
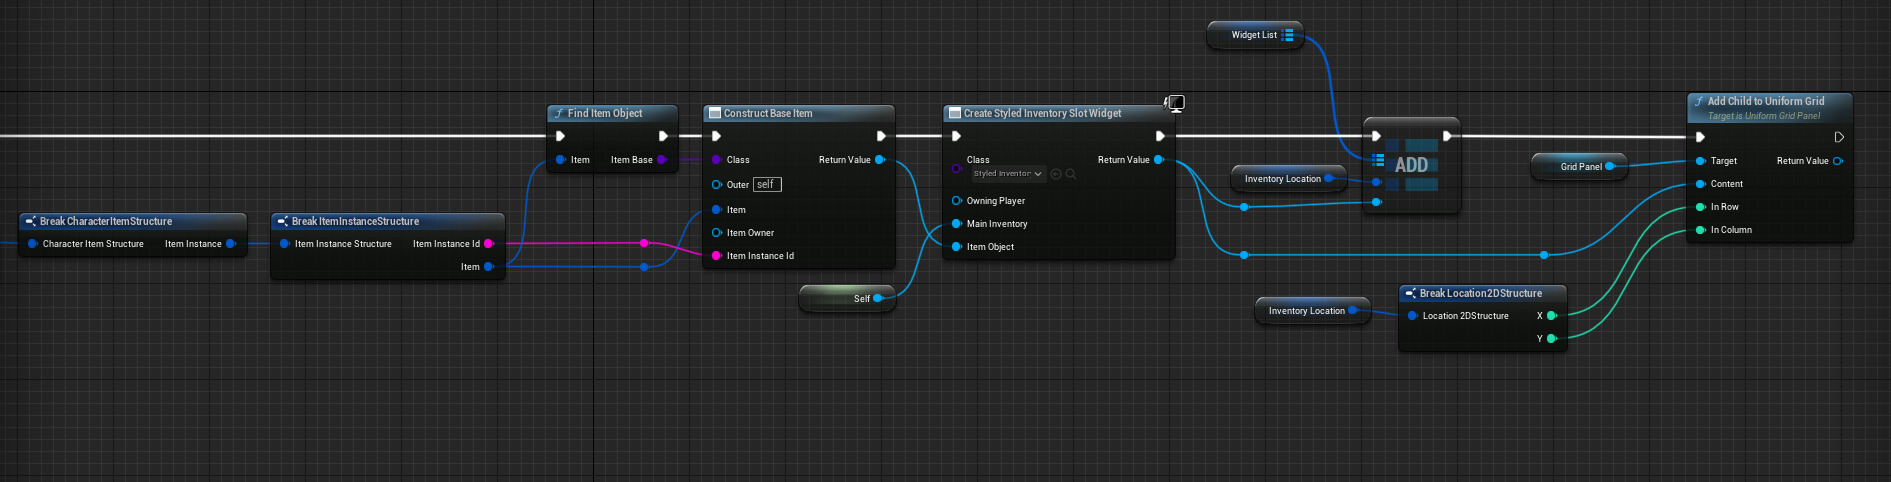
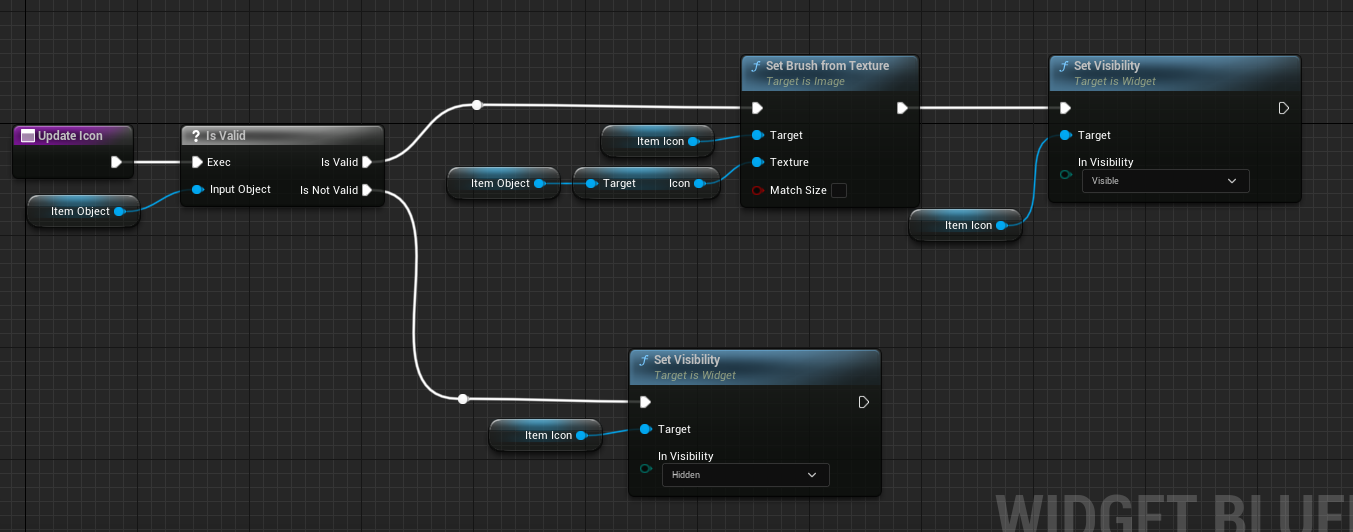
Inside the inventory slot, I draw the icon using the item object.
Handle equip item
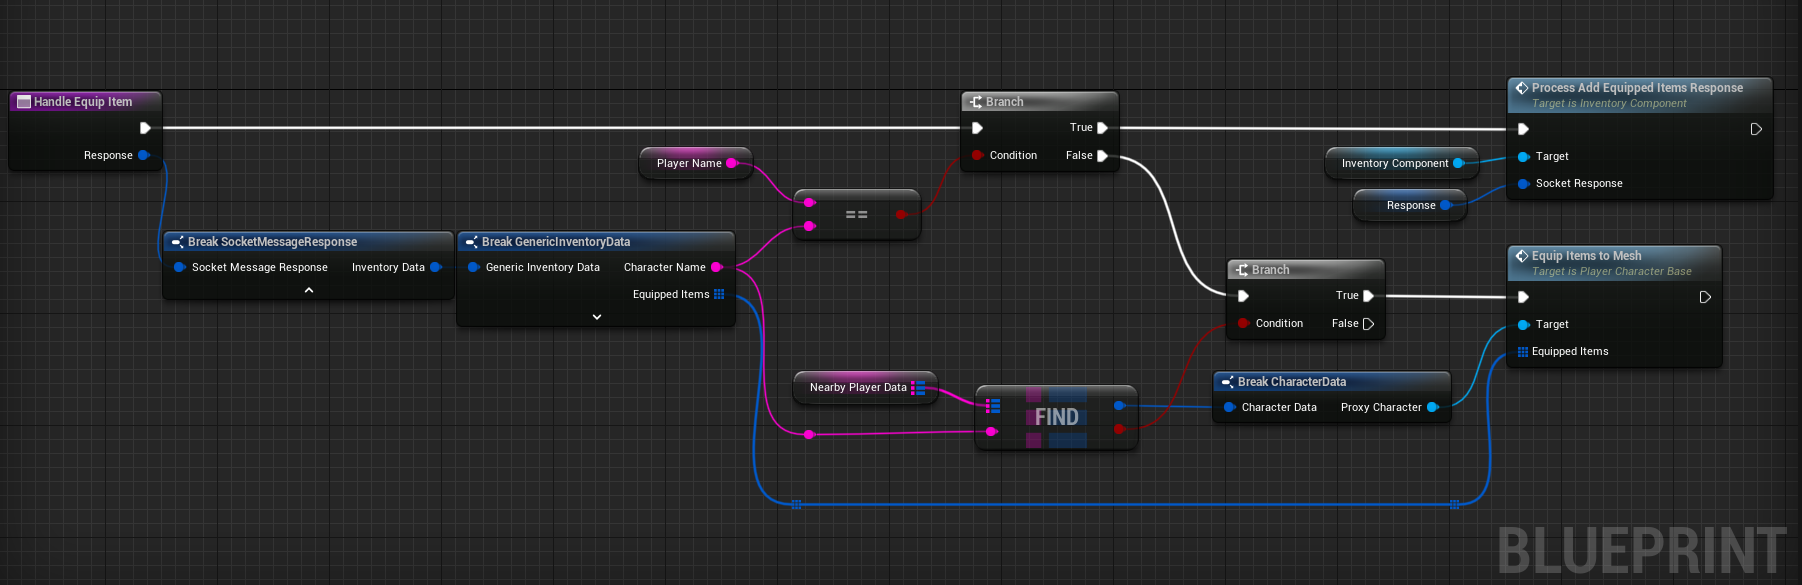
Here is how I process a message from the server which tells me to equip an item.
You can see that I can be equipping items either on my own character or nearby characters – the base character reference is the same which allows us to re-use the functionality.
This equip item to mesh function is particularly useful like this because its referencing my player base blueprint. This means that I can re-use this on:
- my player character
- player proxies (nearby characters)
- inventory widget representing my character
When the player is equipping item, there’s several other things to process:
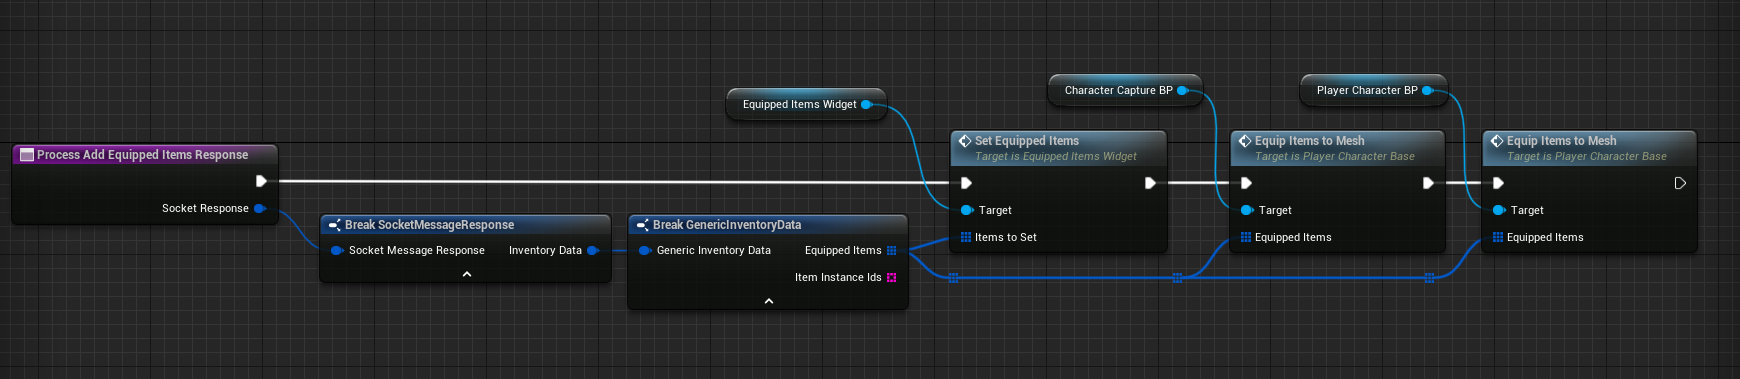
here you can see I am updating my equipped items widget, I modify the appearance of my Character Capture BP and my Player Character BP. There may be other things you may do, such as actioning the stats, but I do that through separate call.
Un equip items
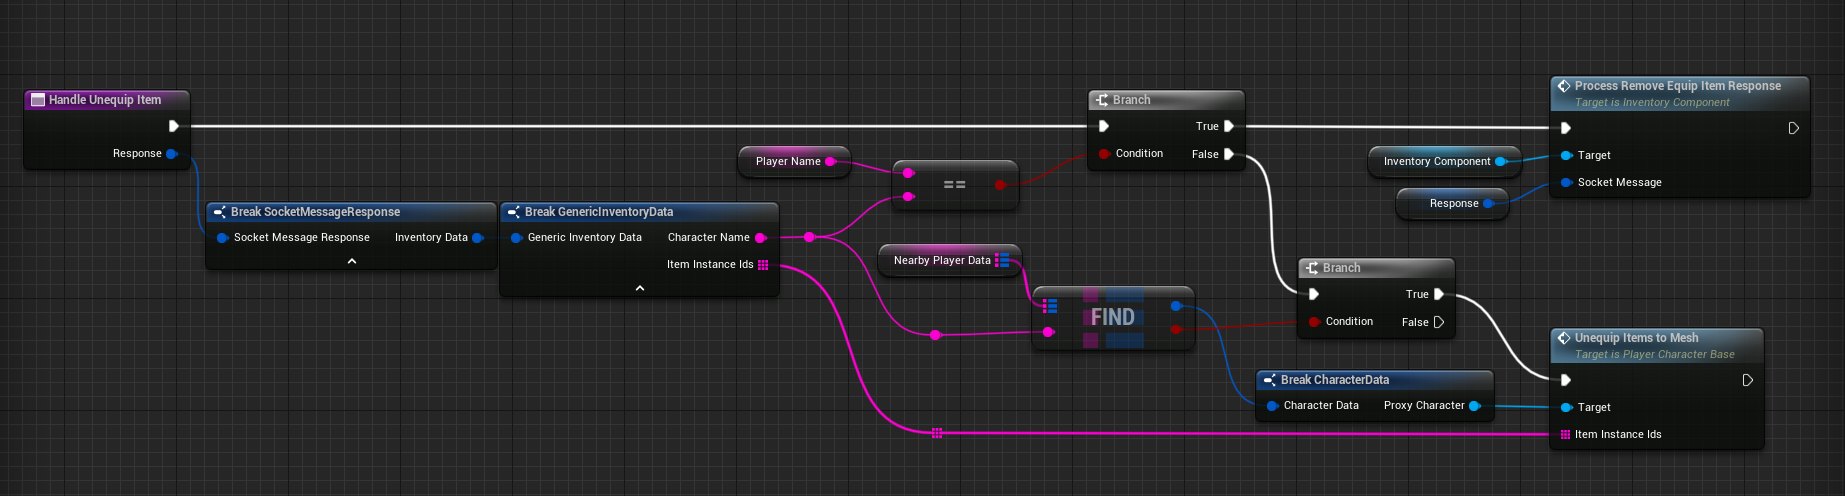
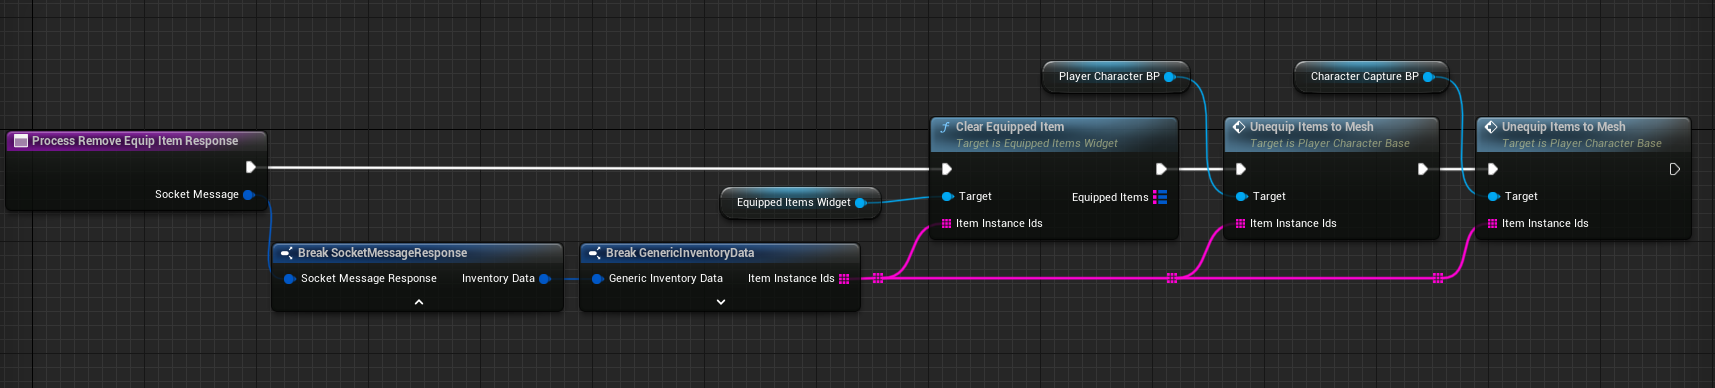
The flow of un-equipping items is very similarto equipping them.
First we check whether the request is for our player or nearby player. If its for our player, we update the equip item widget (clearing it), we request our player BP to unequip the item, using the item itself to figure it out. This will be a lot more important when dealing with armor as you will see why soon.
Bear in mind, to get this to work, I had to add the equipped items variable to my player base component (shared by proxy characters and character capture bp).
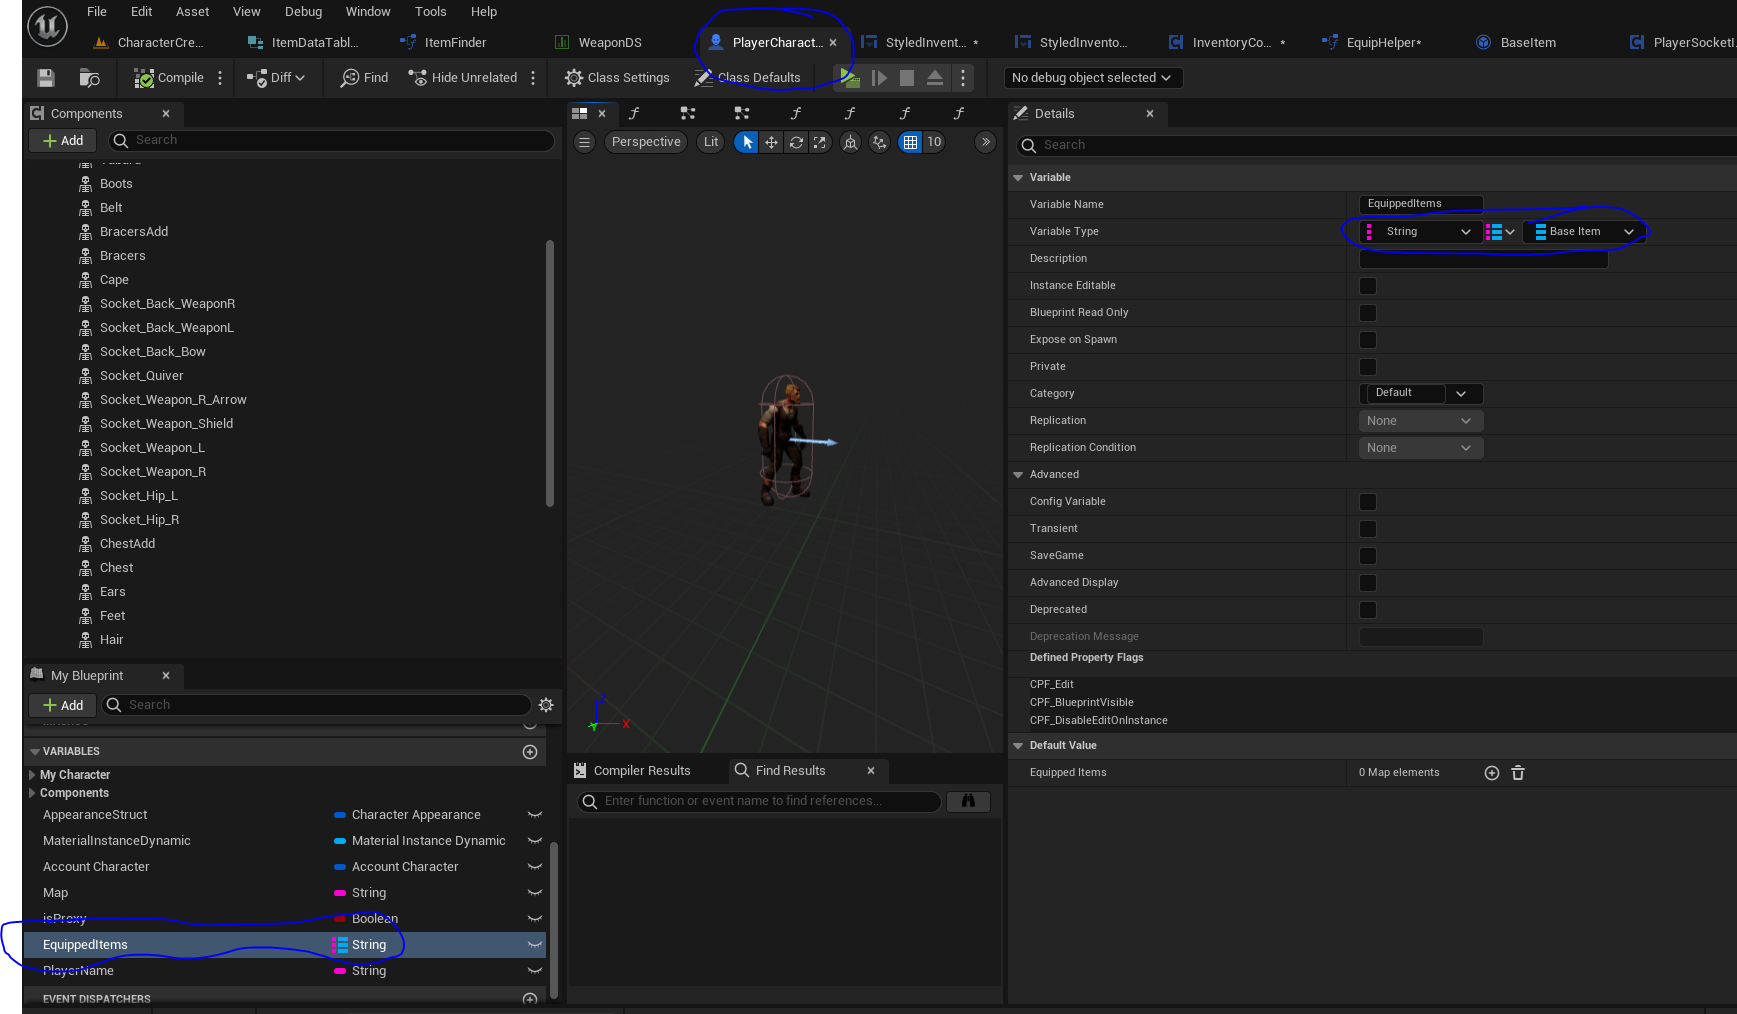
I was originally planning to keep it inside the inventory component, but some blueprints, such as character capture bp didn’t require that context.
Armor items
Both, weapons and armor extend the Base Item class.
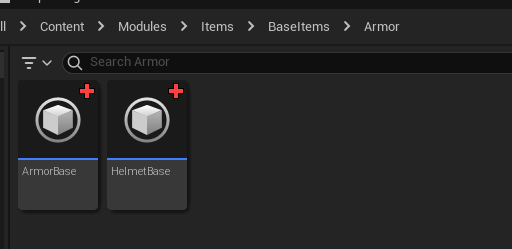
For now we will just look at two base classes – Armor base and Helmet base.
Armor unlike weapons have quite significant data to weapons – also a bit more complicated when applying to skeletal meshes.
The ‘interface’ however is quite similar – armor similar to weapons will have ‘equip or use’ and ‘unequip’ functions .
One large complexity is that armor can look differently depending on factors such as player race and player gender.
For example, let’s say you have Plate Armor.
If your character is a:
- human male
- human female
- orc male
- orc female
The armor should have different skeletal meshes and materials for each combination.
That’s what the additional variables are targeting in this Armor Base class.
Race gender pair struct:
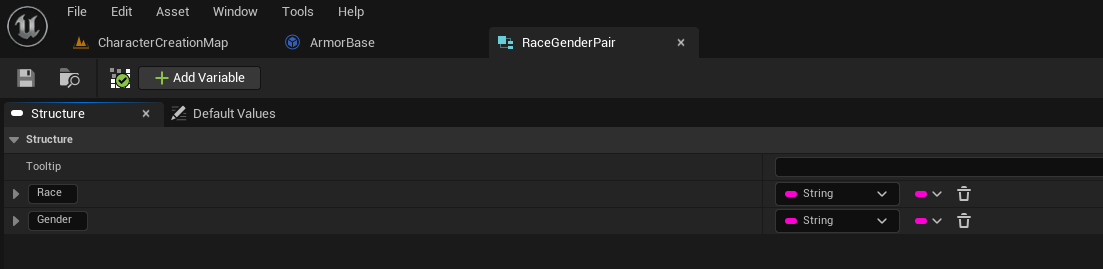
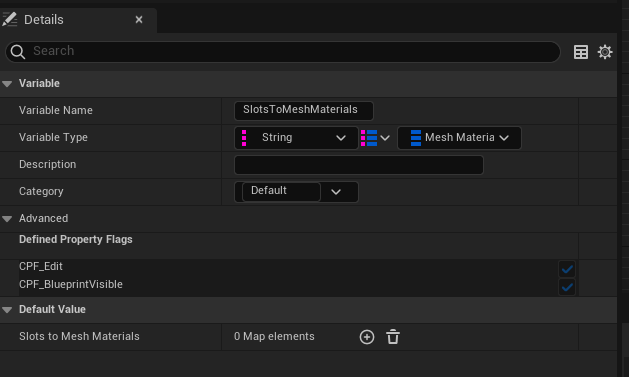
Mesh material struct:
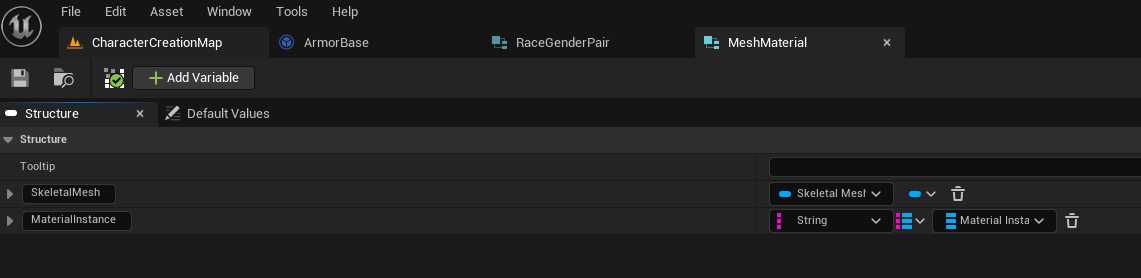
Note that skeletal meshes can have multiple materials assigned to it, each one assigned with a key – that’s why Material Instance is a map here.
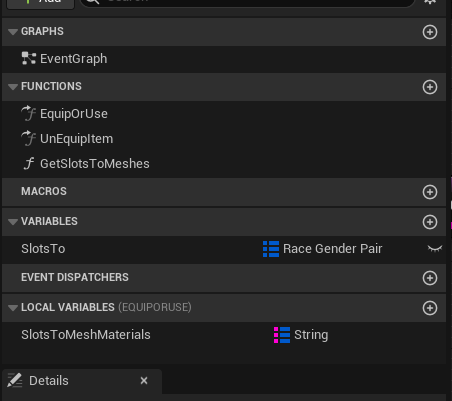
Armor Base Equip
We’ll continue exploring the functionality of Armor Base.
Like weapons, we have Equip or Use function on armor – this is refactored across all armor pieces.
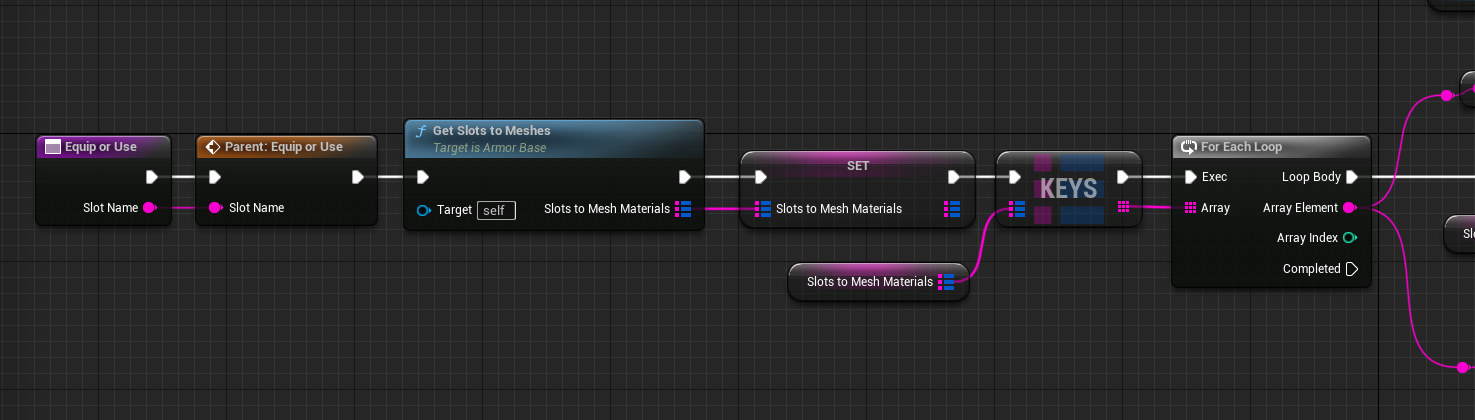
The slots to mesh materials are not defined in this base class – they will be overridden by instances of item classes themselves.
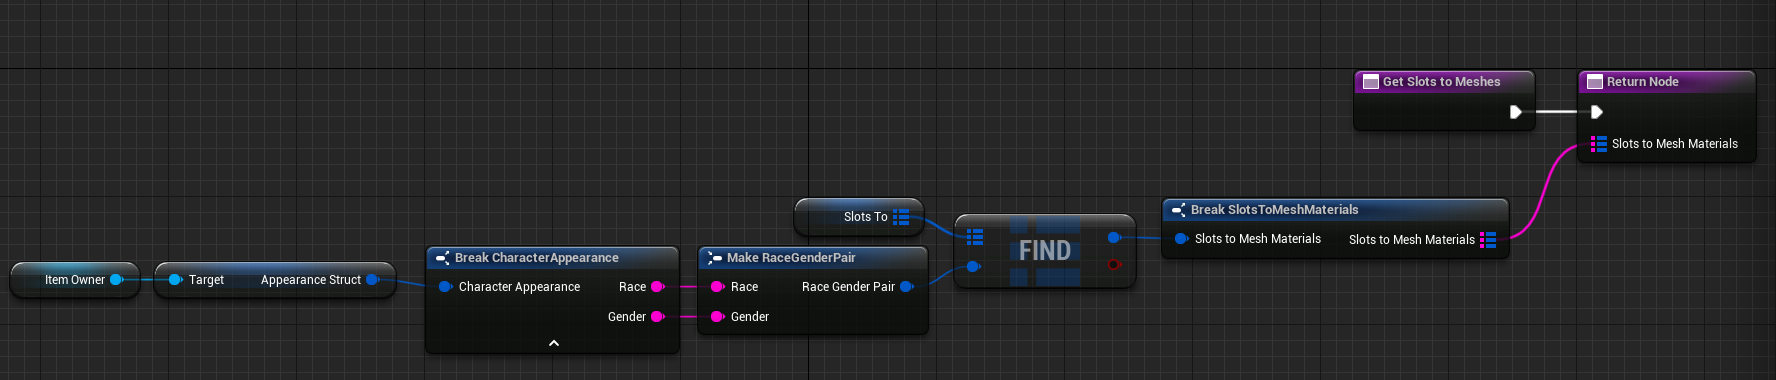
When you assign an item to a character, you update the item owner reference. So the item knows who it belongs to, and with that info, it knows whether its a a human, orc, male or female.
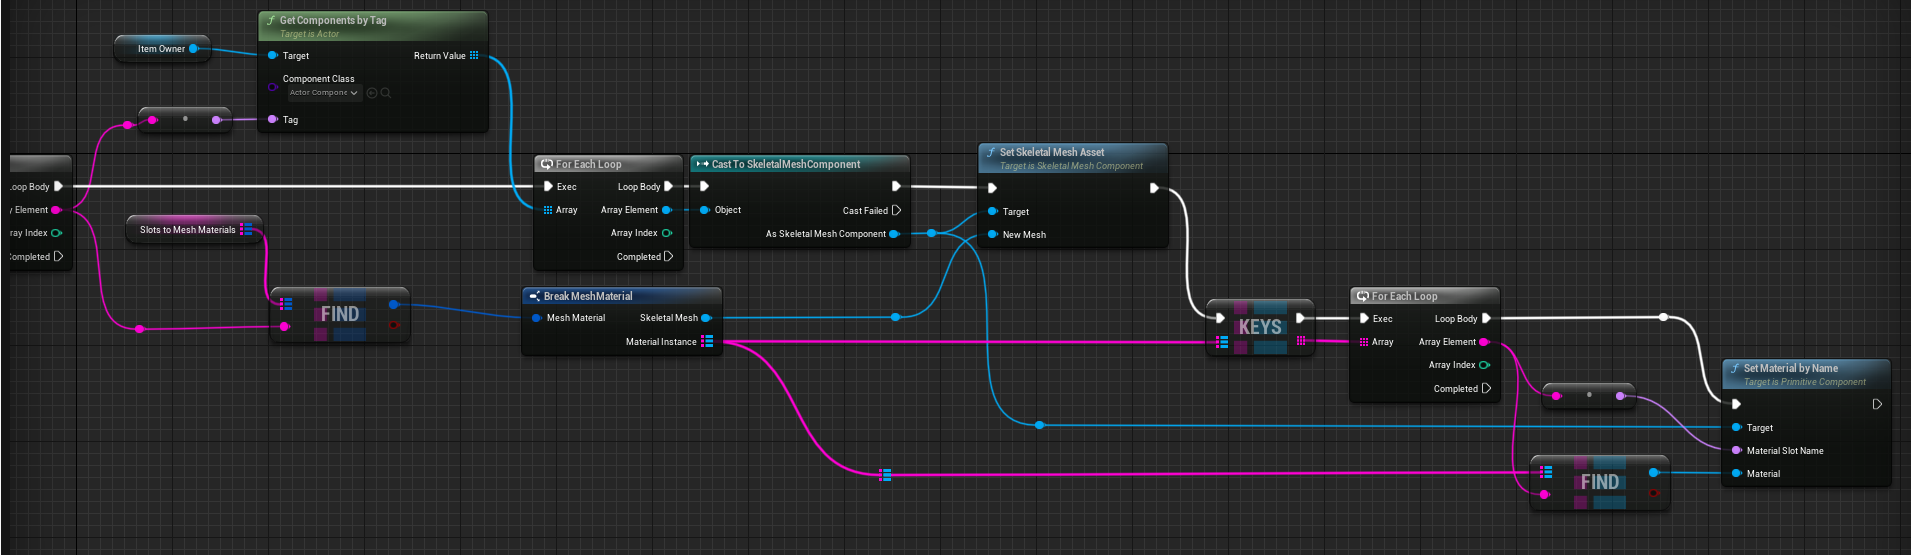
The slots to mesh materials links the skeletal mesh components (key) to new skeletal meshes and materials that will need to be used.
Note that one item can modify more than one component. Gloves for example can modify Hands and HandsAdd component.
Helmet can also modify more than one component – hair and facial hair. These are specific to helmet though, therefore it will be handled in the helm base class.
Helmet Base
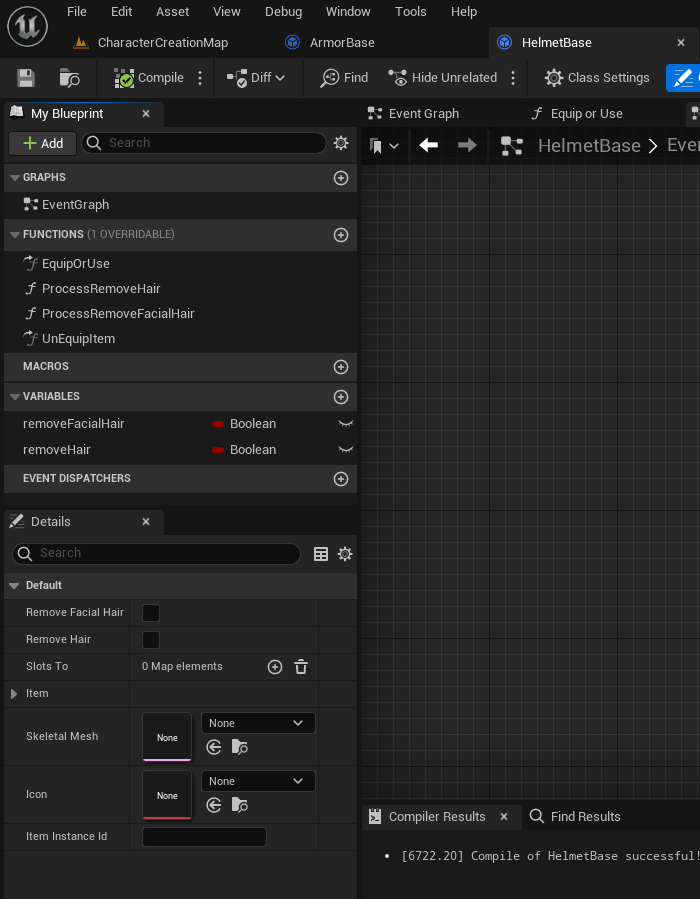
As you can see, we’re navigating further into the class tree and the complexity is getting more fine-grained.
Helmets for example have additional requirements. Some helmets may require to remove facial hair or head hair to look properly.
Therefore we have two additional booleans for helmets, to specify whether a particular helm requires us to remove the hair meshes when equipped.
So let’s explore what happens when we equip a helm.
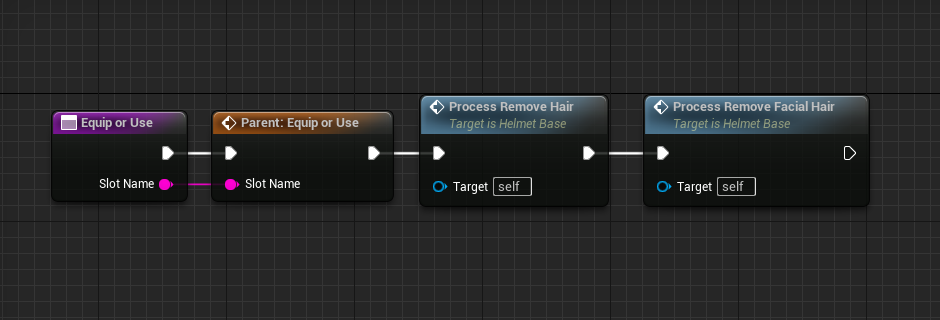
We call the parent classes (armor base) which applies the skeletal meshes and materials to required components.
Helmets require us to process hair so that’s what you can see us do next.
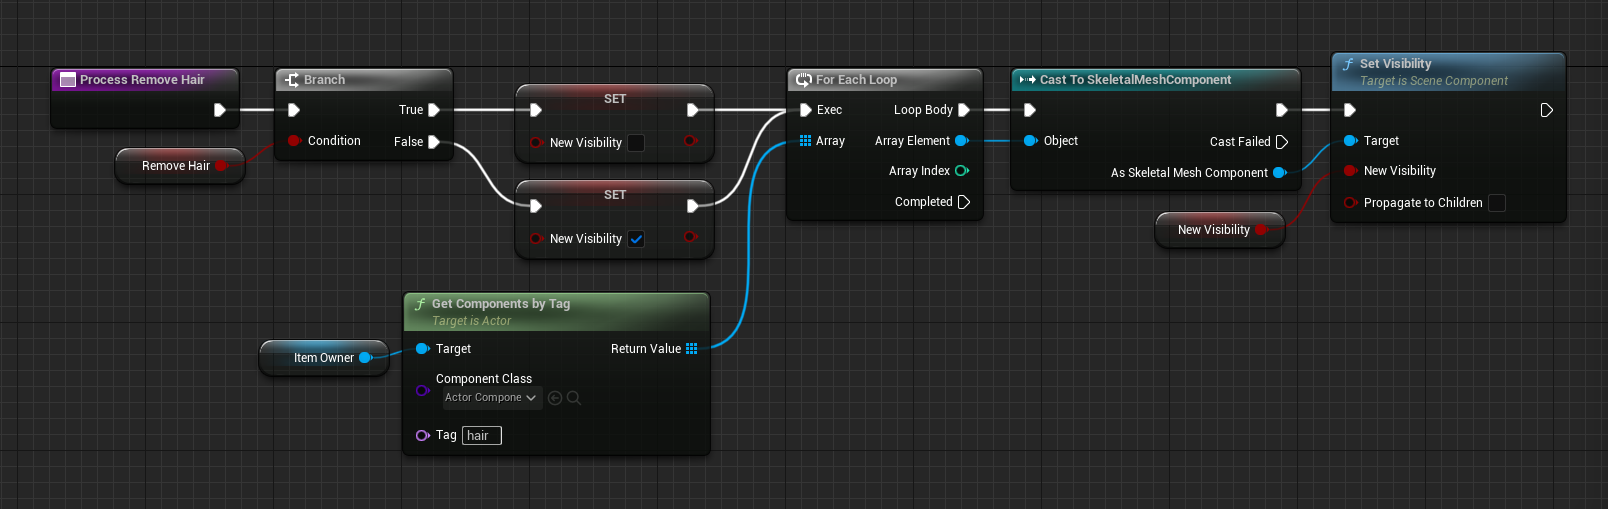

The two functions are very similar, so I will look to refactor it in near future.
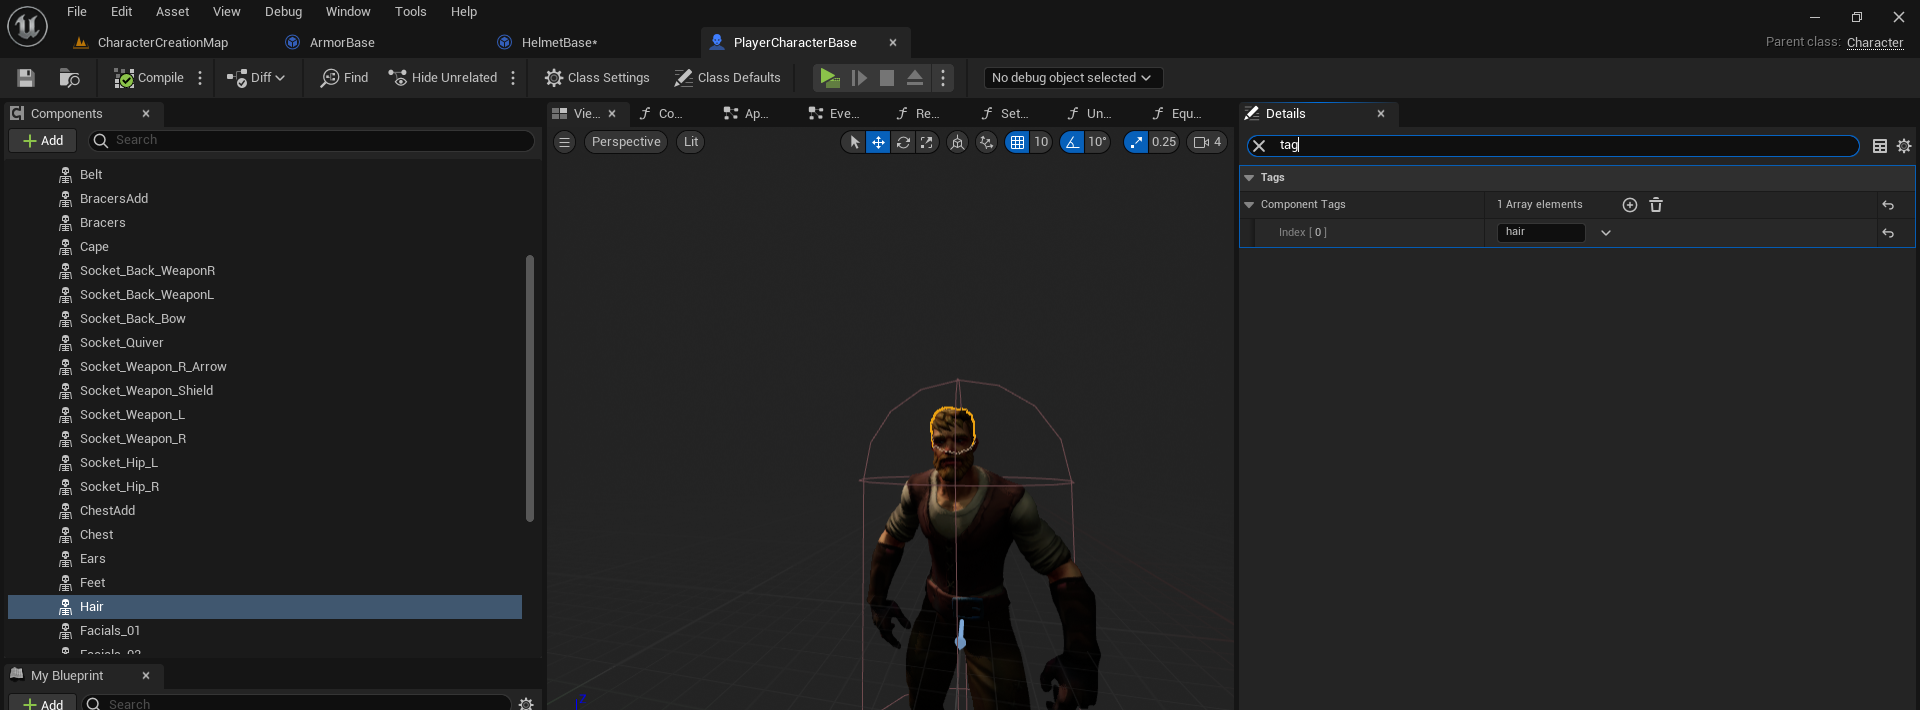
Again, we find the relevant components by using the tags on player:
Now that we’ve explored the base armor and base helmet, let’s check what a helmet instance can look like.
Helm armor example item
Let’s have a look at an example helmet item object.
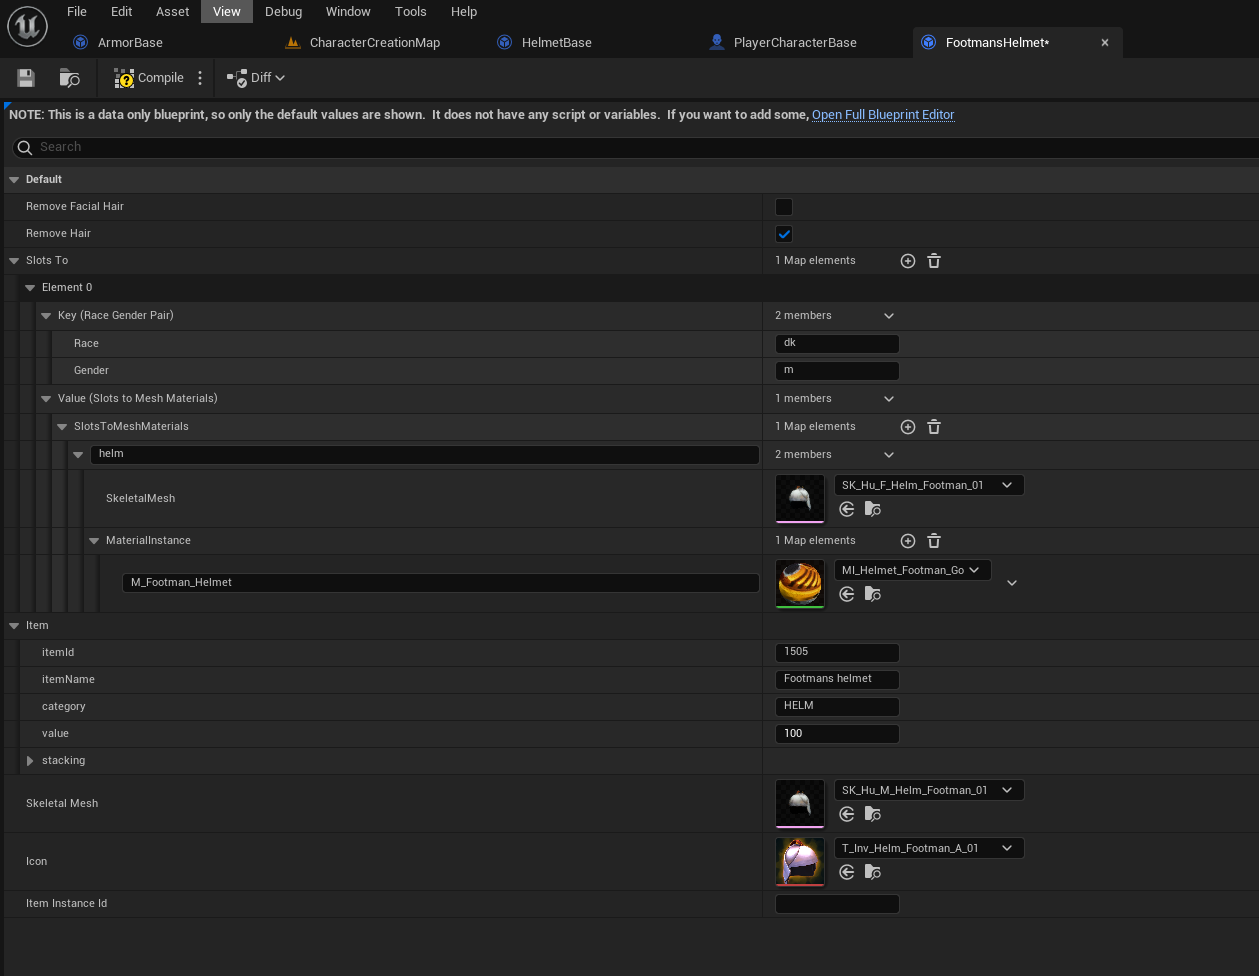
First, we can specify whether the helm should remove the facial hair or head hair. In this case, the facial hair can remain, but we need to remove the head hair.
Next, we specify the skeletal meshes and materials for each race gender combination.
If I have 1 race and 2 genders, there would be 2 entries here.
Item structure will contain basic item data, like name, description, etc.
Skeletal Mesh – I will modify this to represent Dropped Item Mesh. Perhaps like a brown bag or something for armor. It will differ based on item type, e.g. armor, potion, weapon, etc.
Icon is used to represent item inside the inventory.
Item instance ID is unique identifier for item which will be used to communicate with server.
NOTE: You may wish to assign the variables in the blueprint part because this is essentially overriding DEFAULT constructor – this can be dangerous.
If you modify the parent definitions for the variables, it can propagate to child classes and it may delete you data, which can be a lot of lost work!
Assigning them in your blueprints can prevent that.
Finding material instance name
Under Slots to materials we have a key which is the name for material instance used in skeletal mesh. This is not a random name.
You can find it by opening up your skeletal mesh and looking at material slots.
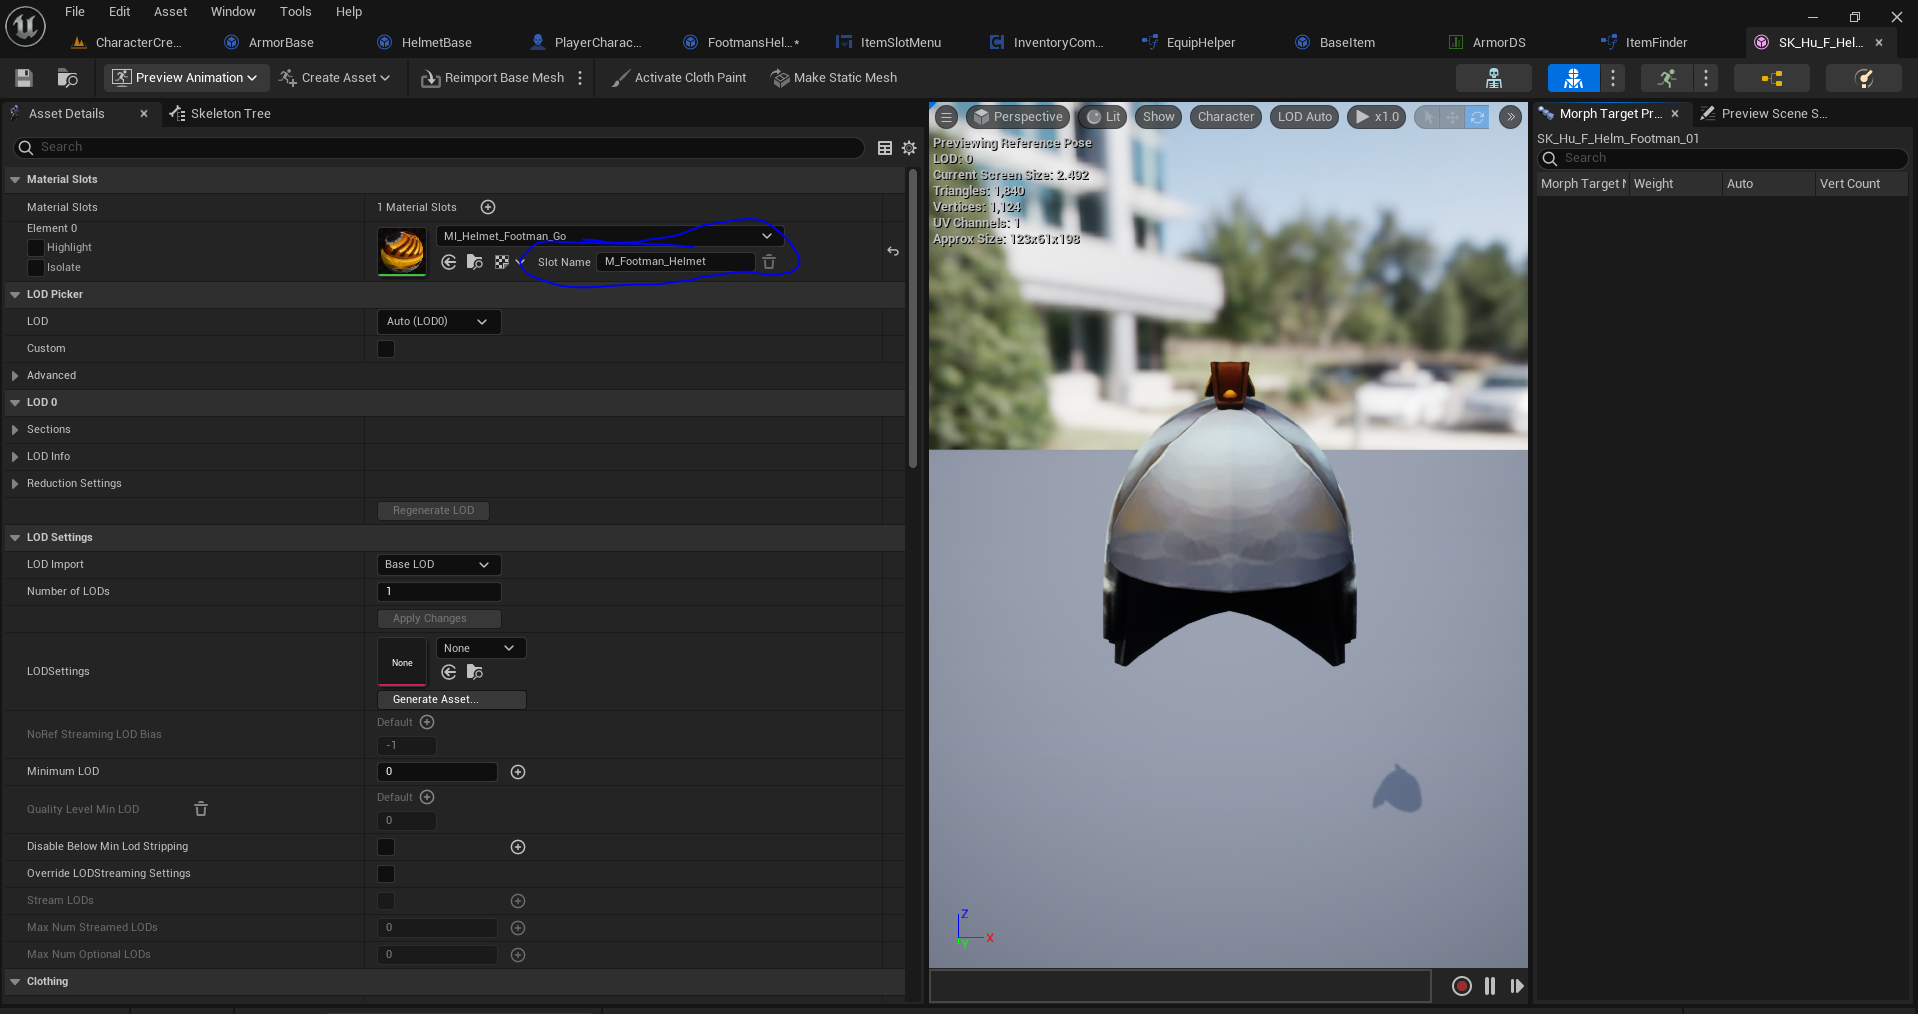
Each skeletal mesh COULD have multiple material slots. Therefore we need to accommodate for this.
Equipping armor
Equipping ALL items follows the same interface. We checked earlier about equipping weapons – we follow the same code to equip armor. This is effectively our polymorphism that we achieve through inheritance.
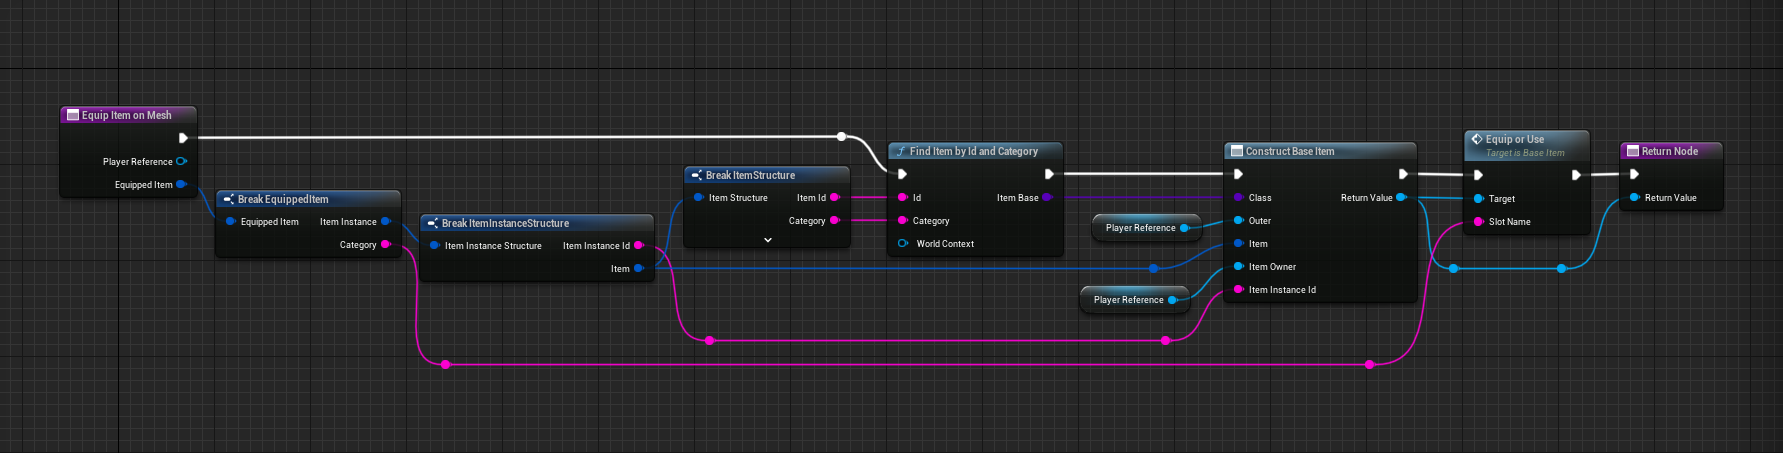
remember this blueprint from when we looked at equipping weapons?

It ultimately gets the player reference and constructs the Item object.
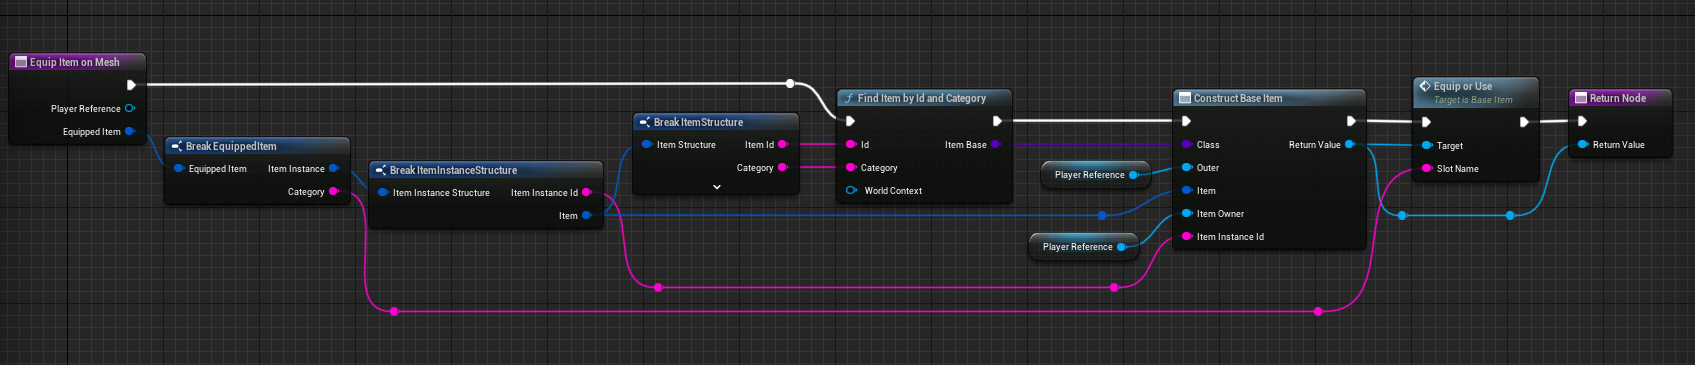
It then asks the item object to process the equipping of itself. Note the inventory component does not know how to equip the item – it would be too much logic to handle here.
How do we find the armor item? The same way that we find weapon item (check again the flow above if you’ve missed it).

We create a data table for armors that are available.
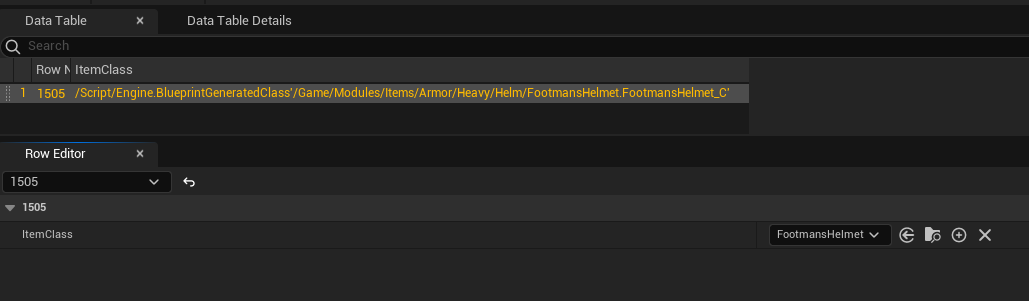
As you can see, I have an ID to my actual armor class.
As you can see, I’ve split weapons from armor. You can further separate through category. E.g. find helmets, bracers, boots etc. This will help keep the data tables a bit cleaner.
This is the same screenshot we saw when looking at weapon implementation.
What’s next?
We follow the same strategy to create the rest of the items, gloves, boots, chest, etc.
This is essentially a framework for implementing the equipping and using items on characters.
This part is still work in progress and you will find it grow and change with future iterations, but the general flow should remain consistent.