46 – How to integrate equipping items and stats system in UE using Websockets
In the previous post we briefly introduced the Stats system and how we will equip items using our Java server.
In this post we will explore how to integrate that server code with our Unreal Engine client.
The Java server code can be found on Github here.
Scope of this post includes:
- Integrate equip item API
- Process equip item by putting it in equipped items slot
- Integrate un-equip item API
- Integrate stats API
- Process current and max HP into action bar
This is essentially a continuation of the inventory system we were building in this post.
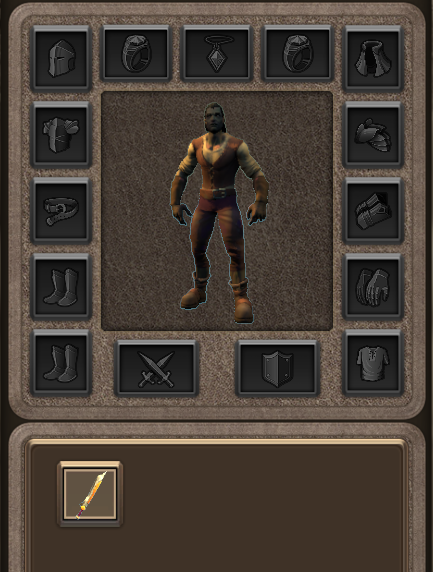
Equipping item
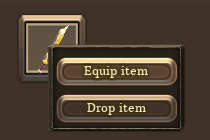
We want to be able to equip an item by either double clicking the item inside the inventory slot, or right clicking the item and selecting equip.
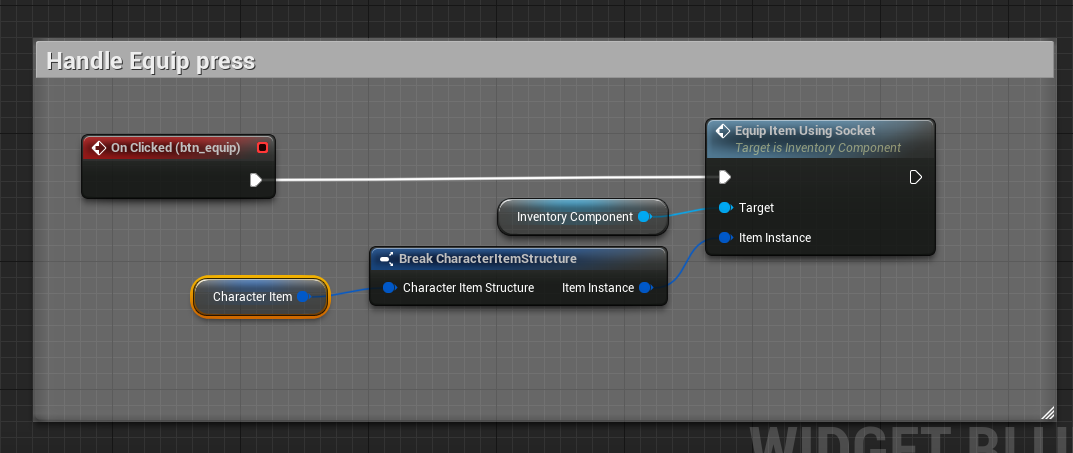
Naturally, I extend my InventoryComponent to include the function to handle equip item.
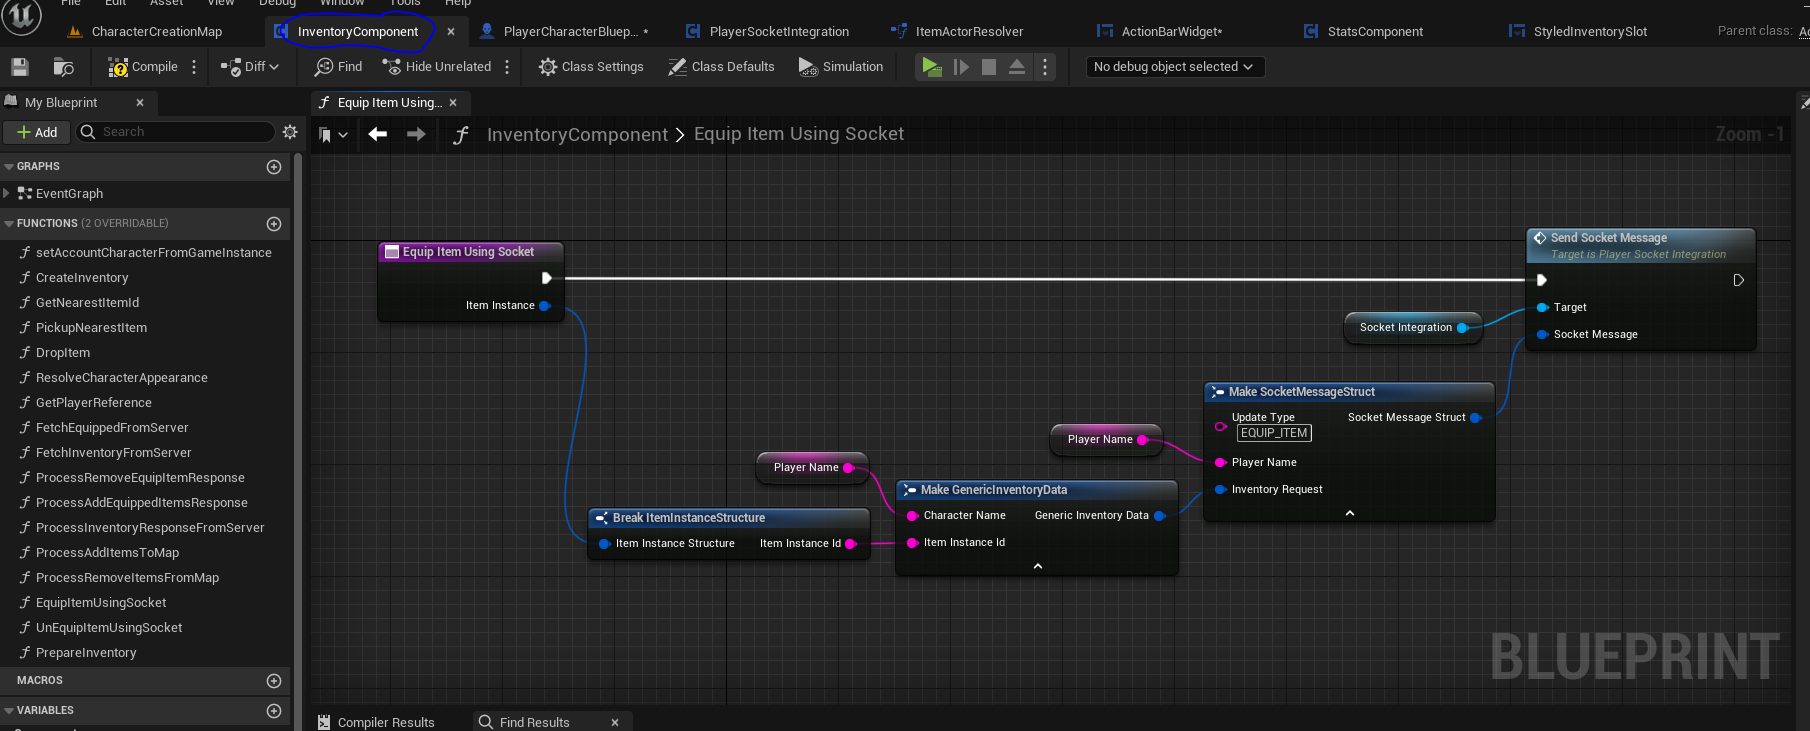
In order to equip the item, all I need to do is create a message to push to my Websocket, which sends the request to the server.
In order to equip an item, I simply need the PlayerName and the Item Instance ID from the item in the inventory.
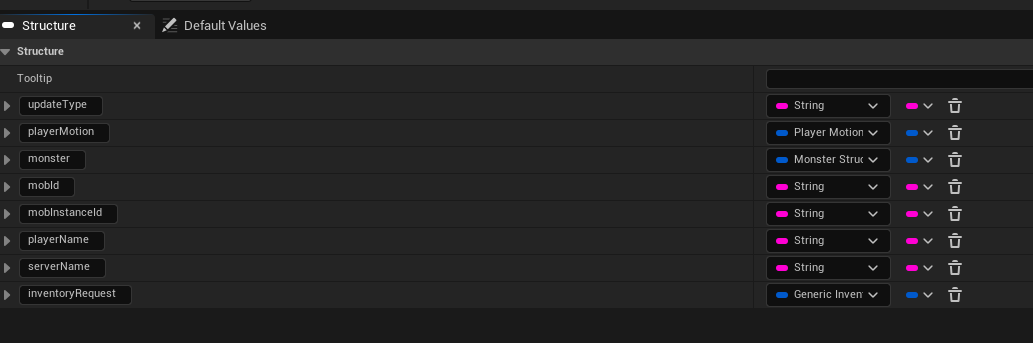
This is populated inside the GenericInventoryData which is attached to SocketMessageStruct.
For reference, the Generic Inventory Data structure contains all possible data fields that may be required by the inventory component:
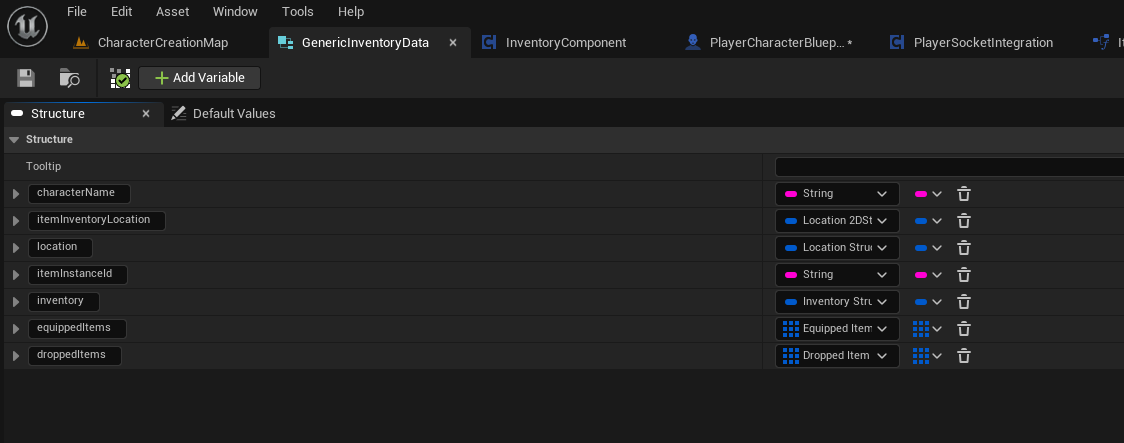
Socket Message Structure also has any possible combination of fields that we can expect to send through our Websocket:
Equip item response
As you can see, the request alone does not change anything in the inventory. We wait for a response from the server for us to process. This is a combination of:
- inventory update (removing the item from inventory)
- equip item update (adding item to equip slot)
- stats update – if the item contained any stat updates, they will come too
All of these updates happen independently, which makes it easier for us to process.
We already explored inventory update as part of this post (making inventory reactive).
So we will check how we process the equipped items.
First, let’s check what the model for Equipped Item looks like:
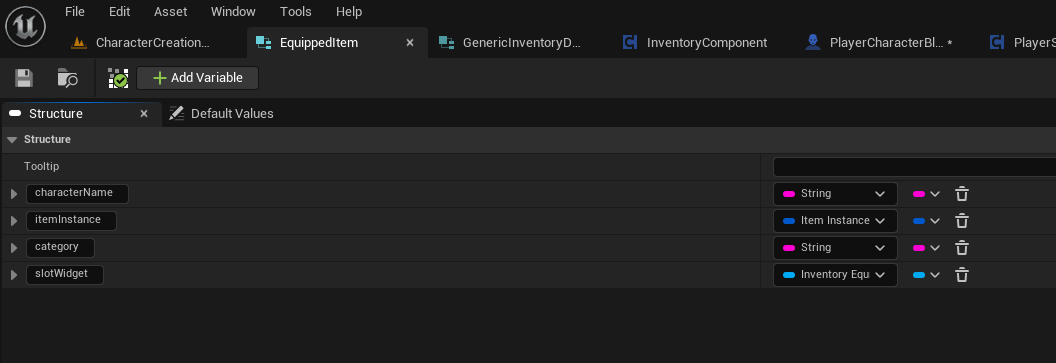
This should reflect the data structure from the server which is currently:
public abstract class EquippedItems {
…

String characterName;
ItemInstance itemInstance;
String category;
}
We looked briefly into the Java models in previous post if you’re interested.
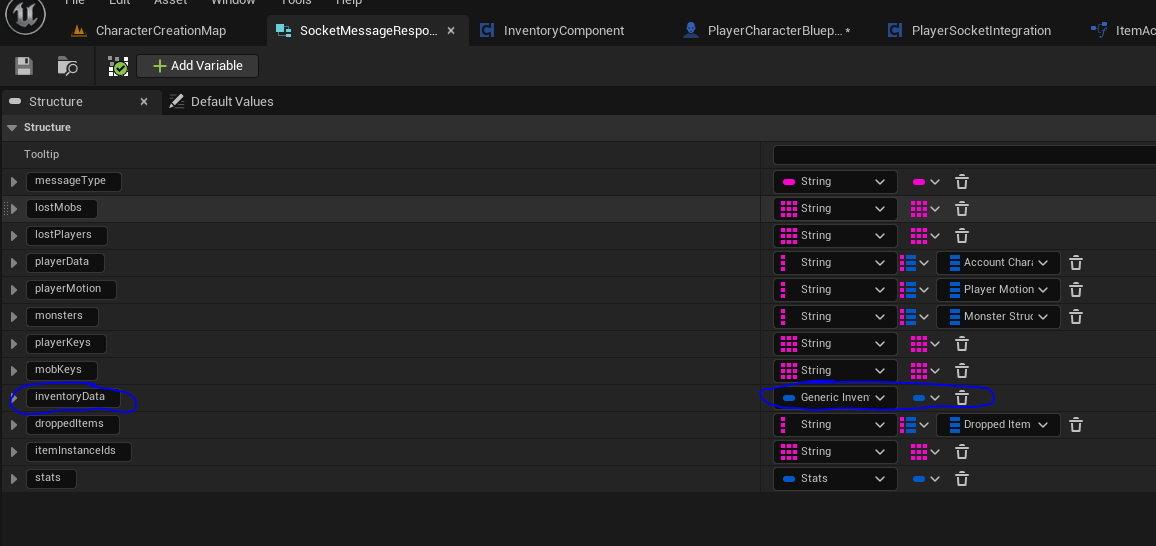
We want to integrate this into the Websocket response and it will be part of Generic Inventory Data.
You may have noticed it in earlier screenshot, but here it is highlighted:

As you can see, the generic inventory data contains the equipped items as an array.
The Socket Message Response structure contains the inventory data, which links it all together:
Processing equip response
We had a look at the response object now and we can see it integrates the inventory update data, including the equipped items.
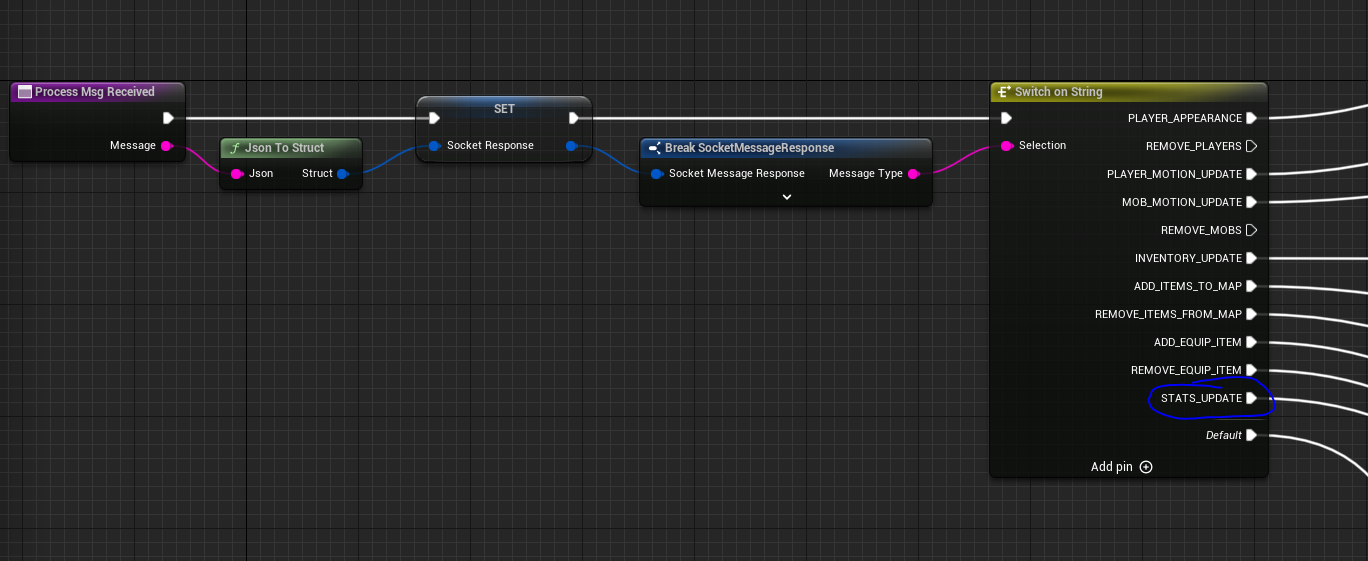
So from our PlayerSocketIntegration component, which is the component managing all communications via Websocket, we add two new message types to process:
- ADD_EQUIP_ITEM
- REMOVE_EQUIP_ITEM
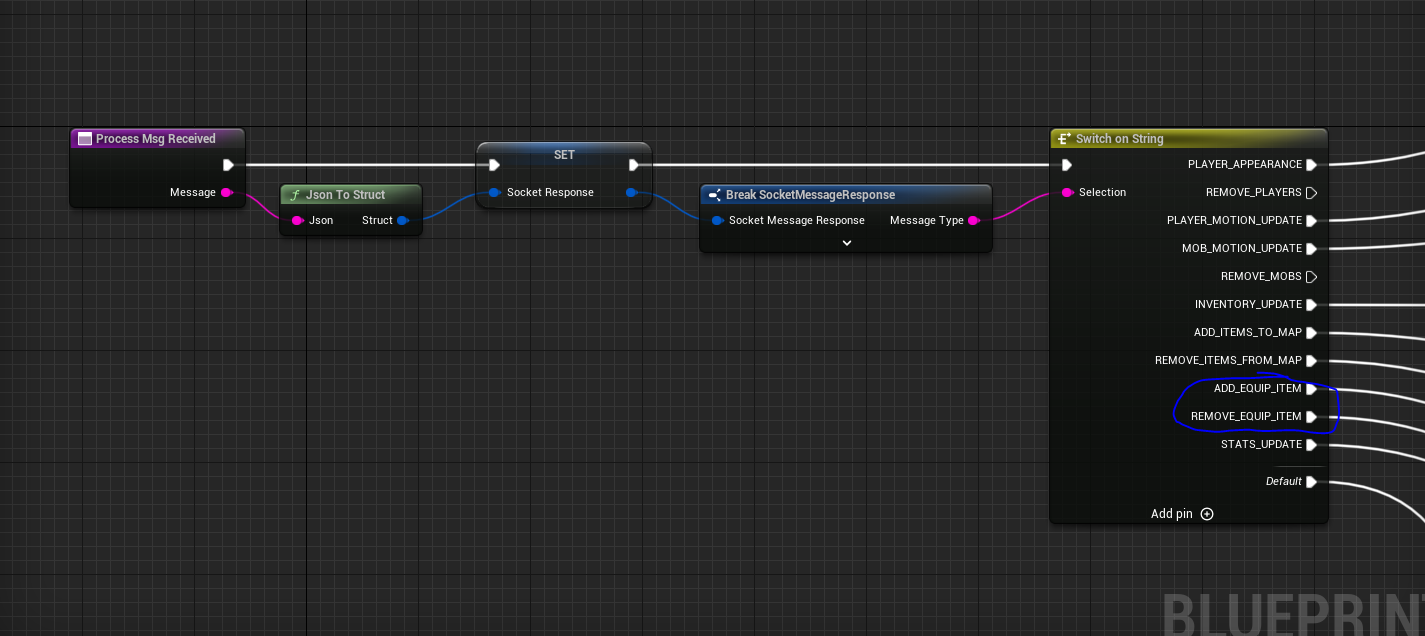
The actual processing would happen part of Inventory Component.
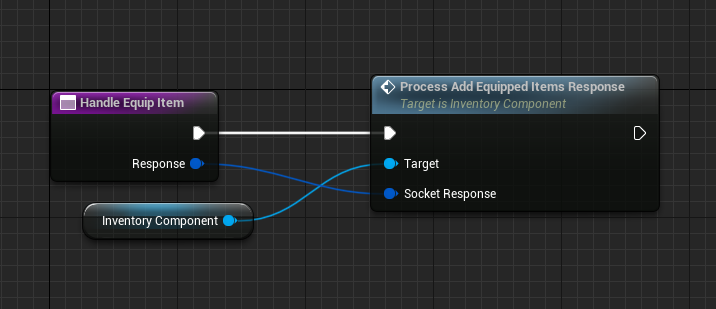
Let’s begin with the Equip function.
The message response contains a list of NEW equipped items. Bear in mind its giving us a update rather than the state. Which means there’s no removal that’s needed to be done in this request, only addition of items.
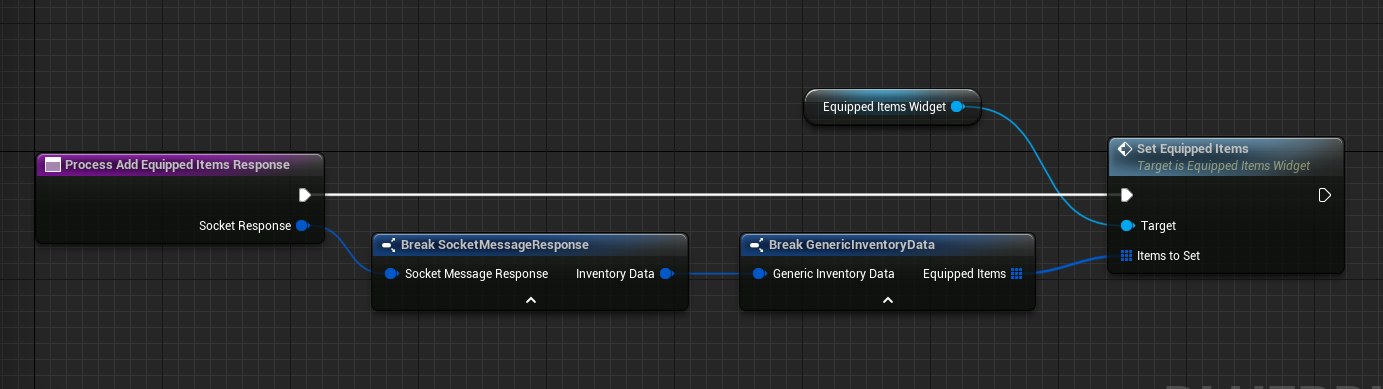
If you’re interested how I set the equipped items, here it is:
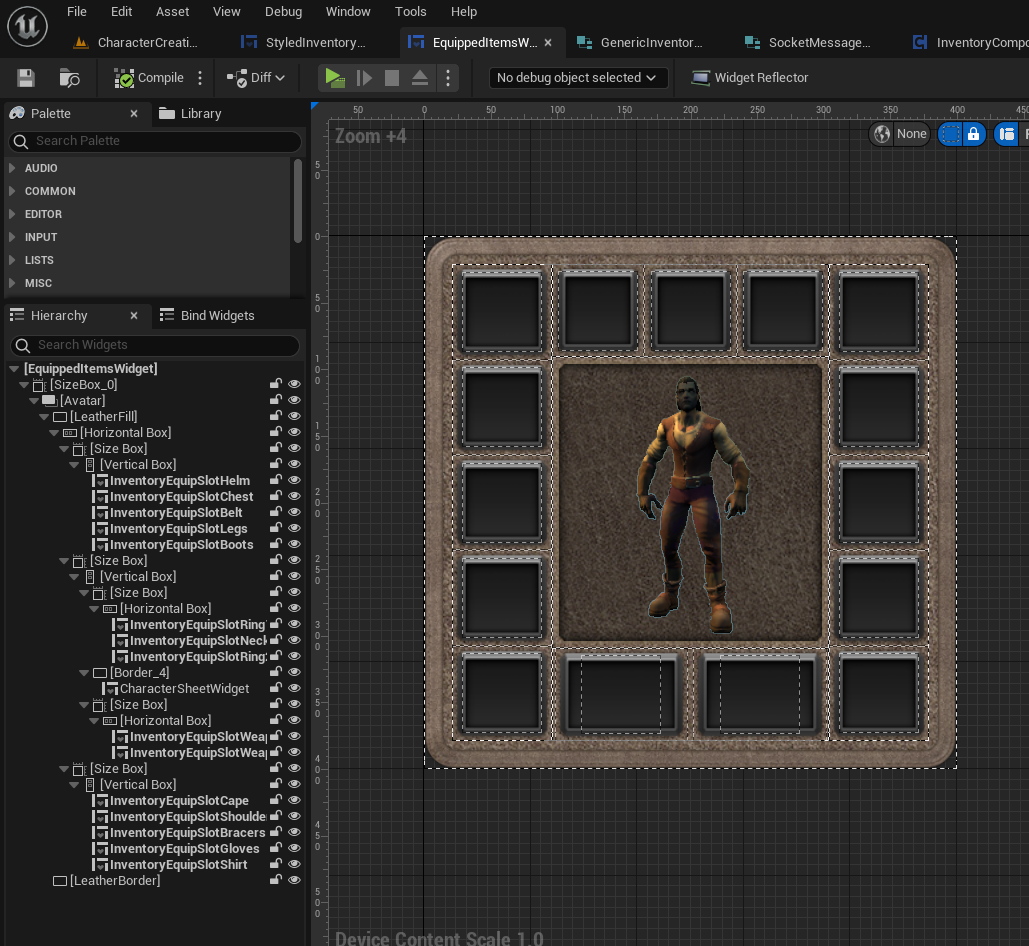
Equipped Items Widget:
The main function to set the equipped items:
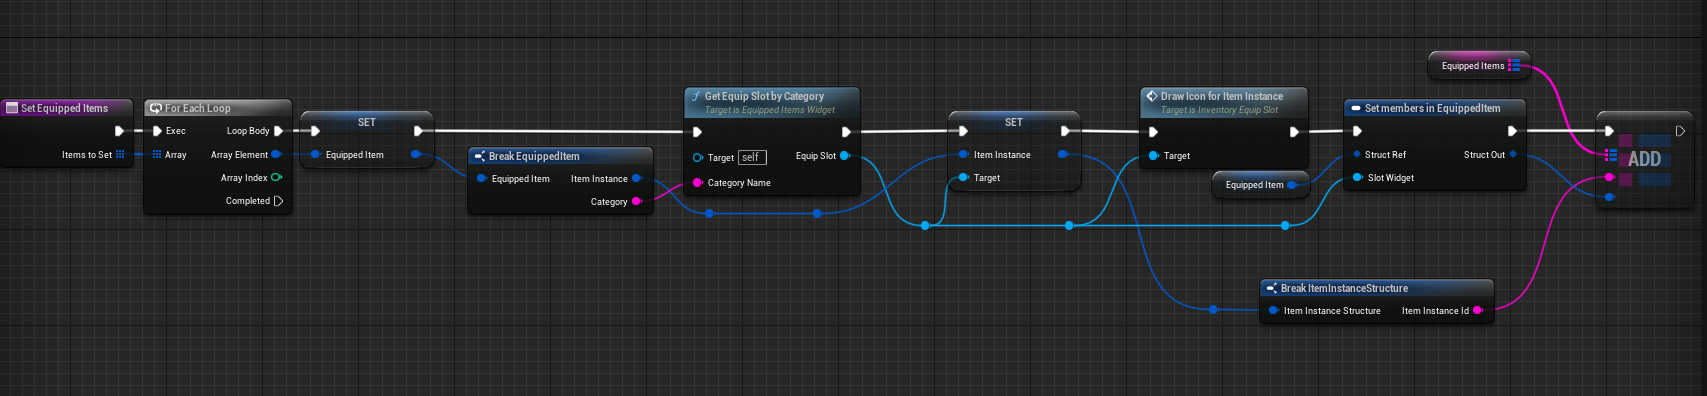
From the equipped items structure, we’re using the category to determine which slot the item goes to. Draw item instance determines what icon to use for the slot based on item ID.
The last part is important, which is populating Map of Equipped Items using the Item Instance ID as the key. This is important because when we unequip the item, we will find which item / equip slot widget we need to clear using this entry.
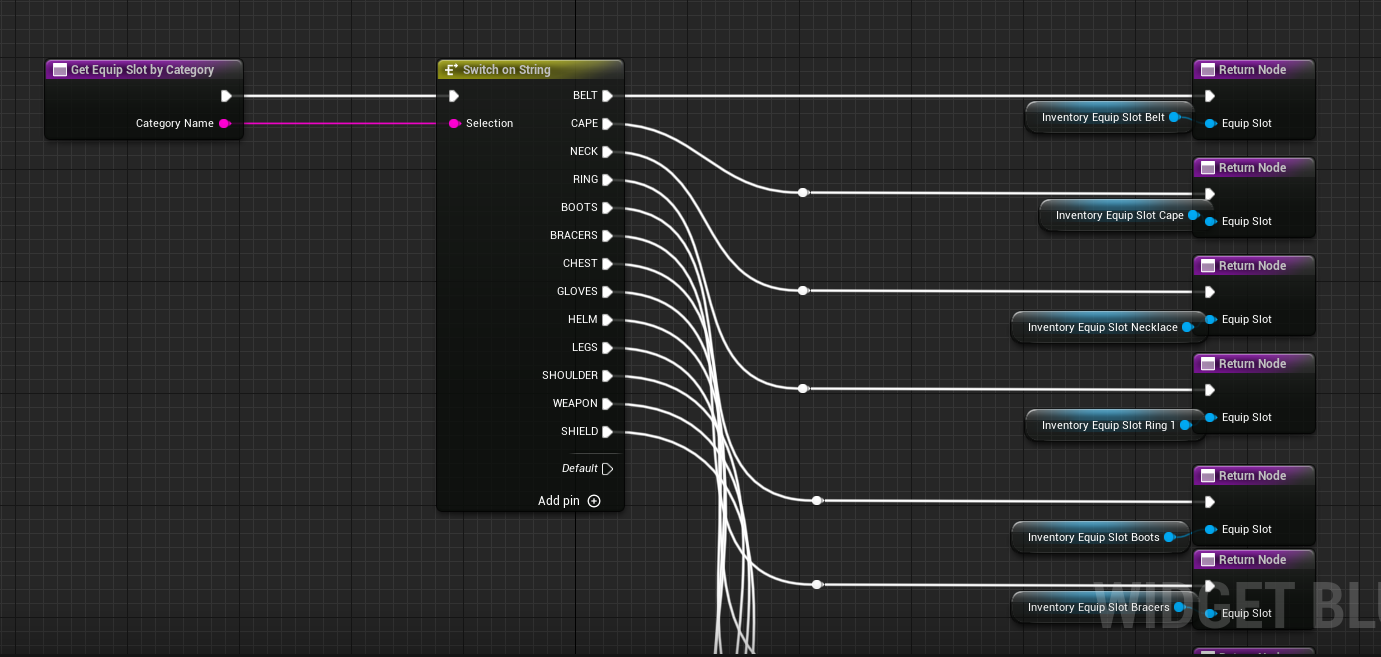
The Get Equip Slot by Category I may change in near future, but in meantime this is how its configured:
Linking the request to widgets
So part of our inventory slot widget:
I’ve got a function to equip the item on double click
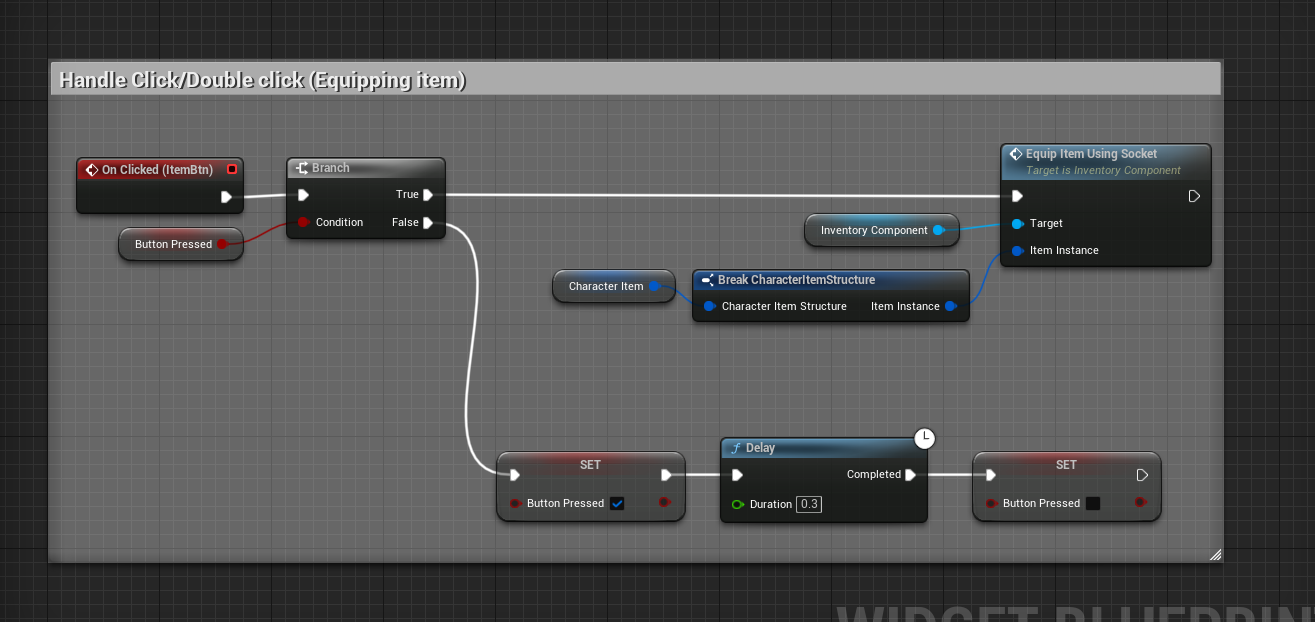
The slot itself has the reference of the character item, which includes the item instance – we simply need the Item Instance ID from that in order to equip the item.
And likewise, from the little menu:
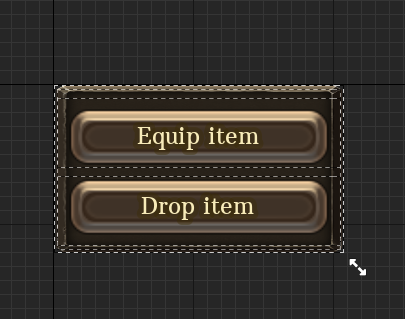
When we click the Equip Item button, we simply get our inventory component (extracted from Game Instance) and call the created function.
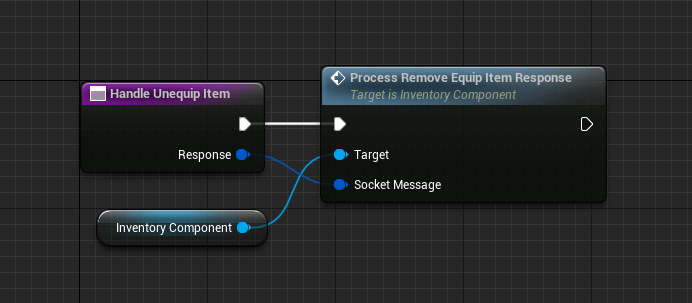
Un-equipping items
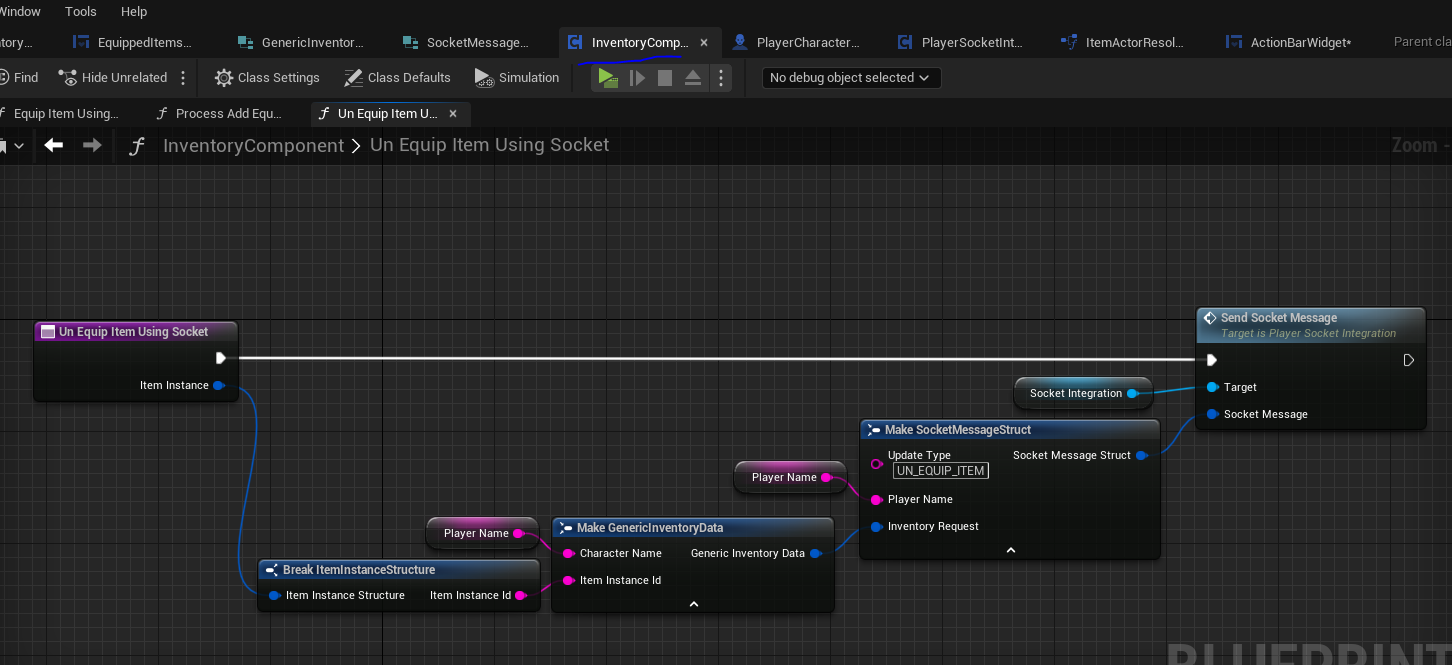
In a very similar fashion to equipping the item, in order to un-equip an item, all we need to do is make a Websocket request, specifying the update type, player name and the item instance id for the item that we want to un-equip.
This is part of the inventory component that we attach to the player.
We call this function by double clicking the equipped item – I will likely add other means of un-equipping items in near future.
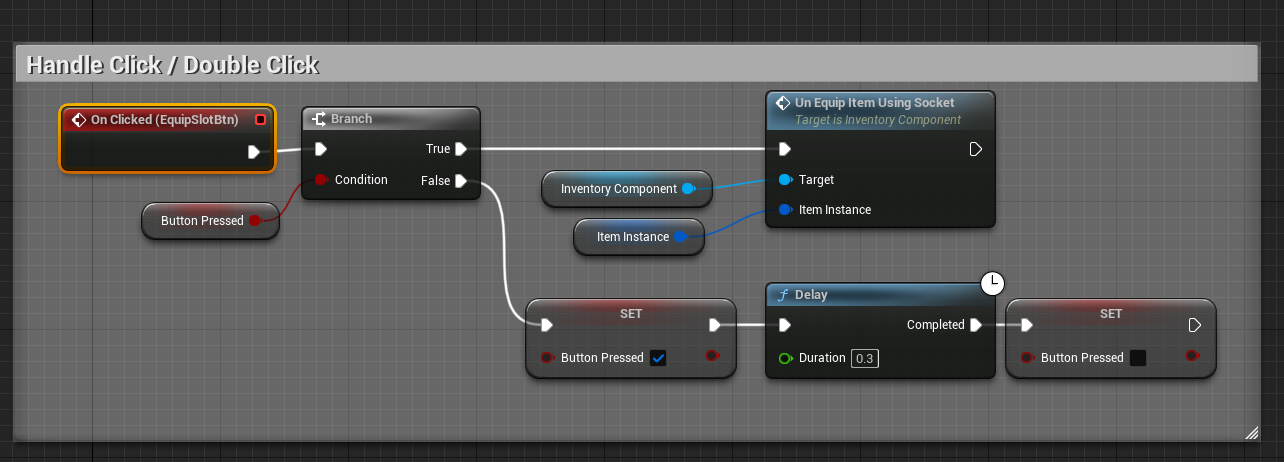
When we double click the equip item slot and it has the item (should do a valid check!) we call the un-equip item using websocket.
Processing un-equip item response
The responses are received in the Player Socket Integration component and the response message will specify REMOVE_EQUIP_ITEM.
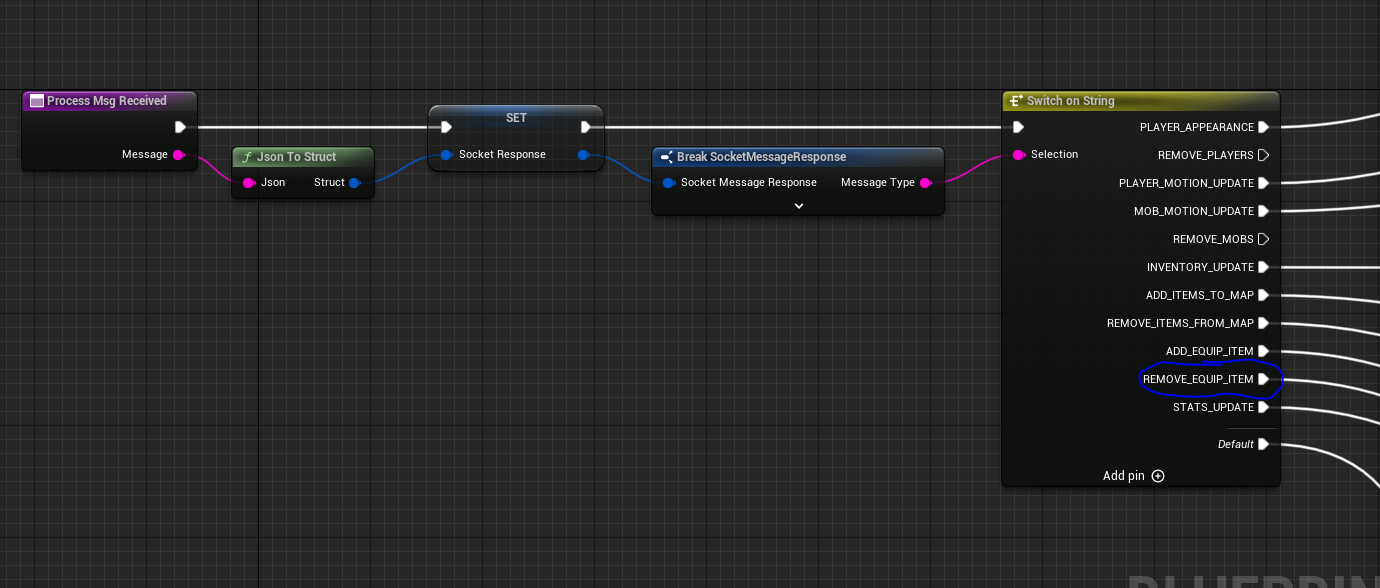
This will route to the following function:
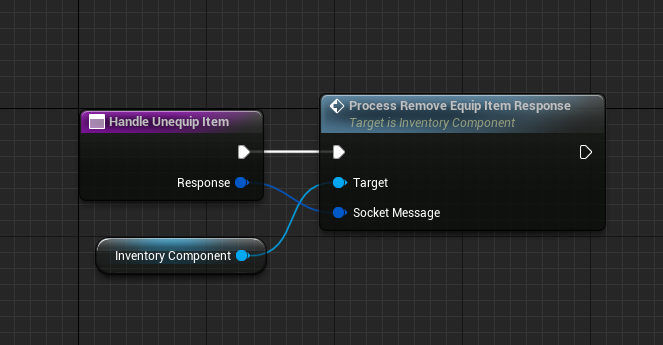
Which is connecting to the inventory component to handle the remove equip item response.
The inventory component has a reference to the equipped items widget, and it asks that widget to clear the equipped item with the specified item instance IDs.
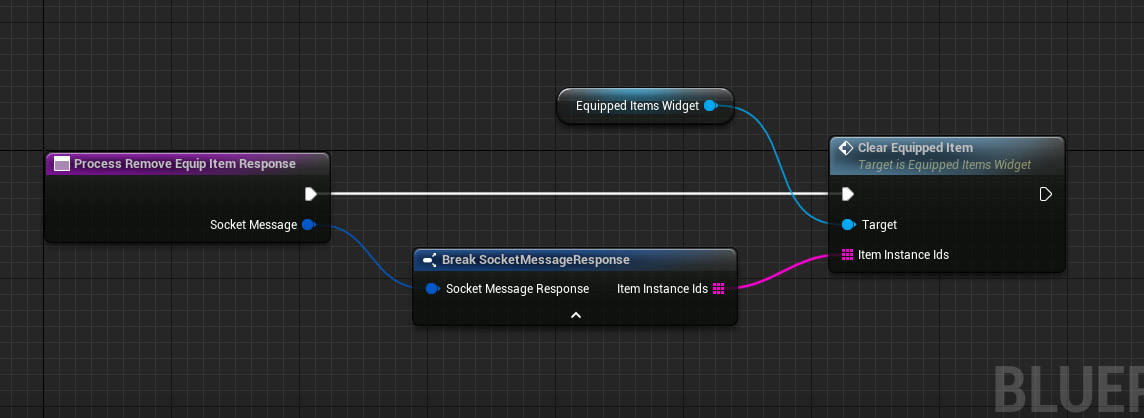
So the equipped items widget is going to clear the equipped item that’s linked.

Modified stats
When we equip items, we will modify the characters stats based on the equipped items.
This response will come automatically from the server, any time the stats change (whether from item updates or something else).
The message type will be ‘STATS_UPDATE’.
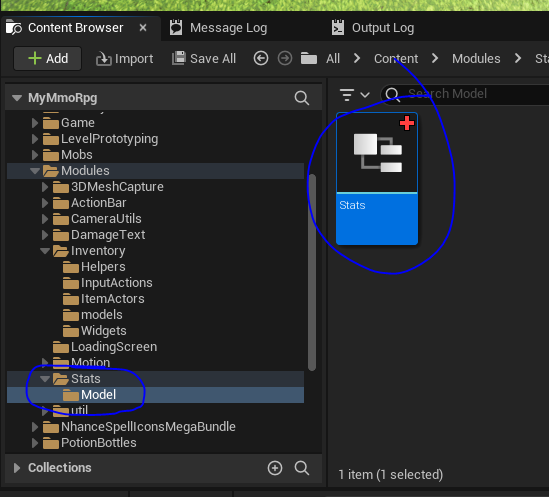
Stats will be a new module in our code, so it has a new folder and model.
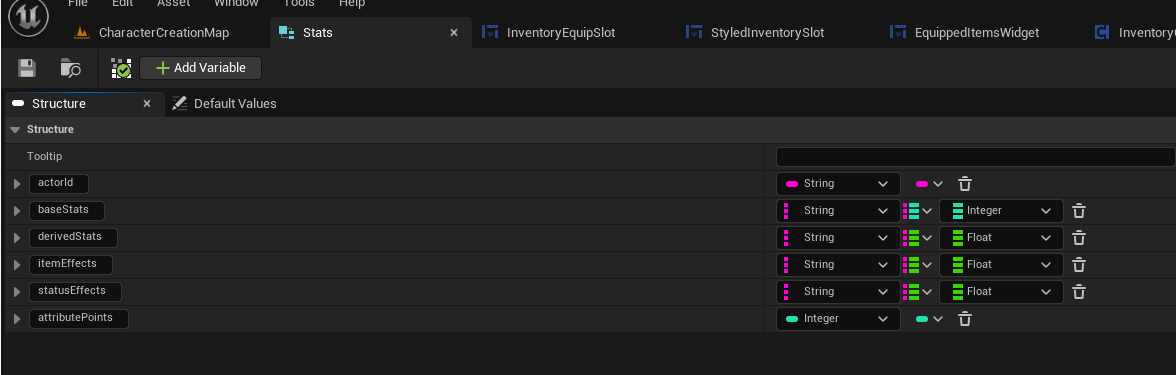
The Stats structure definition reflects what we have in our server.
We can see that we have ‘Actor ID’ rather than player name, this is so we can reuse this component for mobs too.
Base stats will be for base attributes, such as strength, dexterity, intelligence, stamina.
The derived stats are things like max HP, physical amp, critical chance, etc. The derived stats are calculated from the base stats and other effects, but these calculation will happen on the server – so on the client we simply need to show them.
Stats component
So I mentioned that we have a new module – and for that we want a new component.
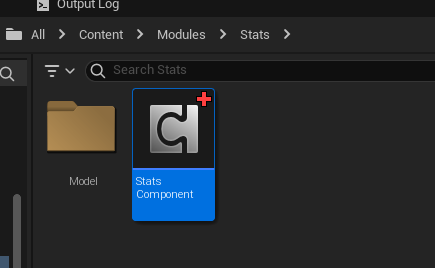
For now, its only being applied to player but it will soon expand to be used for player and mob.

All our modules will require the Socket Integration component. We can either extract it from Game Instance or through parameter. I’ve parameterized it in this function to ensure that socket integration is initialized before passing it.
As you can see, I also provide the Actor ID, which for a player will be the player name. I also specify a boolean whether this is a player or a mob, this is not in use for now but will be used when updating widgets (e.g. does it update action bar or something else).
I will reference the action bar soon after looking at the data flow.
And the last thing when initializing is actually fetching the stats from the server.

In order to fetch stats, all we need is the SocketMessageStruct with update type of FETCH_STATS and PlayerName (which really should be actor ID).
As you can see, I had to link an empty GenericInventoryData – however this is because of an apparent bug, I believe with Struct to Json library that I am using. As for some reason, it fails without it (it populates some of the object arrays with empty values rather than keeping array empty which causes some problems upon sending).
Process Stats update
We’ve seen from our Socket Integration component that we can get a stats update response. Let’s see the function in the Stats Component which will be responsible for processing it.
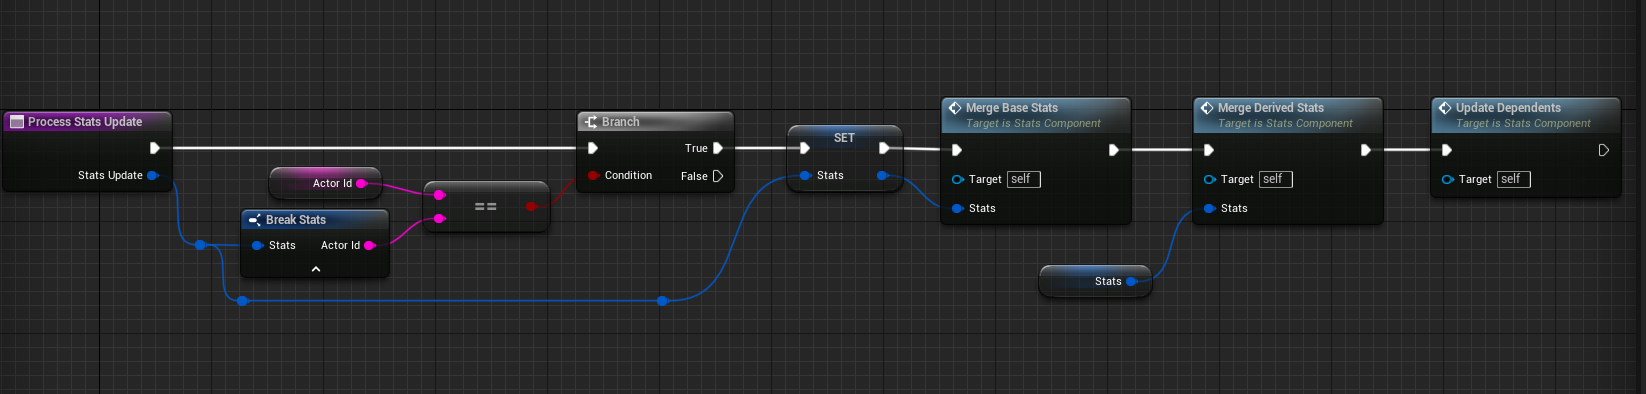
First of all, we ensure that the actor ID associated to this stats component matches the update. This will be important when we also integrate mobs.
As we get a update rather than the state, we want to merge the stats.
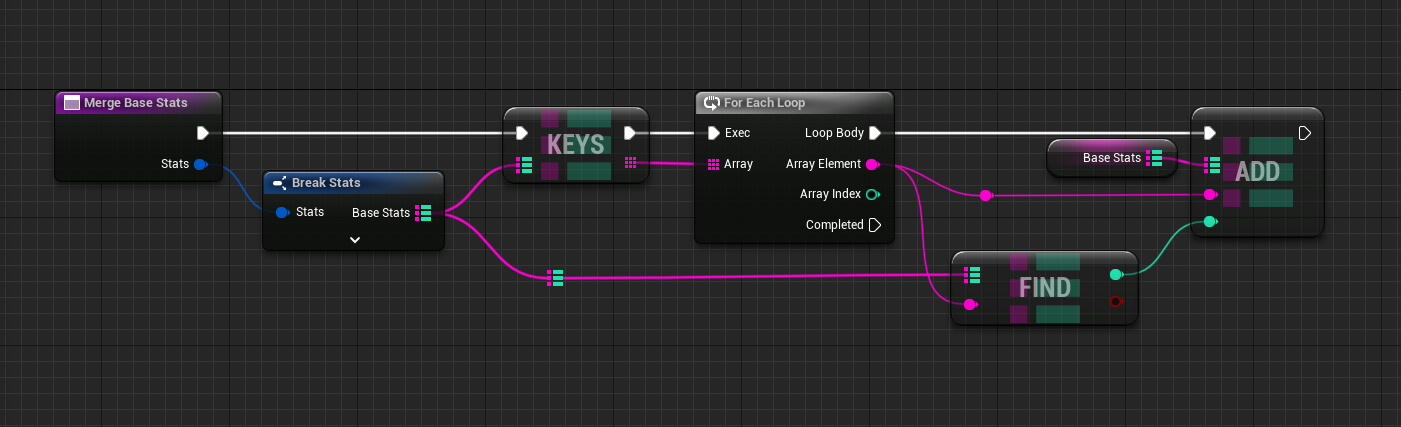
Merge Base Stats is as follows:
Merge derived stats:
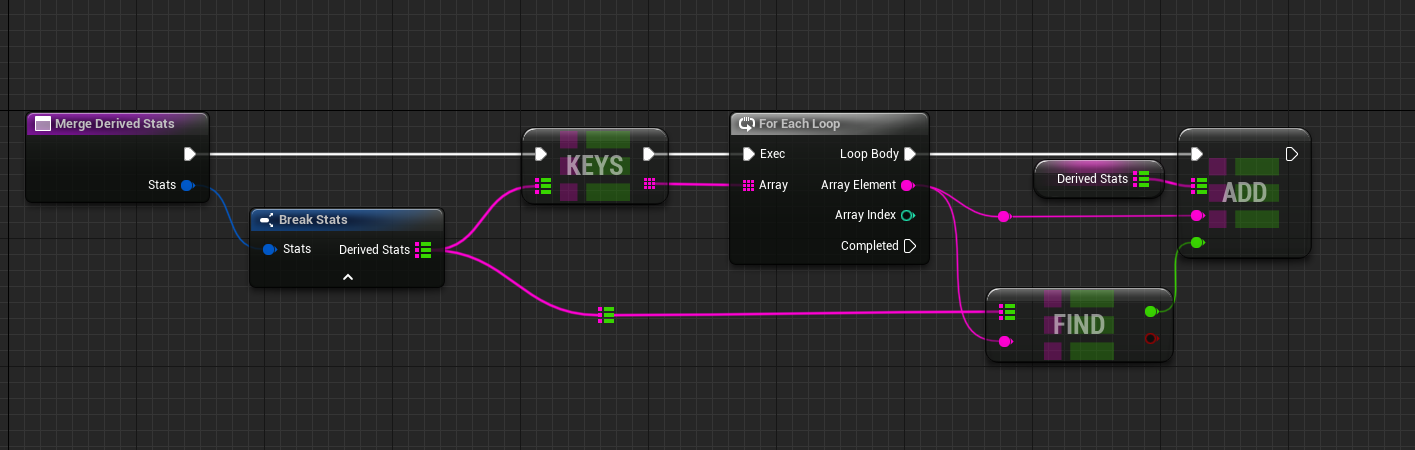
The two functions are nearly identical (so we could refactor into 1 function and pass different map object in).
But you can see that we simply iterate over all of the updated results and we put them into our variable map.
After we updated our variables, we will update depending resources – in our first case its updating the health bar.
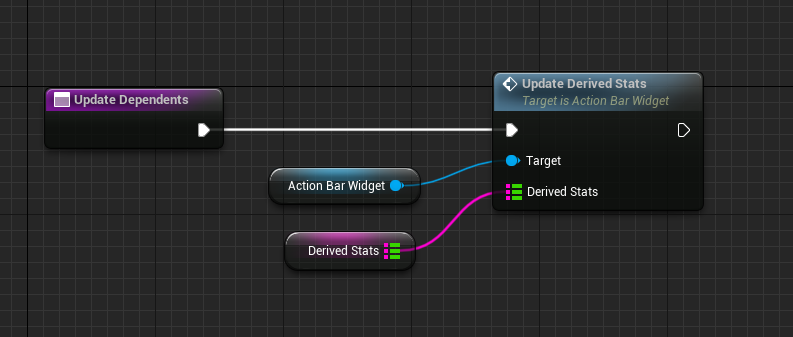
We have a reference of the action bar widget which will update its content based on the stats updates. It will include things like status effects in future too.
We’ll look at the action bar widget soon, before that let’s just show the linking of the Stats component.
Adding stats component to our character
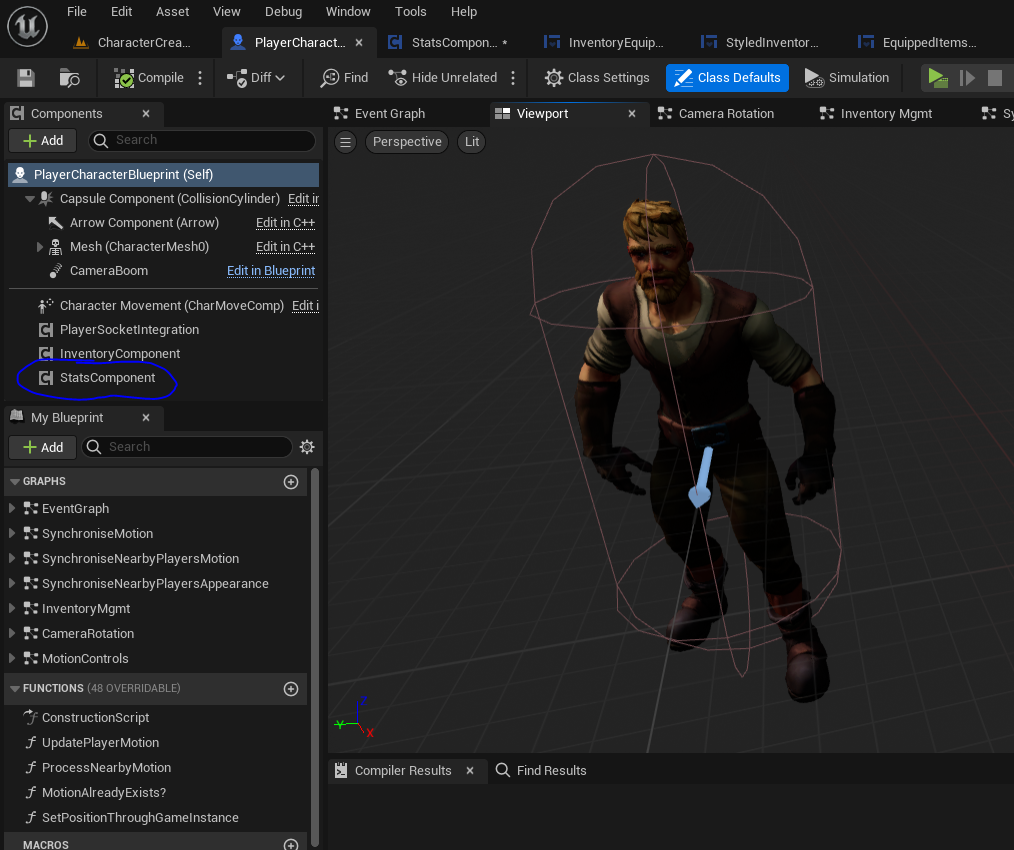
We add the stats component to our character, so combined we now have 3 integrated modules:
- Player socket integration component (managing websocket comms)
- Inventory component (managing any inventory related updates)
- Stats component (new component, managing all stats related updates)
We want to initialize the stats component after we’ve initialized the web socket.

We will have all modules, including stats component available in the game instance, for other future components to use them when required:

Action bar and health updates
Ok now that we’ve seen how we linked the stats component to the player, we should cover how we will update the HP updates.
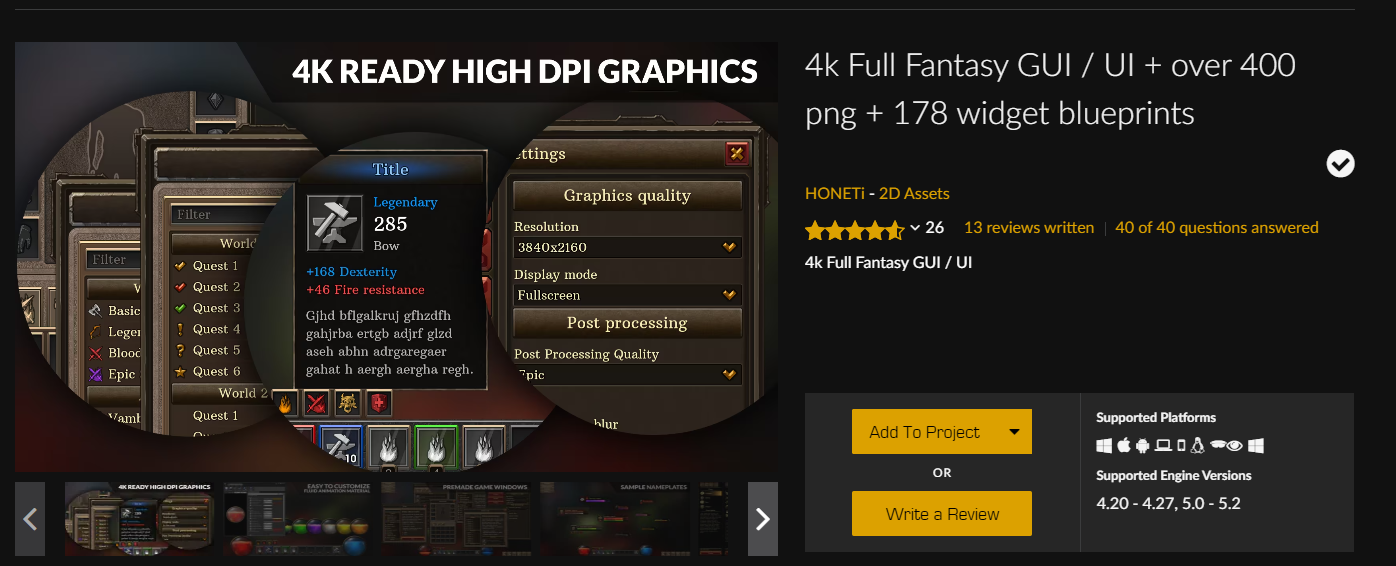
I will be using an action bar from the demo from this asset pack: 4k Full Fantasy GUI / UI + over 400 png + 178 widget blueprints in 2D Assets – UE Marketplace (unrealengine.com)
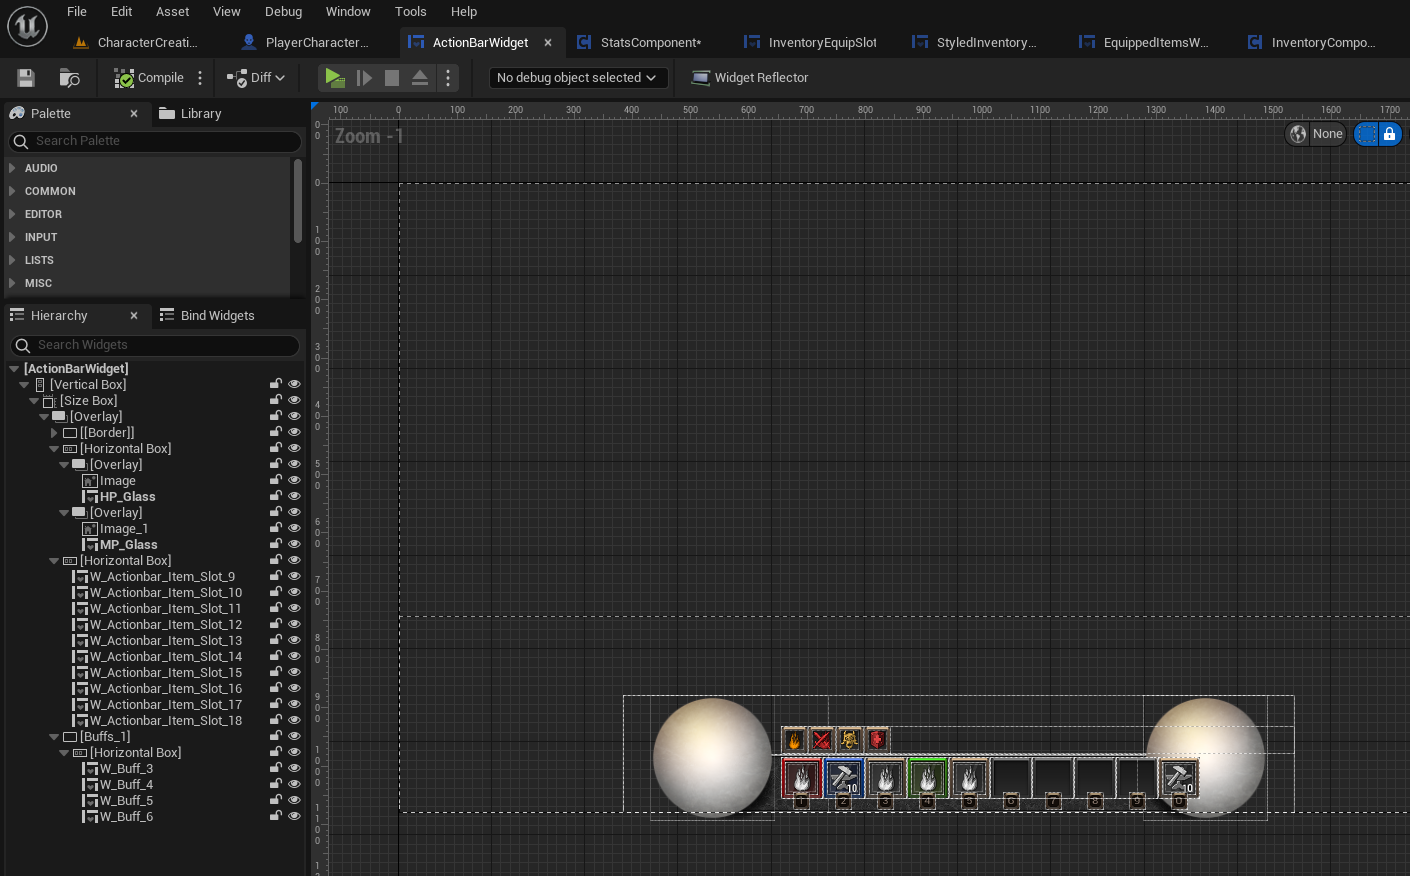
This is the widget for the action bar; I will be changing it a lot in the future, but for now it will prove the purpose of a demo.
We’ve seen that the Stats component called the reference to this widget and called the function ‘Update Derived Stats’ so let’s see what that does.
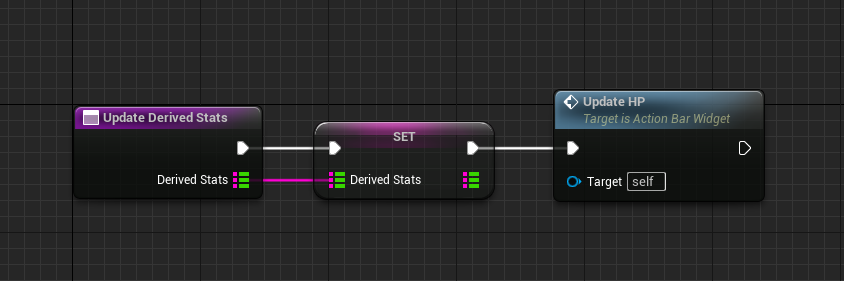
It will later have a lot more processing here, e.g. update HP, update MP, add status effects to icons, etc.
For now, it only has Update HP so let’s see what that does.
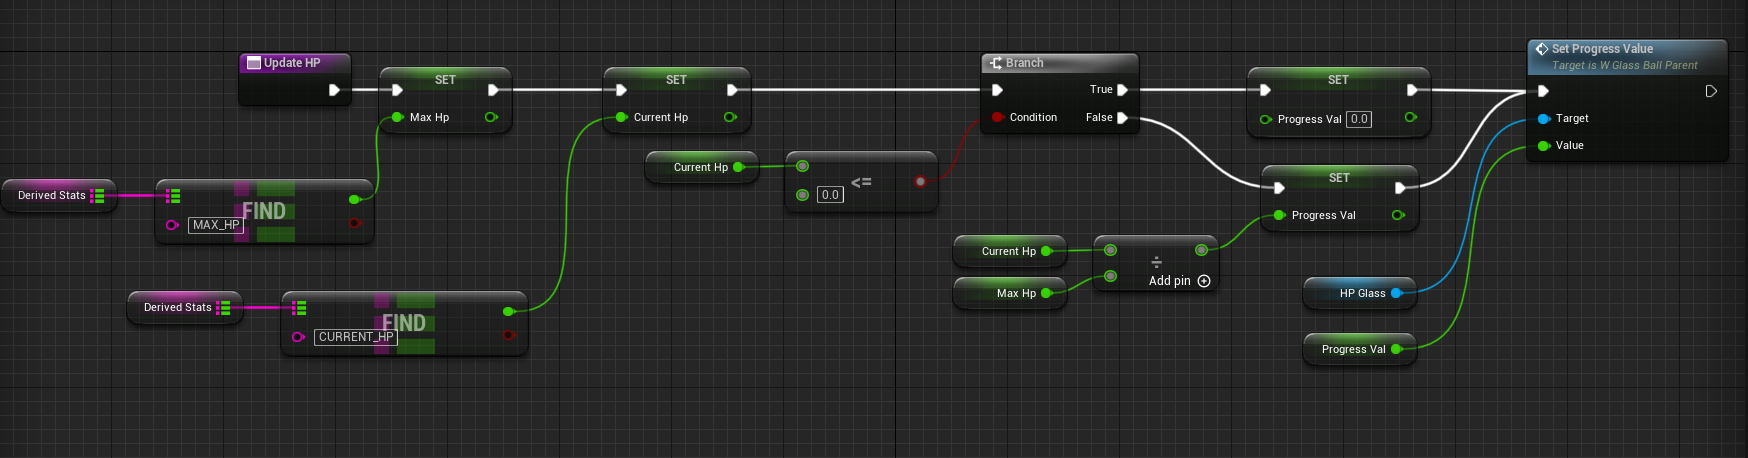
The HP will be displayed as a glass ball, it will display the HP in a progress bar equivalent form. So, we extract the max hp and the current hp from the derived stats, and we evaluate what’s the progress to set that glass ball to.
Results
So now that we’ve integrated the equipping of the item and the stats system linked to the Action Bar, we can go ahead and test it.
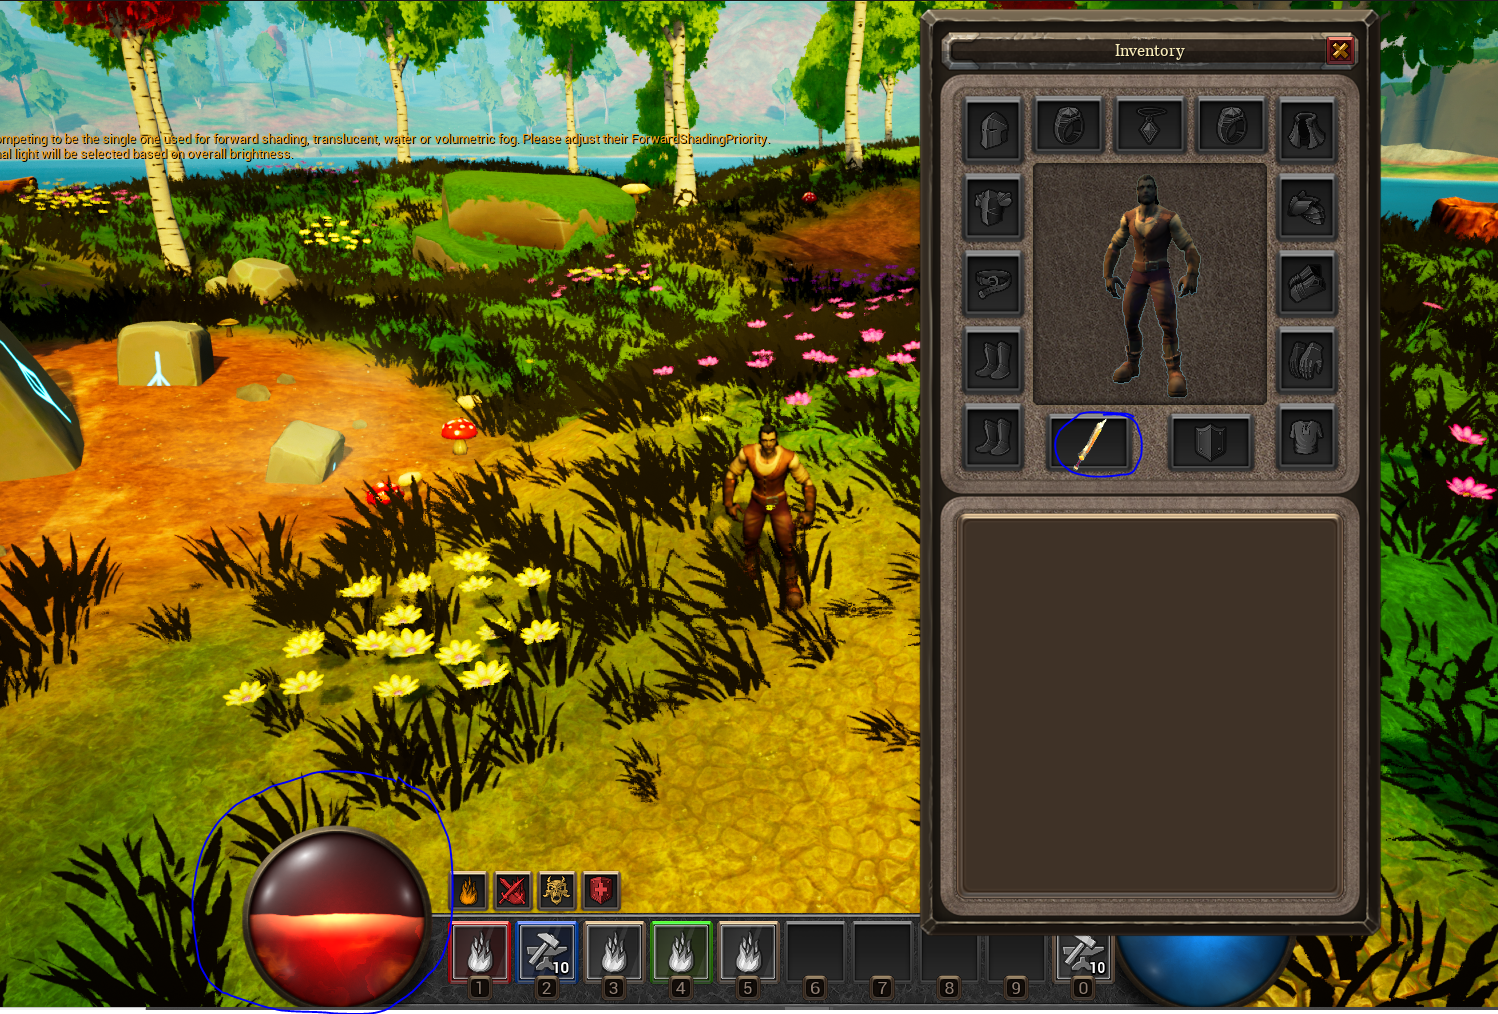
I created a weapon item, which increases my characters MAX HP by 100 (to 200). When I equip this item, the server pushes this update and the stats component receives the update. When processing the update, it sends it to the action bar widget and as you can see, it updates the HP bar.