44. How to integrate dynamic MMO inventory with your Unreal Engine
I’ve recently made some changes to the custom MMO server to support dynamic inventory. The Java Micronaut server code that’s used can be found here on GitHub.
The video going through backend testing using Postman can be found here.
What is the objectives for this post?
- Get characters inventory data
- Draw the items in the inventory based on the data
- Be able to drop items from inventory
- Be able to pick up items from map into inventory
Let’s get started! I will try re-use what I can from the previous implementation of inventory module, which was ‘state based’ and obtaining data via HTTP.
Some of the previous inventory implementations were from posts like this: Unreal Engine – customize and improve inventory design (unreal-mmo-dev.com).
If you’re interested in the Java part – websocket commands and such, you can find it in this youtube video.
Creating inventory component
First of all, I will create a new component for Inventory, which I will be adding to my players component.
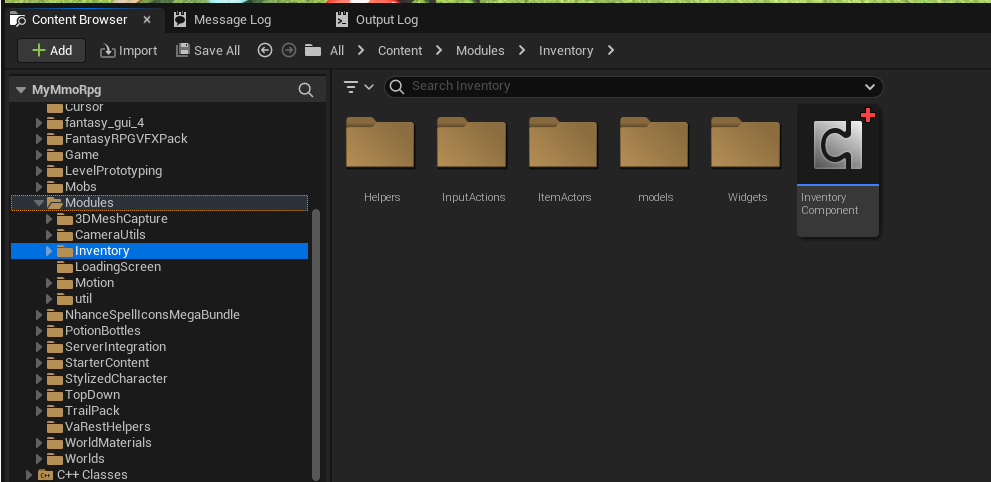
This component will try handle all inventory and item related processing. This includes items spawned on map and items being equipped.
Let’s get started with Event Begin Play.
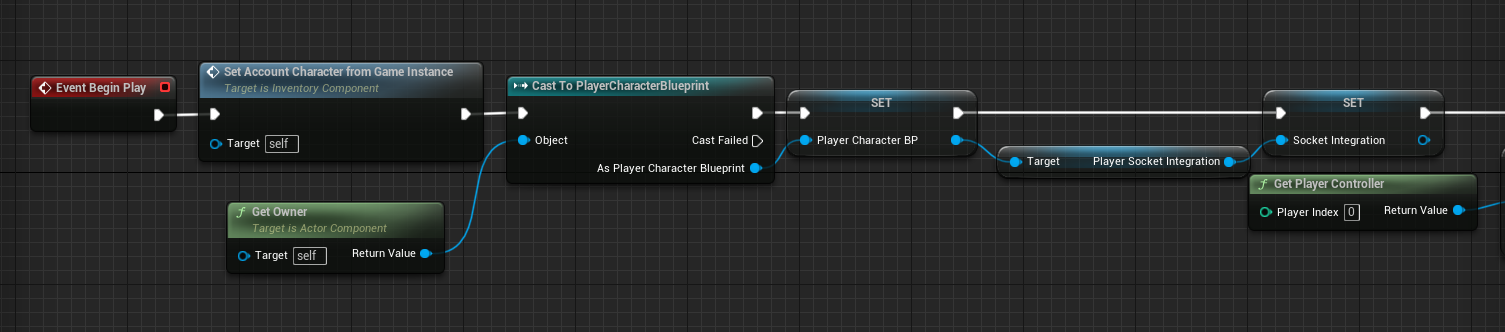
This will handle our initialize function. We previously stored Account information in our Game instance, therefore we will extract this information from the Game instance again.

We will occasionally use the Player Character blueprint throughout this component, so rather than getting parent and doing the cast each time, we will promote it to variable here.
Next, from our Player Character blueprint, we’re able to take reference of the Player socket Integration component that we created – this component is used to interact with our websocket, therefore all messages sent and received should go via that component.
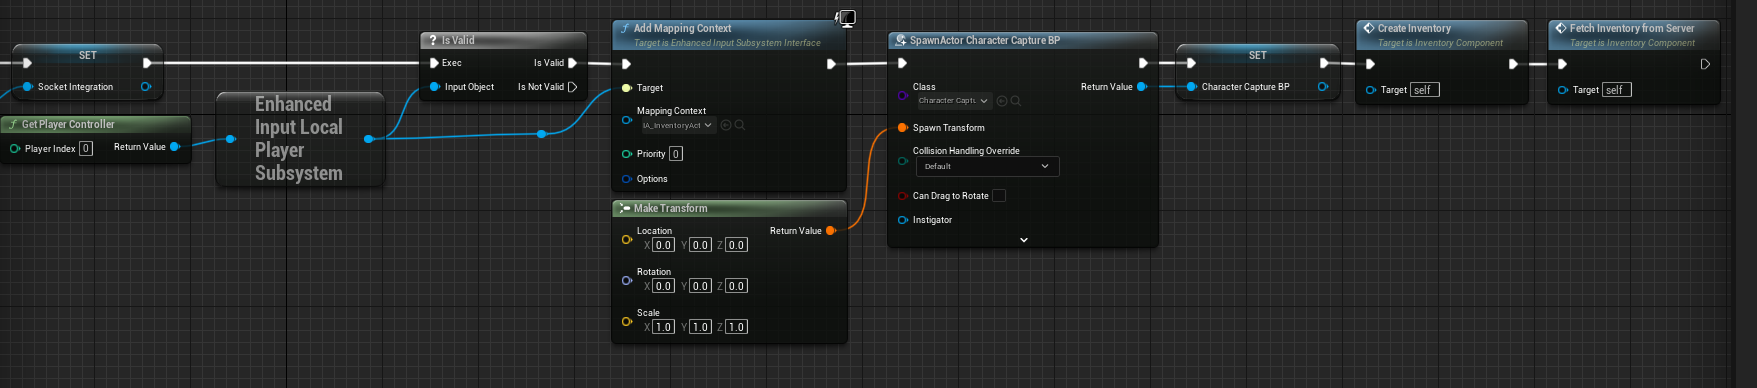
In order to open/close our inventory and other actions, such as picking up items, we will want to map out some inputs, for this we use the Player Controller Enhanced Input. We will add the mapping for it which will be shared shortly.
Our inventory uses a model to represent our character, its referenced as Character Capture Blueprint, this is documented here: How to create animated character in widget using UE (unreal-mmo-dev.com). We spawn this for the inventory widget to use.
We then create the inventory widget and promote the useful variables that we will use.
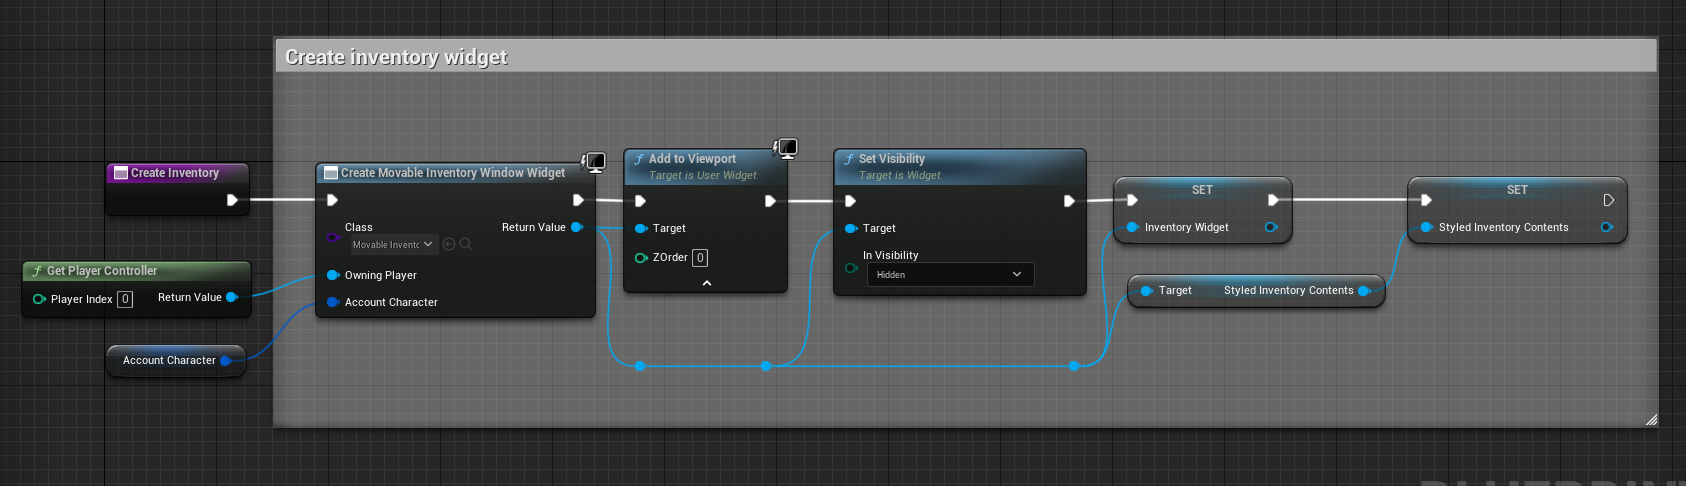
In order to fetch inventory, we ask the server to send it to us. The request to do so is quite simple, we mainly need to specify the characters name.
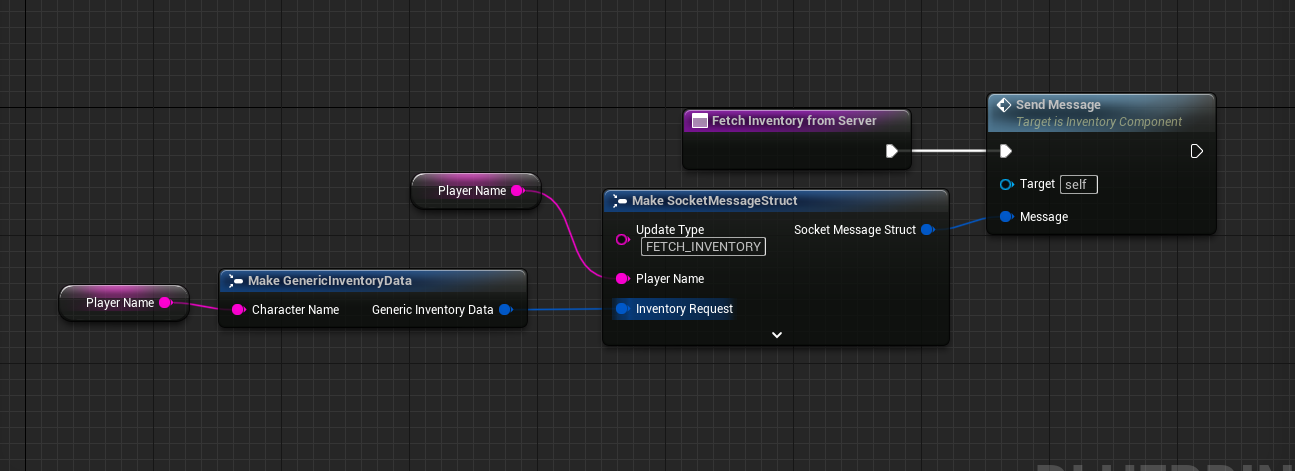
And the send message is simply using the reference of the Socket Integration to send the message.

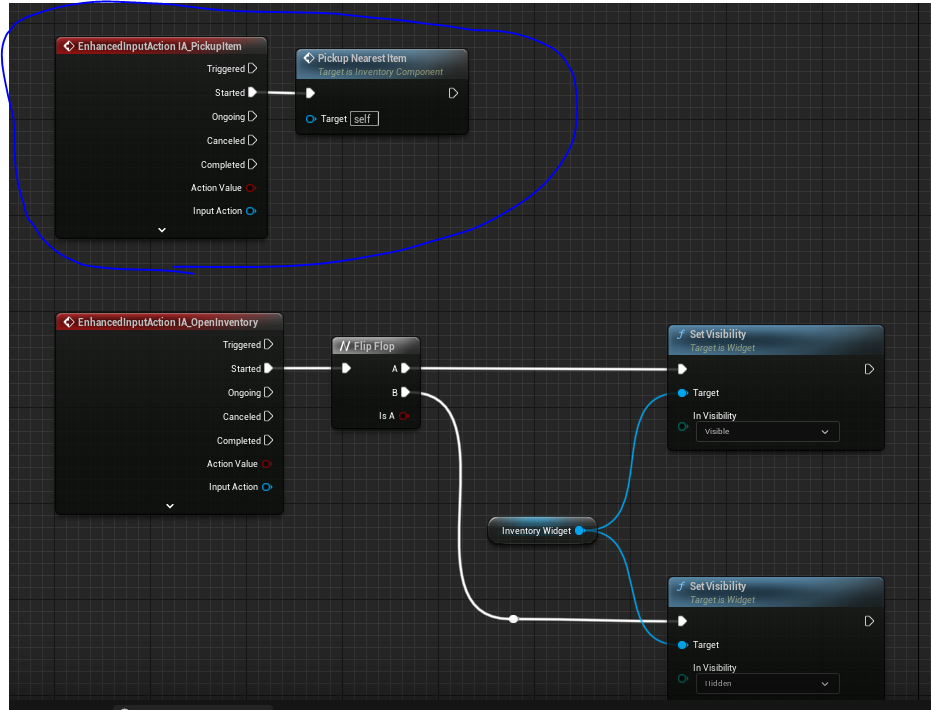
We referenced a couple of enhanced input actions, let’s share them now.
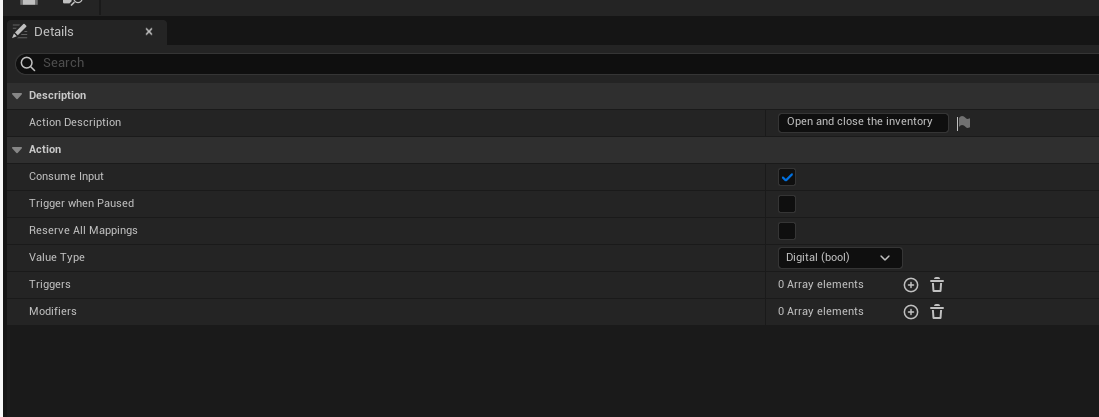
Inside my inventory module, I created some input actions, just two for now, to open inventory and to pickup items.
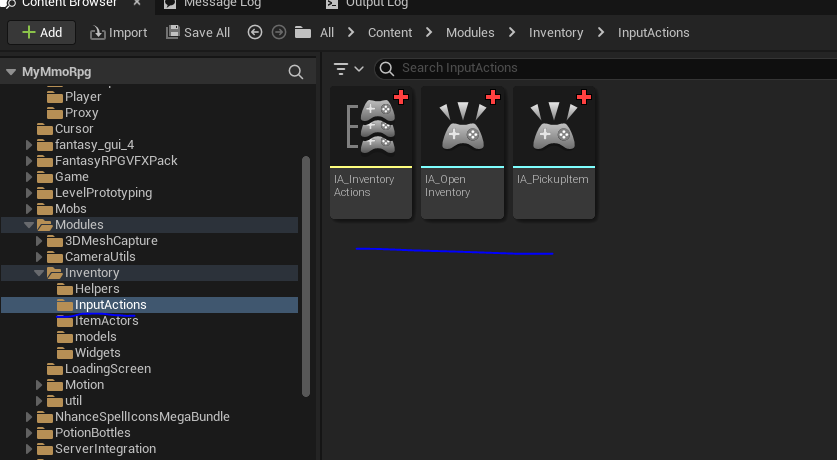
Both actions are simple Booleans which when triggered will consume the input.
I’ve mapped open inventory to the button ‘i’ and the button to pick up nearby items to ‘p’.
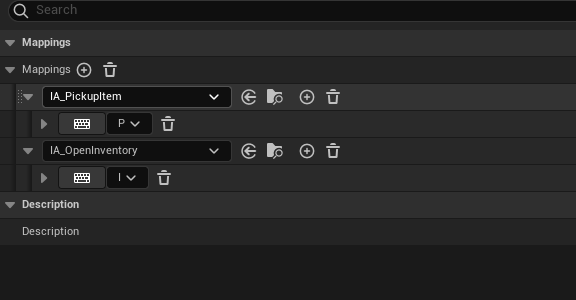
This is what’s referenced when we bound these input actions.
Receiving inventory and drawing the items
Ok so we saw the request to fetch the inventory, we now want to see how we process its response.
This is achieved from inside the Player Socket Integration component as that’s the component which handles with all the comms.
First, I want to highlight that I use Struct -> Json tool to help with that:
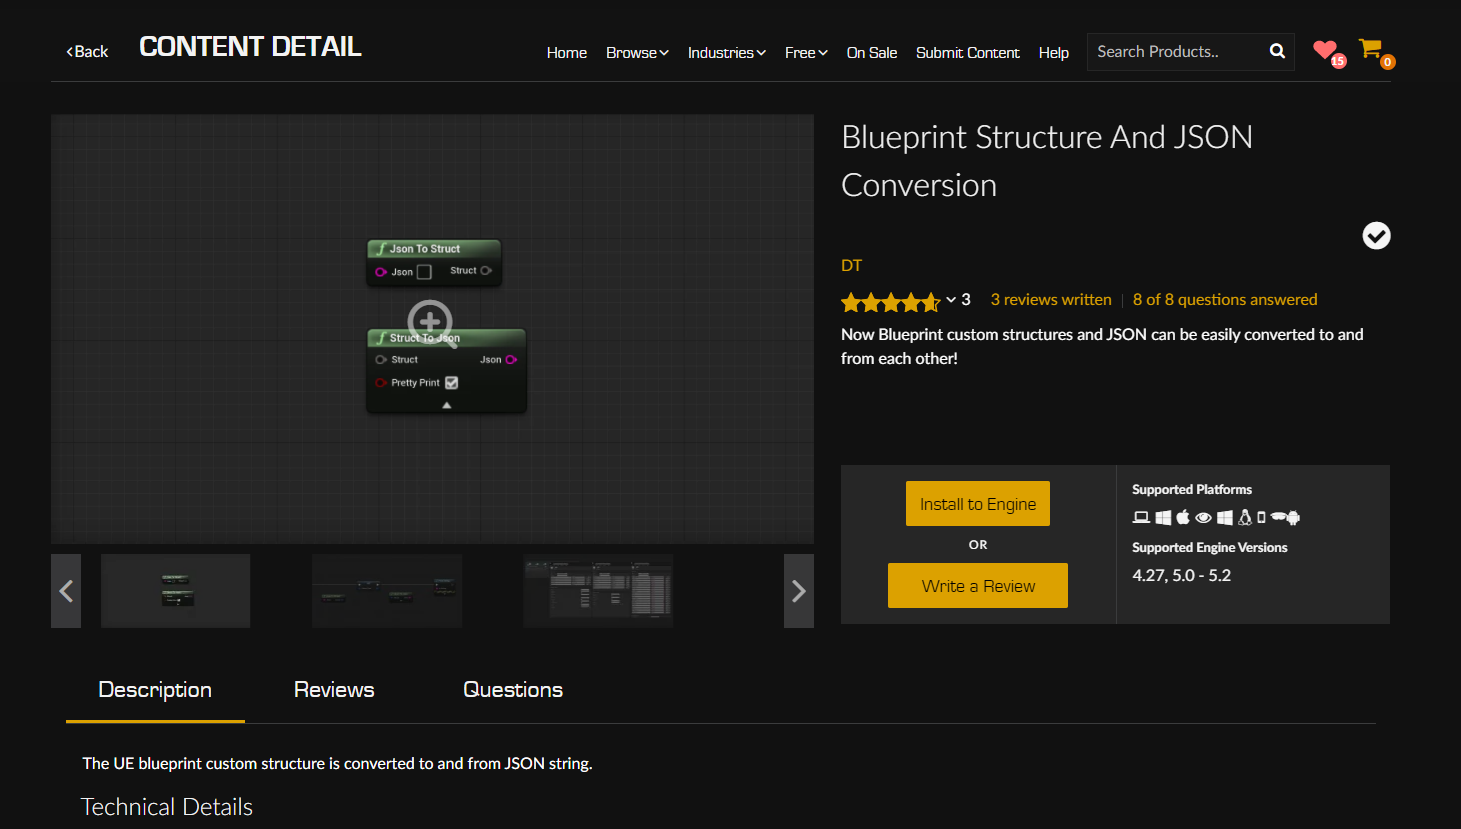
This is the plugin I used and so far so good – it saved me loads of time where I’d be creating serialisers/deserialisers manually.
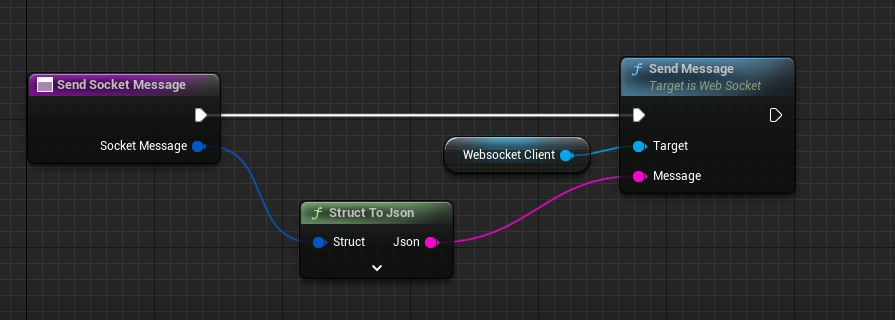
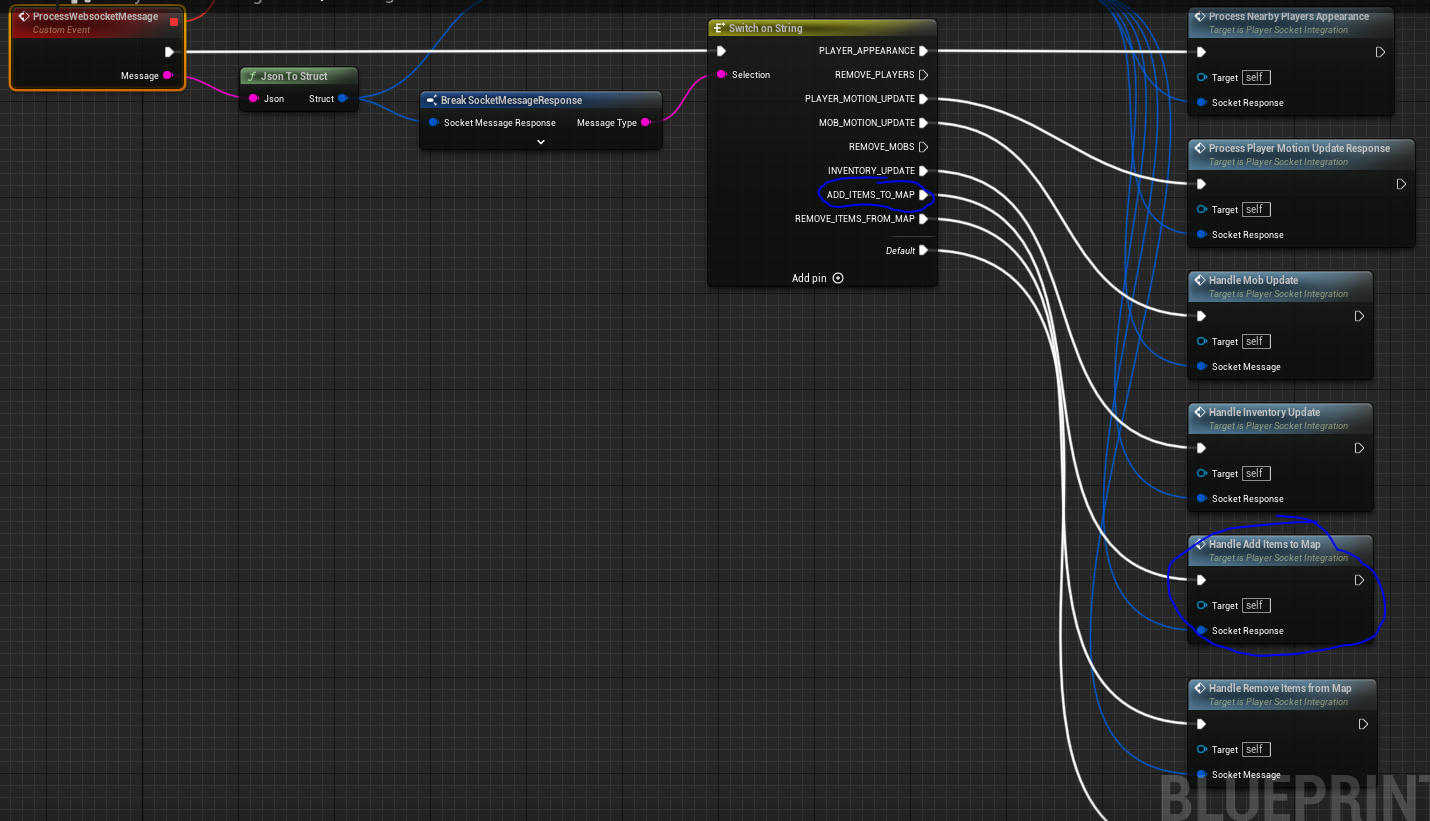
Ok so from our Player Socket Integration component we want to receive the inventory message and send it to the inventory component for processing.
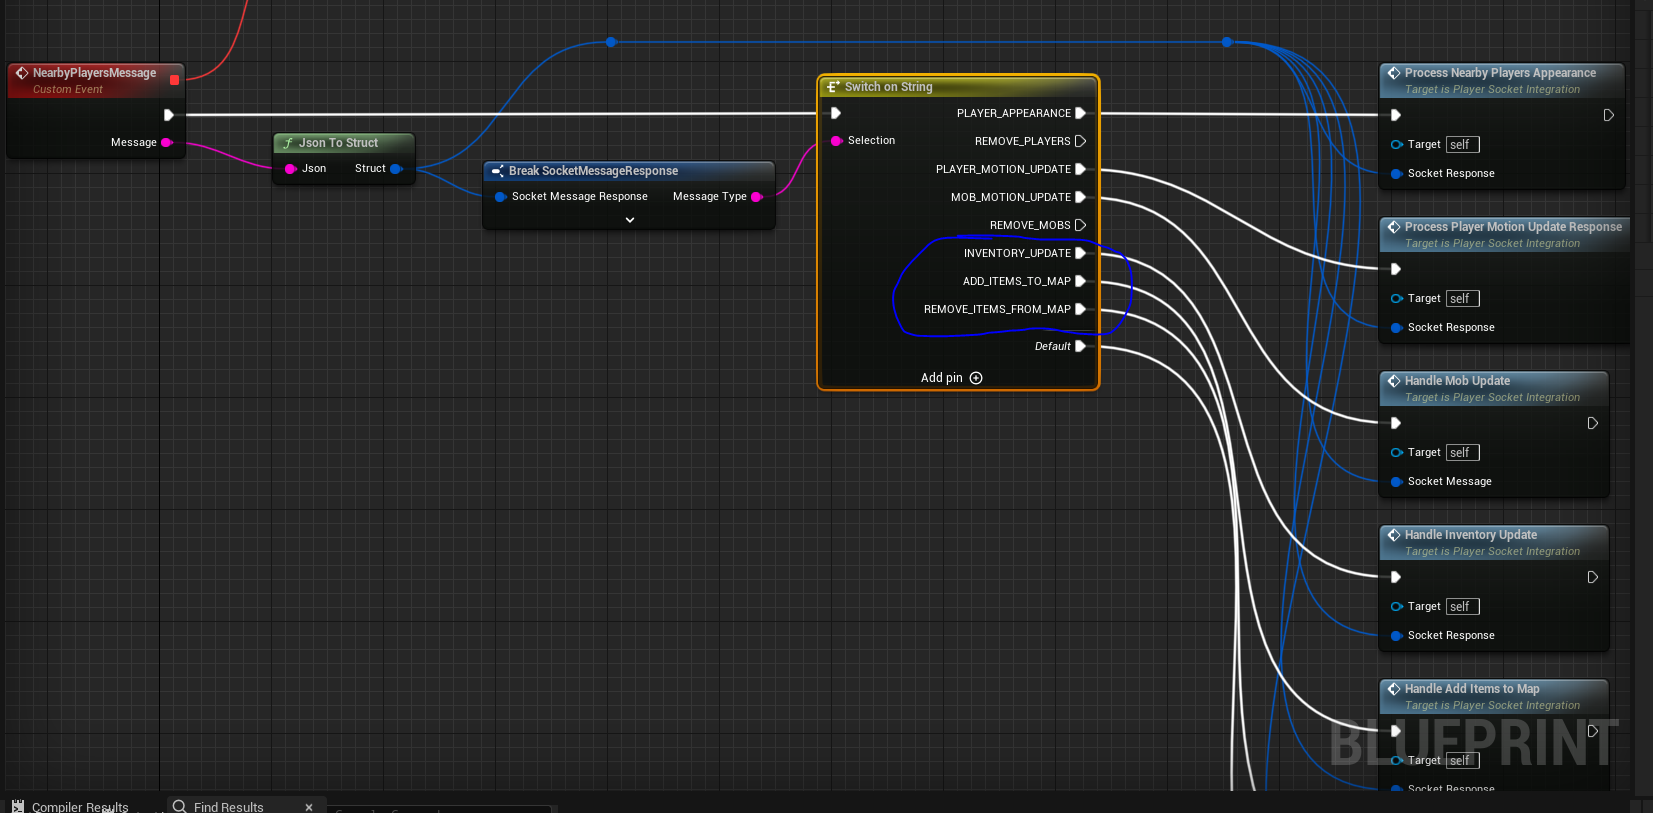
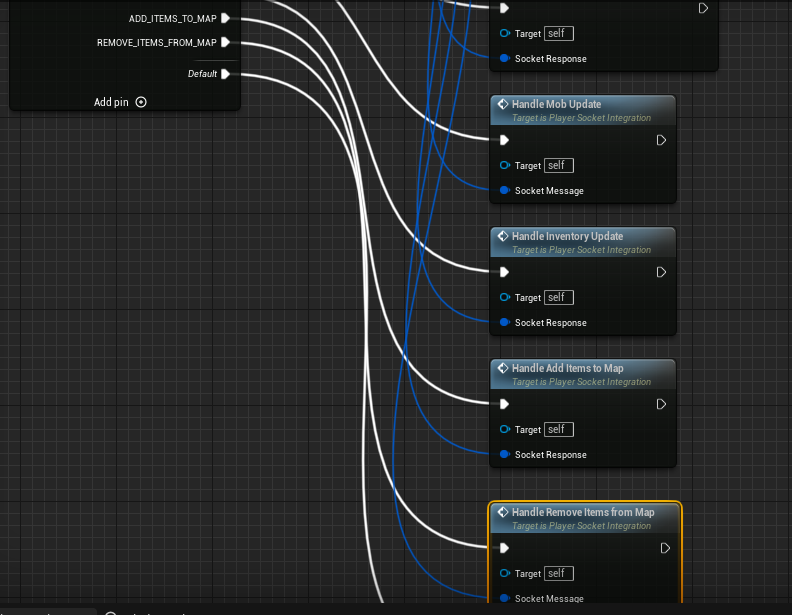
As you can see, I take the String message and convert it to Struct. With that socket message response, I extract the Message Type and in this post we’re adding 3 new types to process:
- INVENTORY_UPDATE
- ADD_ITEMS_TO_MAP
- REMOVE_ITEMS_FROM_MAP
In this case, we’re processing the first one. Each one takes you to a function which will deal with it.
So the Player Socket Integration component has a reference to the Inventory component and will know which function to call from it.
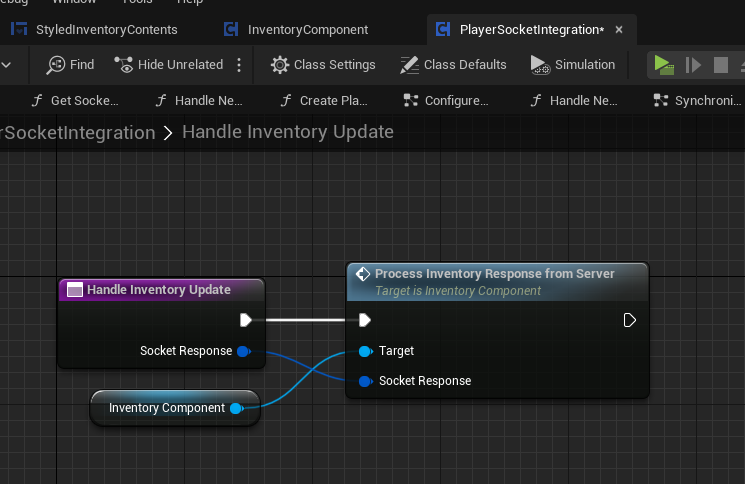
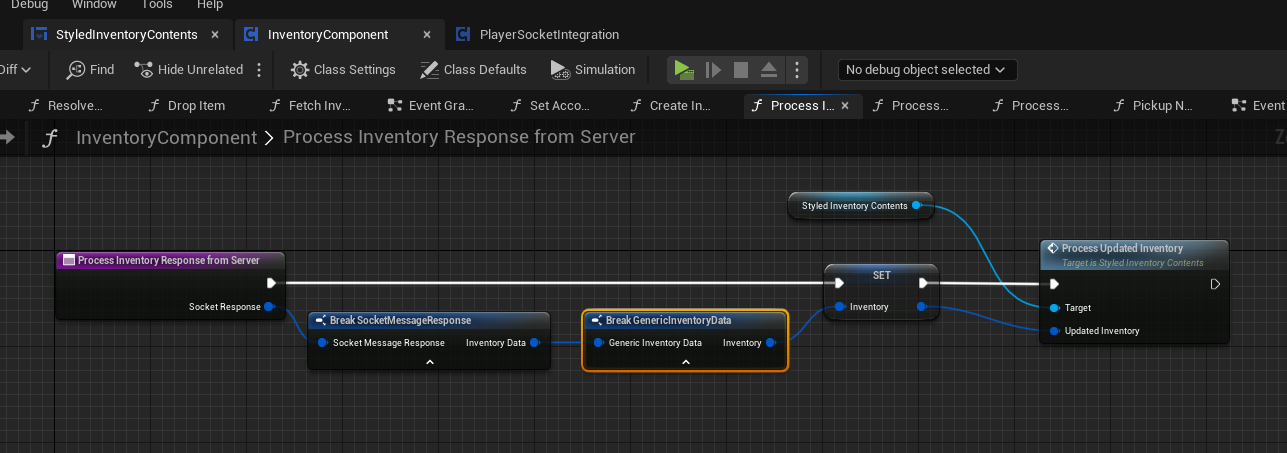
Now, back inside the Inventory Component we create a function to process this response.
In terms of the structures used:
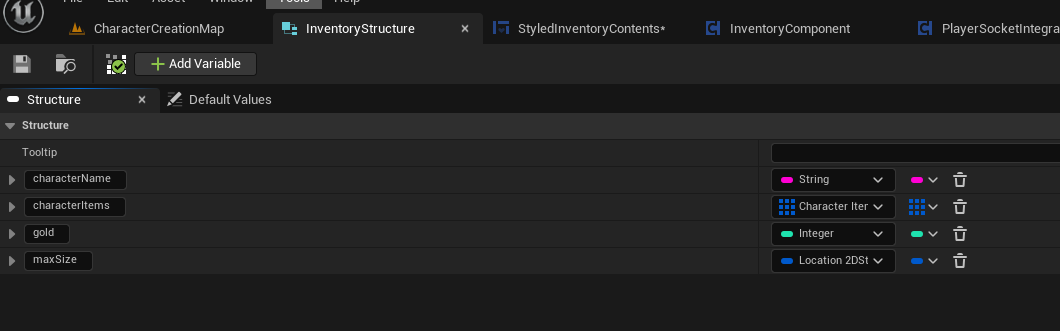
Inventory Structure:
Character Item structure:
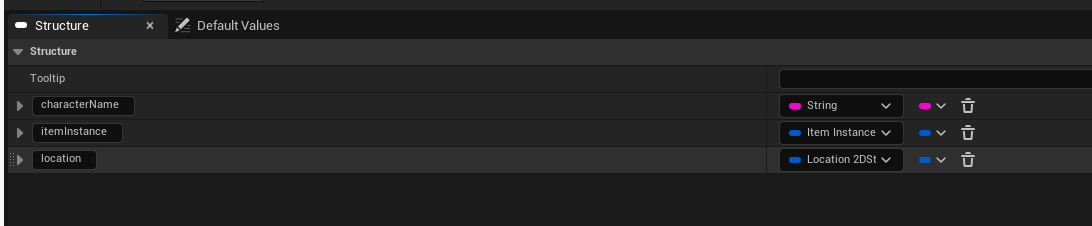
Item instance structure:

And the Item structure:
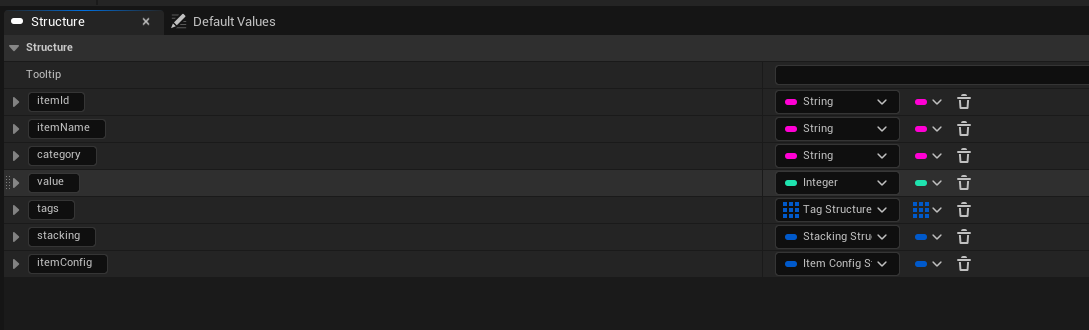
Note that most of the Item fields are not currently in use – mainly the item ID is used for referencing models and that’s about it.
The scope of this post is about how we process the data, rather than drawing it on the inventory (as that part should be a bit easier for people, I think). However, here’s how I processed some of it before, re-using the blueprints I created historically for state based approach.
This is now inside the Styled Inventory Contents widget

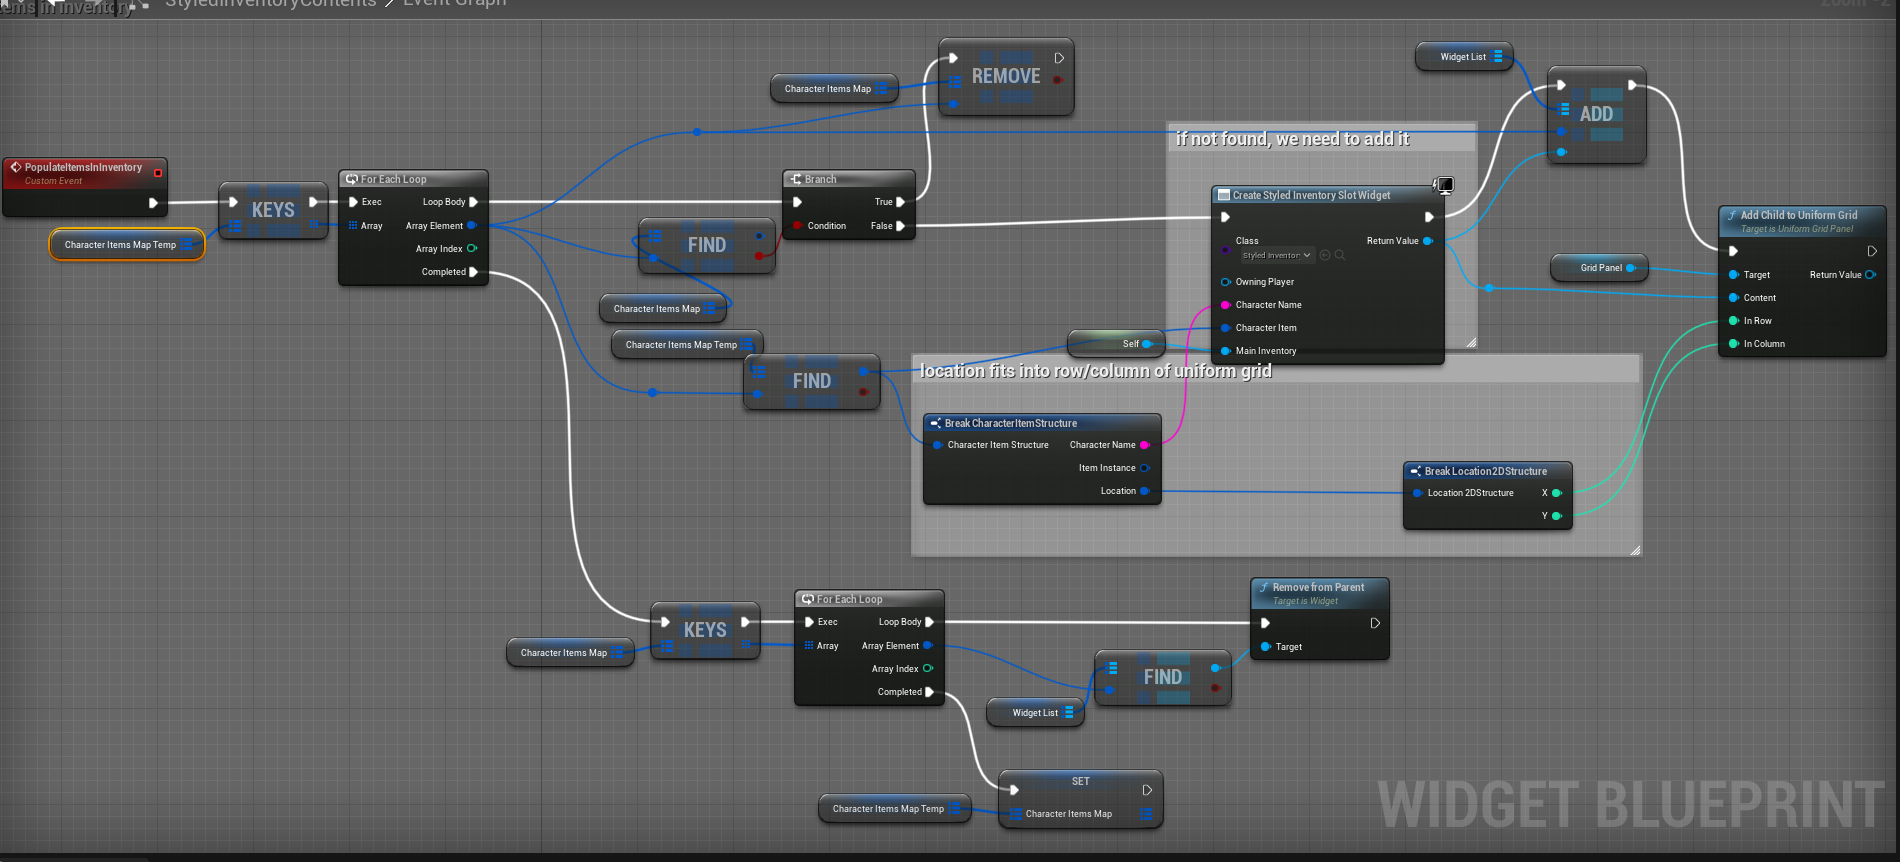
Inventory update
So just want to explain – first we manually fetch inventory from server. We could actually automate this request for it to be sent when user logs in, but its just easier to do so with manual request.
When we receive the inventory result from server, its packaged inside the Socket Response object, which contains the Inventory object. This inventory contains CharacterItems which specifies which item is in which inventory slot.

Now, whenever we do interaction with inventory, such as picking up items, dropping them or equipping them, we will automatically be sent an inventory update from the server.
This improves performance and makes the client side code (in Unreal Engine) a bit easier.
There are many ways of drawing up the items in the inventory, a simple way is to iterate over each of the Character Item structure and draw a item slot for it (essentially what I am doing).
There are many types of inventories too, you can have 1D or 2D inventory, or just items in an order, etc. The one configured currently is 2D but I am considering changing it to 1D as it would have some benefits (mainly be easier to maintain).
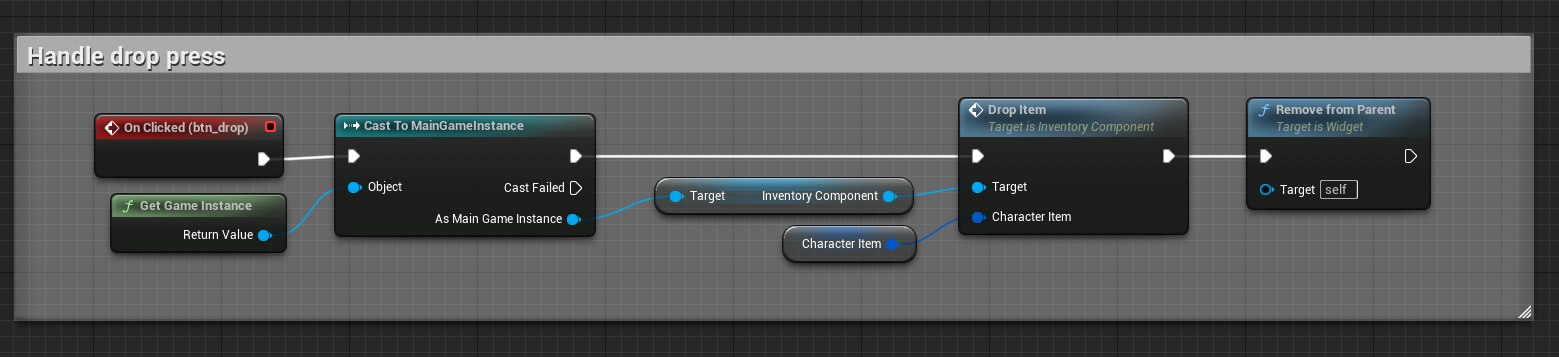
Dropping items
Whenever an item is dropped into the map, the server will automatically find players nearby to send this update to.
In order for the player to drop the item, we use item reference which contains the item ID and item inventory location. Currently its using the inventory location to specify which item to drop, but I will likely make it use the ID in the near future.
From inside the item slot menu, we map the button for dropping the item like so:
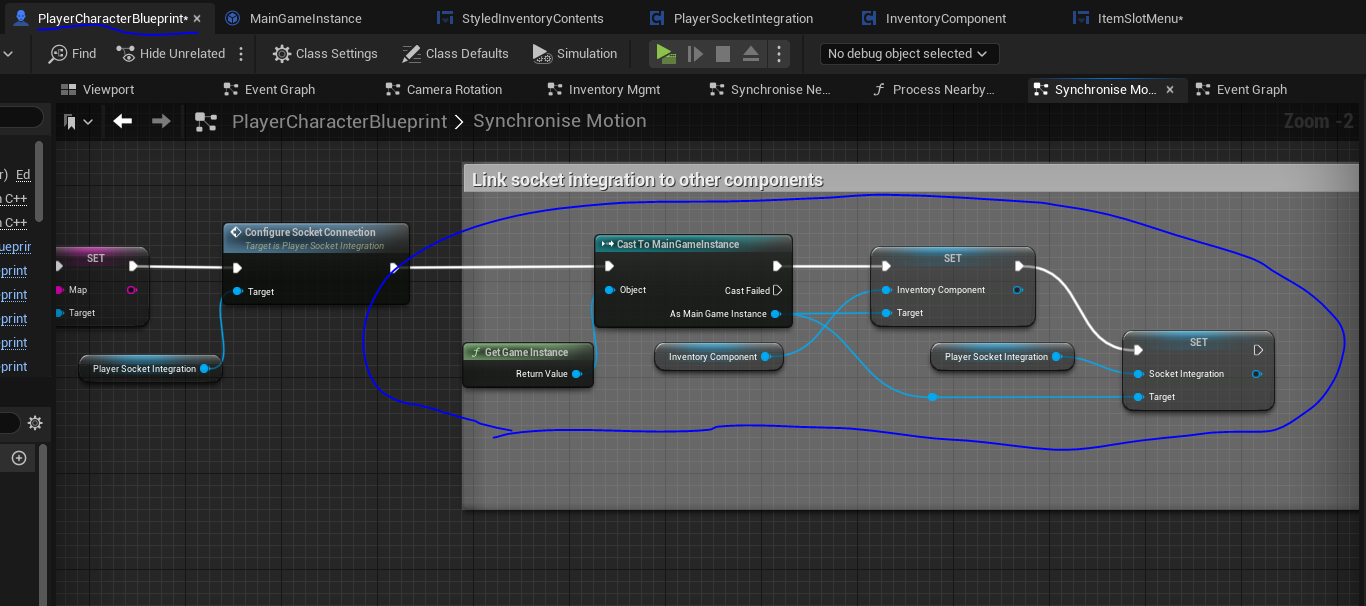
Because this menu is a nested component, I don’t have direct access to the Inventory component unfortunately. So I stored the component references in the Game Instance.
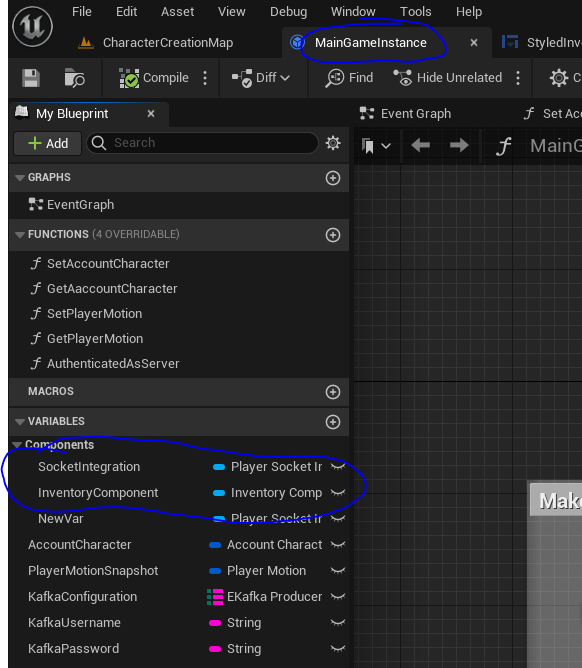
Then part of my Player Character Blueprint (which contains the player socket component and the inventory component) I will link them to the game mode in the Event Begin Play.
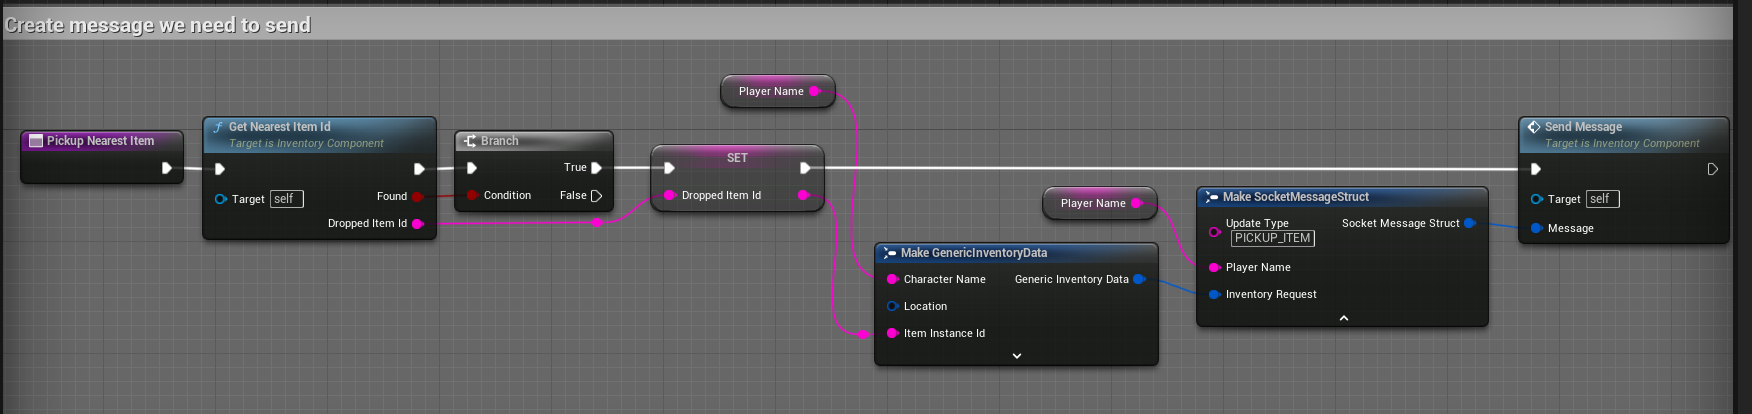
Ok now back to the Inventory Component – we need to create a function to handle the dropping of the item.
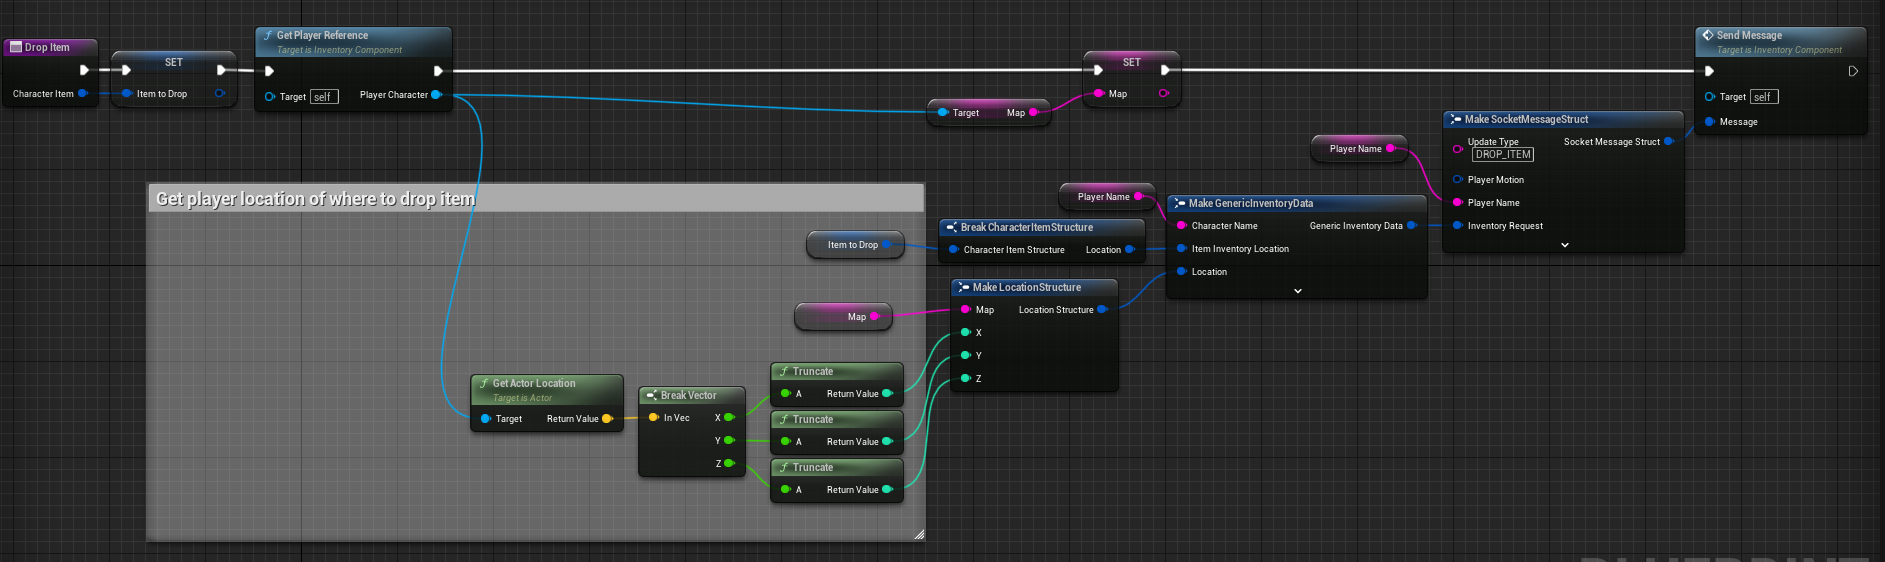
You can see me populating the Generic Inventory Data structure. For dropping items, I need to populate:
- character name
- inventory location (2d, e.g.
0,0) - location to drop the item on the map (players location).
The character name we have from Account Character information which is taken on inventory constructor.
item location is taken from the item reference, part of Character Item structure (linked to inventory slot).
location to drop is extracted from the inventory components owner – i.e. the player itself.
Once we create this structure, we put it into the Socket Message structure and set the Update Type to DROP_ITEM for the server to recognize.
We then simply send this message, which will convert this structure to JSON and send via Websocket.
This request will either be rejected (if invalid) or create 2 responses, one for updated inventory and another to indicate the dropped item on the map.
Added items to map
When you drop items to map, or come close to an item, the server will notify you of those items.
The message type is going to be ADD_ITEMS_TO_MAP. This message will be received in the player socket integration component.
Again, we simply need to map it to the inventory component to process.
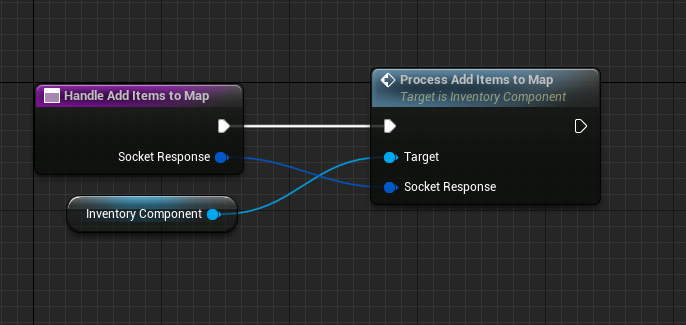
Ok so now we’re routed to the inventory component which will deal with this response. There’s a few things that we need to do.
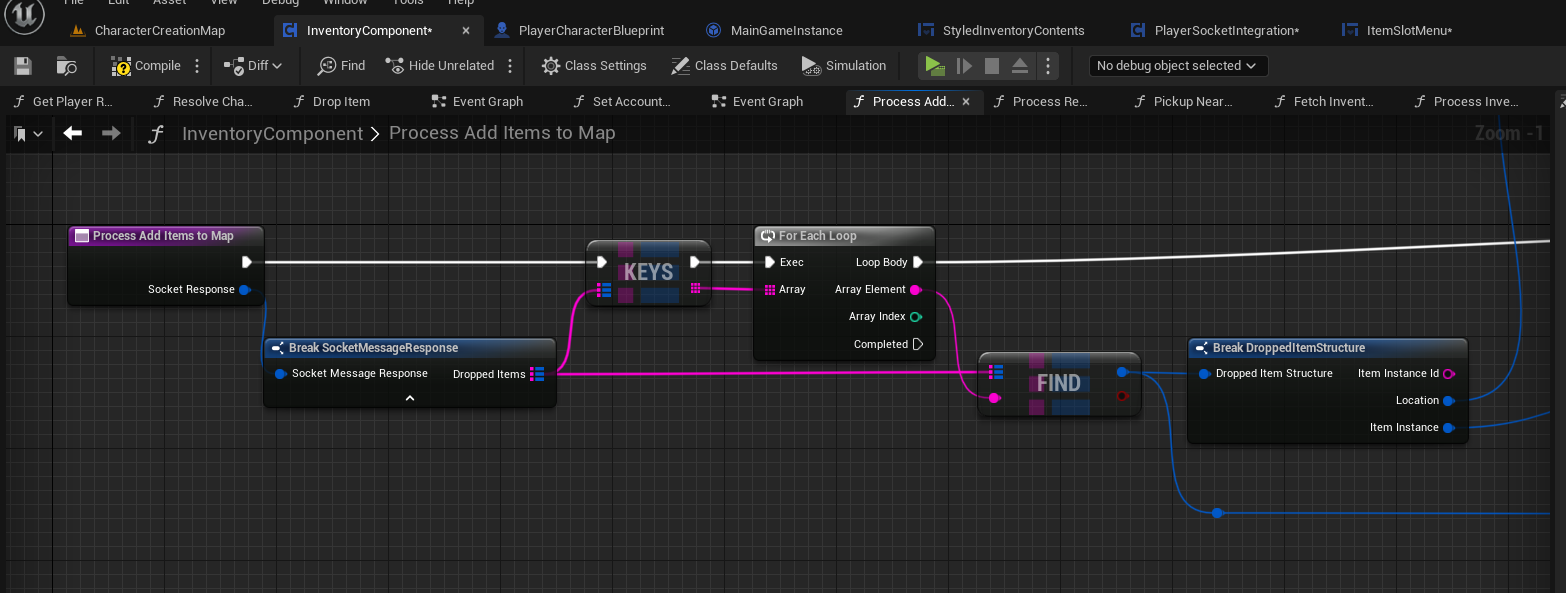
The Socket Response structure contains an array of DroppedItems structures.
For reference, the DroppedItem structure is as follows:

So you can see that we receive the response, we extract the array of dropped items and then for each one we will:
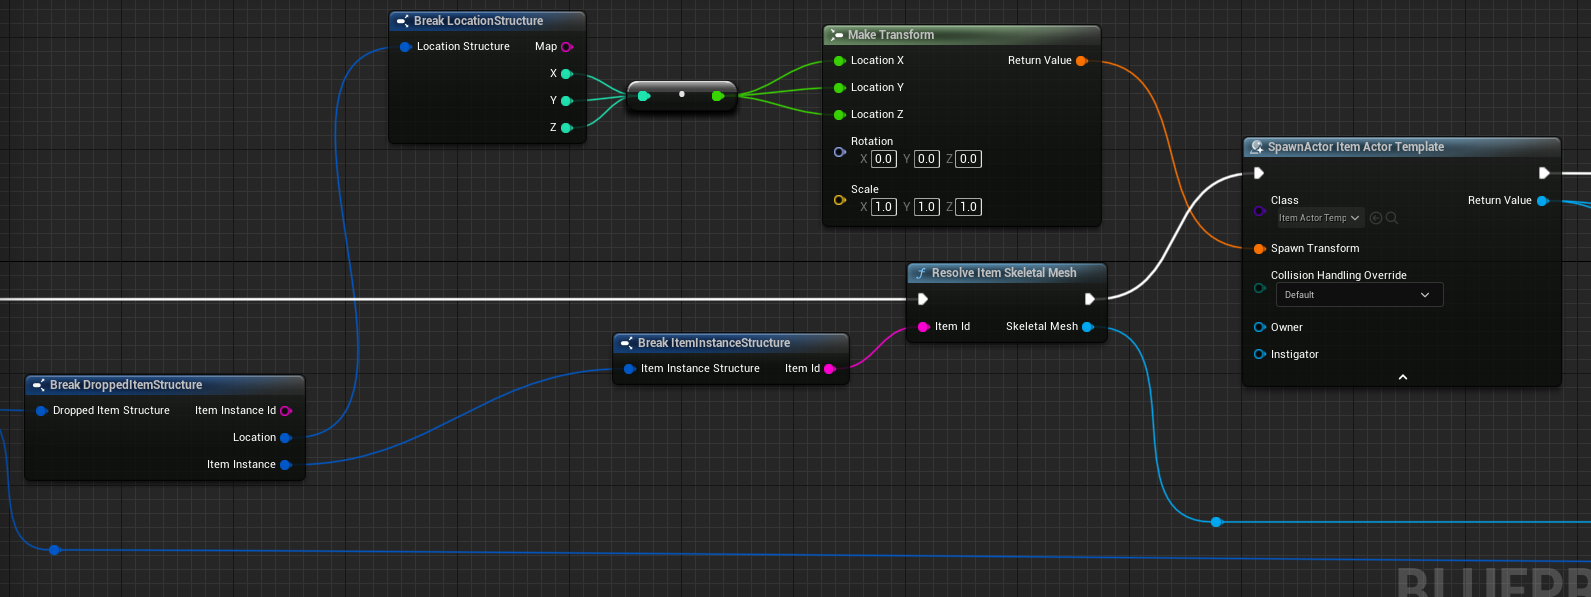
We will spawn actors to represent the dropped items. There is an interesting function, Resolve item skeletal mesh – which will identify the mesh to use in the given actor.
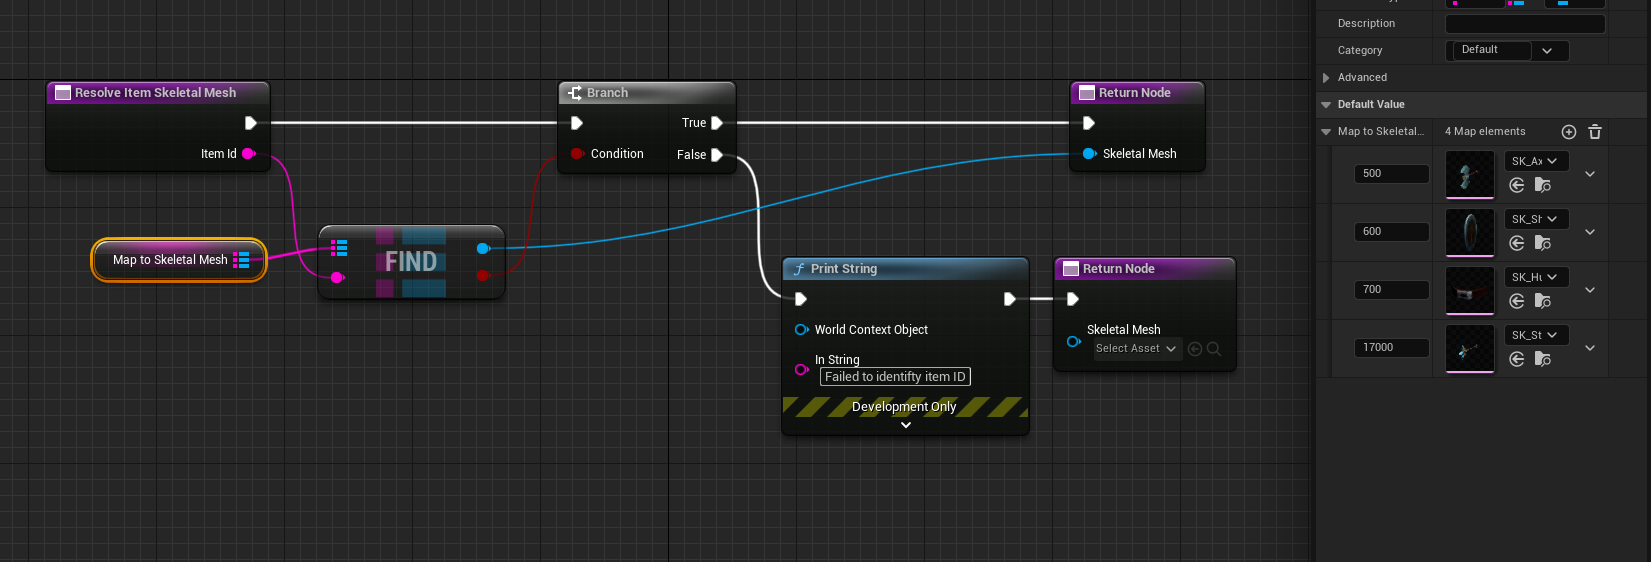
As you can see it simply uses the item ID to evaluate what mesh to use in a given map.
After we spawned the Actor, we will keep tracked of all the dropped items near this player:
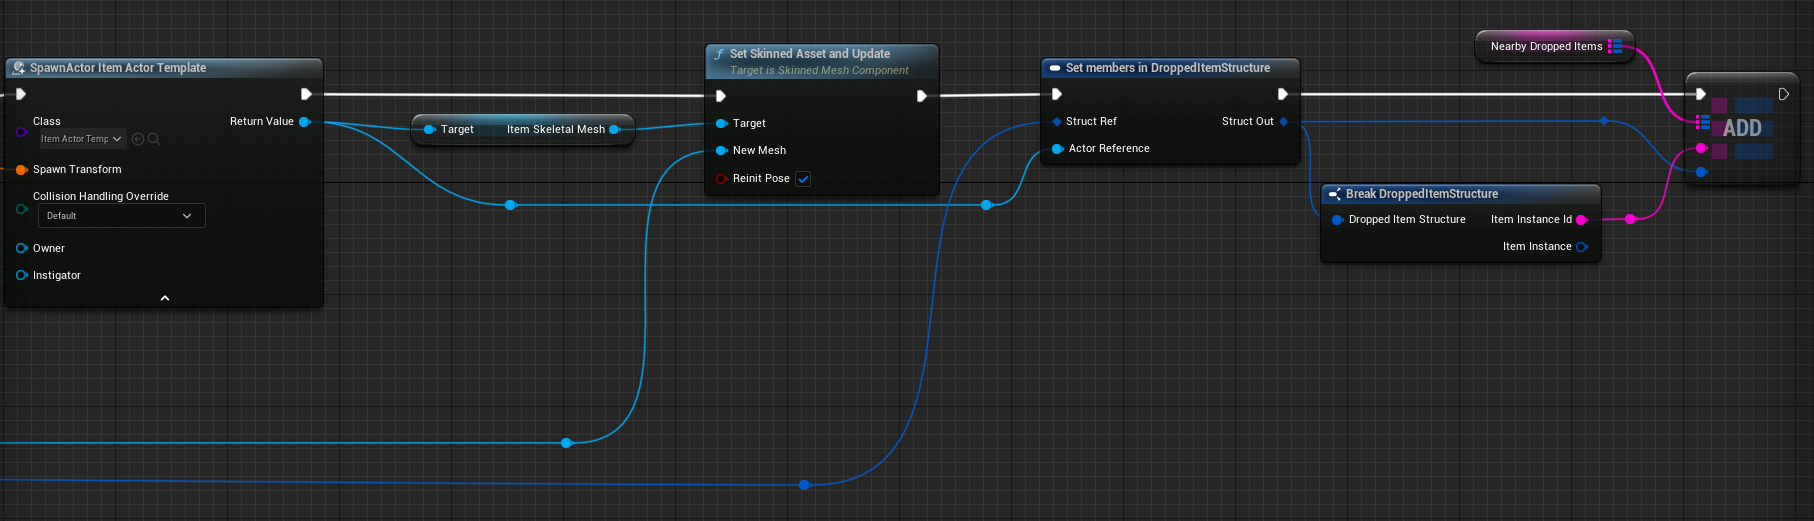
By keeping the dropped item as variable here, we’re able to control when we destroy it – after its picked up or player moves away from it.
Furthermore, to pickup items, we will check against this variable to see what the player will pick up.
Pick up nearby items
Ok for this we will use our enhanced inputs that we referenced at the beginning, when we mapped them on Begin Play.
Here we will check the pickup items button flow.
The request to pick up an item is quite straight forward, we just need the character name which is picking up the item and the item instance ID which we have in the nearby items variable.
Getting the nearby item ID is achieved using the folowing:
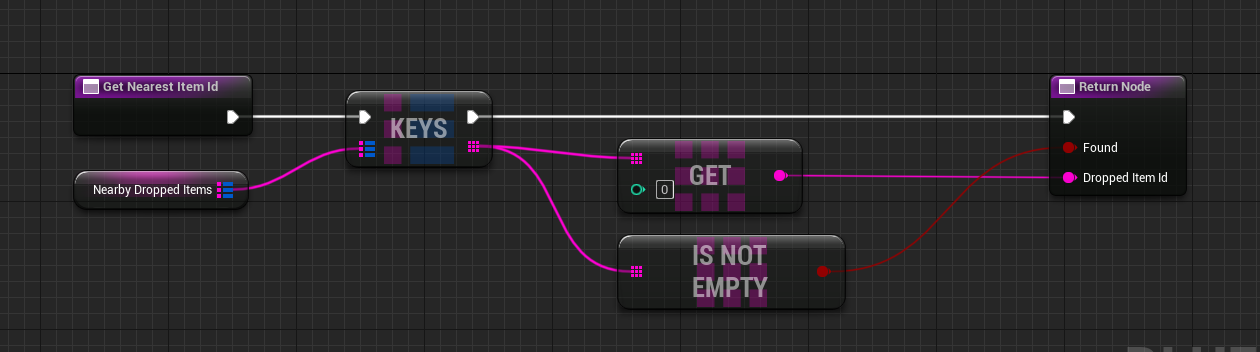
Here we will be picking up a relatively random item because the order is not guaranteed. You can create your logic on how to determine which item to pickup, e.g. order by nearest item to player.
When this request is sent, the server will process it and can either reject it (e.g. item already picked up) or accept it, which will prompt two more responses. One will include updated inventory and the other will remove the item from the map.
In a very similar way, the remove items from map inside the player socket integration component will know to direct this response to the inventory component.
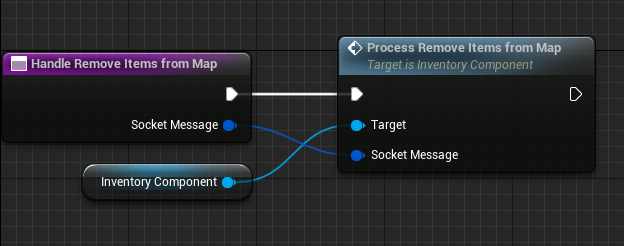
This function will simply look over the nearby dropped items variable and destroy the actor and remove this key from the map.

What’s next
Next, we just need to integrate the equip items to work with Websockets also and then we can get into some more interesting topics like combat.
In the server code, I’ve already added functionality to support player stats and items should be able to modify them. So soon we can start integrating all of this together too.