43. How to spawn and control mobs using Unreal Engine for MMO
This post is part of the journey of making MMO server using Unreal Engine and our Micronaut java server. Here are some of the linked posts.
- How to make effective comms between UE and custom server (overview)
- Implementing a good backend system design
- Connecting your Unreal Engine to your websockets (synchronize players)
- Motion smoothing for your actors
- How to spawn and control mobs using UE connected to our MMO server (this post)
Ok so we’re at a point where we have our micronaut server running and if several clients are logged in, they are synchronized using this server.
Now, we want to introduce some mobs and AI into the game. This is where we can leverage Unreal Engine server. It will actually run as a player for the mobs. It will spawn the mobs and control their behavior, pushing the updates to the micronaut server, not the players directly.
We do this to achieve greater scalability.
By the way, you will have to note that the contents in here are not production ready and are designed for MVP purposes only, so you will find particularly on this post a lot of unrefined work.
How do we spawn mobs
Well there are many ways of achieving this, you can do this programmatically yourself, but to save time I utilized this marketplace blueprint, Advanced AI Spawn System.
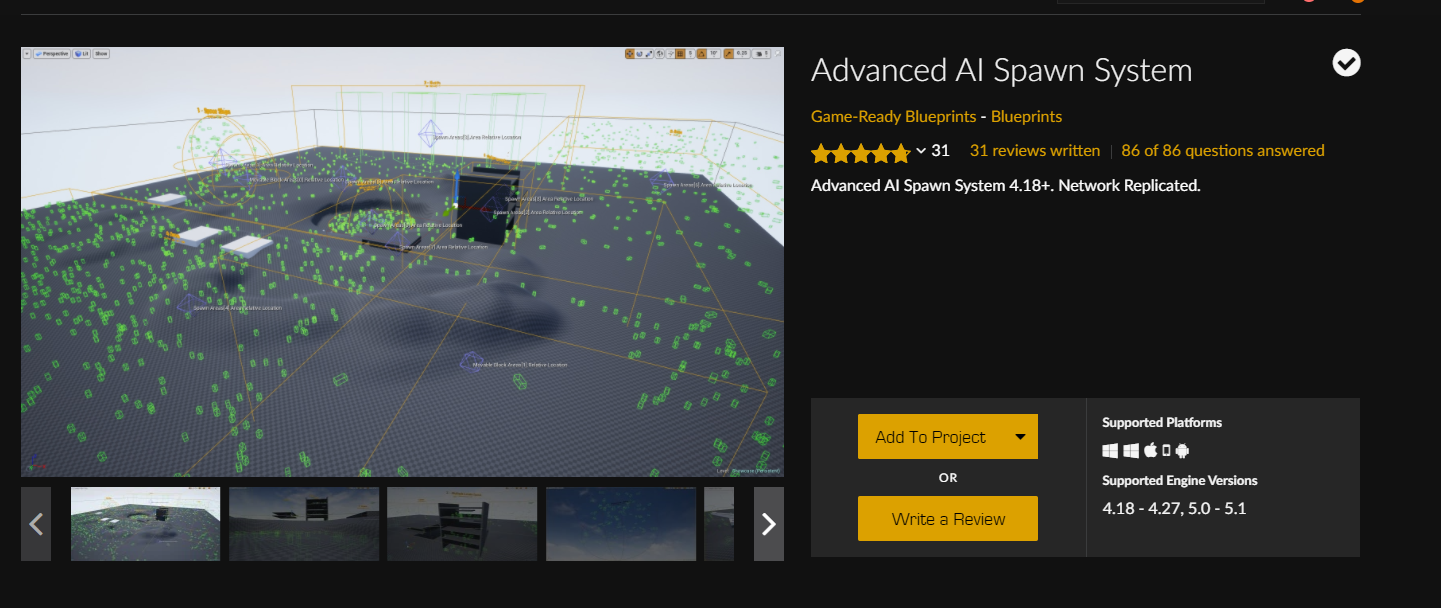
I add this blueprint actor into the map and it will handle the spawning of the mobs. By default it tries to check whether the game has authority. Under normal circumstances, this would be sufficient, but I also created my own equivalent, which is checking if the instance is authenticated as a server.
Ok so looking into the spawn blueprint itself, we will add our Player Socket Integration component.
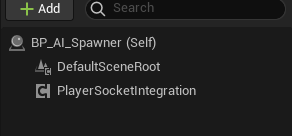
Perhaps I should rename it to Actor Socket Integration; but we introduced it in this section: Connecting your Unreal Engine to your websockets (synchronize players).
I then had to add the following to the event begin play in order to set it up.

Of-course the map will be depending on the server config in future.
Next, I start preparing the blueprints for my mobs. They will be VERY basic for now, just to demonstrate how things can be synchronized.
Mob blueprints
I create a blueprint MobBaseActor which will be the base component for all my mobs.
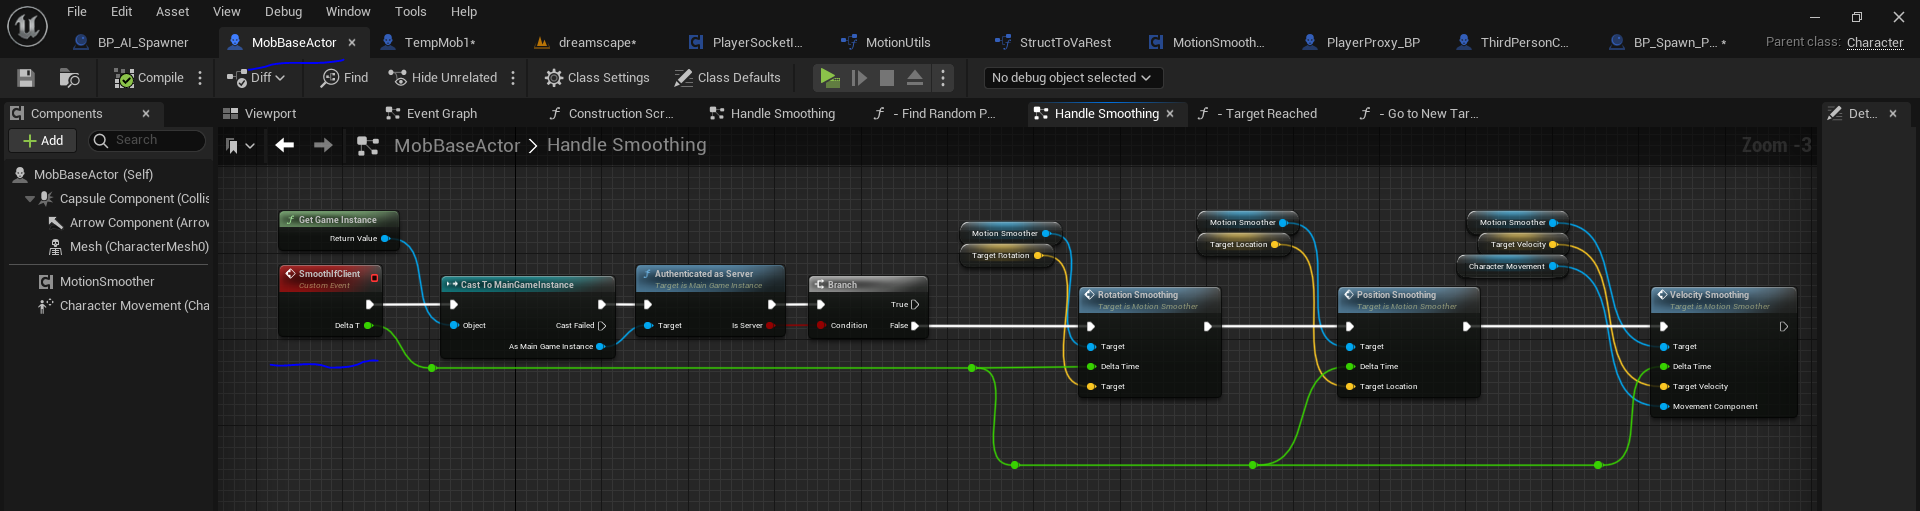
This blueprint will contain all the BASE functionality that my mobs will require.
Here’s the smoothing execution that was built here: Motion smoothing for your actors.
This smoothing is only required for the client, rather than the server, hence it does the check for whether this is executed on client/server.
There are some AI related functionality in there, very basic for now – just to get some random motion into these actors.
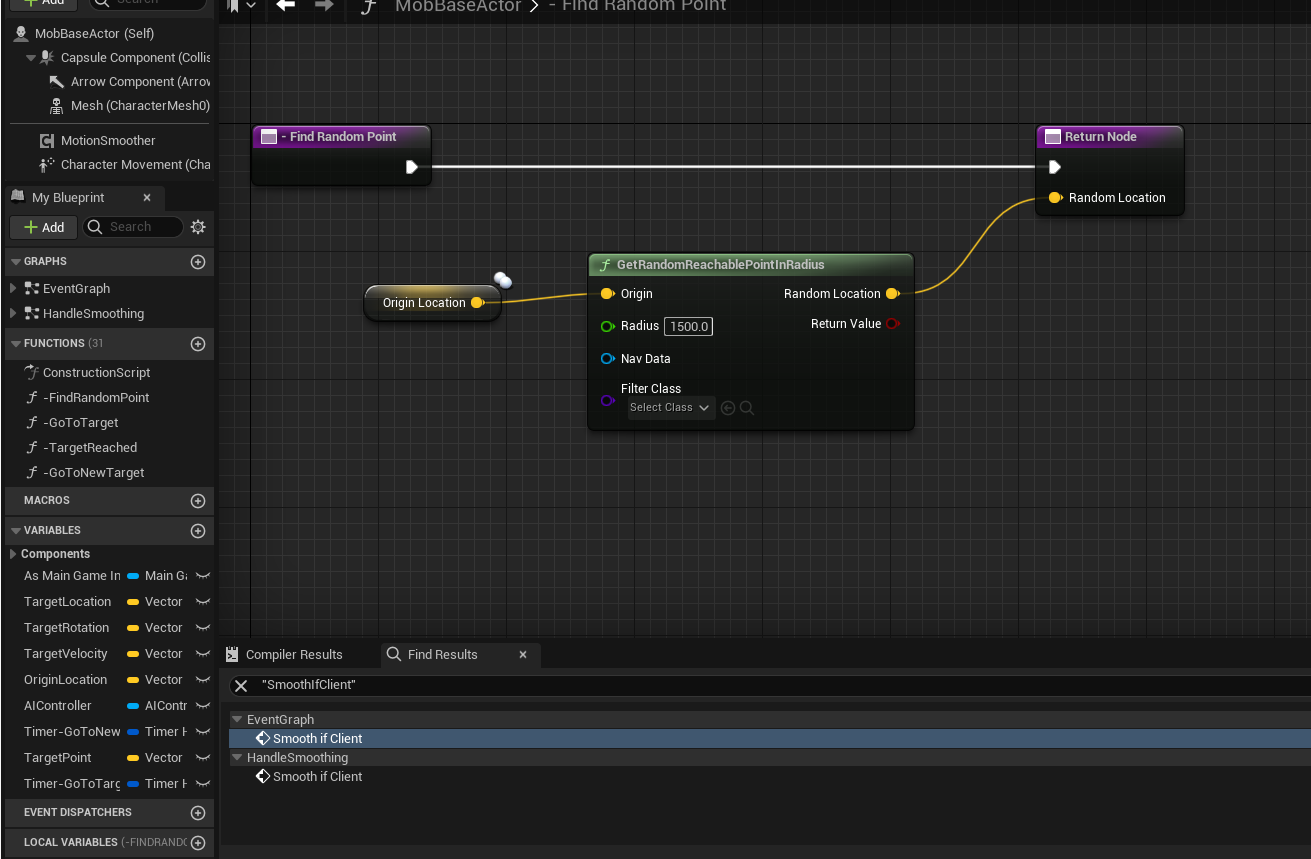
Those functions above came part of the Advanced AI Spawn System asset pack, that’s why I wont go into much detail of them – and of course your logic may be completely different.
The main point here is that you can move the AI logic into the base component to keep your blueprints refactored.
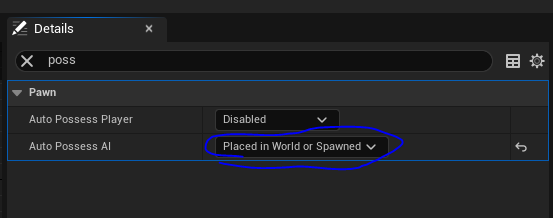
The main thing I need to reference is that you may need to set Auto possess AI as Placed in world or spawned.
I can now create a basic mob blueprint. I did this by simply copying a character asset and reparenting it to mob base actor.
You can create one from scratch by simply creating new blueprint and selecting mob base actor and then configuring its appearance manually.
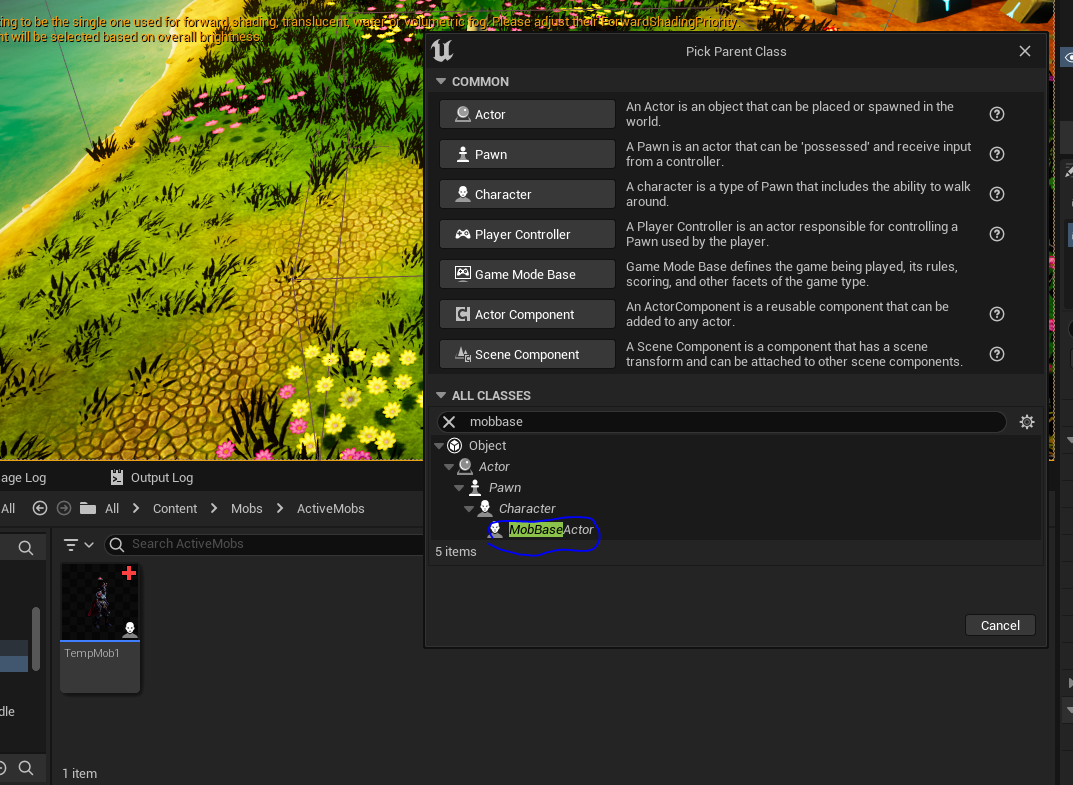
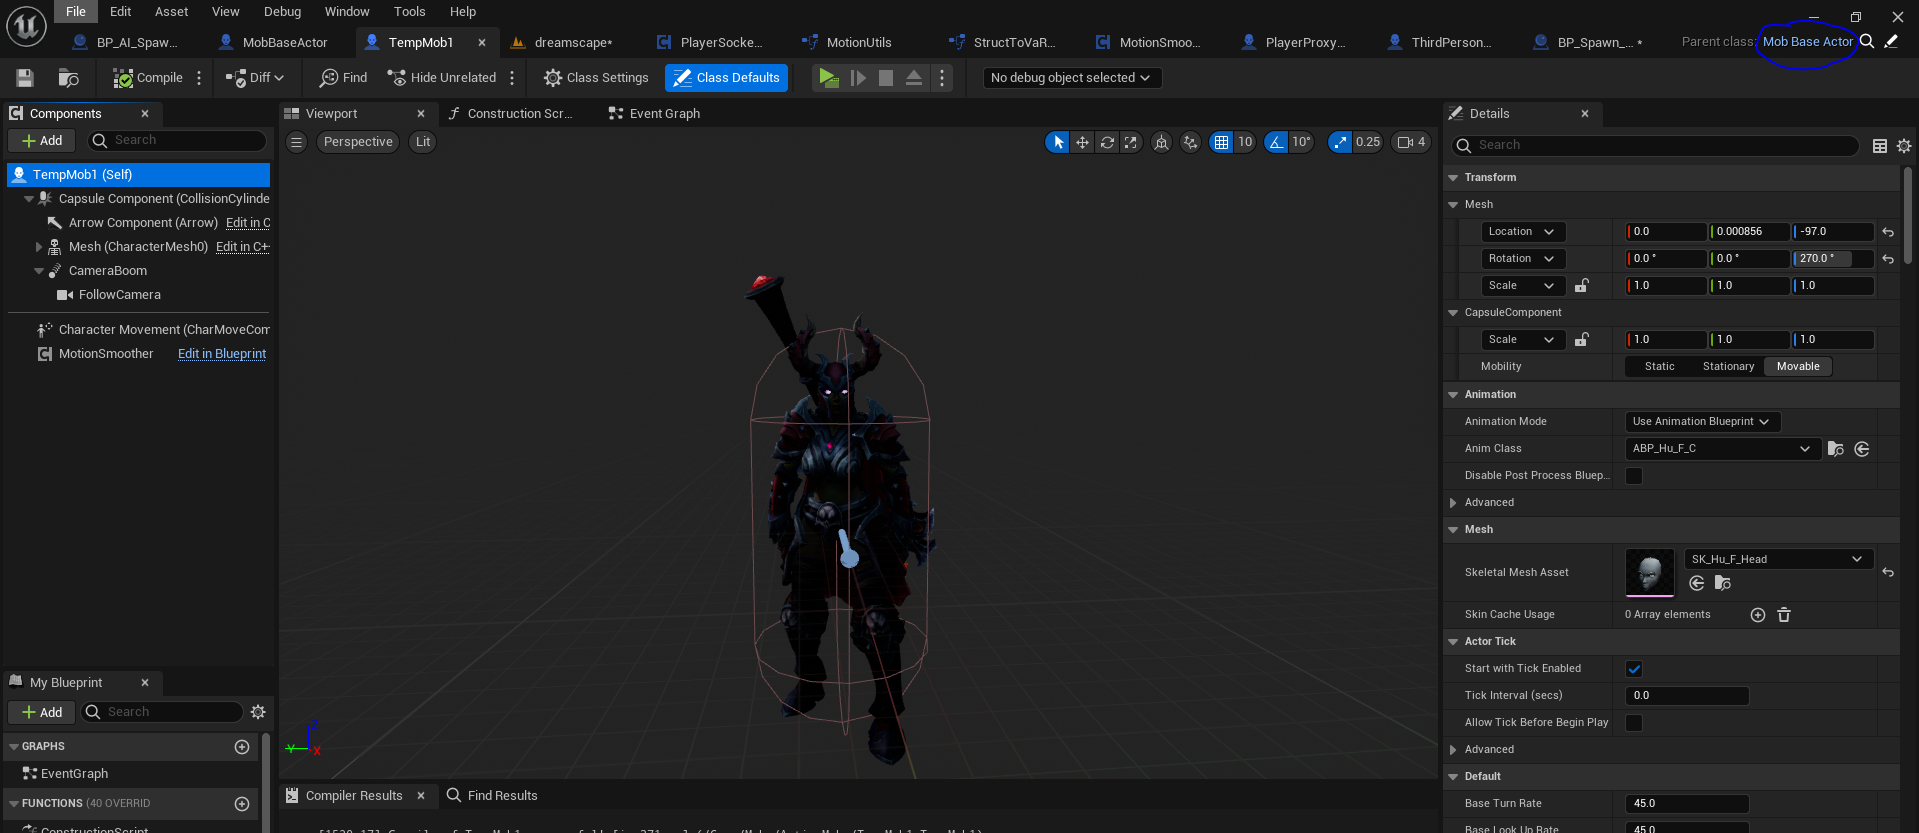
This blueprint has NO code to it right now. Note that the parent is set to Mob Base Actor – that’s where the movement logic will come from.
The only thing this blueprint has is the skeleton meshes with its specific animation information.
Note this blueprint is called TempMob1.
Spawning your mob using the AI Spawner
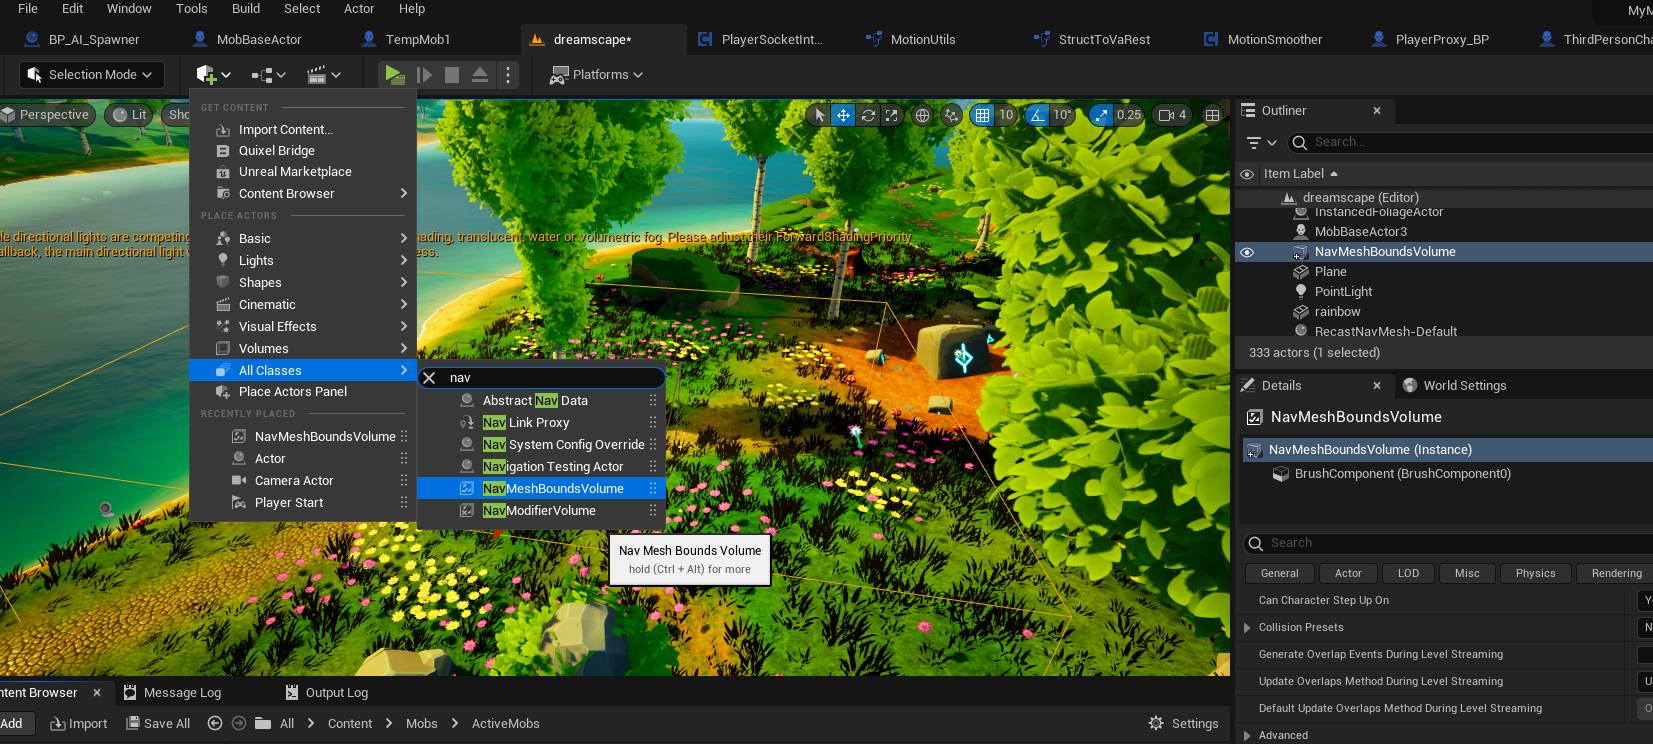
Ok we’re now at a point where we can add the spawner blueprint onto the map.
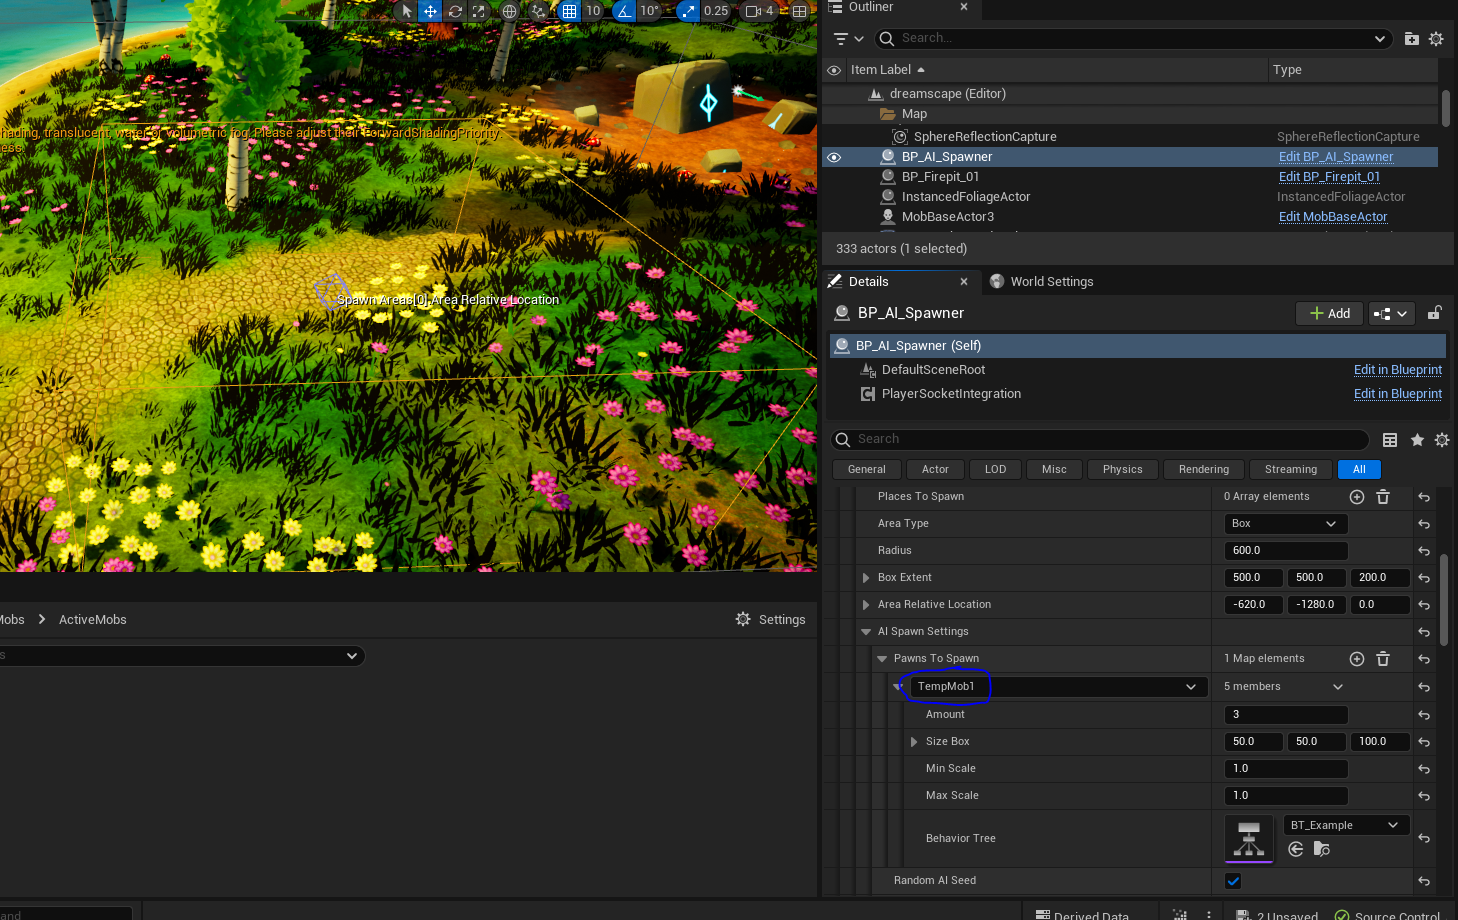
I then add some configurations, such as adding the box to spawn the mobs as well as the pawn to spawn being the TempMob1 that we just created.
Note that the behavior tree is again linked to your AI. I am using the default that came with this asset, which is simply finding random point within range and moving to it.
Note that I also had to add the nav mesh bounds around where the AI mob was going to walk around. This is to make sure it knows where it can move to.
Configuring the spawner with socket integration
We now added the socket integration component to the spawner. However, we did not yet define how we add the actors to sync, so let’s look at that now.
I created a basic function for now which will add the mob to the socket integration to be synched:
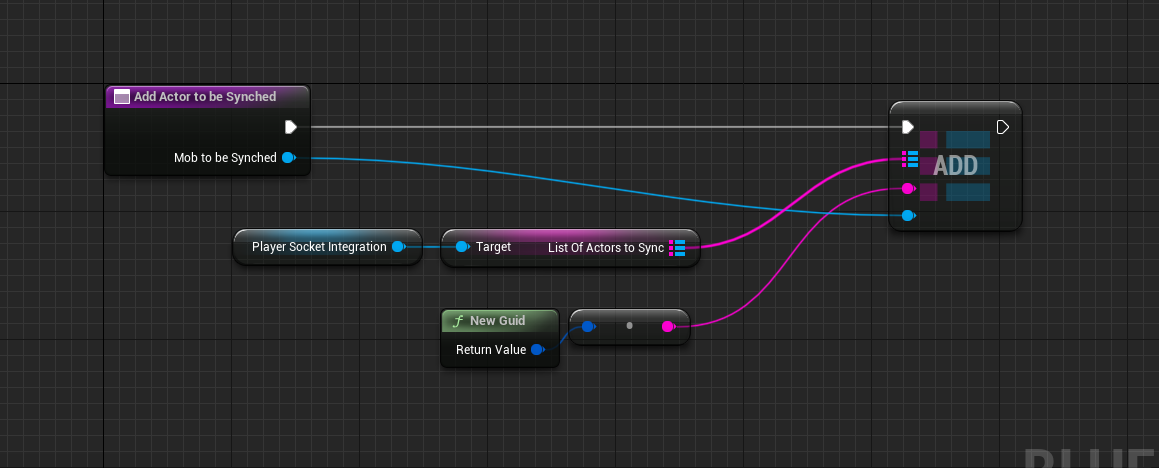
So this function will now receive a actor component, a new mob that is spawned. I will generate a new random GUID to be the mobs unique instance ID – this is similar to player name but for mobs.
I then take my Player Socket Integration component and add the new mob to the list of actors it will have to sync.
I will need to also remove this mob once the mob has been removed from the game, but we can do that a bit later, after implementing combat functionality in future.
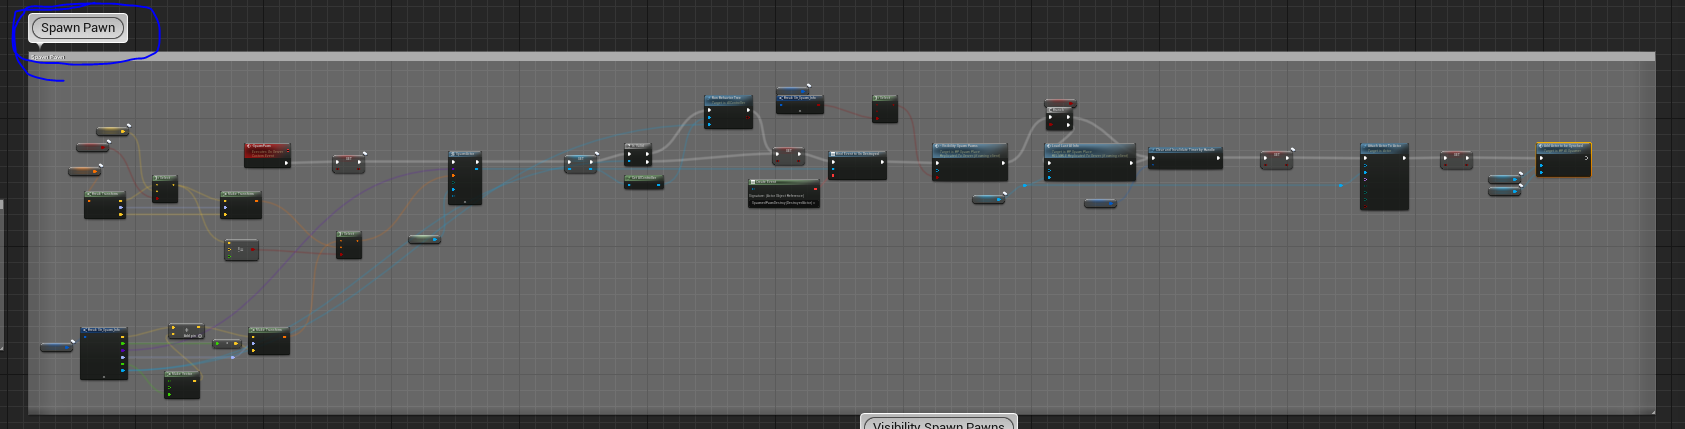
Now you just need to find where the pawn is being spawned, I found it because its labelled on BP_Spawn_Place in my case. Don’t worry too much about what the spawner does as its not in scope of this post (comment if you’d like content around this topic!).
I then just called the referenced function just at the end:
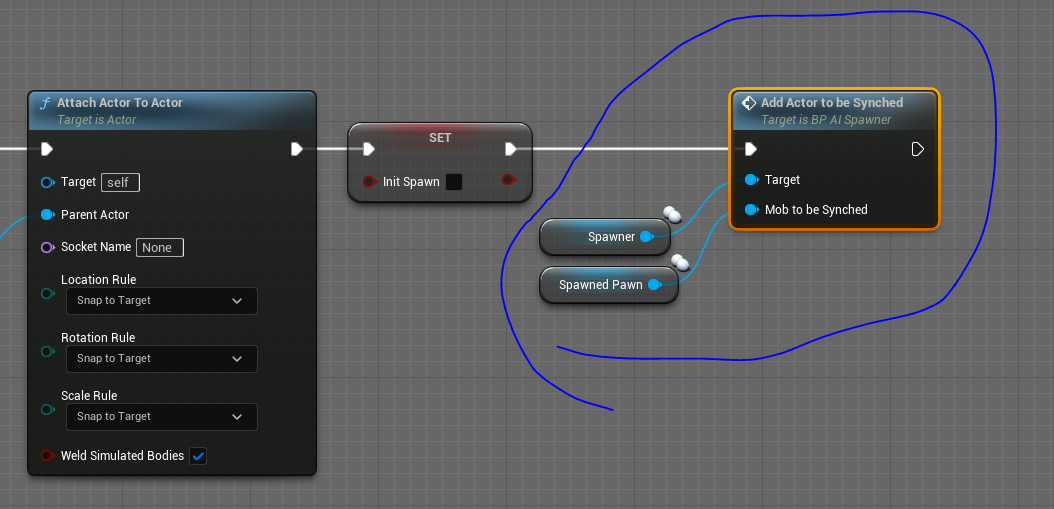
So now we have a configured socket and added the actor to sync. The actor is also enabled with some AI to walk around randomly within specified area. The integration socket will run a timer async, every 0.1 seconds (configurable) and pushing any new updates to the server.
Extending Socket Integration to support mobs
We will now be extending the socket integration component that we’ve built in: Connecting your Unreal Engine to your websockets (synchronize players).
Specifically, we will add information on how to handle mob updates. This is inherently processed by players because they have this component integrated.
Mob spawners will NOT get this update because its filtered by the backend service. I.e. when you connect socket you specify whether its connected to player or server and the comms will be slightly different if you’re a server – for instance they will not get mob updates as they should already be fully aware of them.
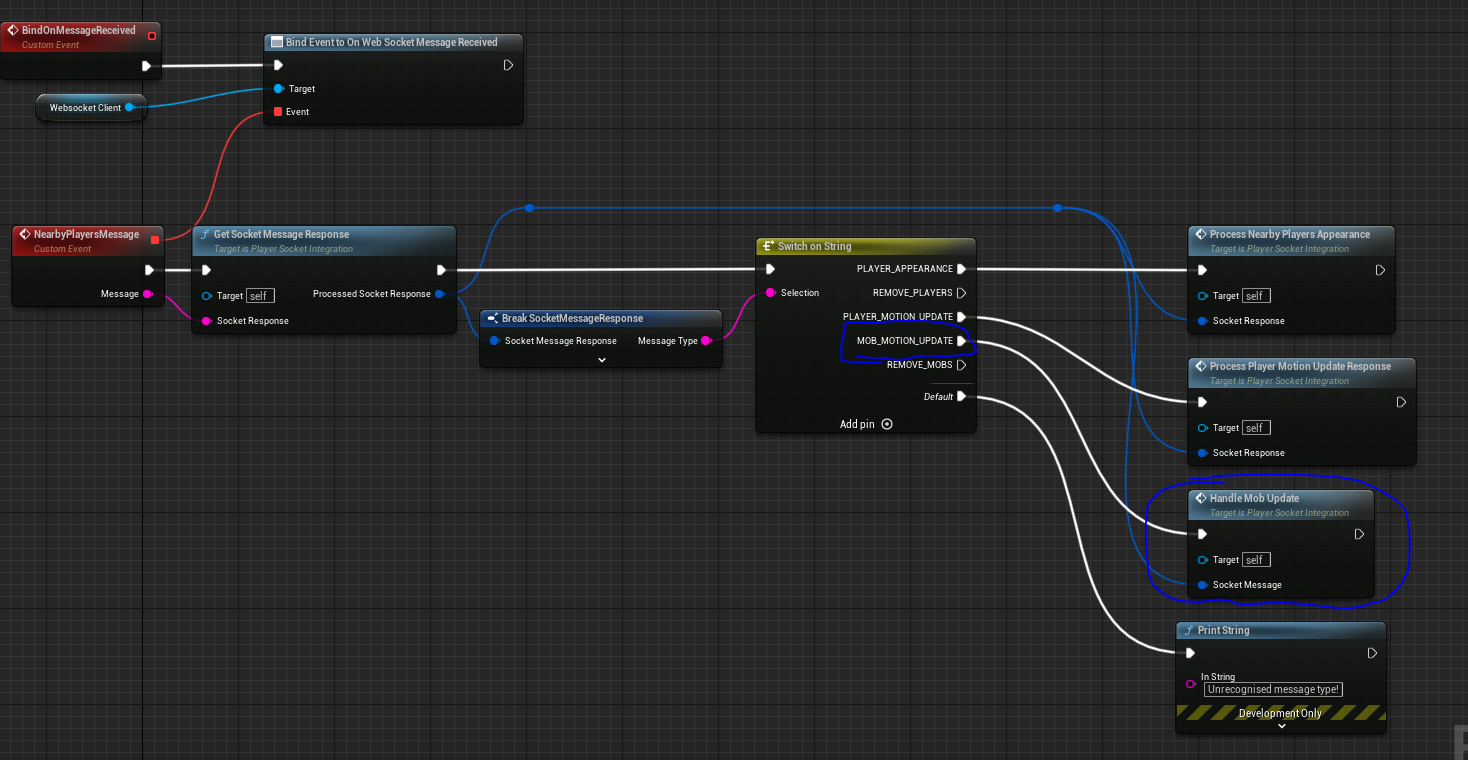
let’s look into Handle Mob Update function.
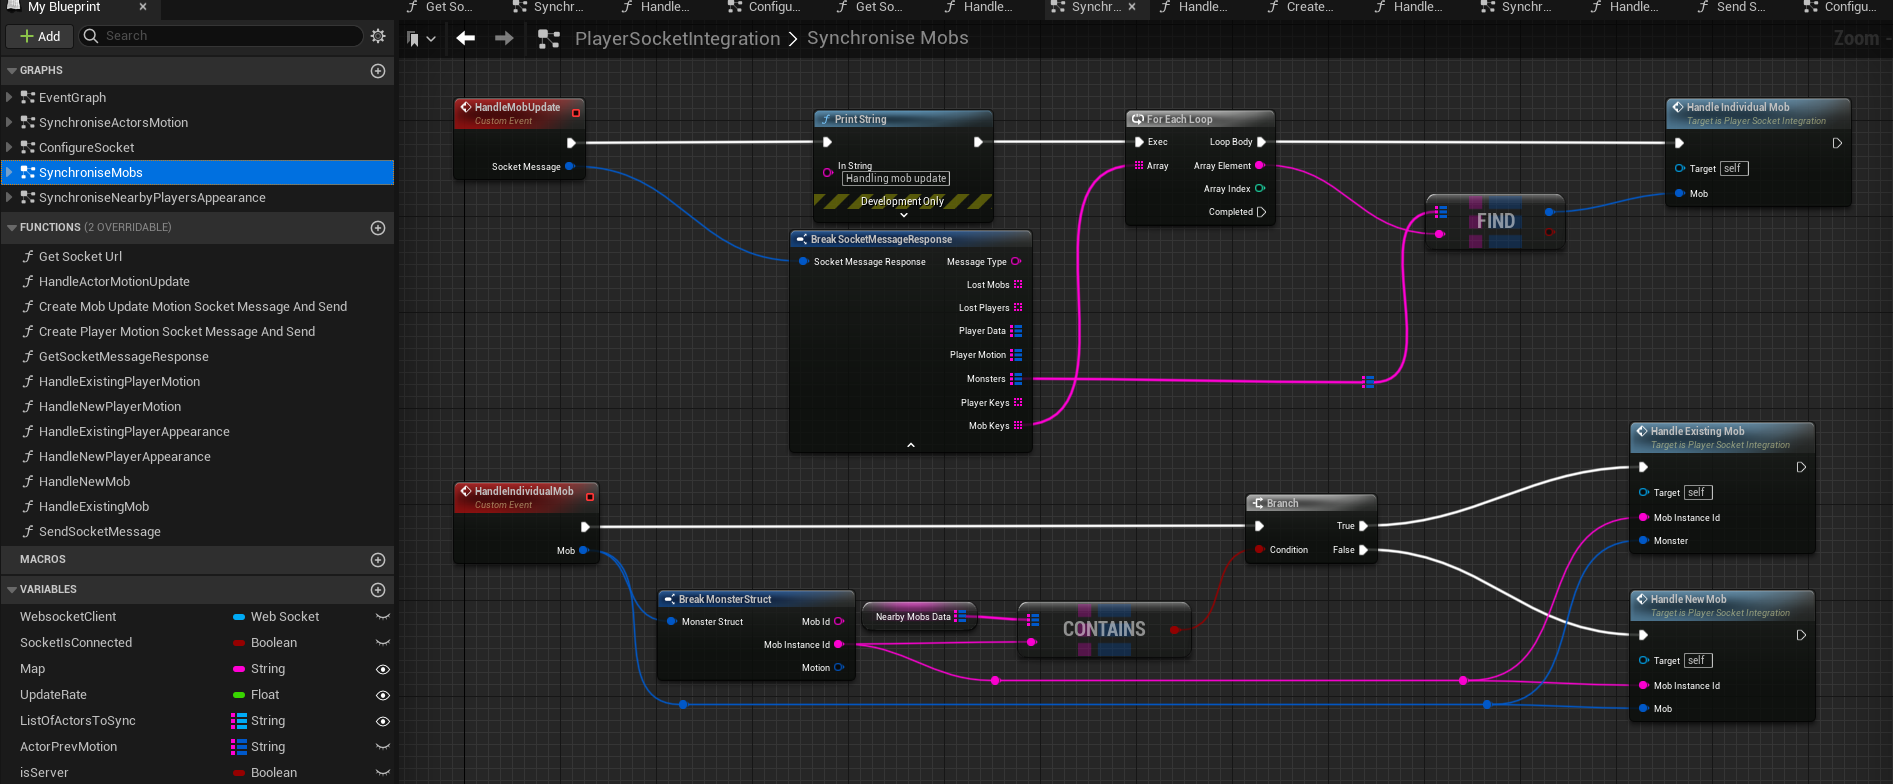
As you can see, the message currently supports format for multiple mobs, but we will process them individually for now.
Let’s see what happens on Handle New Mob.
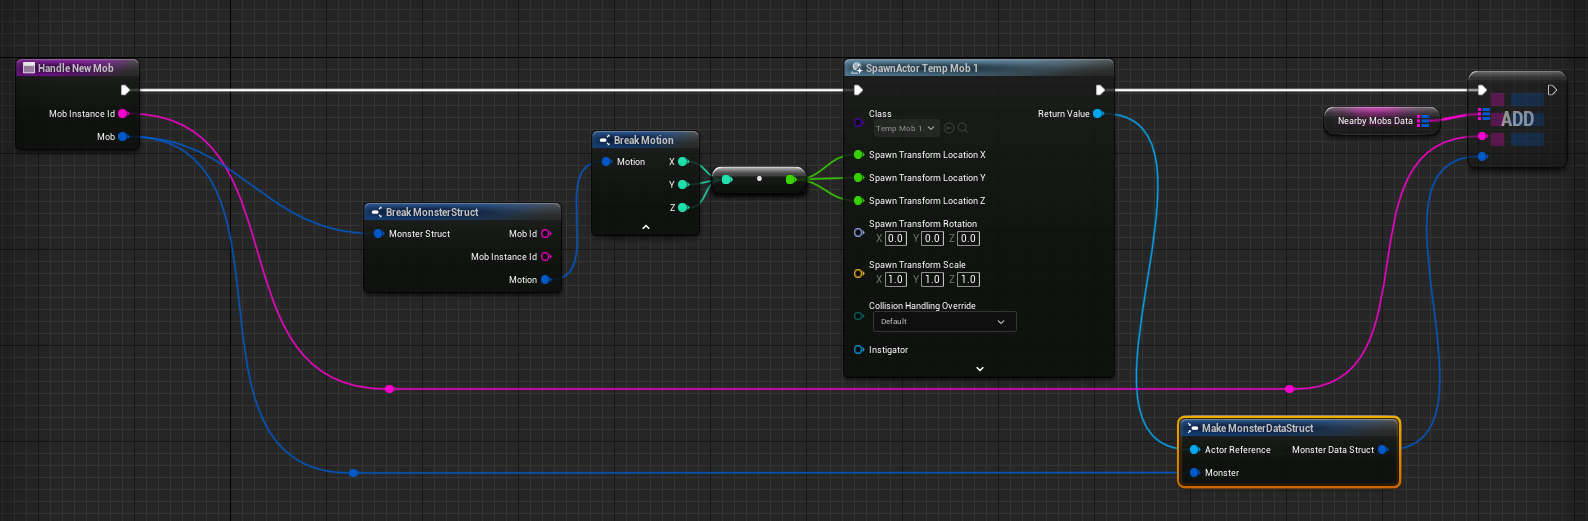
Note that we only have 1 mob at the moment and the spawner does not yet reference the mob ID, only mob instance ID. Therefore for now, all mobs will spawn TempMob1 actor component. We then add it the nearby mobs data. We could also handle existing mob at this point, in order to update its rotation and velocity values, but again, this is just simple MVP.
Let’s have a look at the Handle Existing Mob function too.
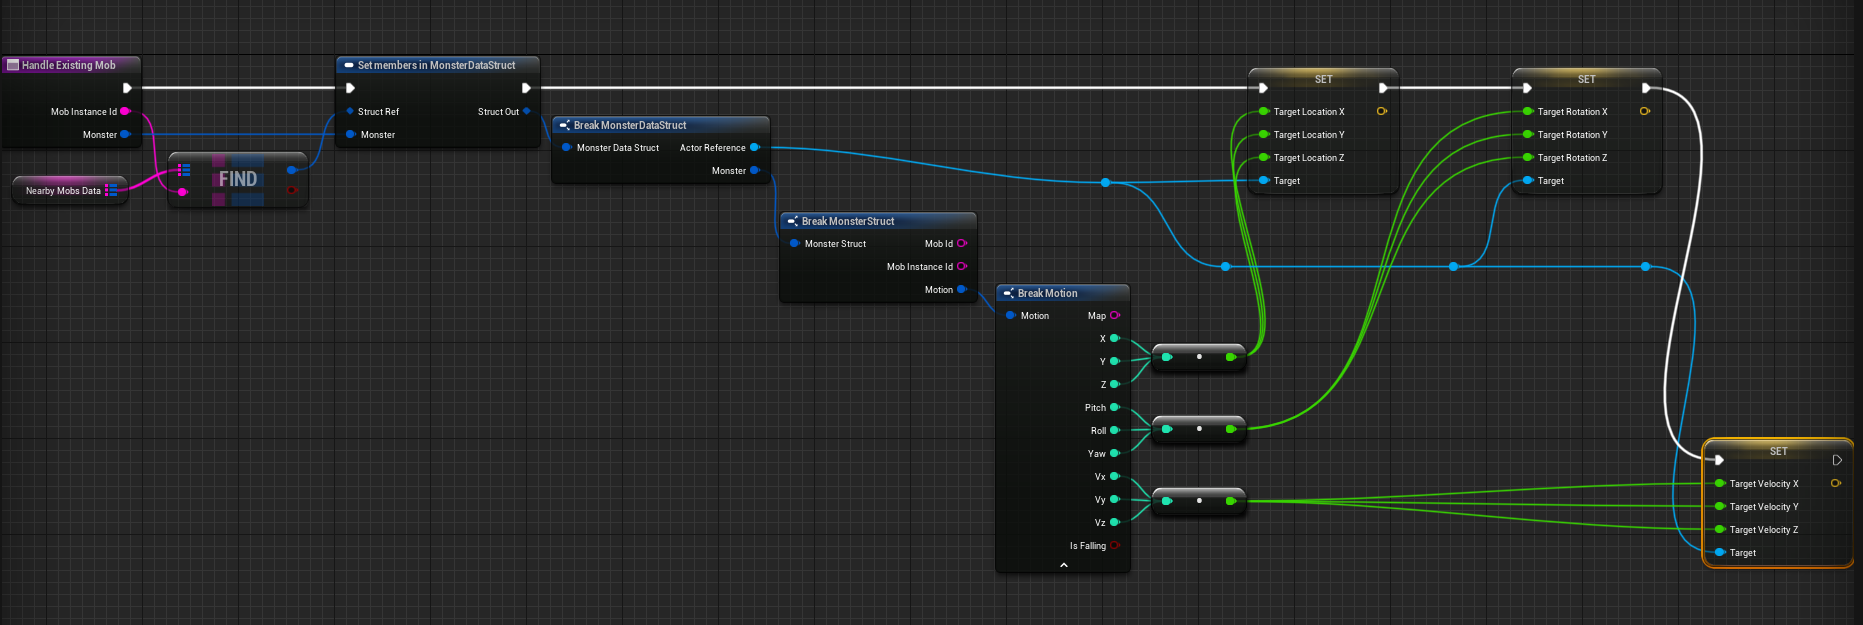
This one finds the nearby mob that we’re referencing and will grab its actor reference and update its position, rotation and velocity targets. The targets are vectors that the mob will aim to smoothly get to. This motion smoothing is the one we covered in this post: Motion smoothing for your actors.
The mobs are now synchronised!
We now have a spawner system which works on a UE server (which is working as a client to our micronaut server). The spawner system creates a mobs and assigns it a instance IDs. It then starts synchronizing the mobs with our server. The mob data is then relayed to any nearby players, whenever they are within its distance over websockets.
In the near future, I will start putting together very basic combat system between the mobs and the players.