42. How to make smooth motion for your actors in UE
In this post we will explore how to handle smooth updates for your actors in Unreal Engine. These actors could be players or mobs.
Essentially what we will achieve is setting targets for position, locations or velocities and we will get to those targets more smoothly, avoiding teleportation or jitterness.
This post is also referenced part of the journey of making MMO server using Unreal Engine and our Micronaut java server.
- How to make effective comms between UE and custom server (overview)
- Implementing a good backend system design
- Connecting your Unreal Engine to your websockets (synchronize players)
- Motion smoothing for your actors (this post)
- How to spawn and control mobs using UE connected to our MMO server
Creating the component
This smoothing can be achieved through multiple ways, what I decided to do was create an actor component which I would attach to my actors. This would include my player base and my mobs base. Instead of creating a separate component, you could just create the functions in a utility class or directly in your character class.
So right click and select create new blueprint and for parent, select Actor Component.
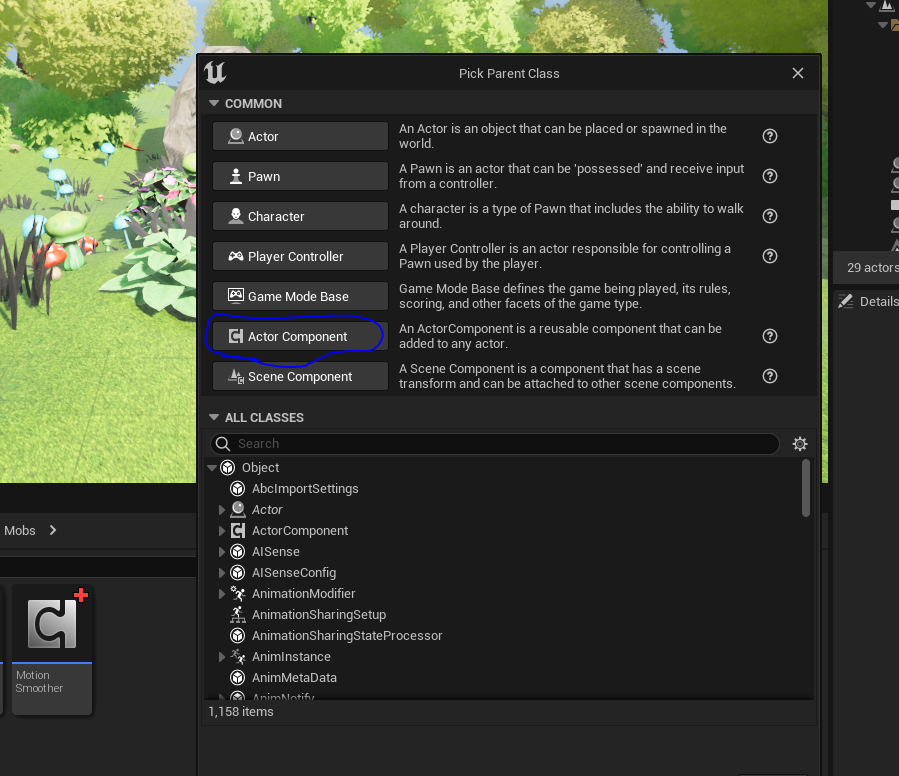
This component will only deal with motion smoothing, so that’s what I called it.
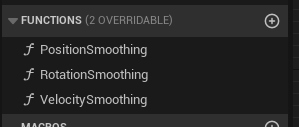
All we’re going to do is create 3 new functions:
- Position smoothing
- Rotation smoothing
- Velocity smoothing
The smoothing functions
The smoothing functions themselves are very simple and look quite similar to each other. Functions themselves can be executed on every frame.
The great thing about it is that Unreal Engine already provides us some great math functions to help us with the smoothing, we just need to integrate them. In particular the ones that we will be using are:
Position Smoothing
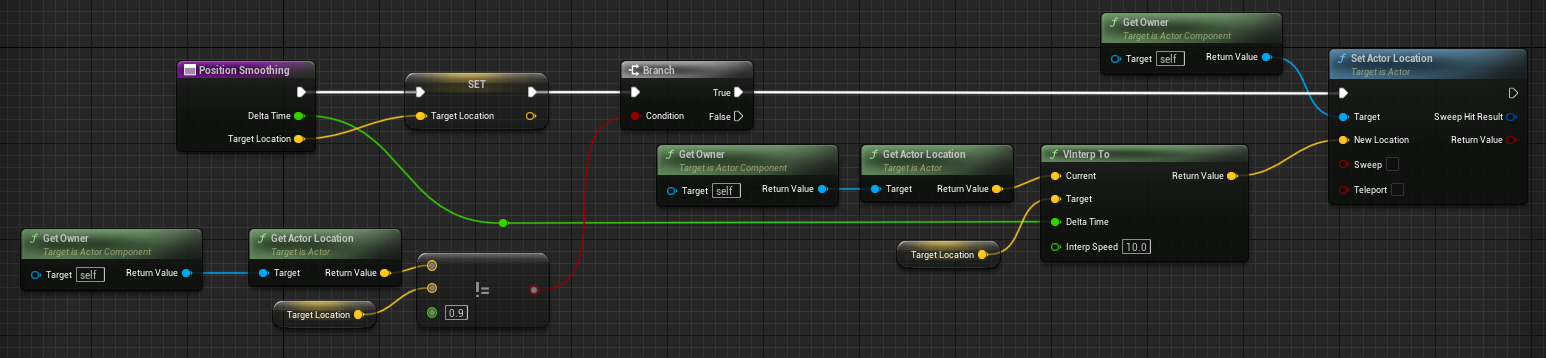
We need two inputs here, the delta time and the target location. In our case, the target location can be updated every 0.1 seconds and we execute the call on every frame, the time difference between the frames are the delta time.
Basically from our actor blueprint, we call this function and specify the target position. We just need to wire the VInterp To function correctly and then set the actor position based on the result. The actor is the owner component in this particular case.
Rotation Smoothing
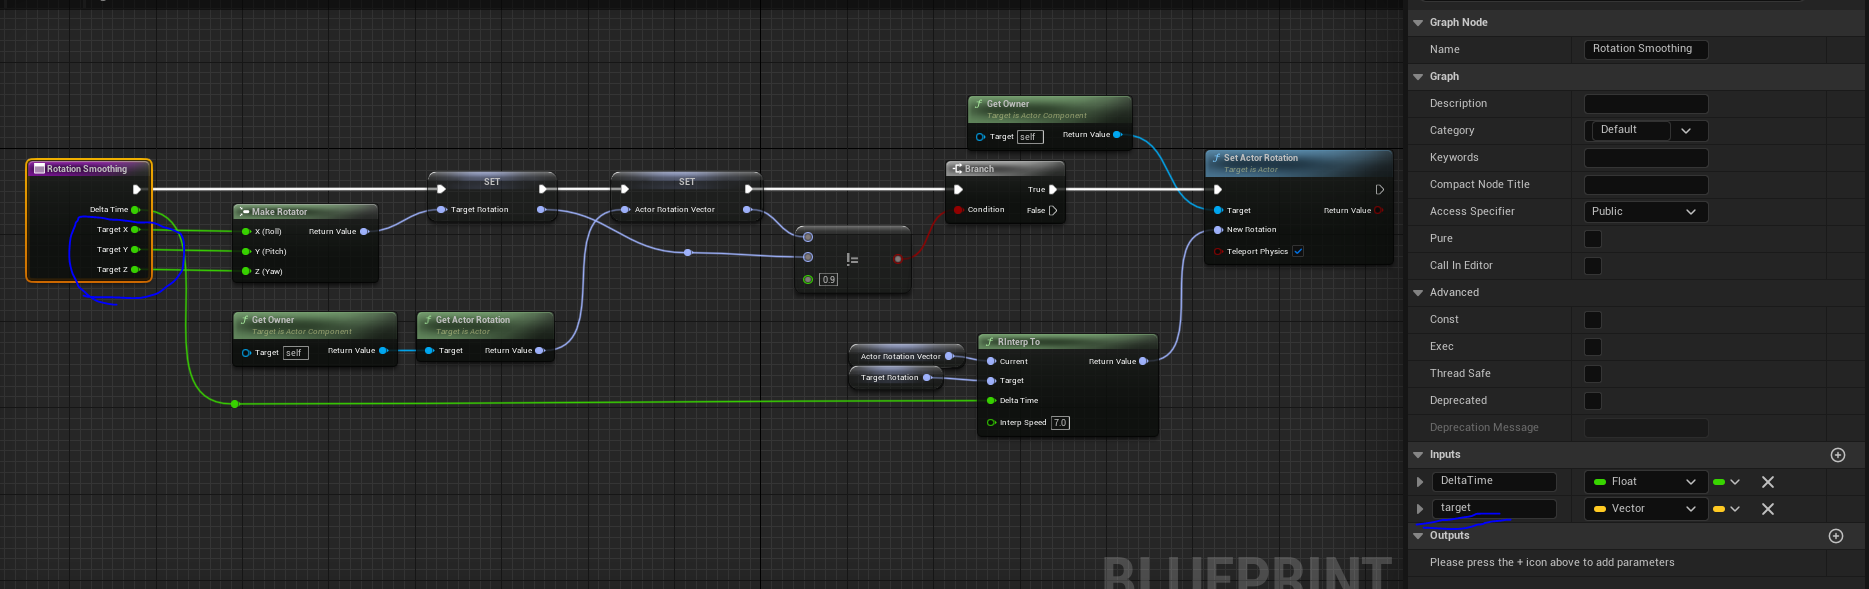
Here the input actually looks very much the same. The target is again a vector, but I right click the pin and click ‘split struct pin’. This is because for rotation, we use RInterp To which takes in a rotator. So we want to convert our vector to a rotator. If you have a target rotator, you don’t need to do this part, but my input was a vector.
I again just grab the owner component, which is the actor, and set its rotation.
Velocity smoothing
This is slightly different because velocity is actually on a movement component of an actor, not the actor directly. Therefore, I add that as a separate pin.
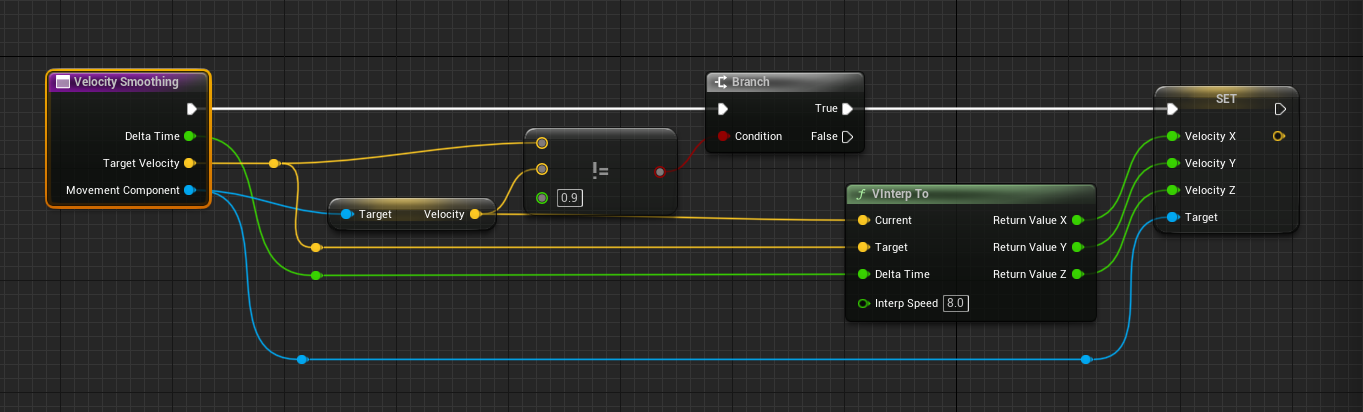
But as you can see, the resulting function is still quite simple.
We now have all the smoothing functions configured so let’s integrate it into our components!
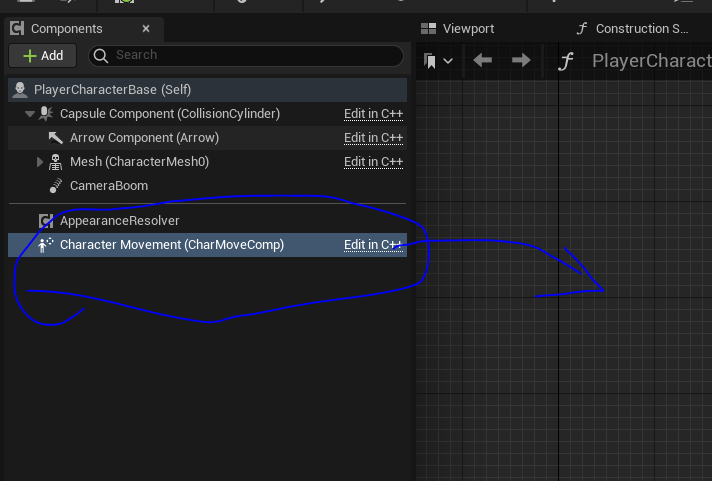
Remember, the movement component can be found inside any character blueprint and it’s not part of a pawn component.
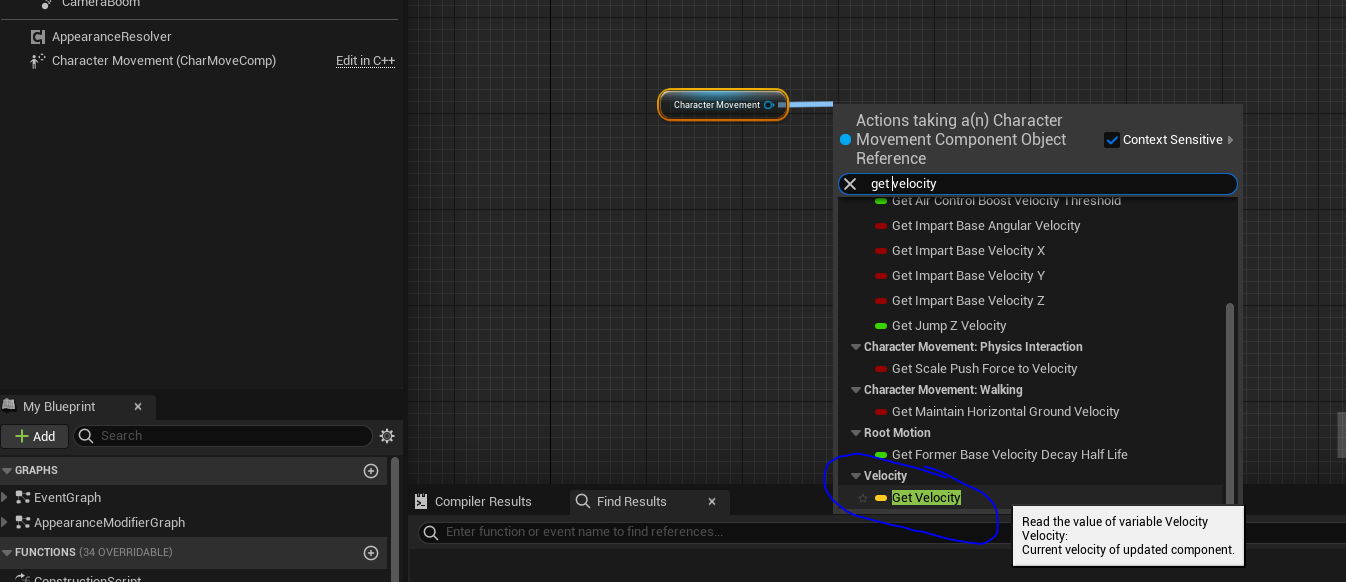
You’re able to drag that component into the event graph, or just type ‘get character movement’ on the graph.
Also, you will be able to get velocity by simply writing ‘get velocity’ off this component.
Integrating the smoothing functions to your actors
Now we can just execute these functions from our actor components.
Bear in mind, the event tick could live inside the actor component blueprint that created. We can also link the movement component via constructor and grab the targets using parent reference.
So there’s multiple ways of achieving the same result, so choose whatever suits your needs.
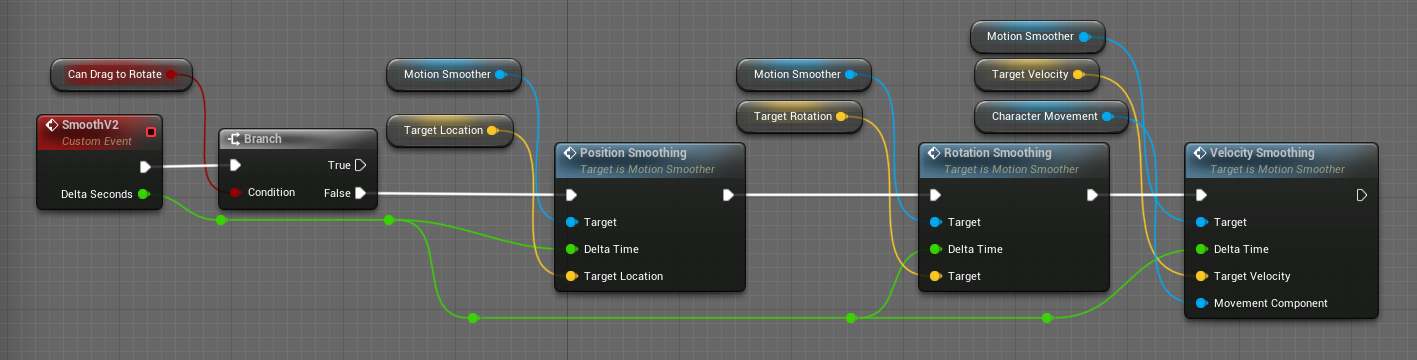
You can ignore the can drag to rotate variable. This is to symbolize that you can have your custom pre-requisites before executing these functions. That variable actually symbolizes that this pawn is used in character creation screen, so it doesn’t need any smoothing done on it.