8. Heroku + RoR + React: Deployment made nice and easy
This post is going to go over the process of taking your Ruby on Rails application with Webpacker and React front-end and deploying it with Heroku.
If you haven’t got a Rails application yet, you may want to check out some of the earlier posts such as this one.
First of all, you will want to go to Heroku, click on apps and create a new app.
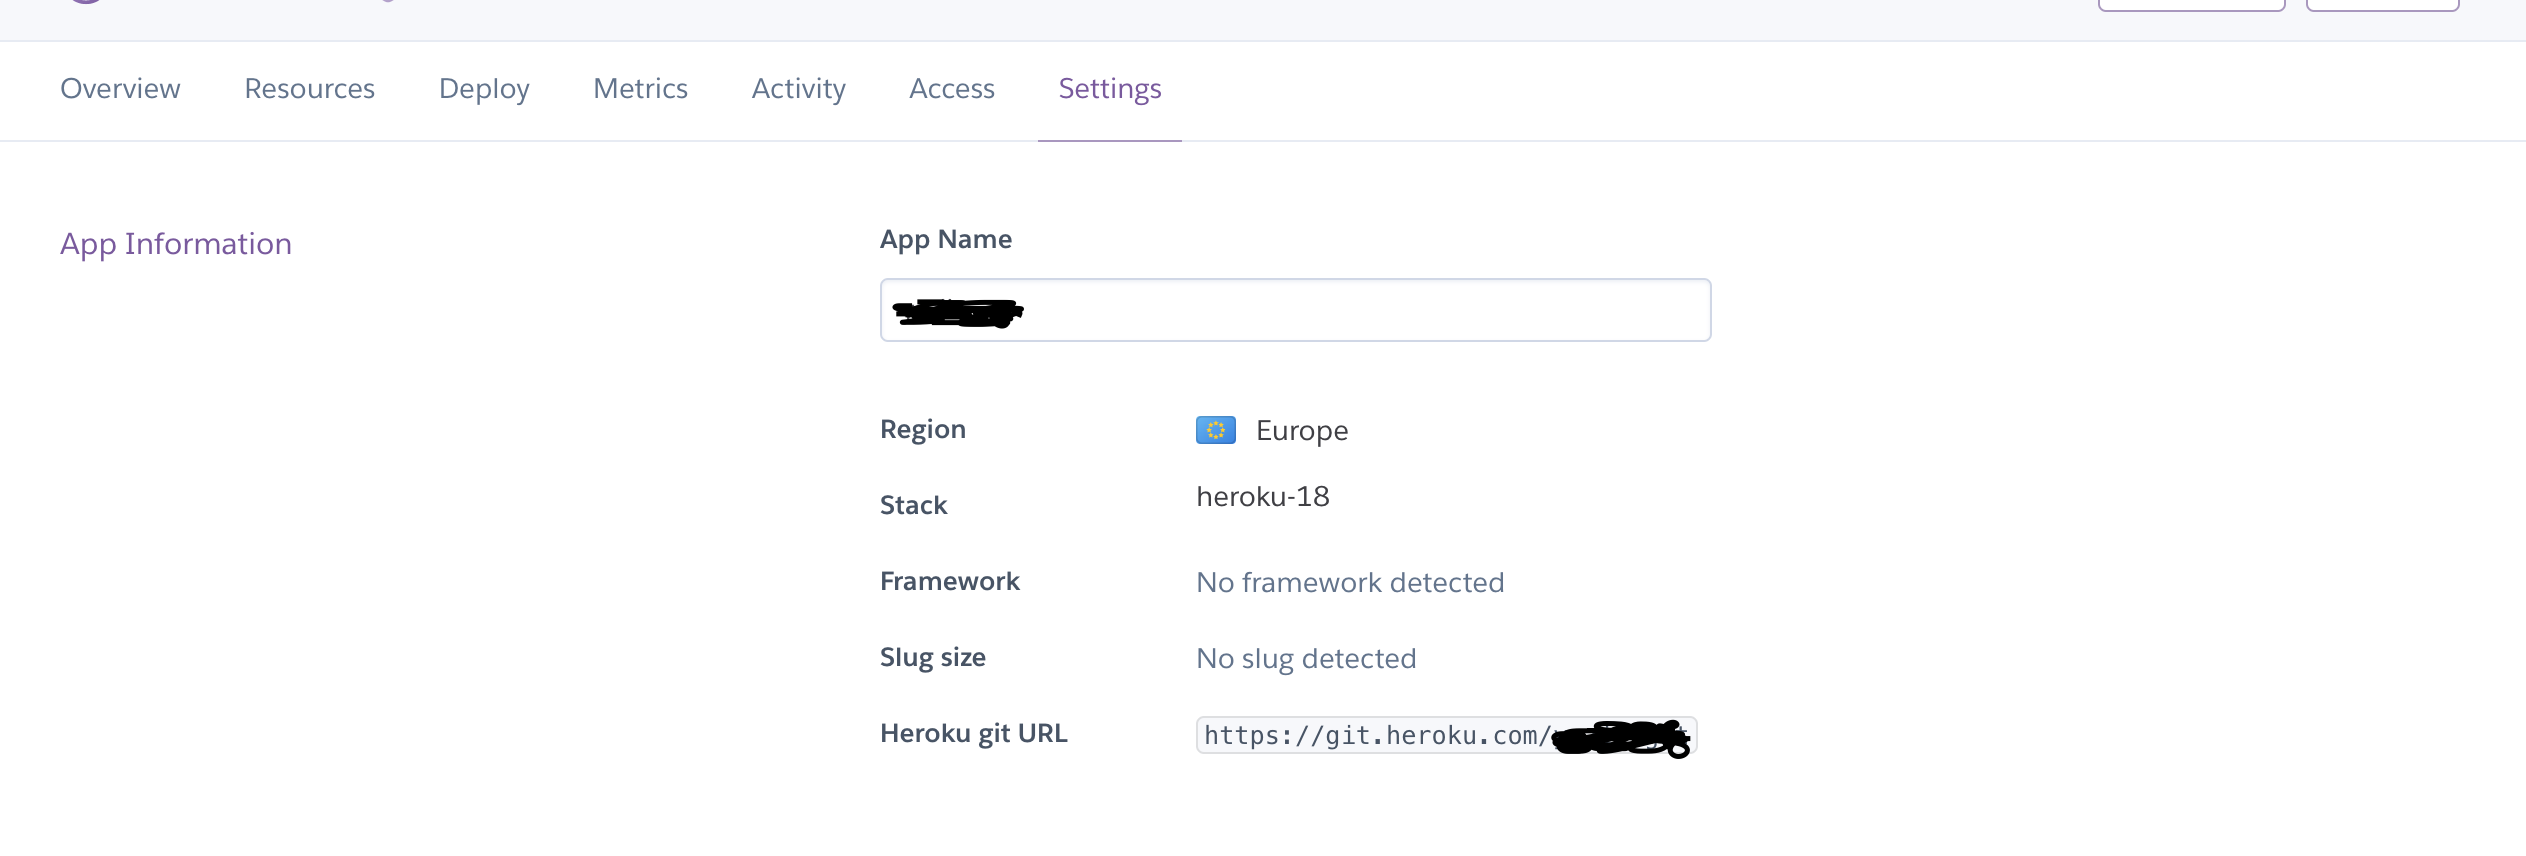
Give it a good name as you will use this quite often in the future.
Once you’ve created the app, navigate to ‘Settings’ tab
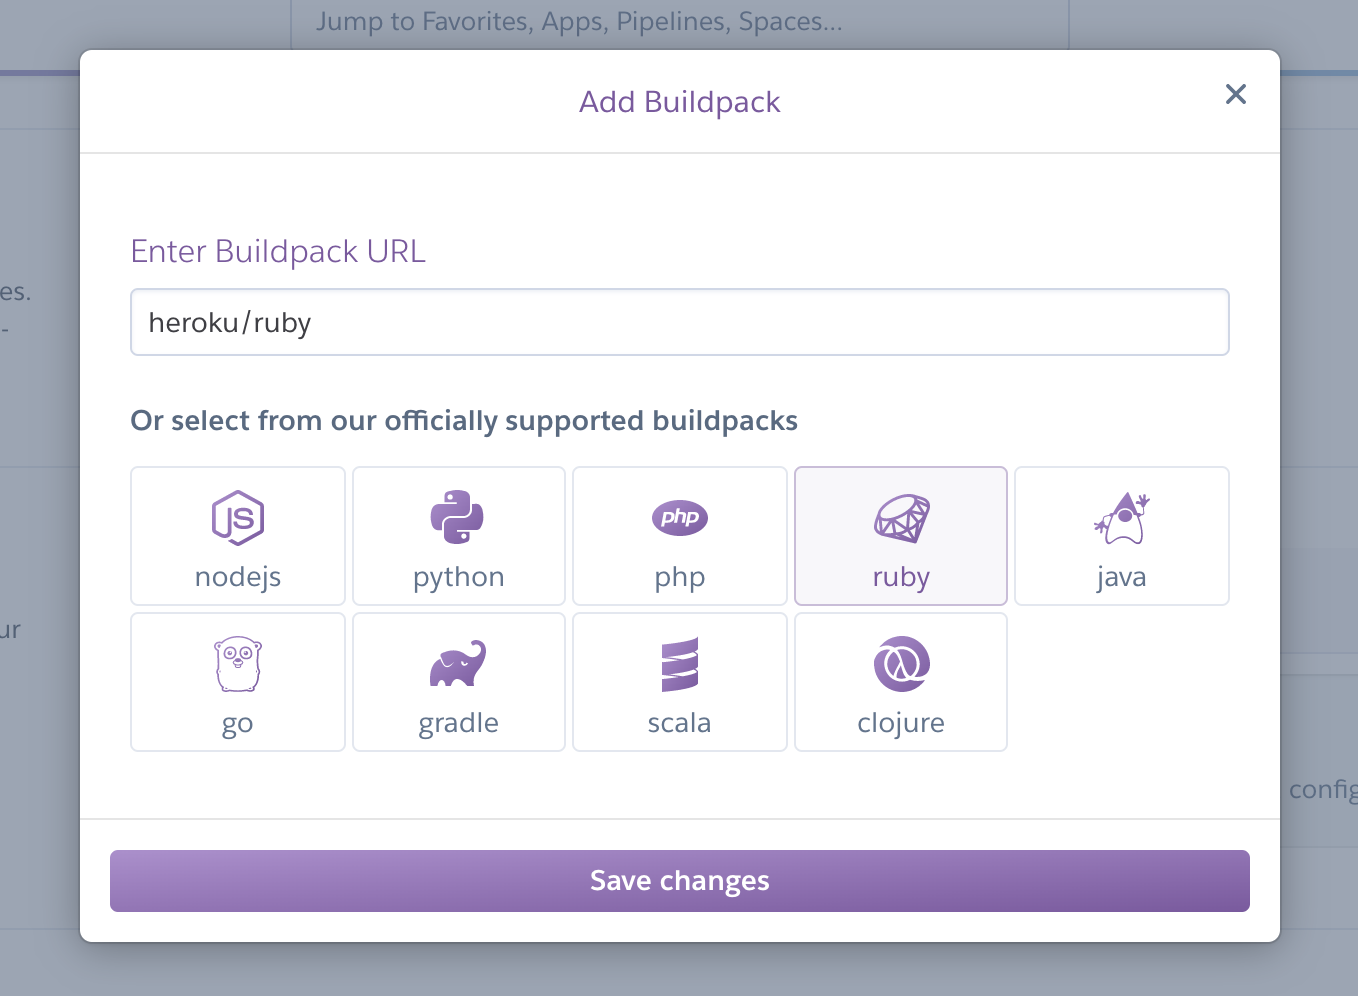
You will want to modify the build packs of this app:

First, select the Ruby buildpack:
Click save changes and add another buildpack, this time nodejs:
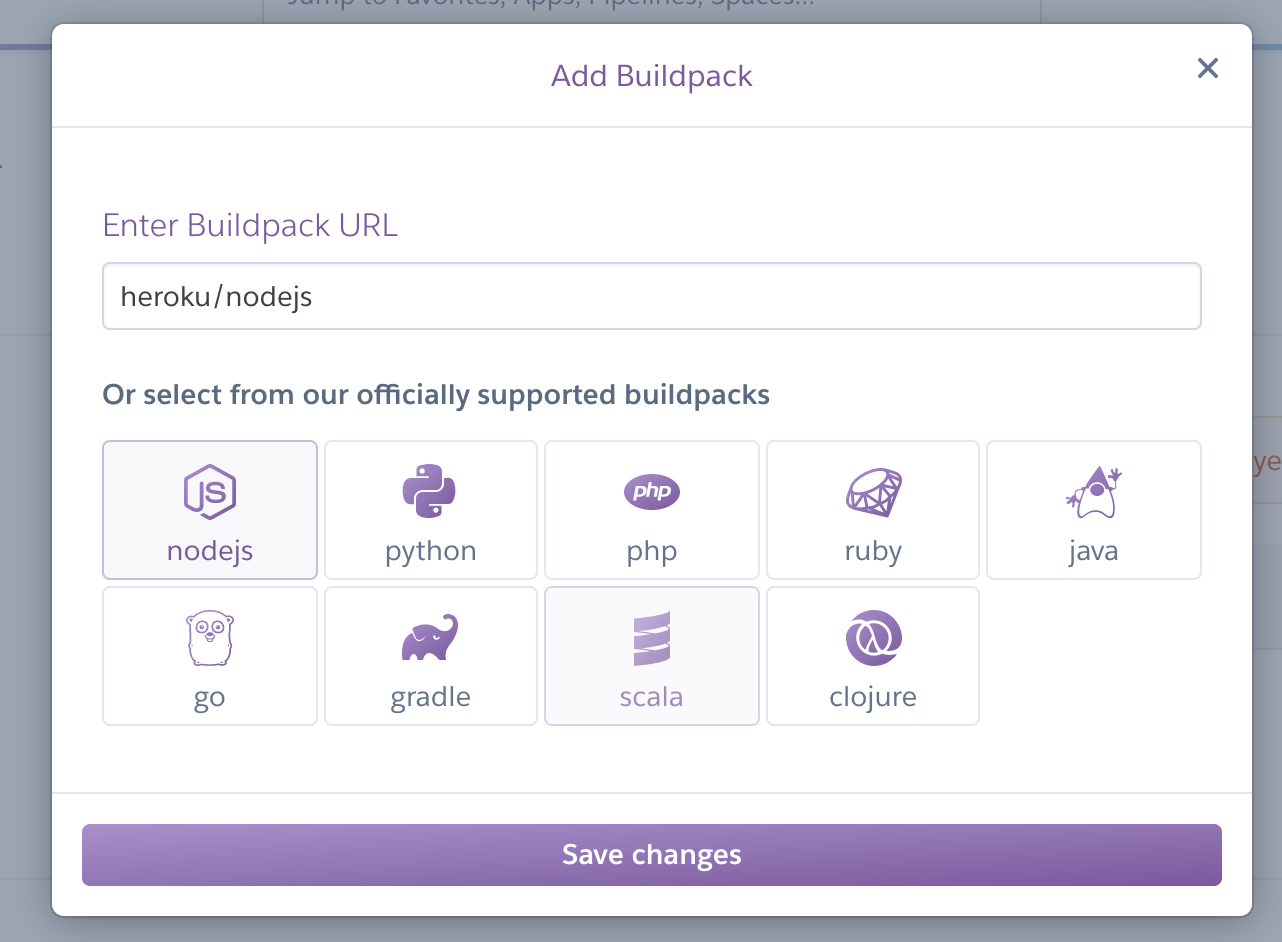
Nodejs is required with Webpacker and React dependencies.
Those two will be minimum. Then if like me you’ve added extra couple of things, you may need additional buildpacks. For example, I am utilising image_processing gem, which requires ImageMagick. We will do this with heroku CLI below.
For now, navigate to ‘deploy’ tab. There are several steps outlined here:
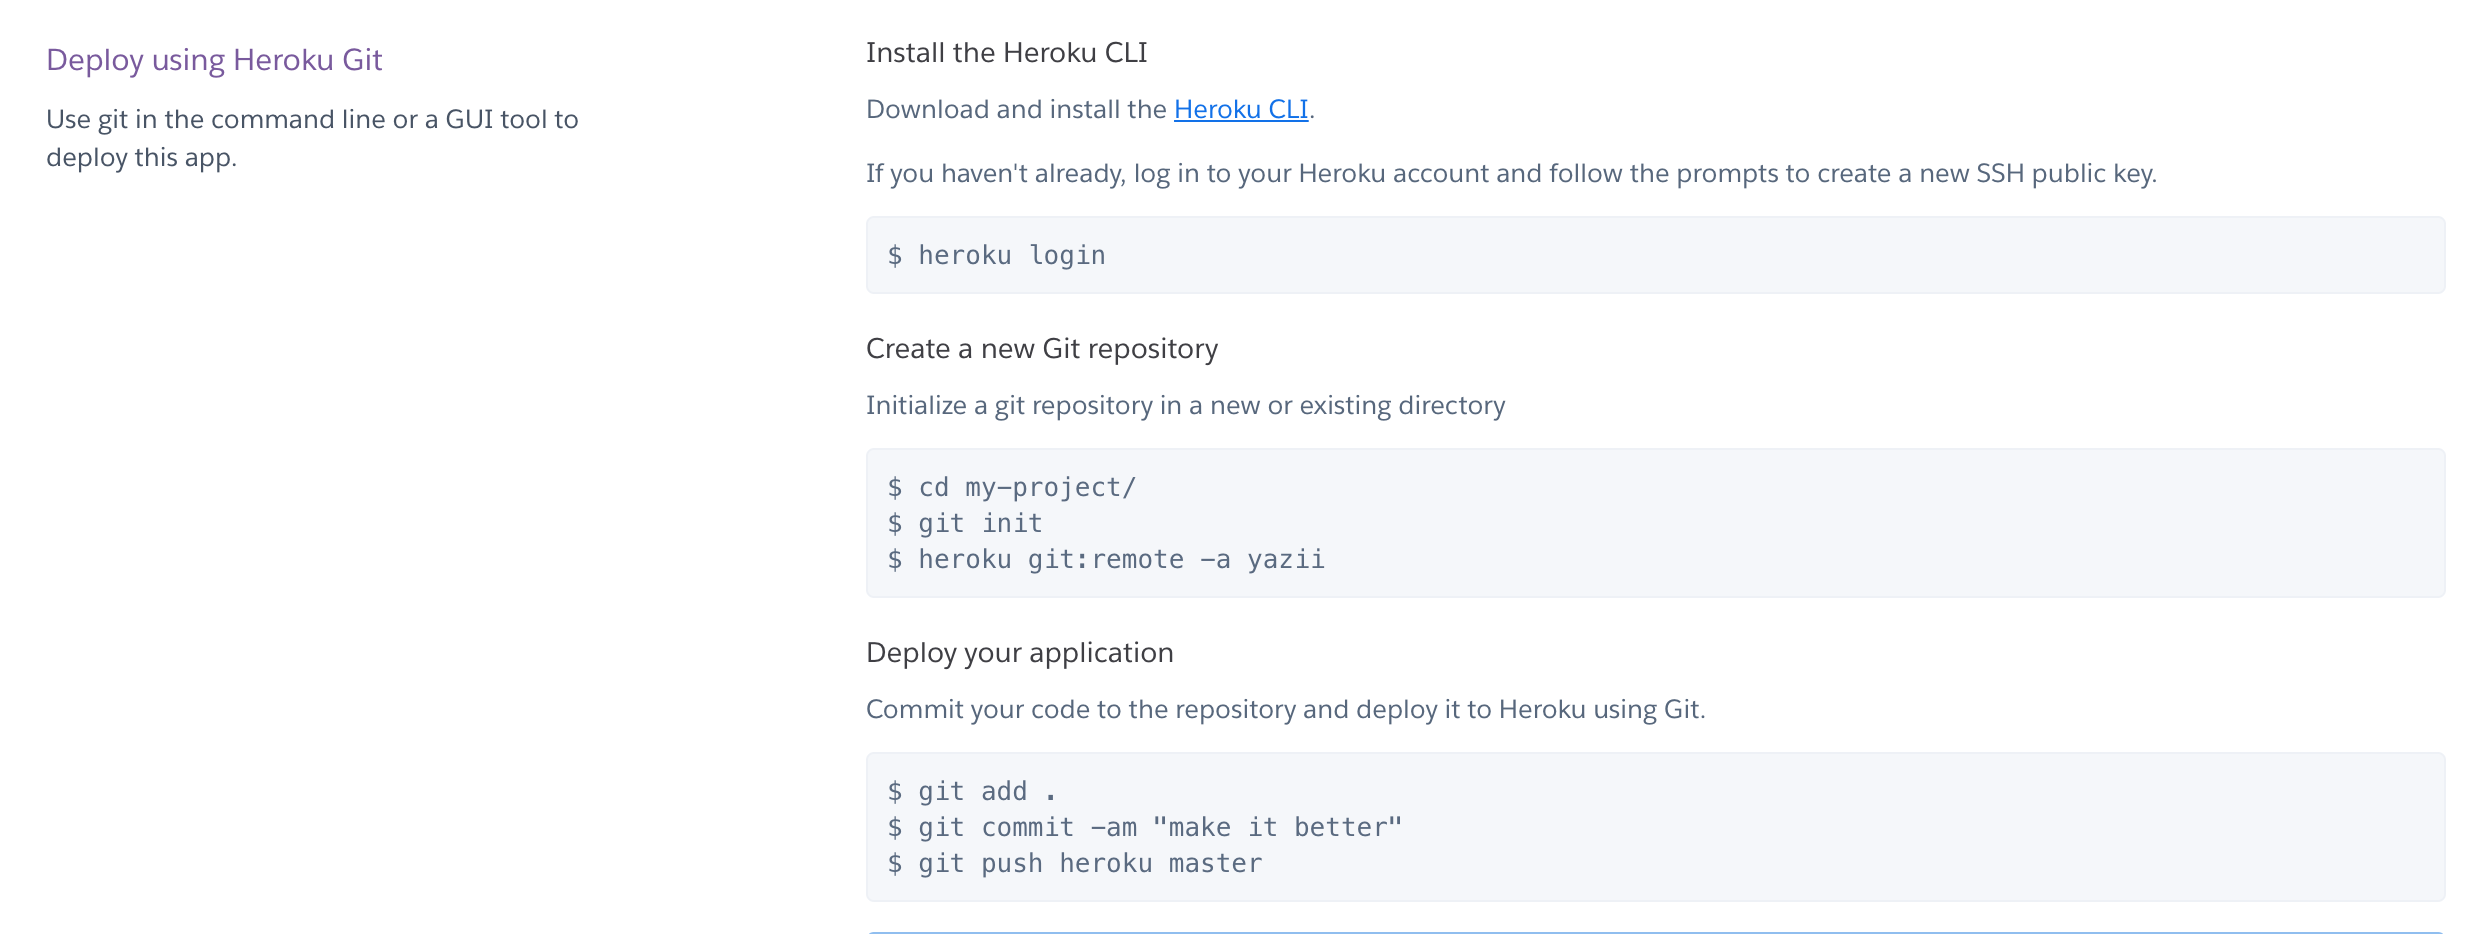
First thing we’ll do is heroku login; make sure to install heroku cli if you haven’t yet
Make sure you’re in the repository folder (rails root) and execute:
git init
heroku git:remote -a <app_name>
Now you can modify the buildpacks further if required, for example I will add ImageMagick from here:
 heroku buildpacks:add https://github.com/DuckyTeam/heroku-buildpack-imagemagick —app <app_name>
› Warning: heroku update available from 7.42.1 to 7.42.6.
Buildpack added. Next release on <app_name> will use:
1. heroku/ruby
2. heroku/nodejs
3. https://github.com/DuckyTeam/heroku-buildpack-imagemagick
Run git push heroku master to create a new release using these buildpacks.
I will also add metrics for future:
heroku buildpacks:add -i 1 heroku/metricsNote that if you’re in the folder that is referenced with git to heroku, you don’t need to specify —app.
You will also want to create a new file in the rails root directory: Procfile
Procfile should have no extensions and contain the following content:
web: bundle exec rails serverThis just sets up the dyno in heroku – essentially its a web service which executes that command.
If you’ve used anything that requires setting environment variables for the application like me, you will also need to configure them with Heroku.
For this app, I need set AWS SDK credentials in environment variables.
In Heroku dashboard, click on the app and select ‘Settings’ tab.
Find the ‘Config Vars’ section:
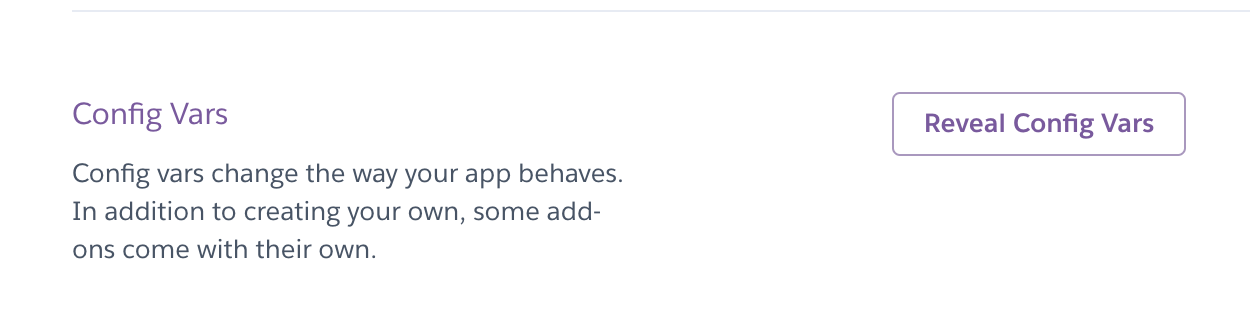
Click on ‘Reveal Config Vars’ button and add the variables that you need.
For example, for AWS SDK gem you may want to add these: AWS_ACCESS_KEY_ID and AWS_SECRET_ACCESS_KEY
So it will look something like this:

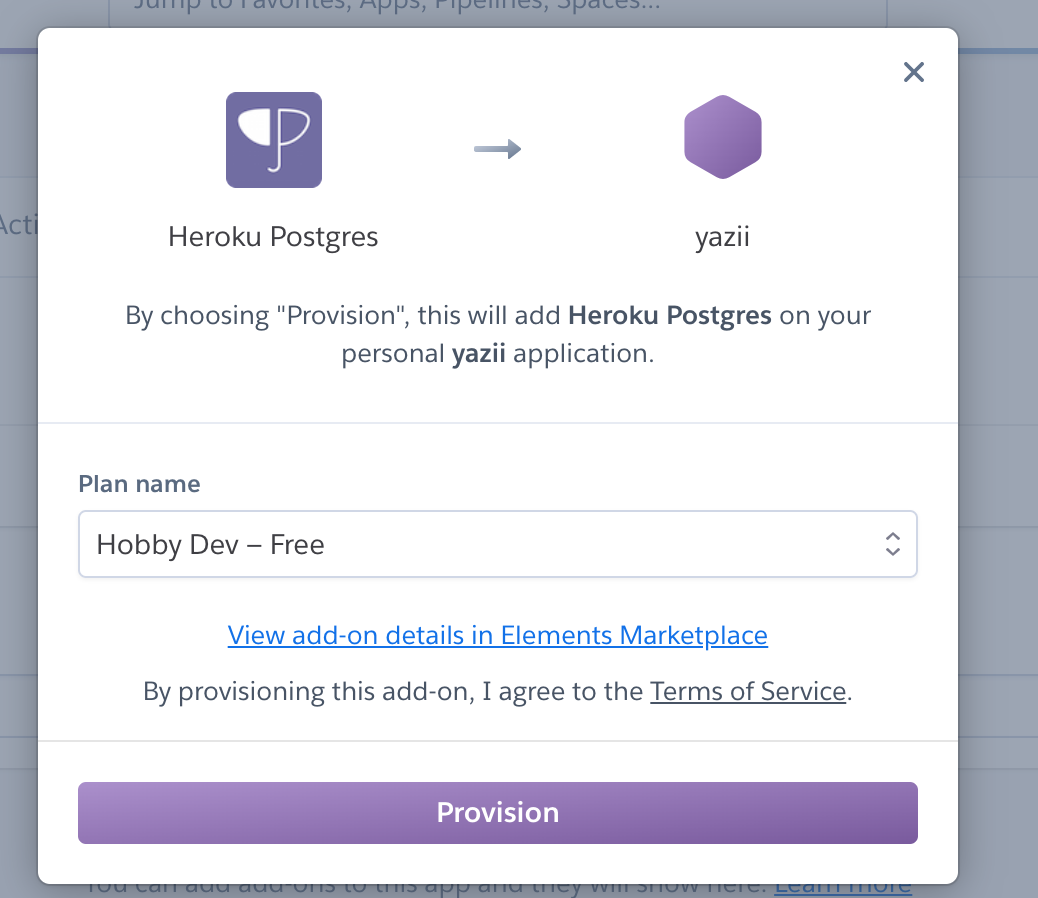
We also have to setup Heroku database configuration before it will have the connection with the database. In this rails app, I’ve used Postgres, so I will set this up, but just change the selection as required for you.
Go to Resources tab in Heroku dashboard and start searching for your database add-on, in my case postgres:

Once you selected the add on, you can keep it as hobby/dev for free until you need to upgrade it.
Bear in mind that for better or worse, Heroku will not use your database.yml file, it will automatically configure these connections.
Now we’re ready to start pushing to heroku
# You may have already commits so this may not be required
git add .
git commit -am “Initial heroku commit”


git push heroku master
Once you execute git push heroku master this will start the build process in heroku and may take a little while (5 -15 minutes for example, depending on the buildpacks you’ve added)
When built, it will give you a URL for the app, it will look something like https://<app_name>.herokuapp.com/
Before it will work, you will just need to migrate the database on the server its running on.
Just run this command:
heroku run rake db:migrateAfter completing, navigate to the page and you should find that your app is now live!
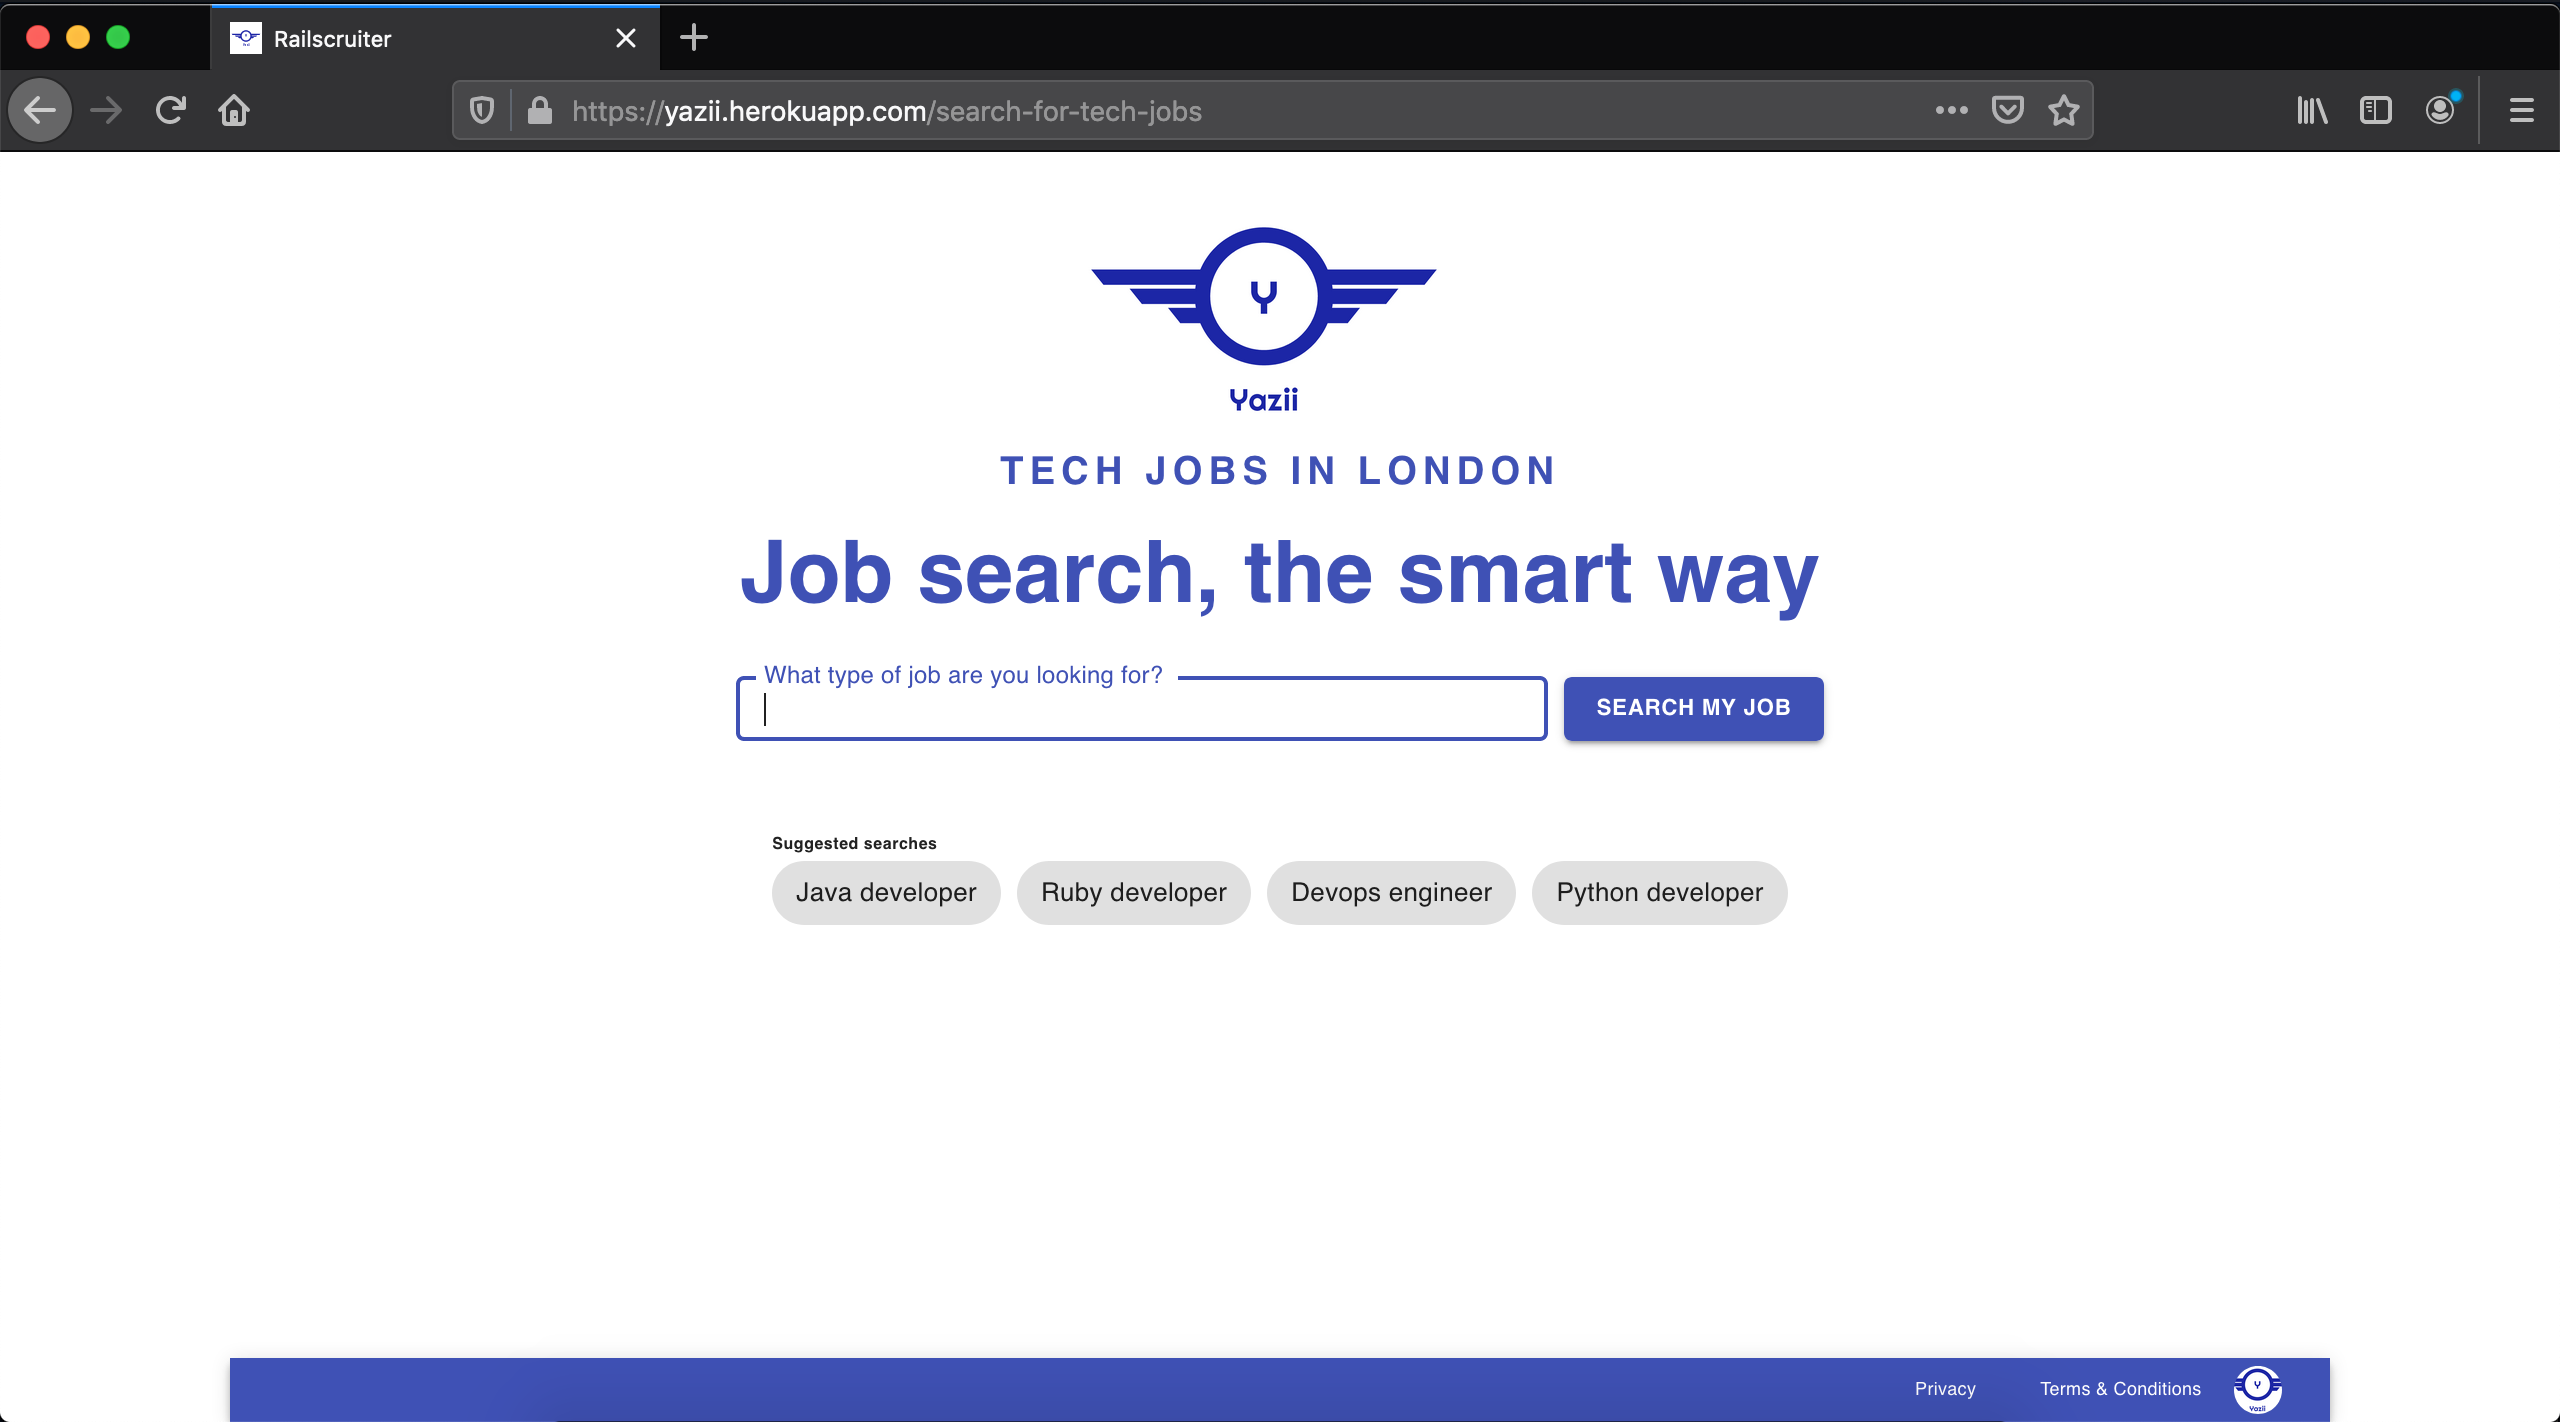
The URL (https://yazii.herokuapp.com/search-for-tech-jobs) is still with Heroku and we will update this to a custom one in a future post. However, this site is now live and available to public after these steps.