Simple way to get started with Material UI and RoR, React and Router Switch
If you’ve followed along in the previous steps, we now have Rails + React working nicely together and we’re ready to start putting in some cool content in. Just in case, here are the previous steps:
If you haven’t heard of Material UI, check it out at https://material-ui.com/
The site suggests to use NPM to install it, but we will use yarn (npm does work but yarn is the go to package manager with Rails and Webpacker). Execute:
yarn add @material-ui/core
With this installed, you have the dependencies that you need to get started.
Here we will go over some _very_ basic examples, as everyone has different needs. If you want to use some templates, there’s plenty available, but I would advise you go for minimal approach. Don’t take a template for instance which has many cool features which you just don’t need.
https://material-ui.com/getting-started/templates/
We will not look to integrate the templates here as they will all differ slightly. But we will stick to the concepts which will allow you to (fairly easily) integrate with those templates.
First of all, we have a file called hello_react.jsx, let’s rename that to something better, like index.jsx
hello_react.jsx -> index.jsx
With this change, we need to modify a line in application.html.erb file to point to this again:
<%= javascript_pack_tag ‘hello_react’ %> —> <%= javascript_pack_tag ‘index’ %>
So the content of application.html.erb is now:
<!DOCTYPE html>
<html>
<head>
<title>Railscruiter</title>
<%= csrf_meta_tags %>
<%= csp_meta_tag %>
<%= stylesheet_link_tag ‘application’, media: ‘all’, ‘data-turbolinks-track’: ‘reload’ %>
<%= javascript_pack_tag ‘application’, ‘data-turbolinks-track’: ‘reload’ %>
<%= javascript_pack_tag ‘hello_react’ %>
</head>
<body>
<%= yield %>
</body>
</html>
Router switch
Now what we will do is create the foundation of the Single Page Application using Router Switch.
Create a new file called app/javascript/components/App.jsx with following content:
import React from “react”;
import Routes from ”../routes/Index”;
export default props => <>{Routes}</>;
Essentially what this means is that your app will be a collection of routes.
Now let’s create the routes directory and file app/javascript/routes/Index.jsx with content:
import React from “react”;
import { BrowserRouter as Router, Switch } from “react-router-dom”;
import Dashboard from ’../views/Dashboard’;
export default (
<Router>
<Switch>
<Dashboard />
</Switch>
</Router>
);
And now we will want to create the views file(s), app/javascript/views/Dashboard.jsx with content:
import React from “react”
import { withStyles } from ‘@material-ui/core/styles’
import Button from ‘@material-ui/core/Button’
var dashboardStyles = theme => ({
rootStyle: {
display: ‘flex’,
}
});
class Dashboard extends React.Component {
constructor(props) {
super(props);
this.state = {
};
}
render() {
const { classes } = this.props;
return (
<div className={classes.rootStyle}>
<Button color=“primary”>
Our first material ui button
</Button>
</div>
)
};
}
export default withStyles(dashboardStyles)(Dashboard);
go back to app/javascript/packs/index.jsx and make it render the app now (content of Dashboard.jsx)
import React from ‘react’
import ReactDOM from ‘react-dom’
import App from ’../components/App’
document.addEventListener(‘DOMContentLoaded’, () => {
ReactDOM.render(
<App />,
document.body.appendChild(document.createElement(‘div’)),
)
})
Before we can run this, we need to install react-router-dom. We can do this by running:
yarn add react-router-dom
start the server with:
rails s
Overview
So let’s discuss a little of what we have, because there’s a lot.
There’s a app/javascript/packs/index.jsx file which is the entry point into your app. It calls the app/javascript/components/App.jsx javascript component to render, which uses react router to load the app/javascript/views/Dashboard.jsx.
Let’s now explore what we have in the dashboard and why
import React from “react”
import { withStyles } from ‘@material-ui/core/styles’
import Button from ‘@material-ui/core/Button’
var dashboardStyles = theme => ({
rootStyle: {
display: ‘flex’,
}
});
class Dashboard extends React.Component {
constructor(props) {
super(props);
this.state = {
};
}
render() {
const { classes } = this.props;
return (
<div className={classes.rootStyle}>
<Button color=“primary”>
Our first material ui button
</Button>
</div>
)
};
}
export default withStyles(dashboardStyles)(Dashboard);
First section is:
var dashboardStyles = theme => ({
rootStyle: {
display: ‘flex’,
}
});
Material UI has a nice feature of applying styles to their component, this allows us to write CSS in javascript and apply them.
Note className={classes.rootStyle} which references the styles.
class Dashboard extends React.Component {
constructor(props) {
super(props);
this.state = {
};
}
This is the first section of the React component. There’s many ways of utlising React, and my preference is through use of classes like this.
We have a default constructor and state initialisation, which you can populate as required in your apps.
render() {
const { classes } = this.props;
return (
<div className={classes.rootStyle}>
<Button color=“primary”>
Our first material ui button
</Button>
</div>
)
};
This is what this class will render/display on the screen. It can display html or other react components. In this case, we’re drawing a <div> which is styled with our rootStyle (you can find out more at https://material-ui.com/styles/basics/).
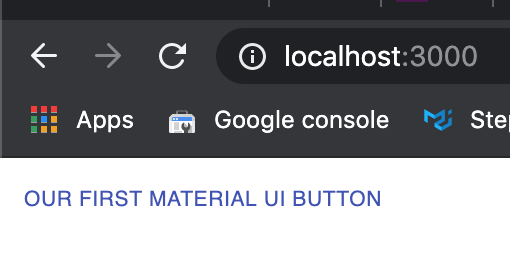
We’re then rendering a simple Material-ui button.
export default withStyles(dashboardStyles)(Dashboard);
Here we export this Dashboard component, and as we do, we apply the styles to it, which gives this react component a props attribute of classes and the items you included in your map. To access them, you do
props.classes.<my_style>
This should get you in a good position to start integrating larger UI elements in your app.