37. How to connect your Java Micronaut/SpringBoot with Kafka SASL
Part of the MMO journey, we need to make sure that we use scalable web systems. One thing we can do, is make our server event driven.
Concept is to have our UE web server communicate with our Micronaut server using Kafka pub/sub, then clients obtain relevant information from our Micronaut server directly.
There’s some very useful documentation for getting started with Java frameworks:
- Micronaut: Micronaut Kafka (micronaut-projects.github.io)
- SpringBoot: Spring for Apache Kafka
Note that both are quite similar, we will be using Micronaut here, but a lot of commands may be similar/identical (with obviously different imports).
This post will focus on getting it working in the development environment but we will have SASL enabled.
Kafka is used within this hobby MMO server project.
So all the code that is shared here, will be available as example in that project.
This part will later be used to synchronize with Unreal Engine server and process the updates from there.
Follow the blog / YouTube channel to stay on top of the updates!
Blog – Unreal MMO Development with Yaz (unreal-mmo-dev.com)
Getting started – docker-compose
Your Kafka and Zookeeper will be started on docker containers rather than locally. This is pretty standard practice now.
What are the key components that are required in your docker-compose?
networks:
kafka-net:
name: kafka-net
driver: bridge

services:
zookeeper:
image: confluentinc/cp-zookeeper:latest
environment:
ZOOKEEPER_CLIENT_PORT: 2181
ZOOKEEPER_TICK_TIME: 2000
ports:
- 2181:2181
networks:
- kafka-net
tmpfs: “/datalog”
kafka1:
image: confluentinc/cp-kafka:latest
depends_on:
- zookeeper
ports:
- 9092:9092
- 9093:9093
networks:
- kafka-net
environment:
KAFKA_BROKER_ID: 1
KAFKA_ZOOKEEPER_CONNECT: zookeeper:2181
ZOOKEEPER_SASL_ENABLED: false
KAFKA_ADVERTISED_LISTENERS: PLAINTEXT://localhost:9092,SASL_PLAINTEXT://localhost:9093
KAFKA_LISTENER_SECURITY_PROTOCOL_MAP: PLAINTEXT:PLAINTEXT,SASL_PLAINTEXT:SASL_PLAINTEXT
KAFKA_SECURITY_INTER_BROKER_PROTOCOL: SASL_PLAINTEXT
KAFKA_SASL_MECHANISM_INTER_BROKER_PROTOCOL: PLAIN
KAFKA_OPTS: “-Djava.security.auth.login.config=/etc/kafka/configs/kafka_server_jaas.conf”
KAFKA_AUTO_CREATE_TOPICS_ENABLE: true
KAFKA_SASL_ENABLED_MECHANISMS: PLAIN
KAFKA_DEFAULT_REPLICATION_FACTOR: 1
KAFKA_NUM_PARTITIONS: 2
# https://github.com/robcowart/docker_compose_cookbook/blob/master/confluent_kafka_oss/docker-compose.yml
KAFKA_OFFSETS_TOPIC_REPLICATION_FACTOR: 1
volumes:
- ./configs:/etc/kafka/configs
restart: always
There are several different images that can be used for your Kafka, the one I am using is:
confluentinc/cp-kafka – Docker Image | Docker Hub
To be honest it took me a while to find some of the environment variable names, for instance I had issue with the default offset topic replication being 3, but only 1 broker enabled. I found KAFKA_OFFSETS_TOPIC_REPLICATION_FACTOR by locating it manually here: https://github.com/robcowart/docker_compose_cookbook/blob/master/confluent_kafka_oss/docker-compose.yml
There are others available there so check it out if there are other parameters you may need.
Configurations – docker-compose
Part of the docker-compose file, we are pushing our configs to the kafka containers. This is achieved through this line:
volumes:
- ./configs:/etc/kafka/configs
You should add them as such, feel free to rename them and just update the reference in the volumes if you do.
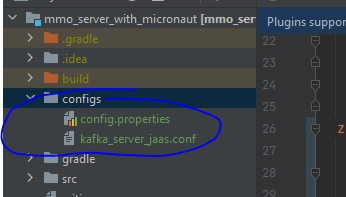
kafka_server_haas.conf:
KafkaServer {
org.apache.kafka.common.security.plain.PlainLoginModule required
username=“kafka”
password=“password123”
user_kafka=“password123”;
};
The kafka_server_jaas.conf file essentially contains the authentication information for client/server. In reality, you will not want to store them like this for production, but its fine for development.
For production, these whole files can be injected before the build, for example through the use of elastic beanstalk build configurations. Also the production docker-compose would generally look quite different to your development one.
The next file in there is config.properties:
sasl.jaas.config=org.apache.kafka.common.security.plain.PlainLoginModule required username=“kafka” password=“password123” user_kafka=“password123”;
security.protocol=SASL_PLAINTEXT
sasl.mechanism=PLAIN
this config.properties will be useful/used if you try to do any manual tests, e.g. produce/consume messages over CLI with provided config.
Note that we had the line: ZOOKEEPER_SASL_ENABLED: false. This means that the comms between the Kafka container and Zookeeper are over plaintext. This is possible because they are over shared network space. If you did not want this, you’d also have to configure zookeeper_jaas.conf and set that up. It may look something like:
Server {
org.apache.zookeeper.server.auth.DigestLoginModule required
user_admin=“admin-secret”;
};
In production it should be ok for zookeeper to share network with the Kafka brokers without SASL/SSL, provided that network is not exposed to the public. It reduces some complexity and improves performance very slightly.
Configurations – Micronaut / Springboot
Now we setup a working Kafka server/client (you can and perhaps should test it using CLI before proceeding, perhaps check the testing section below just to make sure).
My configuration can be found here (application.yml):
kafka:
bootstrap:
servers: 127.0.0.1:9093
security:
protocol: SASL_PLAINTEXT
sasl:
mechanism: PLAIN
jaas:
config: org.apache.kafka.common.security.plain.PlainLoginModule required username=“kafka” password=“password123”;
consumers:
mmo-server:
bootstrap:
servers: 127.0.0.1:9093
session:
timeout:
ms: 30000
auto:
offset:
reset: earliest
Note that replication of 1 is not good for production, you need at least 2 and typical is 3.
Check that bootstrap.servers matches the port of your SASL enabled port from docker-compose. You need to also ensure you’ve setup the security/sasl information which matches with docker-compose too.
The section on consumers is related to your @KafkaListener code. You can specify configs under ‘default’ (check documentation) or specify based on groups, in this case, the group ID is mmo-server.
Again, note that jaas-config should not be provided with plaintext credentials in production – they would usually be part of env variables here.
Useful example
Now let’s create a scenario where I want to publish an update, specifically relating to a mob and then I want a subscriber to pick this event up and process it.
I will do the following for this example then:
- Define a complex (ish) data structure representing a mob update
- Define a Producer which will publish the messages
- Create a timed event which will publish the message periodically
- Create a listener which will subscribe to the event and do something (print to output) when receive the message.
Monster update model
Let’s begin by defining the monster update model.
@Data
@NoArgsConstructor
@AllArgsConstructor
public class MobUpdate {

String mobId;
String mobInstanceId;
Motion motion;
String state;
String target;
}
We’re using Lombok for the constructors/getters/setters.
Don’t worry about reproducing this exactly, this is just for testing representation.
Producer interface
Next, we will define the producer:
@KafkaClient(id = “test_client”)
public interface TestProducer {

@Topic(“mob-updates”)
void sendFakeUpdate(MobUpdate mobUpdate);

}
This is super simple because Micronaut (and Springboot) is pretty awesome..
Basically, when you define an interface and specify the Kafka client and the Topic you want to publish, Micronaut will go ahead and fill out all the necessary internal code for you!
Check some more in-depth docs here for example: Kafka and the Micronaut Framework – Event-Driven Applications.
Execute the producer via scheduled task
Ok now that we have the function to use to actually do the publishing, let’s create a call which will execute the call.
@Singleton
public class TestKafkaService {

TestProducer testProducer;

public TestKafkaService(@KafkaClient(“test_client”) TestProducer testProducer) {
// advised this way vs direct inject
this.testProducer = testProducer;
}

@Scheduled(fixedDelay = ”10s”)
void executeEveryTen() {
MobUpdate mobUpdate = new MobUpdate(UUID.randomUUID().toString(), UUID.randomUUID().toString(), null, “ATTACKING”, “player1”);
testProducer.sendFakeUpdate(mobUpdate);
}
}
Here I created a class, make sure to tag it as a Singleton to make sure it gets instantiated by Micronaut/Springboot.
You could either inject/autowire it (actually I haven’t tested that part as the docs suggested to use constructor like above, but it should probably work too).
Next I create the MobUpdate model we defined earlier, note I add some random IDs to it so we have some different data to display.
Then I use the interface bean to actually publish the message.
Creating the Kafka listener
Finally, let’s define the Kafka listener, this will be ‘subscribing’ to the events and will do some work after receiving the message.
@KafkaListener(groupId = “mmo-server”, offsetReset = OffsetReset.EARLIEST)
public class MonsterServerListener {

@Topic(“mob-updates”)
public void receive(MobUpdate mobUpdate) {
System.out.printf(“Got a mob update, mob id: %s, mob instance id: %s, mote: %s, state: %s, target: %s%n”,
mobUpdate.getMobId(), mobUpdate.getMobInstanceId(), mobUpdate.getMotion(), mobUpdate.getState(), mobUpdate.getTarget());
}
}
Note the groupId matches to that from application.yml.
Micronaut will automatically create the consumer at startup and you can define the groups they belong to.
Specify the Topic above the function which it will ‘listen to’. Inside the function call, specify the data object that you are expecting to get from this call.
You can also specify much more data, a common one for instance is @KafkaKey which can be a String/Integer or a more complex data object.
That’s basically it for the implementation!
So its time for some testing.
Testing
Since we just finished some code which will send some updates, listen to it and print from the consumer, let’s just put a screenshot of that working:
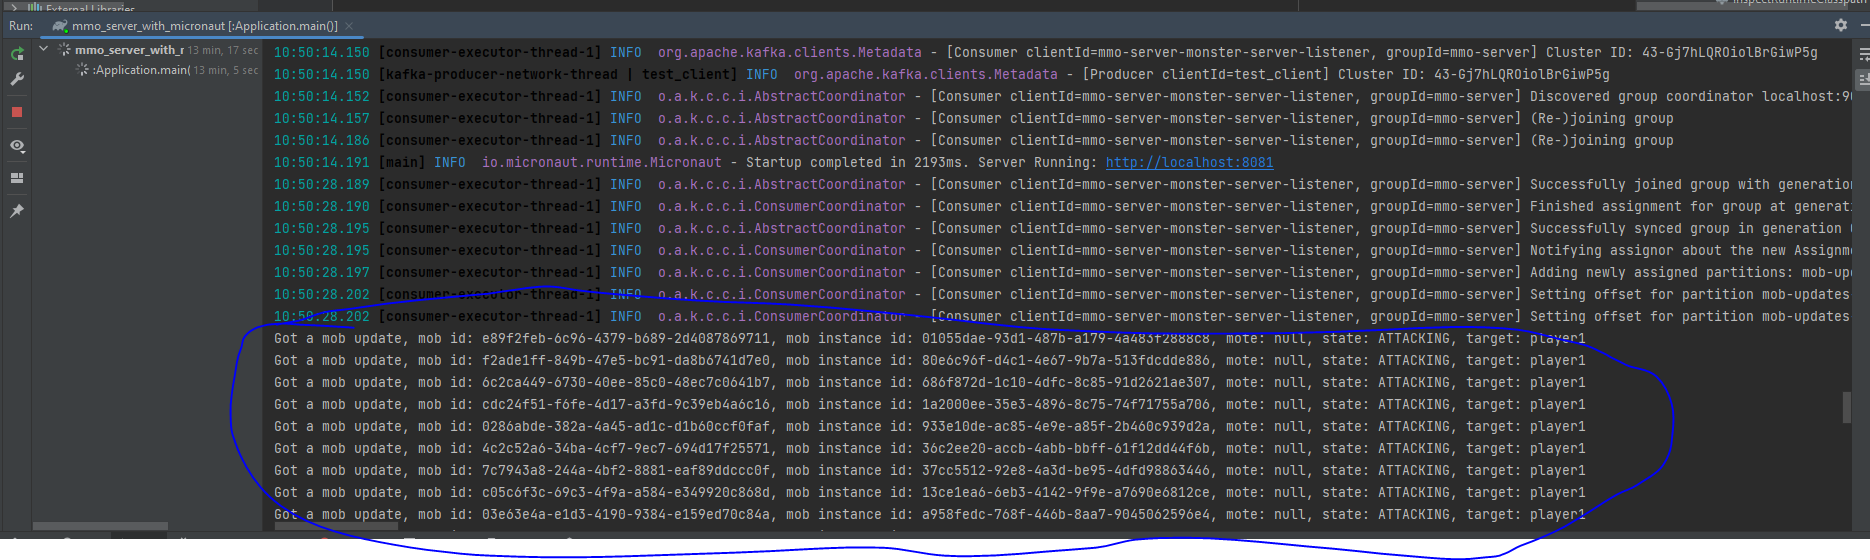
As you can see, I am almost simulating some updates from a server which will represent monster updates.
You may want to try execute the requests over CLI if having problems with Java code. In order to execute them, go into your container using docker exec -it <container_id> /bin/bash. Here are some useful snippets:
Create topic:
kafka-topics —create —bootstrap-server localhost:9093 —replication-factor 1
—partitions 1 —topic test —command-config /etc/kafka/configs/config.properties
Setup a listener
kafka-console-consumer —bootstrap-server localhost:9093 —topic test —from-beginning
—partition 0
—consumer.config /etc/kafka/configs/config.properties
Publish message:
kafka-console-producer —broker-list localhost:9093 —topic test
—producer.config /etc/kafka/configs/config.properties
Before this stage though, you may run into more problems, for example the docker image has changed and some env variables are different etc.
If you’re having issues with instantiating the docker containers, check their logs!
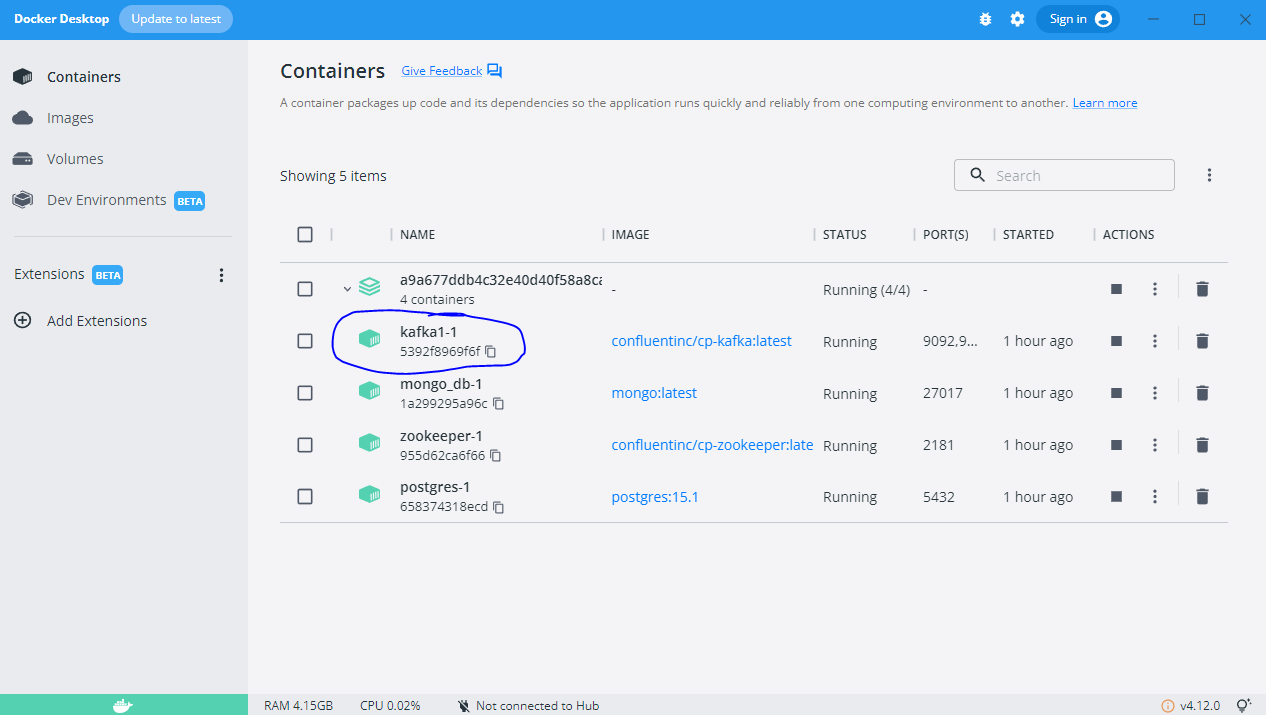
If you have docker desktop installed, simply click on the container, for instance ‘kafka1’ from above screenshot. For instance here I found obscure issues relating to offset replication being too high, which caused silent failures in my app.

It can be hard to find relevant things here, but just search for ‘error’ entries perhaps.
Offset explorer
Next very useful tool was offset explorer.
You will be able to use it to check the topics and the consumers as well as see if data is being published:
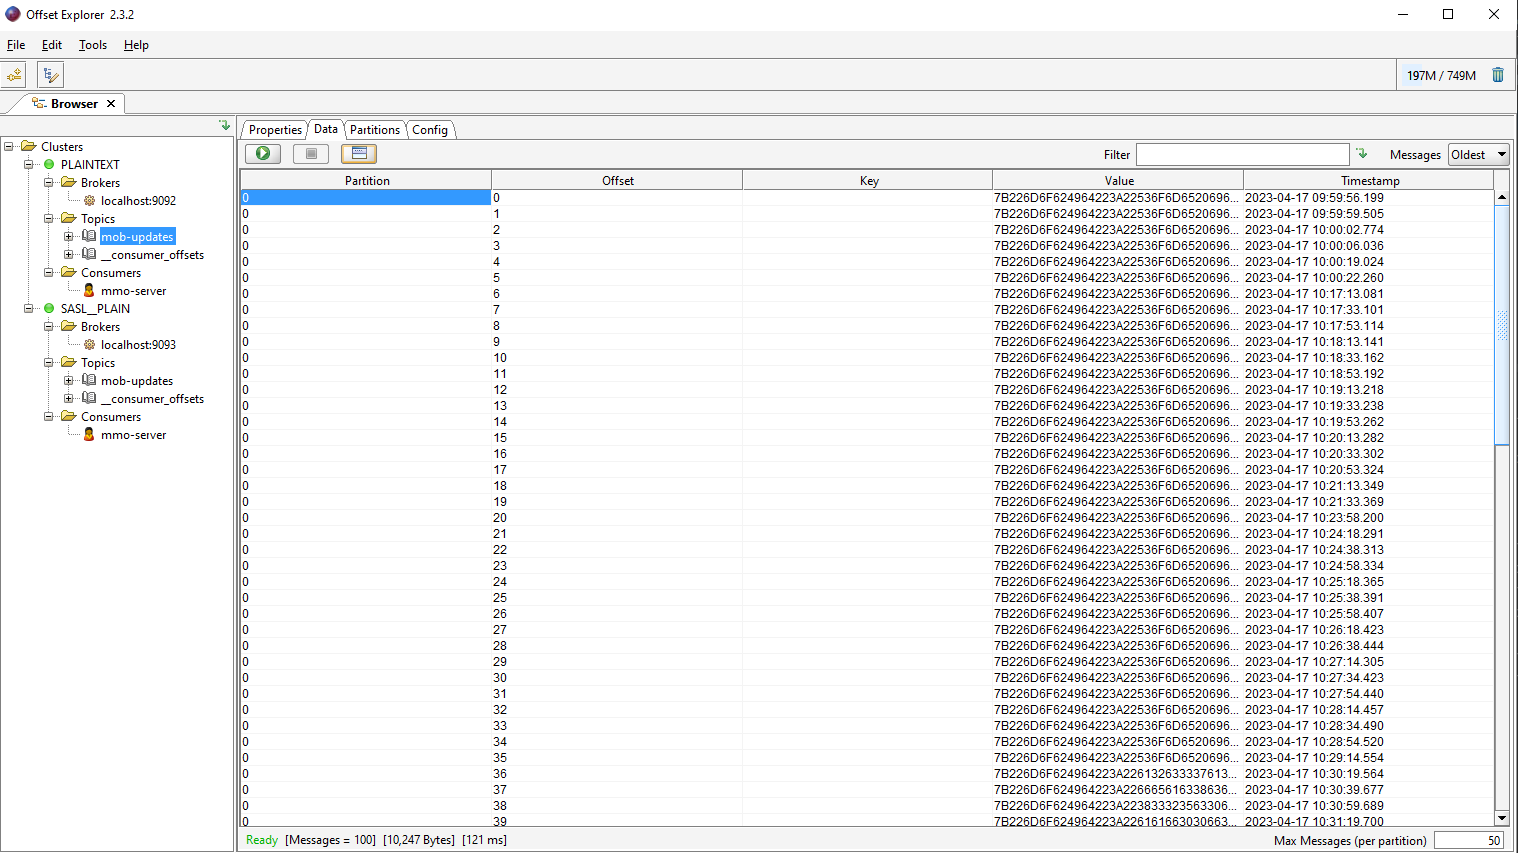
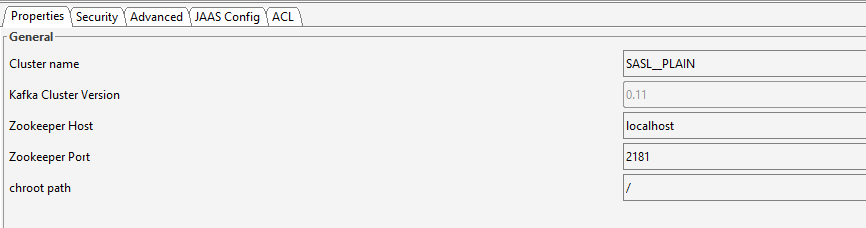
Here are the configurations I’ve got for plaintext/sasl:
plaintext properties:

Security is simply plaintext:

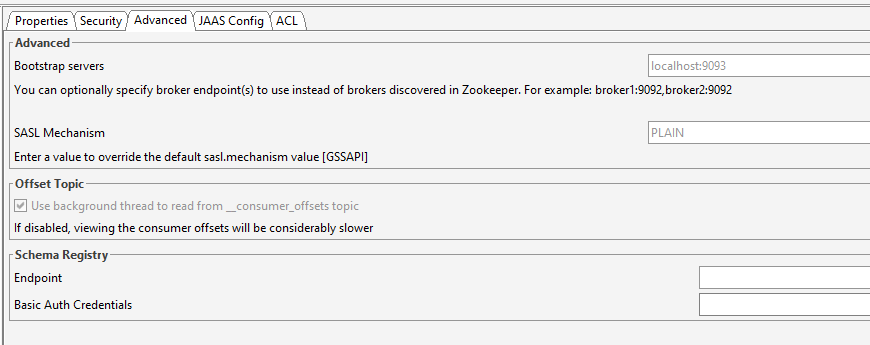
Advanced refers to bootstrap servers
JAAS and ACL are both not configured.
Next we setup the SASL_PLAIN configurations (which is what your app will use for instance).
SASL properties:
Next is SASL security – defining the type.

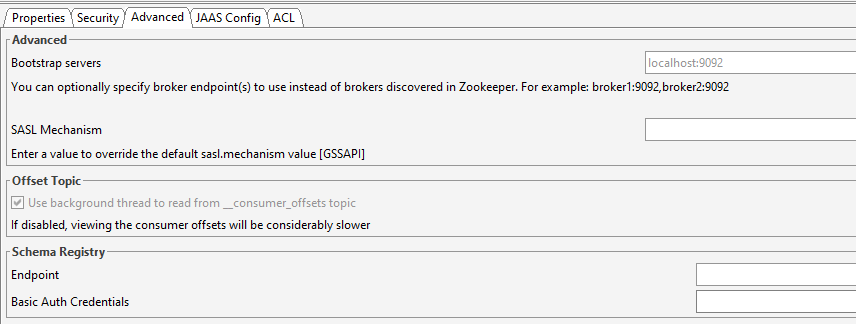
SASL Advanced properties:
The JAAS config:

Note this config should be the same as the one used in application.yml file.
ACL is also empty.